


1、底部导航
import 'package:flutter/material.dart';
import 'package:baby_one/View/BottomNavigation/navigation_icon_view.dart';

import 'package:baby_one/View/Home/Home.dart';
import 'package:baby_one/View/Home/Page.dart';

class MyAppNav extends StatefulWidget {
  @override
  _MyAppNavState createState() => _MyAppNavState();
}

class _MyAppNavState extends State<MyAppNav>  with TickerProviderStateMixin{

  int _currentIndex = 0;    // 当前界面的索引值
  List<NavigationIconView> _navigationViews;  // 底部图标按钮区域
  List<StatefulWidget> _pageList;   // 用来存放我们的图标对应的页面
  StatefulWidget _currentPage;  // 当前的显示页面
  // 定义一个空的设置状态值的方法
  void _rebuild() {
    setState((){});
  }
  @override
  void initState() {
    super.initState();

    // 初始化导航图标
    _navigationViews = <NavigationIconView>[
      new NavigationIconView(icon: new Icon(Icons.assessment), title: new Text("首页"), vsync: this), // vsync 默认属性和参数
      new NavigationIconView(icon: new Icon(Icons.all_inclusive), title: new Text("想法"), vsync: this),
      new NavigationIconView(icon: new Icon(Icons.add_shopping_cart), title: new Text("市场"), vsync: this),
      new NavigationIconView(icon: new Icon(Icons.add_alert), title: new Text("通知"), vsync: this),
      new NavigationIconView(icon: new Icon(Icons.perm_identity), title: new Text("我的"), vsync: this),
    ];

    // 给每一个按钮区域加上监听
    for (NavigationIconView view in _navigationViews) {
      view.controller.addListener(_rebuild);
    }

    // 将我们 bottomBar 上面的按钮图标对应的页面存放起来,方便我们在点击的时候
    _pageList = <StatefulWidget>[
      new HomePage(),
      new Page(),
      new HomePage(),
    ];
    _currentPage = _pageList[_currentIndex];
  }


  @override
  Widget build(BuildContext context) {
    // 声明定义一个 底部导航的工具栏
    final BottomNavigationBar bottomNavigationBar = new BottomNavigationBar(
      items: _navigationViews
          .map((NavigationIconView navigationIconView) => navigationIconView.item)
          .toList(),  // 添加 icon 按钮
      currentIndex: _currentIndex,  // 当前点击的索引值
      type: BottomNavigationBarType.fixed,    // 设置底部导航工具栏的类型:fixed 固定
      onTap: (int index){   // 添加点击事件
        setState((){    // 点击之后,需要触发的逻辑事件
          _navigationViews[_currentIndex].controller.reverse();
          _currentIndex = index;
          _navigationViews[_currentIndex].controller.forward();
          _currentPage = _pageList[_currentIndex];
        });
      },
      fixedColor:Color.fromRGBO(36, 141, 248, 1),
    );
    return MaterialApp(
        home: new Scaffold(
          /*body: new Center(
              child: _currentPage   // 动态的展示我们当前的页面
          ),*/
           /*body: new Center(
              child: _currentPage   // 动态的展示我们当前的页面
          ),*/
          //实现页面数据保持
          body: IndexedStack(
            index: _currentIndex,
            children: _pageList,
          ),
          bottomNavigationBar: bottomNavigationBar,   // 底部工具栏
        ),

        theme: new ThemeData(
          primarySwatch: Colors.blue,   // 设置主题颜色
        ),
    );
  }
}
2、底部样式
import 'package:flutter/material.dart';

// 创建一个 Icon 展示控件
class NavigationIconView {

  // 创建两个属性,一个是 用来展示 icon, 一个是动画处理
  final BottomNavigationBarItem item;
  final AnimationController controller;

  // 类似于 java 中的构造方法
  // 创建 NavigationIconView 需要传入三个参数, icon 图标,title 标题, TickerProvider
  NavigationIconView({Widget icon, Widget title, TickerProvider vsync}):
        item = new BottomNavigationBarItem(
          icon: icon,
          title: title,
        ),
        controller = new AnimationController(
            duration: kThemeAnimationDuration,    // 设置动画持续的时间
            vsync: vsync                          // 默认属性和参数
        );
}

3、跳转页面
Navigator.push(
        context,
        MaterialPageRoute(
            builder:(context)=>SecondScreen(name:name)//新页面
        )
    );
4、接收参数
final String name;
  SecondScreen({Key key ,@required this.name}):super(key:key);
5、返回参数
JumpChil(context,String name) async{
if(name!="aaaa"){
Fluttertoast.showToast(
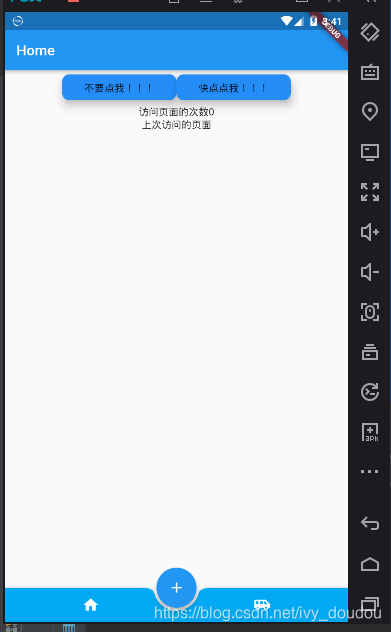
msg: '都说了,不要点我,还点!!!',
toastLength: Toast.LENGTH_SHORT,
gravity: ToastGravity.BOTTOM,
timeInSecForIos: 2,
fontSize: 16.0);
}else{
a++;//a自增
}
b = await Navigator.push(
context,
MaterialPageRoute(
builder:(context)=>SecondScreen(name:name)//新页面
)
);
setState(() {
});
}
//带动画效果的获取返回值
Navigator.of(context).push(CustomRoute(SecondScreen(name:name), "SlideTransition")).then( (result){
b=result;
});
b = await Navigator.push(
context,
MaterialPageRoute(
builder:(context)=>SecondScreen(name:name)//新页面
)
);

5、不规则导航
import 'package:flutter/material.dart';
import 'package:flutter_app_day01/View/Home/Home.dart';

class BottomAppBarDemo extends StatefulWidget {
  _BottomAppBarDemoState createState() => _BottomAppBarDemoState();
}

class _BottomAppBarDemoState extends State<BottomAppBarDemo> {
  List<Widget> _eachView;  //创建视图数组
  int _index = 0;          //数组索引,通过改变索引值改变视图

  @override
  void initState() {
    super.initState();
    _eachView = List();
    _eachView..add(HomePage())..add(HomePage());
  }

  @override
  Widget build(BuildContext context) {
    return Scaffold(
      body:_eachView[_index],
      floatingActionButton: FloatingActionButton(
        onPressed: (){
          Navigator.of(context).push(MaterialPageRoute(builder:(BuildContext context){
            return HomePage();
          }));
        },
        tooltip: 'Increment',
        child: Icon(
          Icons.add,
          color: Colors.white,
        ),
      ),
      floatingActionButtonLocation: FloatingActionButtonLocation.centerDocked,
      bottomNavigationBar: BottomAppBar(
        color:Colors.lightBlue,
        shape:CircularNotchedRectangle(),
        child: Row(
          mainAxisSize: MainAxisSize.max,
          mainAxisAlignment: MainAxisAlignment.spaceAround,
          children: <Widget>[
            IconButton(
                icon:Icon(Icons.home),
                color:Colors.white,
                onPressed:(){
                  setState(() {
                    _index=0;
                  });
                }
            ),
            IconButton(
                icon:Icon(Icons.airport_shuttle),
                color:Colors.white,
                onPressed:(){
                  setState(() {
                    _index=1;
                  });
                }
            ),
          ],
        ),
      )
      ,
    );
  }
}
6、上部导航
import 'package:flutter/material.dart';

class TabBarNew extends StatefulWidget {
  @override
  _TabBarNewState createState() => _TabBarNewState();
}

class _TabBarNewState extends State<TabBarNew> with SingleTickerProviderStateMixin{
  TabController _tabController;//控制器
  @override
  void dispose() {
    _tabController.dispose();
    super.dispose();
  }
  void initState() {
    super.initState();
    _tabController = new TabController(vsync: this, length: 3);
  }
  @override
  Widget build(BuildContext context) {
    return Scaffold(
      appBar: new AppBar(
        title: new Text('顶部tab切换'),
        bottom: new TabBar(
          tabs: <Widget>[
            new Tab(
              icon: new Icon(Icons.directions_bike),
            ),
            new Tab(
              icon: new Icon(Icons.directions_boat),
            ),
            new Tab(
              icon: new Icon(Icons.directions_bus),
            ),
          ],
          controller: _tabController,
        ),
      ),
      body: new TabBarView(
        controller: _tabController,
        children: <Widget>[
          new Center(child: new Text('自行车')),
          new Center(child: new Text('船')),
          new Center(child: new Text('巴士')),
        ],
      ),
    );
  }
}

/**
    const TabBar({
    Key key,
    @required this.tabs,//显示的标签内容,一般使用Tab对象,也可以是其他的Widget
    this.controller,//TabController对象
    this.isScrollable = false,//是否可滚动
    this.indicatorColor,//指示器颜色
    this.indicatorWeight = 2.0,//指示器高度
    this.indicatorPadding = EdgeInsets.zero,//底部指示器的Padding
    this.indicator,//指示器decoration,例如边框等
    this.indicatorSize,//指示器大小计算方式,TabBarIndicatorSize.label跟文字等宽,TabBarIndicatorSize.tab跟每个tab等宽
    this.labelColor,//选中label颜色
    this.labelStyle,//选中label的Style
    this.labelPadding,//每个label的padding值
    this.unselectedLabelColor,//未选中label颜色
    this.unselectedLabelStyle,//未选中label的Style
    }) : assert(tabs != null),
    assert(isScrollable != null),
    assert(indicator != null || (indicatorWeight != null && indicatorWeight > 0.0)),
    assert(indicator != null || (indicatorPadding != null)),
    super(key: key);
 */
appBar: new AppBar(
        title:Text(
          "监管对象",
          style: TextStyle(fontSize: 30.0),
        ),
        centerTitle: true,
        actions: <Widget>[
          Center(
              child: GestureDetector(
                onTap: () {
                  //跳转检查记录
                  print("检查记录");
                  /*Navigator.of(context)
                      .push(CustomRoute(JdjcRecord(), "RotationTransition"));*/
                },
                child: Padding(
                  padding: EdgeInsets.fromLTRB(0, 0, 20.0, 0),
                  child: Text(
                    "检查记录",
                    style: TextStyle(fontSize: 20.0),
                  ),
                ),
              ))
        ],
        bottom: PreferredSize(
          preferredSize:  Size.fromHeight(48),
          child: Material(
            //color: Colors.red,//设置背景颜色
            child: TabBar(
              indicatorColor: Colors.red,//提示器颜色
              tabs: <Widget>[
                Tab(
                  child: Text("主体信息",style: TextStyle(color: Colors.black),),
                ),
                Tab(
                  child: Text("地块/棚信息",style: TextStyle(color: Colors.black),),
                ),
                Tab(
                  child: Text("种植信息",style: TextStyle(color: Colors.black),),
                ),
              ],
              controller: _tabController,
            ),
          ),
        )

      ),


 491
491

 被折叠的 条评论
为什么被折叠?
被折叠的 条评论
为什么被折叠?
 到【灌水乐园】发言


