


http://www.jianshu.com/p/116f7e075f54
Objc 精选 - 3D Touch 之 Peek & Pop 操作

在前面几期快报中,我们介绍了 3D Touch 的基本内容,以及如何创建 3D Touch 桌面快捷菜单。这次咱们来讨论 3D Touch 的另外一个内容 - Peek & Pop 操作。
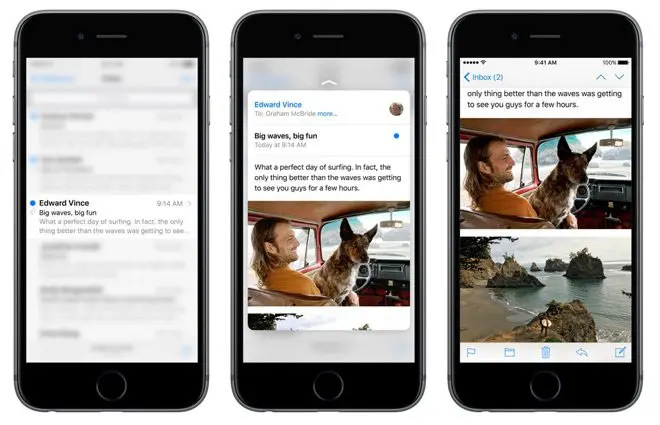
所谓 Peek & Pop 其实就是 iOS 9 中为我们提供的一种预览功能,通过 3D Touch 来激发它的调用。比如我们在看短信或者邮件等信息的时候,通过按压列表中得内容,我们就能够得到一个预览视图。然后再继续用力按压,我们就可以从预览界面直接进入到内容页面。
Peek & Pop 操作,也是 WWDC 中演示 3D Touch 的主要方面。它的实现其实也并不复杂,我们自己的 APP 中可以通过新的 API 很轻易的实现这个功能。
下面咱们就来看看吧,首先我们定义一个 UIViewController:
@interface ViewController : UIViewController<UITableViewDelegate, UITableViewDataSource, UIViewControllerPreviewingDelegate>


@end
这个 ViewController 实现了三个 Protocol - UITableViewDelegate, UITableViewDataSource, UIViewControllerPreviewingDelegate。
前两个相信大家都比较熟悉了,都和 UITable 相关,用于我们展示列表信息。而最后一个 Protocol - UIViewControllerPreviewingDelegate 就比较重要了。它是实现 Peek & Pop 操作的关键。
当然,我们还定义了两个属性 tableView 和 news,它们只是用于信息展示。
接着就是 UITableView 相关的代理方法的实现,都比较熟悉,大家一带而过即可:
// MARK: TableView Delegate
- (NSInteger)tableView:(UITableView *)tableView numberOfRowsInSection:(NSInteger)section {

    return news.count;

}

- (NSInteger)numberOfSectionsInTableView:(UITableView *)tableView {

    return 1;

}

- (UITableViewCell *)tableView:(UITableView *)tableView cellForRowAtIndexPath:(NSIndexPath *)indexPath {

    NSString *cellIdentifier = @"cellIdentifier";

    UITableViewCell *cell = [tableView dequeueReusableCellWithIdentifier:cellIdentifier];

    if (cell == nil) {

        cell = [[UITableViewCell alloc] initWithStyle:UITableViewCellStyleDefault reuseIdentifier:cellIdentifier];

    }

    cell.textLabel.text = news[indexPath.row];

    return cell;

}
无非是确定如何显示 UItableView 相关的信息。
然后我们实现 viewDidLoad 方法,对整个控制器进行初始化工作:
- (void)viewDidLoad {

    [super viewDidLoad];

    news = @[@"SwiftCafe 快报 - 3D Touch 实践之桌面快捷方式第二篇",
             @"SwiftCafe 快报 - TIOBE 10月编程语言排行 Swift 即将超越 Objective-C",
             @"SwiftCafe 快报 - iOS 9 新特性之 3D Touch"];

    self.title = @"3D Touch - Peek & Pop 示例";
    self.navigationItem.backBarButtonItem.title = @"返回";

    mainTableView = [[UITableView alloc] init];
    mainTableView.delegate = self;
    mainTableView.dataSource = self;

    self.navigationController.navigationBar.translucent = NO;

    mainTableView.frame = CGRectMake(0, 0, self.view.frame.size.width, self.view.frame.size.height);
    [self.view addSubview:mainTableView];

    if(self.traitCollection.forceTouchCapability == UIForceTouchCapabilityAvailable) {

        [self registerForPreviewingWithDelegate:self sourceView:self.view];

    }


}
这个方法的前半部分,也基本都是一些 UI 元素的初始化工作。比较重要的是这个方法的后半部分,也就是:
if(self.traitCollection.forceTouchCapability == UIForceTouchCapabilityAvailable) {

    [self registerForPreviewingWithDelegate:self sourceView:self.view];

}
这个判断的作用是检测当前设备是否支持 3D Touch,如果支持,就调用 registerForPreviewingWithDelegate(self, sourceView: view) 方法,将视图控制器的主视图注册为 3D Touch Peek & Pop 的主体。
这时我们运行程序,就可以看到列表内容的展现了:
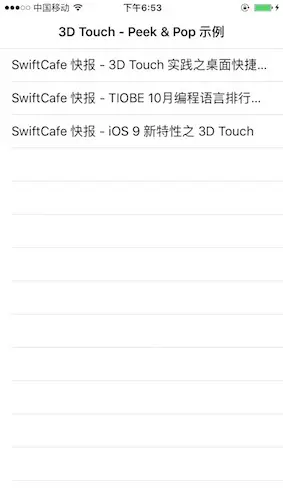
怎么样,列表出现了,但这是我们用力按压列表项上的内容,并没有出现预料的结果。
接下来,我们继续实现 3D Touch 操作处理部分,还记得我们前面提到的 UIViewControllerPreviewingDelegate 么,关键就在于这个 Protocol 中的两个方法:
- (UIViewController *)previewingContext:(id<UIViewControllerPreviewing>)previewingContext viewControllerForLocation:(CGPoint)location {

    NSIndexPath *index =  [mainTableView indexPathForRowAtPoint:location];

    UITableViewCell *cell = [mainTableView cellForRowAtIndexPath:index];

    if(cell != nil ){

        DetailViewController *detailViewController = [[DetailViewController alloc] init];
        detailViewController.text = cell.textLabel.text;
        return detailViewController;

    }

    return nil;

}

- (void)previewingContext:(id<UIViewControllerPreviewing>)previewingContext commitViewController:(UIViewController *)viewControllerToCommit {

    [self showViewController:viewControllerToCommit sender:self];

}
这两个方法中,第一个方法 func previewingContext(previewingContext: viewControllerForLocation:) 是用于相应轻度按压后出现预览窗口的。当我们轻度按压主列表的条目时,我们就会创建一个 DetailViewController 并用它来展示预览内容。
而第二个方法 func previewingContext(previewingContext: commitViewController:) 用于,当用户已经通过轻度按压激发出预览界面的时候,继续用力按压后,正式的进入详情页面。我们调用 showViewController 方法,来进入详情页面。
实现完这两个方法,我们就可以像 WWDC 演示的那样,在我们自己的 APP 中响应 3D Touch 预览事件啦。有没有感觉很酷~
而详细界面控制器的实现也需要我们做一些操作,我们来看一下 DetailViewController的实现:
@interface DetailViewController : UIViewController

@property (nonatomic, strong) NSString *text;

@end
#import "DetailViewController.h"
@implementation DetailViewController
- (void)viewDidLoad {
[super viewDidLoad];
self.title = @"SwiftCafe 快报";
self.navigationItem.backBarButtonItem.title = @"返回";
UITextView *textView = [[UITextView alloc] initWithFrame:CGRectMake(0, 0, self.view.frame.size.width, self.view.frame.size.height)];
textView.font = [UIFont systemFontOfSize:24];
textView.text = self.text;
[self.view addSubview:textView];
}
- (NSArray<id<UIPreviewActionItem>> *)previewActionItems {
UIPreviewAction *itemShare = [UIPreviewAction actionWithTitle:@"分享" style:UIPreviewActionStyleDefault handler:^(UIPreviewAction * _Nonnull action, UIViewController * _Nonnull previewViewController) {
UIAlertView *alertView = [[UIAlertView alloc] initWithTitle:@"分享" message:@"分享内容" delegate:nil cancelButtonTitle:@"确定" otherButtonTitles: nil];
[alertView show];
}];
return @[itemShare];
}
- (void)didReceiveMemoryWarning {
[super didReceiveMemoryWarning];
// Dispose of any resources that can be recreated.
}
@end DetailViewController 的 viewDidLoad 方法实现对 UI 进行了一些基本初始化操作,比较简单,不多赘述。
而 previewActionItems 方法,大家可以稍加关注。
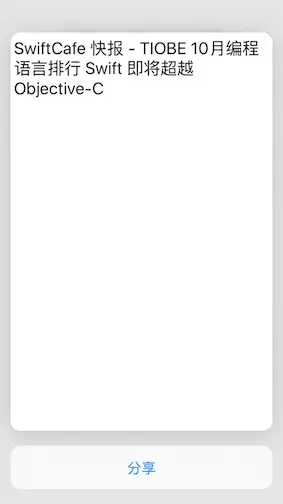
我们在通过按压列表条目后,会弹出类似这样的预览视图:
而这个预览视图,我们出来继续按压,进而打开真正的详情视图以外,我们还可以通过向上滑动手指,打开这个预览视图的操作界面,这样我们就可以不真正的进入详情页面,来对该条目进行一些特定的操作了,比如分享,删除,等等。
我们这里实现的 previewActionItems 方法,正是为预览视图提供这些操作选项用的。每一个操作选项,都是一个 UIPreviewAction 类。
接下来,我们可以运行这个示例,并按压后向上滑动,就可以打开预览视图的操作选项界面了:


 4232
4232

 被折叠的 条评论
为什么被折叠?
被折叠的 条评论
为什么被折叠?
 到【灌水乐园】发言


