神经网络训练预处理:图片resize和归一化

1. 读取原图像数据,和尺寸

import cv2
from matplotlib import pyplot as plt
from PIL import Image
import numpy as np


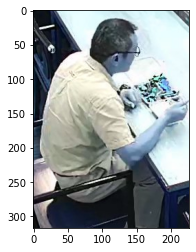
#原始图片大小为[H,W]-->[317,227]
image_path = "./images/smoke.jpg"

#opencv 读取图片,图片格式默认是BGR图片
img_cv = cv2.imread(image_path)
#读取的图片的尺寸信息
img_cv.shape

图片的尺寸大小为:

(317, 227, 3)

显示图像,cv默认按照BGR通道读取。 按照那种通道读取无所谓,重要的是要保证训练和推理的方式保持一致

#opencv imread读取的数据格式数array数组
plt.imshow(img_cv)

在这里插入图片描述

2. 定义resize函数,支持直接缩放和定比例缩放

#imag: 图像array数组,(H,W,C)格式
#resize_uniform:表示是否进行等比例缩放
#return:resize之后的图像array数组,和resize的scale值
def resize(img,size=448, resize_uniform = True, boder_color=[0,0,0]):
    H,W,C = img.shape
    if resize_uniform:
        scale_h = size/max(H,W)
        scale_w = scale_h
        dst_h = int(H*scale_h)
        dst_w = int(W*scale_h)
        img_resize = cv2.resize(img, (dst_w, dst_h), interpolation=cv2.INTER_AREA)
        #因为缩放的是图片的额最大的方向,所以填充颜色是在小的图片方向上
        boder_size = max(abs(dst_h-H),abs(dst_w-W))
        #copyMakeBorder(img, top,bootom,left,right)
        img_resize = cv2.copyMakeBorder(img_resize,0, 0, int(boder_size/2), int(boder_size/2) ,cv2.BORDER_CONSTANT,value=boder_color)
    else:
        img_resize = cv2.resize(img, (size, size), interpolation=cv2.INTER_AREA)
        scale_h = size/H
        scale_w = size/W
    return img_resize,scale_h,scale_w
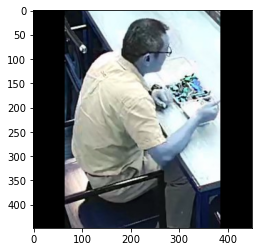
2.1 直接缩放

img_resize,scale_h,scale_w = resize(img_cv)
scale_h,scale_w

缩放因子:
(1.413249211356467, 1.413249211356467)

显示效果:

plt.imshow(img_resize)

在这里插入图片描述

2.2 定比例缩放

img_resize,scale_h,scale_w = resize(img_cv, resize_uniform = False)

显示效果:

plt.imshow(img_resize)

在这里插入图片描述

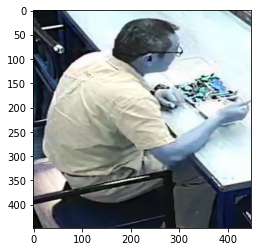
等比例缩放,默认会在端的边界方向上填充黑色。

3 图像归一化

可以直接对像素进行归一化(plt可以显示归一化后的图像)

plt.imshow(img_cv/255)

在这里插入图片描述

更多是是计算整个训练接的mean和std,然后通过(x-mean)/std,计算[-1, 1]的归一化值,pytorch中的实现方式如下

import torchvision.transforms as transforms
transfrom = transforms.Compose([
            transforms.ToTensor(), # height * width * channel -> channel * height * width
            transforms.Normalize(mean=(0.5,0.5,0.5),std=(0.5,0.5,0.5))
        ])

原数据:

img_cv

array([[[ 14,  19,  22],
        [  5,  10,  13],
        [  7,  12,  13],
        ...,
        [245, 248, 252],
        [249, 252, 255],
        [252, 253, 255]],

       [[  7,  12,  15],
        [ 10,  15,  18],
        [  8,  13,  14],
        ...,
        [166, 169, 173],
        [223, 226, 230],
        [243, 244, 248]],

       [[ 12,  17,  20],
        [ 16,  21,  24],
        [ 10,  15,  18],
        ...,
        [101, 106, 109],
        [133, 138, 141],
        [220, 223, 227]],

       ...,

       [[  7,  12,  13],
        [  9,  14,  13],
        [ 14,  17,  15],
        ...,
        [ 18,  19,  29],
        [ 18,  19,  29],
        [ 19,  16,  25]],

       [[  8,  13,  14],
        [  6,  11,  10],
        [ 19,  21,  21],
        ...,
        [ 18,  20,  30],
        [ 19,  21,  29],
        [  9,   6,  15]],

       [[ 15,  20,  21],
        [  5,  10,   9],
        [ 18,  20,  20],
        ...,
        [ 18,  20,  30],
        [ 19,  21,  29],
        [ 19,  16,  25]]], dtype=uint8)

归一化后的数据

train_data = transfrom(img_cv)
tensor([[[-0.8902, -0.9608, -0.9451,  ...,  0.9216,  0.9529,  0.9765],
         [-0.9451, -0.9216, -0.9373,  ...,  0.3020,  0.7490,  0.9059],
         [-0.9059, -0.8745, -0.9216,  ..., -0.2078,  0.0431,  0.7255],
         ...,
         [-0.9451, -0.9294, -0.8902,  ..., -0.8588, -0.8588, -0.8510],
         [-0.9373, -0.9529, -0.8510,  ..., -0.8588, -0.8510, -0.9294],
         [-0.8824, -0.9608, -0.8588,  ..., -0.8588, -0.8510, -0.8510]],

        [[-0.8510, -0.9216, -0.9059,  ...,  0.9451,  0.9765,  0.9843],
         [-0.9059, -0.8824, -0.8980,  ...,  0.3255,  0.7725,  0.9137],
         [-0.8667, -0.8353, -0.8824,  ..., -0.1686,  0.0824,  0.7490],
         ...,
         [-0.9059, -0.8902, -0.8667,  ..., -0.8510, -0.8510, -0.8745],
         [-0.8980, -0.9137, -0.8353,  ..., -0.8431, -0.8353, -0.9529],
         [-0.8431, -0.9216, -0.8431,  ..., -0.8431, -0.8353, -0.8745]],

        [[-0.8275, -0.8980, -0.8980,  ...,  0.9765,  1.0000,  1.0000],
         [-0.8824, -0.8588, -0.8902,  ...,  0.3569,  0.8039,  0.9451],
         [-0.8431, -0.8118, -0.8588,  ..., -0.1451,  0.1059,  0.7804],
         ...,
         [-0.8980, -0.8980, -0.8824,  ..., -0.7725, -0.7725, -0.8039],
         [-0.8902, -0.9216, -0.8353,  ..., -0.7647, -0.7725, -0.8824],
         [-0.8353, -0.9294, -0.8431,  ..., -0.7647, -0.7725, -0.8039]]])
train_data.shape
torch.Size([3, 317, 227])
  • 3
    点赞
  • 20
    收藏
    觉得还不错? 一键收藏
  • 2
    评论
1. 数据准备 可以使用网络爬虫等方式收集大量的图片数据,并将其按类别进行分类。例如,可以使用以下代码将猫、狗、鸟的图片下载到本地: ```python import requests import os # 创建文件夹 if not os.path.exists('cat'): os.makedirs('cat') if not os.path.exists('dog'): os.makedirs('dog') if not os.path.exists('bird'): os.makedirs('bird') # 下载猫的图片 response = requests.get('https://www.example.com/cat_images.zip') with open('cat_images.zip', 'wb') as f: f.write(response.content) # 解压猫的图片 import zipfile with zipfile.ZipFile('cat_images.zip', 'r') as zip_ref: zip_ref.extractall('cat') # 下载狗的图片 response = requests.get('https://www.example.com/dog_images.zip') with open('dog_images.zip', 'wb') as f: f.write(response.content) # 解压狗的图片 with zipfile.ZipFile('dog_images.zip', 'r') as zip_ref: zip_ref.extractall('dog') # 下载鸟的图片 response = requests.get('https://www.example.com/bird_images.zip') with open('bird_images.zip', 'wb') as f: f.write(response.content) # 解压鸟的图片 with zipfile.ZipFile('bird_images.zip', 'r') as zip_ref: zip_ref.extractall('bird') ``` 2. 数据预处理 对于图片数据,需要将其转换成数字矩阵的形式,并对其进行归一化处理。可以使用以下代码实现: ```python from PIL import Image import numpy as np # 将图片转换成数字矩阵,并归一化处理 def preprocess_image(image_path): img = Image.open(image_path) img = img.resize((224, 224)) img = np.array(img) img = img.astype('float32') img /= 255.0 return img # 加载数据 def load_data(): # 加载猫的图片 cat_images = [] for filename in os.listdir('cat'): cat_image = preprocess_image(os.path.join('cat', filename)) cat_images.append(cat_image) # 加载狗的图片 dog_images = [] for filename in os.listdir('dog'): dog_image = preprocess_image(os.path.join('dog', filename)) dog_images.append(dog_image) # 加载鸟的图片 bird_images = [] for filename in os.listdir('bird'): bird_image = preprocess_image(os.path.join('bird', filename)) bird_images.append(bird_image) # 将数据转换成numpy数组,并打上标签 x = np.concatenate([cat_images, dog_images, bird_images], axis=0) y = np.concatenate([np.zeros(len(cat_images)), np.ones(len(dog_images)), np.ones(len(bird_images))*2], axis=0) return x, y ``` 3. 模型构建 可以使用TensorFlow或Keras等框架来构建卷积神经网络模型。以下是一个简单的卷积神经网络模型: ```python import tensorflow as tf from tensorflow.keras import layers # 构建模型 def build_model(): model = tf.keras.Sequential([ layers.Conv2D(32, (3, 3), activation='relu', input_shape=(224, 224, 3)), layers.MaxPooling2D((2, 2)), layers.Conv2D(64, (3, 3), activation='relu'), layers.MaxPooling2D((2, 2)), layers.Conv2D(128, (3, 3), activation='relu'), layers.MaxPooling2D((2, 2)), layers.Flatten(), layers.Dense(128, activation='relu'), layers.Dense(3) ]) return model ``` 4. 模型训练 可以使用以下代码对模型进行训练: ```python import tensorflow as tf # 加载数据 x, y = load_data() # 构建模型 model = build_model() # 编译模型 model.compile(optimizer='adam', loss=tf.keras.losses.SparseCategoricalCrossentropy(from_logits=True), metrics=['accuracy']) # 训练模型 model.fit(x, y, epochs=10, validation_split=0.2) ``` 5. 模型测试 可以使用以下代码对模型进行测试,并计算其准确率: ```python # 加载测试数据 test_x, test_y = load_data() # 对测试数据进行预测 predictions = model.predict(test_x) # 计算准确率 test_loss, test_acc = model.evaluate(test_x, test_y, verbose=2) print('Test accuracy:', test_acc) ``` 6. 预测 可以使用以下代码对新的照片进行分类: ```python # 预处理图片 new_image = preprocess_image('new_image.jpg') # 对新的照片进行分类 prediction = model.predict(np.array([new_image])) # 输出预测结果 if np.argmax(prediction) == 0: print('猫') elif np.argmax(prediction) == 1: print('狗') else: print('鸟') ```

“相关推荐”对你有帮助么?

  • 非常没帮助
  • 没帮助
  • 一般
  • 有帮助
  • 非常有帮助
提交
评论 2
添加红包

请填写红包祝福语或标题

红包个数最小为10个

红包金额最低5元

当前余额3.43前往充值 >
需支付:10.00
成就一亿技术人!
领取后你会自动成为博主和红包主的粉丝 规则
hope_wisdom
发出的红包
实付
使用余额支付
点击重新获取
扫码支付
钱包余额 0

抵扣说明:

1.余额是钱包充值的虚拟货币,按照1:1的比例进行支付金额的抵扣。
2.余额无法直接购买下载,可以购买VIP、付费专栏及课程。

余额充值