


使用了vuex做自定义动态tabbar,第一次进去小程序切换不会再闪烁完全是意料之外的收获,嘿嘿。
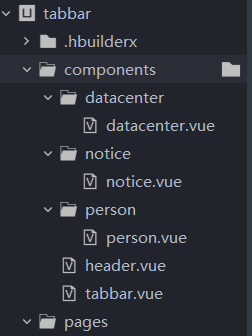
第一步,在组件里新建自定义tabbar所需的三个页面、还有自定义tabbar和header
tabbar.vue
<template>
	<view class="tabbar">
		<view class="" v-for="(item, index) in list" :key="index" @click="tabItemChange(index)">
			<navigator hover-class="none" :url="item.pagePath" open-type="switchTab">
				<view class="tabbar-inner">
					<image class="tab-img" :src="index === cur ? item.selectedIconPath : item.iconPath" mode=""></image>
					<view class="tab-name" :style="{color: index === cur ? '#007AFF' : '#B3B3B3'}">{{item.text}}</view>
				</view>
			</navigator>
		</view>
	</view>
</template>

<script>
	export default {
		props: {
			cur: {
				type: Number,
				default: 1
			}
		},
		computed: {
			list() {
				console.log(this.$store.state.tabList)
				// 显示在页面上的tabbar
				return this.$store.state.tabList
			}
		},
		methods: {
			// 改变tabbar的下标
			tabItemChange(e) {
				this.$store.commit("tabChange", e)
			}
		}
	}
</script>

<style lang="scss" scoped>
	.tabbar {
		width: 750rpx;
		height: 98rpx;
		background: #FFFFFF;
		box-shadow: 0rpx -1rpx 0rpx 0rpx rgba(204, 204, 204, 0.5);
		display: flex;
		justify-content: space-around;
		align-items: center;
		position: fixed;
		bottom: 0;
		z-index: 12;

		.tabbar-inner {
			display: flex;
			align-items: center;
			flex-direction: column;
			padding: 10rpx 60rpx;

			.tab-img {
				width: 40rpx;
				height: 40rpx;
			}

			.tab-name {
				color: #B3B3B3;
				font-size: 20rpx;
				padding-bottom: 4rpx 0 10rpx;
			}
		}
	}
</style>
第二步,在,page/index/index里,把第一步的组件引入进来,权限切换操作我都写在该组件里,代码如下:
<template>
	<view>
		<v-header></v-header>
		<view class="" @click="tabChange">
			<Notice v-if="name == 'notice'"></Notice>
			<Person v-if="name == 'person'"></Person>
			<Datacenter v-if="name == 'datacenter'"></Datacenter>
		</view>
		<v-tabbar :cur="cur"></v-tabbar>
	</view>
</template>

<script>
	import VHeader from '../../components/header.vue'
	import VTabbar from '../../components/tabbar.vue'
	import Notice from '../../components/notice/notice.vue'
	import Person from '../../components/person/person.vue'
	import Datacenter from '../../components/datacenter/datacenter.vue'
	export default {
		components: {
			VHeader,
			VTabbar,
			Notice,
			Person,
			Datacenter
		},
		computed: {
			// 通过对比名称显示tabbar的某一页面
			name () {
				return this.$store.state.tabList[this.$store.state.tab_cur].name_code
			},
			// 默认当前下标
			cur() {
				return this.$store.state.tab_cur
			}
		},
		created() {
			console.log(this.$store.state.tabList[this.$store.state.tab_cur], '首页呀', this.$store.state.tab_cur)
			console.log(this.$store.state.tabList, 'tab', this.$store.state.tab_cur)
			console.log('角色', this.$store.state.userinfo.roleType)
			// 各种角色权限对应的数组,可以根据需求自行处理
			const list = [{
				iconPath: "/static/person.png",
				selectedIconPath: "/static/person-active.png",
				text: "人员认证",
				name_code: "person"
			},
			{
				iconPath: "/static/notice.png",
				selectedIconPath: "/static/notice-active.png",
				text: "园区公告",
				name_code: "notice"
			}]
			// roleType为登录时获取到的角色权限,根据roleType显示tabbar,此为动态切换自定义tabbar的关键,暂时注释,自己解开测试
			// if(this.$store.state.userinfo.roleType == 1) {
			// 	this.$store.commit('tabItemChange', list)
			// 	// this.$store.commit('curChange', this.$store.state.tabList.length)
			// }
			// 取到tabbar的长度-1 赋值给store中的tabbar下标
			this.$store.commit('curChange', this.$store.state.tabList.length)
		}
	}
</script>

<style lang="scss" scoped>

</style>
第四步:创建store文件并挂载到main.js里
import Vue from 'vue'
import App from './App'
//引入vuex
import store from './store/index.js'
//把vuex定义成全局组件
Vue.prototype.$store = store


Vue.config.productionTip = false

App.mpType = 'app'

const app = new Vue({
	...App,
	store // 挂载
})
app.$mount()
第五步,store中的代码
import Vue from 'vue'
import Vuex from 'vuex'
Vue.use(Vuex)
const store = new Vuex.Store({
	state: {
		userinfo: {
			id: 13,
			roleType: 1, // 1.游客2.普通用户3.分管4.企业
			token: "a3fb27d3d26e43518894fa538c37c075-13",
			updateTime: 1617162453105,
		},
		tabList: [{
				iconPath: "/static/data.png",
				selectedIconPath: "/static/data-active.png",
				text: "数据",
				name_code: "datacenter"
			}, {
				iconPath: "/static/person.png",
				selectedIconPath: "/static/person-active.png",
				text: "人员",
				name_code: "person"
			},
			{
				iconPath: "/static/notice.png",
				selectedIconPath: "/static/notice-active.png",
				text: "公告",
				name_code: "notice"
			}],
		tab_cur: 1,
		test: '测试的呀'
	},
	// 使用mutations直接更改state的值
	mutations: {
		tabChange(state, index) {
			console.log(state, index, 'store中的tab切换事件')
			state.tab_cur = index
		},
		// tabbar
		tabItemChange(state, list) {
			console.log(list, 'tab都有什么')
			state.tabList = list
		},
		curChange(state, index) {
			console.log(state, index - 1, 'tab-index')
			state.tab_cur = index - 1
		},
		// 测试可删
		ontest(state, txt) {
			console.log(state, txt, '测试vuex可删')
			state.test = txt
		},
	},
	// 使用actions,通过mutations更改state的值
	actions: {}
})
export default store
第六步,在App.vue里根据是否存在token判断跳转路由
    onLaunch: function() {
			// // 本来是隐藏原生的tabbar的
			// uni.hideTabBar({
			// 	animation: false
			// })
			console.log('App Launch')
			const token = this.$store.state.userinfo.token
			console.log(token, 'App里的token')
			// 如果token不存在就跳转登录页,存在就跳首页
			if(!token) {
				uni.reLaunch({
					url: "pages/login/login"
				})
			} else {
				uni.switchTab({
					url: "./pages/index/index"
				})
			}
},完结撒花。源码在https://download.csdn.net/download/jingruoannan/16581373


 3336
3336


 被折叠的 条评论
为什么被折叠?
被折叠的 条评论
为什么被折叠?
 到【灌水乐园】发言


