


Numpy:
import numpy as np
x = np.random.randn(100)
x_relu = np.maximum(x,0)
Pytorch:
import torch
x = torch.randn(100)
x_relu = torch.clamp(x,min = 0)
关于torch.clamp:
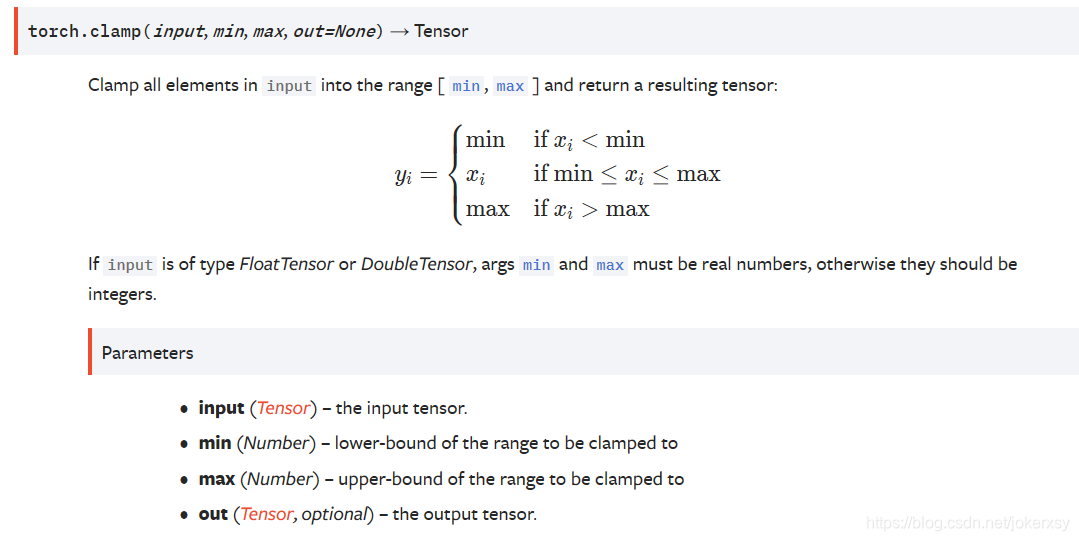
examples:
a = torch.randn(4)
a
>>>tensor([-1.7120,  0.1734, -0.0478, -0.0922])
torch.clamp(a, min=-0.5, max=0.5)
>>>tensor([-0.5000,  0.1734, -0.0478, -0.0922])
把一个tensor"夹"进规定的范围内。


 2万+
2万+


 被折叠的 条评论
为什么被折叠?
被折叠的 条评论
为什么被折叠?
 到【灌水乐园】发言


