


- 本系列代码已经上传至github,有需要的可以自行下载
查看和评论
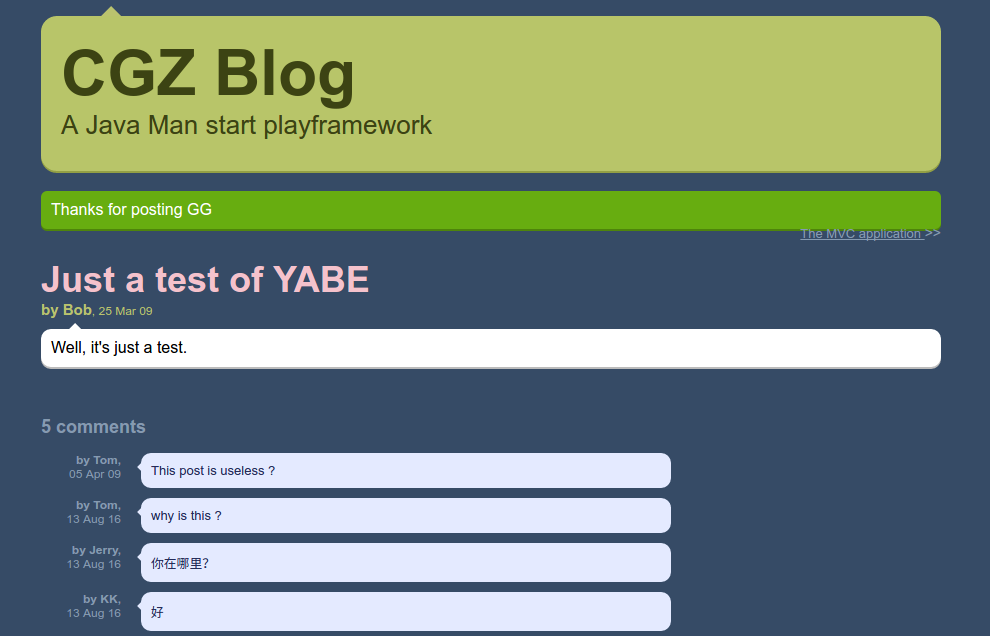
上一篇我们已经完成了博客的首页,本篇我们将做文章的详情页。详情页会展示文章所有的评论和一个评论的表单。
创建一个Show Action
我们编写一个action显示文章详情的方法在Applicationcontroller中,方法名为show():
public static void show(Long id){
    Post post = Post.findById(id);
    render(post);
}如你所见,添加一个action方法很简单,我们在方法中声明了一个id参数,Play会自动从HTTP请求参数中取出名为id的值作为Long类型的对象。这个参数是从URL地址中的查询参数中取出。
如果我们给HTTP参数
id赋一个非数字的值,方法中接收到的id变量将会设为null,Play会自动地添加一个验证错误到错误容器中。
这个action默认会使用/app_1/app/views/Application/show.html模板:
#{extends 'main.html'/}
#{set title: post.title/}

#{display post:post, as:'full'/}因为我们之前已经创建了display标签,在这个页面中可以很简单的使用。
添加一个链接到详细页
在play中,可以使用@{...}标注很容易地建立和Action链接,这种语法反向地调用特定的action方法.
修改/app_1/app/views/tags/display.html标签模板:
...

<h2 class="post-title">
    <a href="@{Application.show(_post.id)}">${_post.title}</a>
</h2>
...
刷新页面即有效果,现在我们再加上回到首页的链接,编辑/app_1/app/views/main.html模板:
...

<div id="title">
    <span class="about">About this blog</span>
    <h1><a href="@{Application.index()}">${blogTitle}</a> </h1>
    <h2>${blogBaseline}</h2>
</div>
...
指定一个更好的URL
使用@{}生成的URL是这样的:
/application/show?id=1
这是因为Play默认使用catch all路由。
* /{controller}/{action} {controller}.{action}
我们可以指定更好的URL地址来访问Application.showaction。在/app_1/conf/routes文件开头添加一行:
GET /posts/{id} Application.show这种方式
id参数将会出现在URL中,更多的路由语法,请点击 查看路由文件中的匹配是由上至下,已经配置到的URL将不再往下匹配,所以应当把特殊的方在前面,通用的方在后面
添加分页显示
为了方便用户浏览博客贴子,这里加上分页机制,拓展Post类,添加上一篇,下一篇方法:
public Post previous() {
    return Post.find("postedAt < ? order by postedAt desc", postedAt).first();
}

public Post next() {
    return Post.find("postedAT > ? order by postedAt asc", postedAt).first();
}在show.html模板中使用,将以下代码加到#{display}标签前:
<ul id="pagination">
    #{if post.previous()}
        <li id="previous">
            <a href="@{Application.show(post.previous().id)}">
            ${post.previous().title}
            </a>
        </li>
    #{/if}
    #{if post.next()}
        <li id="next">
            <a href="@{Application.show(post.next().id)}">
                ${post.next().title}
            </a>
        </li>
    #{/if}
</ul>
添加一个评论表单
添加postCommentaction方法至Application controller中:
public static void postComment(Long postId, String author, String content) {
    Post post = Post.findById(postId);
    post.addComment(author,content);
    show(postId);
}这里的addComment方法已经在Post类中定义过了,添加表单至show.html中,放在#{disply/}标签后面
<h3>Post a comment</h3>
#{form @Application.postComment(post.id)}
    <p>
        <label for="author">Your name:</label>
        <input type="text" name="author" id="author">
    </p>
    <p>
        <label for="content">Your message:</label>
        <textarea name="content" id="content"></textarea>
    </p>
    <p>
        <input type="submit" value="Submit your comment">
    </p>
#{/form}
效果如下图:
添加表单验证
现在我们还不能验证表单内容,为了确保用户输入了name和content正确性,可以添加Play校验机制,修改postComent添加@Required验证注解:
public static void postComment(Long postId, @Required String author, @Required String content) {
Post post = Post.findById(postId);
if (validation.hasErrors()) {
render("Application/show.html", post);
}
post.addComment(author, content);
show(postId);
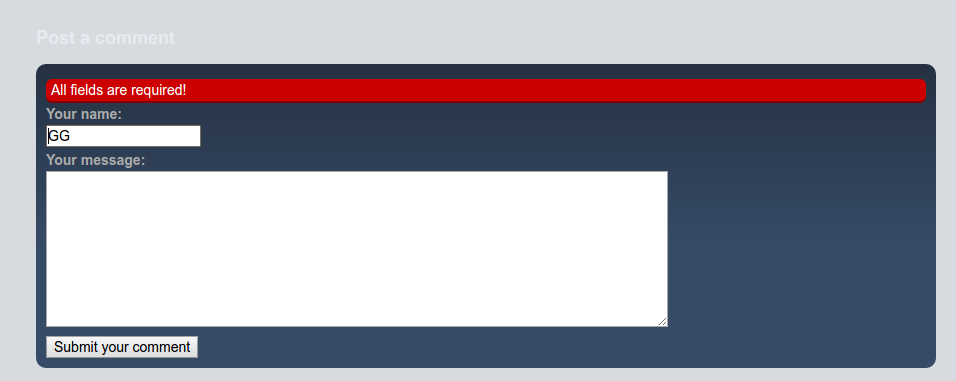
}修改模板代码以显示错误信息:
#{form @Application.postComment(post.id)}
    #{ifErrors }
        <p class="error">
            All fields are required!
        </p>
    #{/ifErrors}
    <p>
        <label for="author">Your name:</label>
        <input type="text" name="author" id="author" value="${params.author}">
    </p>
    <p>
        <label for="content">Your message:</label>
        <textarea name="content" id="content">${params.content}</textarea>
    </p>
    <p>
        <input type="submit" value="Submit your comment">
    </p>
#{/form}刷新看到效果,为了更好的用户体验,这里添加在出错时,自动设置焦点的JS。引入JQuery 和 JQuery Tools Expose 库。将JS文件放在/app_1/public/javascripts目录下,修改main.html:
<script src="@{'/public/javascripts/jquery-1.4.2.min.js'}"></script>
<script src="@{'/public/javascripts/jquery.tools-1.2.5.toolbox.expose.min.js'}"></script>添加JS至show.html:
<script type="text/javascript" charset="utf-8">
    $(function(){
       $('form').click(function(){
           $('form').expose({api:true}).load();
       });

        if($('form .error').size()) {
            $('form').expose({api: true, loadSpeed: 0}).load();
            $('form input[type=text]').get(0).focus();
        };
    });
</script>
现在的效果如下:
评论成功时,应该反馈成功信息,修改postComment方法,添加成功信息:
public static void postComment(Long postId, @Required String author, @Required String content) {
    Post post = Post.findById(postId);
    if (validation.hasErrors()) {
        render("Application/show.html", post);
    }
    post.addComment(author, content);
    flash.success("Thanks for posting %s", author);
    show(postId);
}添加评论成功信息至show.html头部
#{if flash.success}
    <p class="success">${flash.success}</p>
#{/if}
同样,我们可以格式化评论的URL,在routes文件中添加:
POST /posts/${postId}/comments Application.postComment


 453
453

 被折叠的 条评论
为什么被折叠?
被折叠的 条评论
为什么被折叠?
 到【灌水乐园】发言


