


torchserve主要用于pytorch模型发布到web端访问,包含一些管理,注册工具。
参考:
https://github.com/pytorch/serve
https://github.com/pytorch/serve/tree/master/model-archiver
步骤一、模型打包成mar文件
创建环境并安装torch-model-archiver:
pip install torchserve torch-model-archiver torch-workflow-archiver源码安装:
git clone https://github.com/pytorch/serve.git
cd serve/model-archiver
pip install .
遇到问题:torch-model-archiver 不是内部或外部命令,也不是可运行的程序
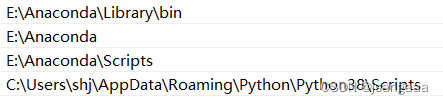
解决办法:添加环境变量,这里一定要注意将所在包应用程序的路径添加到,我这里存在一个C盘的,当时找了半天
我准备了一个alexnet.pt通过jit.trace生成:
from torchvision import models
import torch
model = models.alexnet(pretrained=True)
model.eval()
example_input = torch.rand(1, 3, 224, 224)
traced_script_module = torch.jit.trace(model, example_input)
traced_script_module.save("alexnet.pt")
打包成mar文件:
# 生成MAR打包文件
torch-model-archiver --model-name alexnet --version 1.0  --serialized-file alexnet.pt --extra-files ./serve/examples/image_classifier/index_to_name.json --handler image_classifier
步骤二、安装torchserve
有教程直接安装在操作系统上,需要java环境,而我通过docker安装的:
docker pull pytorch/torchserve步骤三、启用torchserve
指定端口,docker run
# 启动服务 windows
docker run --rm -p 8080:8080 -p 8081:8081 -p 8082:8082 -p 7070:7070 -p 7071:7071 -v "$(torch_serve的路径)/model_store:/home/model-server/model-store" pytorch/torchserve torchserve --start --model-store model-store --models alexnet=alexnet.mar
至此就完成啦!!!,可以通过postman测试


 723
723


 被折叠的 条评论
为什么被折叠?
被折叠的 条评论
为什么被折叠?
 到【灌水乐园】发言


