


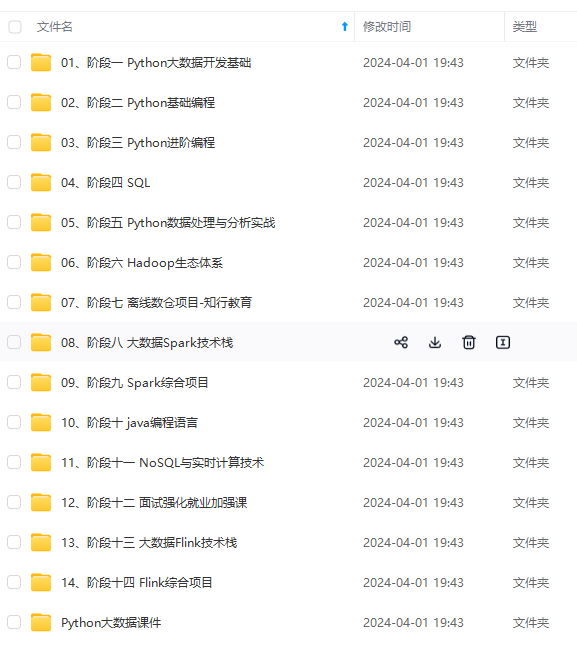
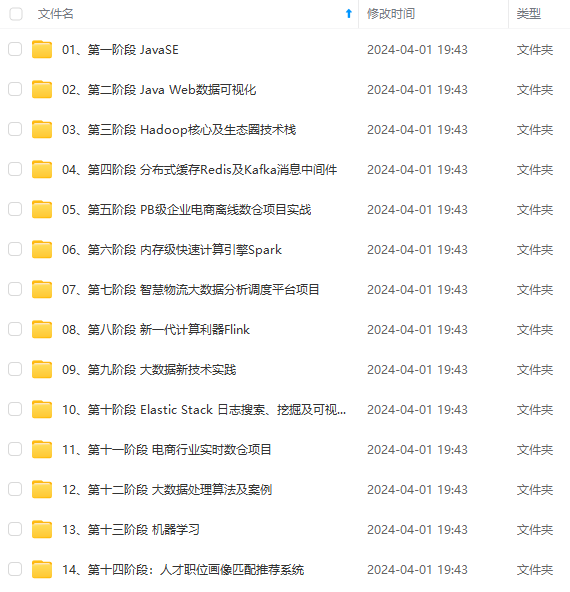
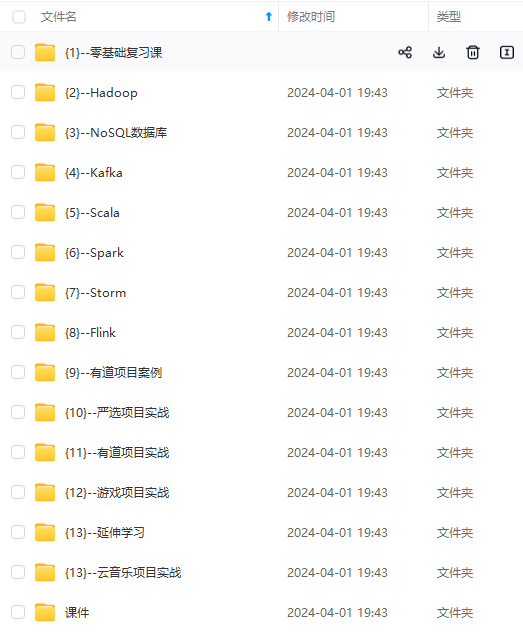
既有适合小白学习的零基础资料,也有适合3年以上经验的小伙伴深入学习提升的进阶课程,涵盖了95%以上大数据知识点,真正体系化!
由于文件比较多,这里只是将部分目录截图出来,全套包含大厂面经、学习笔记、源码讲义、实战项目、大纲路线、讲解视频,并且后续会持续更新
nnU-Net expects the same file format for images and segmentations! These will also be used for inference. For now, it
is thus not possible to train .png and then run inference on .jpg.
One big change in nnU-Net V2 is the support of multiple input file types. Gone are the days of converting everything to .nii.gz!
This is implemented by abstracting the input and output of images + segmentations through BaseReaderWriter. nnU-Net
comes with a broad collection of Readers+Writers and you can even add your own to support your data format!
See here.
As a nice bonus, nnU-Net now also natively supports 2D input images and you no longer have to mess around with
conversions to pseudo 3D niftis. Yuck. That was disgusting.
Note that internally (for storing and accessing preprocessed images) nnU-Net will use its own file format, irrespective
of what the raw data was provided in! This is for performance reasons.
By default, the following file formats are supported:
- NaturalImage2DIO: .png, .bmp, .tif
- NibabelIO: .nii.gz, .nrrd, .mha
- NibabelIOWithReorient: .nii.gz, .nrrd, .mha. This reader will reorient images to RAS!
- SimpleITKIO: .nii.gz, .nrrd, .mha
- Tiff3DIO: .tif, .tiff. 3D tif images! Since TIF does not have a standardized way of storing spacing information,
nnU-Net expects each TIF file to be accompanied by an identically named .json file that contains three numbers
(no units, no comma. Just separated by whitespace), one for each dimension.
The file extension lists are not exhaustive and depend on what the backend supports. For example, nibabel and SimpleITK
support more than the three given here. The file endings given here are just the ones we tested!
IMPORTANT: nnU-Net can only be used with file formats that use lossless (or no) compression! Because the file
format is defined for an entire dataset (and not separately for images and segmentations, this could be a todo for
the future), we must ensure that there are no compression artifacts that destroy the segmentation maps. So no .jpg and
the likes!
Dataset folder structure
Datasets must be located in the nnUNet_raw folder (which you either define when installing nnU-Net or export/set every
time you intend to run nnU-Net commands!).
Each segmentation dataset is stored as a separate ‘Dataset’. Datasets are associated with a dataset ID, a three digit
integer, and a dataset name (which you can freely choose): For example, Dataset005_Prostate has ‘Prostate’ as dataset name and
the dataset id is 5. Datasets are stored in the nnUNet_raw folder like this:
nnUNet_raw/
├── Dataset001_BrainTumour
├── Dataset002_Heart
├── Dataset003_Liver
├── Dataset004_Hippocampus
├── Dataset005_Prostate
├── ...
Within each dataset folder, the following structure is expected:
Dataset001_BrainTumour/
├── dataset.json
├── imagesTr
├── imagesTs  # optional
└── labelsTr
When adding your custom dataset, take a look at the dataset_conversion folder and
pick an id that is not already taken. IDs 001-010 are for the Medical Segmentation Decathlon.
- imagesTr contains the images belonging to the training cases. nnU-Net will perform pipeline configuration, training with
cross-validation, as well as finding postprocessing and the best ensemble using this data. - imagesTs (optional) contains the images that belong to the test cases. nnU-Net does not use them! This could just
be a convenient location for you to store these images. Remnant of the Medical Segmentation Decathlon folder structure. - labelsTr contains the images with the ground truth segmentation maps for the training cases.
- dataset.json contains metadata of the dataset.
The scheme introduced above results in the following folder structure. Given
is an example for the first Dataset of the MSD: BrainTumour. This dataset hat four input channels: FLAIR (0000),
T1w (0001), T1gd (0002) and T2w (0003). Note that the imagesTs folder is optional and does not have to be present.
nnUNet_raw/Dataset001_BrainTumour/
├── dataset.json
├── imagesTr
│   ├── BRATS_001_0000.nii.gz
│   ├── BRATS_001_0001.nii.gz
│   ├── BRATS_001_0002.nii.gz
│   ├── BRATS_001_0003.nii.gz
│   ├── BRATS_002_0000.nii.gz
│   ├── BRATS_002_0001.nii.gz
│   ├── BRATS_002_0002.nii.gz
│   ├── BRATS_002_0003.nii.gz
│   ├── ...
├── imagesTs
│   ├── BRATS_485_0000.nii.gz
│   ├── BRATS_485_0001.nii.gz
│   ├── BRATS_485_0002.nii.gz
│   ├── BRATS_485_0003.nii.gz
│   ├── BRATS_486_0000.nii.gz
│   ├── BRATS_486_0001.nii.gz
│   ├── BRATS_486_0002.nii.gz
│   ├── BRATS_486_0003.nii.gz
│   ├── ...
└── labelsTr
    ├── BRATS_001.nii.gz
    ├── BRATS_002.nii.gz
    ├── ...
Here is another example of the second dataset of the MSD, which has only one input channel:
nnUNet_raw/Dataset002_Heart/
├── dataset.json
├── imagesTr
│   ├── la_003_0000.nii.gz
│   ├── la_004_0000.nii.gz
│   ├── ...
├── imagesTs
│   ├── la_001_0000.nii.gz
│   ├── la_002_0000.nii.gz
│   ├── ...
└── labelsTr
    ├── la_003.nii.gz
    ├── la_004.nii.gz
    ├── ...
Remember: For each training case, all images must have the same geometry to ensure that their pixel arrays are aligned. Also
make sure that all your data is co-registered!
See also dataset format inference!!
dataset.json
The dataset.json contains metadata that nnU-Net needs for training. We have greatly reduced the number of required
fields since version 1!
Here is what the dataset.json should look like at the example of the Dataset005_Prostate from the MSD:
{
 "channel_names": {  # formerly modalities
   "0": "T2",
   "1": "ADC"
 },
 "labels": {  # THIS IS DIFFERENT NOW!
   "background": 0,
   "PZ": 1,
   "TZ": 2
 },
 "numTraining": 32,
 "file_ending": ".nii.gz"
 "overwrite_image_reader_writer": "SimpleITKIO"  # optional! If not provided nnU-Net will automatically determine the ReaderWriter
 }
The channel_names determine the normalization used by nnU-Net. If a channel is marked as ‘CT’, then a global
normalization based on the intensities in the foreground pixels will be used. If it is something else, per-channel
z-scoring will be used. Refer to the methods section in our paper
for more details. nnU-Net v2 introduces a few more normalization schemes to
choose from and allows you to define your own, see here for more information.
Important changes relative to nnU-Net v1:
- “modality” is now called “channel_names” to remove strong bias to medical images
- labels are structured differently (name -> int instead of int -> name). This was needed to support region-based training
- “file_ending” is added to support different input file types
- “overwrite_image_reader_writer” optional! Can be used to specify a certain (custom) ReaderWriter class that should
be used with this dataset. If not provided, nnU-Net will automatically determine the ReaderWriter - “regions_class_order” only used in region-based training
There is a utility with which you can generate the dataset.json automatically. You can find it
here.
See our examples in dataset_conversion for how to use it. And read its documentation!
How to use nnU-Net v1 Tasks
If you are migrating from the old nnU-Net, convert your existing datasets with nnUNetv2_convert_old_nnUNet_dataset!
Example for migrating a nnU-Net v1 Task:
nnUNetv2_convert_old_nnUNet_dataset /media/isensee/raw_data/nnUNet_raw_data_base/nnUNet_raw_data/Task027_ACDC Dataset027_ACDC
Use nnUNetv2_convert_old_nnUNet_dataset -h for detailed usage instructions.
How to use decathlon datasets
See <convert_msd_dataset.md>
How to use 2D data with nnU-Net
2D is now natively supported (yay!). See here as well as the example dataset in this
script.
How to update an existing dataset
When updating a dataset it is best practice to remove the preprocessed data in nnUNet_preprocessed/DatasetXXX_NAME
to ensure a fresh start. Then replace the data in nnUNet_raw and rerun nnUNetv2_plan_and_preprocess. Optionally,
also remove the results from old trainings.
Example dataset conversion scripts
In the dataset_conversion folder (see here) are multiple example scripts for
converting datasets into nnU-Net format. These scripts cannot be run as they are (you need to open them and change
some paths) but they are excellent examples for you to learn how to convert your own datasets into nnU-Net format.
Just pick the dataset that is closest to yours as a starting point.
The list of dataset conversion scripts is continually updated. If you find that some publicly available dataset is
missing, feel free to open a PR to add it!
[3] Setting up Paths
nnU-Net relies on environment variables to know where raw data, preprocessed data and trained model weights are stored.
To use the full functionality of nnU-Net, the following three environment variables must be set:
nnUNet_raw: This is where you place the raw datasets. This folder will have one subfolder for each dataset names
DatasetXXX_YYY where XXX is a 3-digit identifier (such as 001, 002, 043, 999, …) and YYY is the (unique)
dataset name. The datasets must be in nnU-Net format, see here.
Example tree structure:
nnUNet_raw/Dataset001_NAME1
├── dataset.json
├── imagesTr
│   ├── ...
├── imagesTs
│   ├── ...
└── labelsTr
    ├── ...
nnUNet_raw/Dataset002_NAME2
├── dataset.json
├── imagesTr
│   ├── ...
├── imagesTs
│   ├── ...
└── labelsTr
    ├── ...
nnUNet_preprocessed: This is the folder where the preprocessed data will be saved. The data will also be read from
this folder during training. It is important that this folder is located on a drive with low access latency and high
throughput (such as a nvme SSD (PCIe gen 3 is sufficient)).nnUNet_results: This specifies where nnU-Net will save the model weights. If pretrained models are downloaded, this
is where it will save them.
[4] How to run nnU-Net on a new dataset
Given some dataset, nnU-Net fully automatically configures an entire segmentation pipeline that matches its properties.
nnU-Net covers the entire pipeline, from preprocessing to model configuration, model training, postprocessing
all the way to ensembling. After running nnU-Net, the trained model(s) can be applied to the test cases for inference.
Dataset Format
nnU-Net expects datasets in a structured format. This format is inspired by the data structure of
the Medical Segmentation Decthlon. Please read
this for information on how to set up datasets to be compatible with nnU-Net.
Since version 2 we support multiple image file formats (.nii.gz, .png, .tif, …)! Read the dataset_format
documentation to learn more!
Datasets from nnU-Net v1 can be converted to V2 by running nnUNetv2_convert_old_nnUNet_dataset INPUT_FOLDER OUTPUT_DATASET_NAME. Remember that v2 calls datasets DatasetXXX_Name (not Task) where XXX is a 3-digit number.
Please provide the path to the old task, not just the Task name. nnU-Net V2 doesn’t know where v1 tasks were!
Experiment planning and preprocessing
Given a new dataset, nnU-Net will extract a dataset fingerprint (a set of dataset-specific properties such as
image sizes, voxel spacings, intensity information etc). This information is used to design three U-Net configurations.
Each of these pipelines operates on its own preprocessed version of the dataset.
The easiest way to run fingerprint extraction, experiment planning and preprocessing is to use:
nnUNetv2_plan_and_preprocess -d DATASET_ID --verify_dataset_integrity
Where DATASET_ID is the dataset id (duh). We recommend --verify_dataset_integrity whenever it’s the first time
you run this command. This will check for some of the most common error sources!
You can also process several datasets at once by giving -d 1 2 3 [...]. If you already know what U-Net configuration
you need you can also specify that with -c 3d_fullres (make sure to adapt -np in this case!). For more information
about all the options available to you please run nnUNetv2_plan_and_preprocess -h.
nnUNetv2_plan_and_preprocess will create a new subfolder in your nnUNet_preprocessed folder named after the dataset.
Once the command is completed there will be a dataset_fingerprint.json file as well as a nnUNetPlans.json file for you to look at
(in case you are interested!). There will also be subfolders containing the preprocessed data for your UNet configurations.
[Optional]
If you prefer to keep things separate, you can also use nnUNetv2_extract_fingerprint, nnUNetv2_plan_experiment
and nnUNetv2_preprocess (in that order).
Model training
Overview
You pick which configurations (2d, 3d_fullres, 3d_lowres, 3d_cascade_fullres) should be trained! If you have no idea
what performs best on your data, just run all of them and let nnU-Net identify the best one. It’s up to you!
nnU-Net trains all configurations in a 5-fold cross-validation over the training cases. This is 1) needed so that
nnU-Net can estimate the performance of each configuration and tell you which one should be used for your
segmentation problem and 2) a natural way of obtaining a good model ensemble (average the output of these 5 models
for prediction) to boost performance.
You can influence the splits nnU-Net uses for 5-fold cross-validation (see here). If you
prefer to train a single model on all training cases, this is also possible (see below).
Note that not all U-Net configurations are created for all datasets. In datasets with small image sizes, the U-Net
cascade (and with it the 3d_lowres configuration) is omitted because the patch size of the full resolution U-Net
already covers a large part of the input images.
Training models is done with the nnUNetv2_train command. The general structure of the command is:
nnUNetv2_train DATASET_NAME_OR_ID UNET_CONFIGURATION FOLD [additional options, see -h]
UNET_CONFIGURATION is a string that identifies the requested U-Net configuration (defaults: 2d, 3d_fullres, 3d_lowres,
3d_cascade_lowres). DATASET_NAME_OR_ID specifies what dataset should be trained on and FOLD specifies which fold of
the 5-fold-cross-validation is trained.
nnU-Net stores a checkpoint every 50 epochs. If you need to continue a previous training, just add a --c to the
training command.
IMPORTANT: If you plan to use nnUNetv2_find_best_configuration (see below) add the --npz flag. This makes
nnU-Net save the softmax outputs during the final validation. They are needed for that. Exported softmax
predictions are very large and therefore can take up a lot of disk space, which is why this is not enabled by default.
If you ran initially without the --npz flag but now require the softmax predictions, simply rerun the validation with:
nnUNetv2_train DATASET_NAME_OR_ID UNET_CONFIGURATION FOLD --val --npz
You can specify the device nnU-net should use by using -device DEVICE. DEVICE can only be cpu, cuda or mps. If
you have multiple GPUs, please select the gpu id using CUDA_VISIBLE_DEVICES=X nnUNetv2_train [...] (requires device to be cuda).
See nnUNetv2_train -h for additional options.
2D U-Net
For FOLD in [0, 1, 2, 3, 4], run:
nnUNetv2_train DATASET_NAME_OR_ID 2d FOLD [--npz]
3D full resolution U-Net
For FOLD in [0, 1, 2, 3, 4], run:
nnUNetv2_train DATASET_NAME_OR_ID 3d_fullres FOLD [--npz]
3D U-Net cascade
3D low resolution U-Net
For FOLD in [0, 1, 2, 3, 4], run:
nnUNetv2_train DATASET_NAME_OR_ID 3d_lowres FOLD [--npz]
3D full resolution U-Net
For FOLD in [0, 1, 2, 3, 4], run:
nnUNetv2_train DATASET_NAME_OR_ID 3d_cascade_fullres FOLD [--npz]
Note that the 3D full resolution U-Net of the cascade requires the five folds of the low resolution U-Net to be
completed!
The trained models will be written to the nnUNet_results folder. Each training obtains an automatically generated
output folder name:
nnUNet_results/DatasetXXX_MYNAME/TRAINER_CLASS_NAME__PLANS_NAME__CONFIGURATION/FOLD
For Dataset002_Heart (from the MSD), for example, this looks like this:
nnUNet_results/
├── Dataset002_Heart
    │── nnUNetTrainer__nnUNetPlans__2d
    │    ├── fold_0
    │    ├── fold_1
    │    ├── fold_2
    │    ├── fold_3
    │    ├── fold_4
    │    ├── dataset.json
    │    ├── dataset_fingerprint.json
    │    └── plans.json
    └── nnUNetTrainer__nnUNetPlans__3d_fullres
         ├── fold_0
         ├── fold_1
         ├── fold_2
         ├── fold_3
         ├── fold_4
         ├── dataset.json
         ├── dataset_fingerprint.json
         └── plans.json
Note that 3d_lowres and 3d_cascade_fullres do not exist here because this dataset did not trigger the cascade. In each
model training output folder (each of the fold_x folder), the following files will be created:
- debug.json: Contains a summary of blueprint and inferred parameters used for training this model as well as a
bunch of additional stuff. Not easy to read, but very useful for debugging 😉 - checkpoint_best.pth: checkpoint files of the best model identified during training. Not used right now unless you
explicitly tell nnU-Net to use it. - checkpoint_final.pth: checkpoint file of the final model (after training has ended). This is what is used for both
validation and inference. - network_architecture.pdf (only if hiddenlayer is installed!): a pdf document with a figure of the network architecture in it.
- progress.png: Shows losses, pseudo dice, learning rate and epoch times ofer the course of the training. At the top is
a plot of the training (blue) and validation (red) loss during training. Also shows an approximation of
the dice (green) as well as a moving average of it (dotted green line). This approximation is the average Dice score
of the foreground classes. It needs to be taken with a big (!)
grain of salt because it is computed on randomly drawn patches from the validation
data at the end of each epoch, and the aggregation of TP, FP and FN for the Dice computation treats the patches as if
they all originate from the same volume (‘global Dice’; we do not compute a Dice for each validation case and then
average over all cases but pretend that there is only one validation case from which we sample patches). The reason for
this is that the ‘global Dice’ is easy to compute during training and is still quite useful to evaluate whether a model
is training at all or not. A proper validation takes way too long to be done each epoch. It is run at the end of the training. - validation_raw: in this folder are the predicted validation cases after the training has finished. The summary.json file in here
contains the validation metrics (a mean over all cases is provided at the start of the file). If--npzwas set then
the compressed softmax outputs (saved as .npz files) are in here as well.
During training it is often useful to watch the progress. We therefore recommend that you have a look at the generated
progress.png when running the first training. It will be updated after each epoch.
Training times largely depend on the GPU. The smallest GPU we recommend for training is the Nvidia RTX 2080ti. With
that all network trainings take less than 2 days. Refer to our benchmarks to see if your system is
performing as expected.
Using multiple GPUs for training
If multiple GPUs are at your disposal, the best way of using them is to train multiple nnU-Net trainings at once, one
on each GPU. This is because data parallelism never scales perfectly linearly, especially not with small networks such
as the ones used by nnU-Net.
Example:
CUDA\_VISIBLE\_DEVICES=0 nnUNetv2_train DATASET_NAME_OR_ID 2d 0 [--npz] & # train on GPU 0
CUDA\_VISIBLE\_DEVICES=1 nnUNetv2_train DATASET_NAME_OR_ID 2d 1 [--npz] & # train on GPU 1
CUDA\_VISIBLE\_DEVICES=2 nnUNetv2_train DATASET_NAME_OR_ID 2d 2 [--npz] & # train on GPU 2
CUDA\_VISIBLE\_DEVICES=3 nnUNetv2_train DATASET_NAME_OR_ID 2d 3 [--npz] & # train on GPU 3
CUDA\_VISIBLE\_DEVICES=4 nnUNetv2_train DATASET_NAME_OR_ID 2d 4 [--npz] & # train on GPU 4
...
wait
Important: The first time a training is run nnU-Net will extract the preprocessed data into uncompressed numpy
arrays for speed reasons! This operation must be completed before starting more than one training of the same
configuration! Wait with starting subsequent folds until the first training is using the GPU! Depending on the
dataset size and your System this should oly take a couple of minutes at most.
If you insist on running DDP multi-GPU training, we got you covered:
nnUNetv2_train DATASET_NAME_OR_ID 2d 0 [--npz] -num_gpus X
Again, note that this will be slower than running separate training on separate GPUs. DDP only makes sense if you have
manually interfered with the nnU-Net configuration and are training larger models with larger patch and/or batch sizes!
Important when using -num_gpus:
- If you train using, say, 2 GPUs but have more GPUs in the system you need to specify which GPUs should be used via
CUDA_VISIBLE_DEVICES=0,1 (or whatever your ids are). - You cannot specify more GPUs than you have samples in your minibatches. If the batch size is 2, 2 GPUs is the maximum!
- Make sure your batch size is divisible by the numbers of GPUs you use or you will not make good use of your hardware.
In contrast to the old nnU-Net, DDP is now completely hassle free. Enjoy!
Automatically determine the best configuration
Once the desired configurations were trained (full cross-validation) you can tell nnU-Net to automatically identify
the best combination for you:
nnUNetv2_find_best_configuration DATASET_NAME_OR_ID -c CONFIGURATIONS
CONFIGURATIONS hereby is the list of configurations you would like to explore. Per default, ensembling is enabled
meaning that nnU-Net will generate all possible combinations of ensembles (2 configurations per ensemble). This requires
the .npz files containing the predicted probabilities of the validation set to be present (use nnUNetv2_train with
--npz flag, see above). You can disable ensembling by setting the --disable_ensembling flag.
See nnUNetv2_find_best_configuration -h for more options.
nnUNetv2_find_best_configuration will also automatically determine the postprocessing that should be used.
Postprocessing in nnU-Net only considers the removal of all but the largest component in the prediction (once for
foreground vs background and once for each label/region).
Once completed, the command will print to your console exactly what commands you need to run to make predictions. It
will also create two files in the nnUNet_results/DATASET_NAME folder for you to inspect:
inference_instructions.txtagain contains the exact commands you need to use for predictionsinference_information.jsoncan be inspected to see the performance of all configurations and ensembles, as well
as the effect of the postprocessing plus some debug information.
Run inference
Remember that the data located in the input folder must have the file endings as the dataset you trained the model on
and must adhere to the nnU-Net naming scheme for image files (see dataset format and
inference data format!)
nnUNetv2_find_best_configuration (see above) will print a string to the terminal with the inference commands you need to use.
The easiest way to run inference is to simply use these commands.
If you wish to manually specify the configuration(s) used for inference, use the following commands:
Run prediction

网上学习资料一大堆,但如果学到的知识不成体系,遇到问题时只是浅尝辄止,不再深入研究,那么很难做到真正的技术提升。
一个人可以走的很快,但一群人才能走的更远!不论你是正从事IT行业的老鸟或是对IT行业感兴趣的新人,都欢迎加入我们的的圈子(技术交流、学习资源、职场吐槽、大厂内推、面试辅导),让我们一起学习成长!
best_configuration` (see above) will print a string to the terminal with the inference commands you need to use.
The easiest way to run inference is to simply use these commands.
If you wish to manually specify the configuration(s) used for inference, use the following commands:
Run prediction
[外链图片转存中…(img-KbvLIw39-1715497323132)]
[外链图片转存中…(img-BtSk4fTB-1715497323132)]
网上学习资料一大堆,但如果学到的知识不成体系,遇到问题时只是浅尝辄止,不再深入研究,那么很难做到真正的技术提升。
一个人可以走的很快,但一群人才能走的更远!不论你是正从事IT行业的老鸟或是对IT行业感兴趣的新人,都欢迎加入我们的的圈子(技术交流、学习资源、职场吐槽、大厂内推、面试辅导),让我们一起学习成长!


 956
956

 被折叠的 条评论
为什么被折叠?
被折叠的 条评论
为什么被折叠?
 到【灌水乐园】发言


