


Disclaimer: These steps were performed on a clean windows 7 64-bit installation after necessary graphics and system drivers and windows updates have been applied, steps may vary between cryengine and crylauncher versions, I take no responsibility or liability for any damages or inconveniences caused by following any information provided. All information provided is of my best knowledge and opinion and is not official in any way, use at your own risk.
The index will not work without an addition to the phpBB BBCode Custom rules. (ie. Allowing/Adding [anchor] tags and anchor link tags [goto=anchorname]).
You can however find the headings related to the content you want using copy and search from this index list.
*Tip: Right-Click on an image and choose "Open in a new tab" to view an larger/native size version of the image.
Tutorial Index
- Getting started with CryEngine Launcher
- Downloading and using the launcher
- Creating and initializing your first project
- Opening and testing your new project
- Downloading and using the launcher
- Getting started with Visual Studio and your Project
- Installing Visual Studio
- Using Visual Studio with your project
- Some notes about Build Configuration types
- Installing Visual Studio
- Getting started with CryEngine on GitHub
- Setting up GitHub with the desktop client
- Getting the git engine on to your system
- Setting up and Registering your local engine
- Using Visual Studio with your local engine
- Building and testing your local engine
- Using the custom engine with your project
- Using sandbox with your custom engine
- Some notes about Build Configuration types
- Setting up GitHub with the desktop client
- Distributing/Sharing your project
- Requirements for distributing your project
- Preparing your project
- Sharing your project with other developers
- Distributing a development package to end users
- Distributing a release package to end users
- Requirements for distributing your project
1. Getting started with CryEngine Launcher
a. Downloading and using the launcher
Start by creating an account by navigating to https://www.cryengine.com/get-engine.
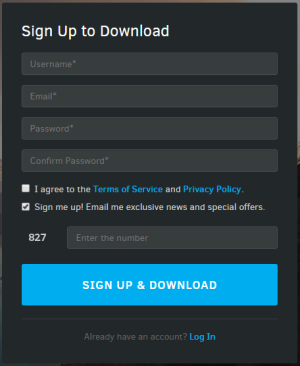
Follow the installation steps after opening the downloaded file and activating your account via email,
then launch and login to the cryengine launcher now installed on your system.
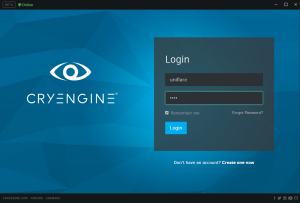
Once logged in you should be presented with a similar screen to this;
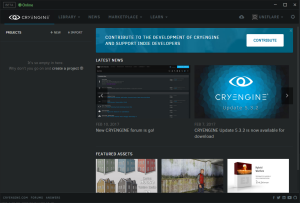
b. Creating and initializing your first project
Now that we are logged in and ready to go, let's start by creating a new project. Click "Create a project" in the left pane.
Select the template you wish to start with, and choose an appropriate project name.
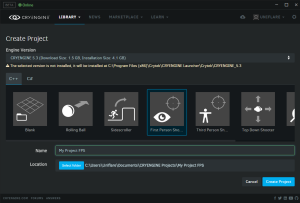
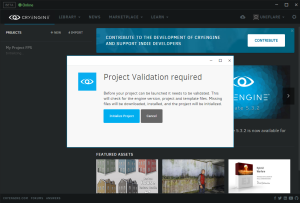
After clicking "Create Project" for the first time, you will be presented with this screen, simple click "Initialize Project".
You should now notice the engine version that you selected to use for your project now downloading:

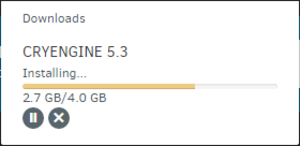
Be patient while the engine downloads and installs, this may take some time depending on your internet and computer speed.
You can check the full progress by navigating to "Library > My Engines"
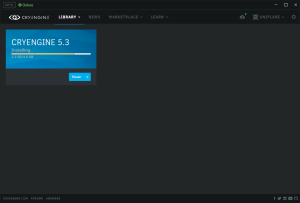
Once the engine has been installed, you can proceed to the next step

c. Opening and testing your new project
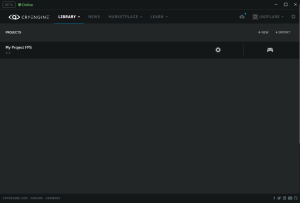
Let's start by launching the editor for our project, navigate to your projects (Library > My Projects), click on the project (not the cog weheel or gamepad).
This should launch the editor, just close it for now.

Now click on the gamepad when you hover over your project in your library (Library > My Projects), you should see your project launch. Close this for now.
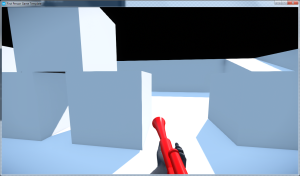
You should now be able to load the editor and test the game in this fashion. In this regard, you do not need any programming experience, or even need to touch or see any code.
These steps should be completed by any developer working on your title, this way, you know everyone on your team has the launcher, and that it works.
^ Back to index
2. Getting started with Visual Studio and your Project
a. Installing Visual Studio
For simplicity, we will assume you do not have a licensed copy of visual studio (or it would surely be installed already).
Head over to https://www.visualstudio.com/vs/community/ and click "Download Community 2015" (Make sure to read the Usage terms near the bottom of the page)
When installing visual studio make sure to select "Universal Windows App Development Tools"

Once Visual Studio is installed, you may follow the steps to generating and opening your project solution files.
b. Using Visual Studio with your project
Before we proceed you will need CMake installed. There is an installer (.msi) provided at https://cmake.org/download/ .

First we want to generate our solution file for our project. The Cryengine launcher makes this very easy.
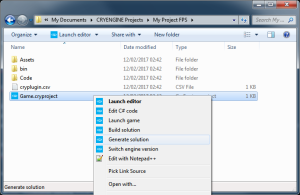
Navigate to your project file (You can do this in the launcher: Library > My Projects > Click cog wheel > "Reveal in explorer"
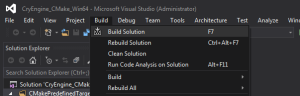
Then right click on your project file and select "Generate Solution"
After generating a solution you will have a new folder in your project directory called "Solutions". You solution file needed for visual studio is inside this folder;
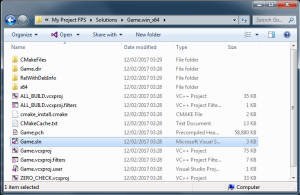
Now you are able to load your project solution, and build using visual studio. take note of the below notes on different build configuration types such as "Debug" and "Release"
c. Some notes about Build Configuration types
For development you should be using "Debug", or at least "RelWithDebInfo" for your project, "Profile" is more compatible for building the engine and combining with the crytek launcher binaries).
When you want to distribute/package your game or do some performance test you should choose "Release" config when building.
Special Note:
If you are _not_ using the crytek launcher engine binaries (is. using your own custom cry engine build from the github source code) then you should be aware that building your custom engine in "Release" mode will produce different binaries than the crytek launcher binaries and will be incompatible with your project dll and any other externally built dlls, including those provided by the launcher engine.
As such, to be able to use your project dll with your custom engine in release, you must add/define the "_RELEASE" macro when building your project. Simply go to your projects "stdafx.h" and add "#define _RELEASE 1" on it's own line after the "#pragma once". DO NOT add this macro if you did not build your custom engine using the "Release" configuration - Only if you built your engine using "Release" config.
Now you can start making changes to the code of your project. Be aware that any files you add or remove will need to be added to your "CMakeLists.txt" file in your "Code" folder.
^ Back to index
3. Getting started with CryEngine Source Code on GitHub
a. Setting up GitHub with the desktop client
Begin by registering an account on github.com. Then download the GitHub desktop client from https://desktop.github.com/ .
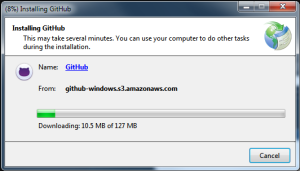
Install the GitHub client;

You may need to login to the client using your github username and password when your start it up.
b. Getting the github engine on to your system
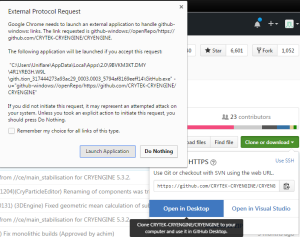
This is easy, go to cryengine on github: https://github.com/CRYTEK-CRYENGINE/CRYENGINE and select "Clone or Download" > "Open in Desktop".
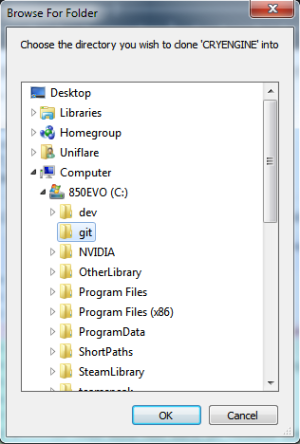
Choose a directory on your system to download the CryEngine source code folder to:
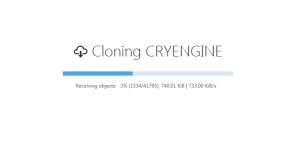
GitHub Desktop will begin downloading the source code for CryEngine:
c. Setting up and Registering your local engine
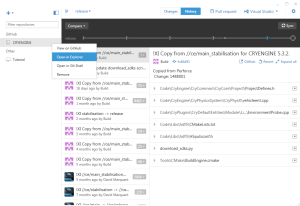
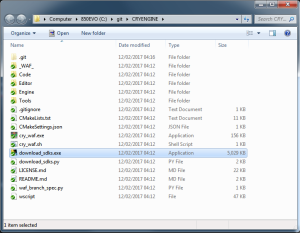
Now you can open the folder to the source code like shown:
Now we need to setup our engine for editing, first open download_sdks.exe.
Now to make it easier we should copy the "engine" and "gamezero" asset folders from the launcher engine to our custom engine.
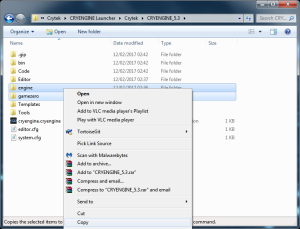
Paste them into your local cryengine directory (from github):

Merge the folders when prompted (There should not be any overwrite dialogs).

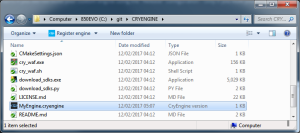
Now we want to register our engine. Create a file name "MyEngine.cryengine".
Edit the file with notepad and put these contents, then save and close:
Code: Select all
{
     "info": {
         "version": "5.3.2",
         "name": "MYCRYENGINE 5.3",
         "id": "myengine-5.3"
     }
 }
Now double-click "MyEngine.cryengine" (run the file you just made). This will register our custom engine so we can assign projects to use it.
d. Using Visual Studio with your local engine
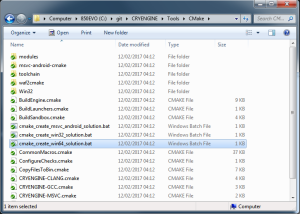
Once the download is finished, open/run "cmake_create_win64_solution.bat":
You will then be presented with the cmake gui, for now, unselect "OPTION_GAMESDK" and select "OPTION_GAMEZERO". Then click "Configure".
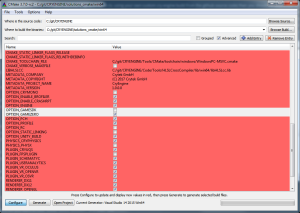
The screen should go from red to white, once this happens, click "Generate".
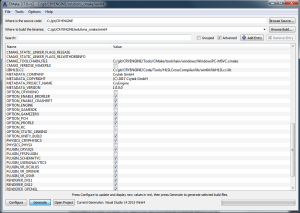
Once the task is finished (Progress is the green bar in the lower right corner of the program gui window), click "Open Project".
e. Building and testing your local engine
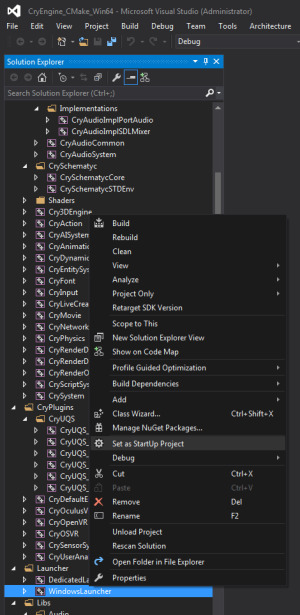
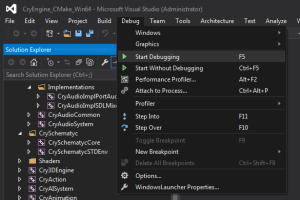
First set the startup project to the "Windows Launcher" project:
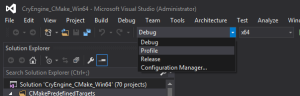
For now, choose "Profile" for the build configuration type:
We should now be able to immediately build the engine:
Once the engine has finished building, and there are no errors in the output log (at the bottom), you can launch and debug your engine:
f. Using the custom engine with your project
To debug your project, make sure you build your project using the same "build configuration" (release/debug) as the engine.
First, navigate to your project file (You can do this in the launcher: Library > My Projects > Click cog wheel > "Reveal in explorer"
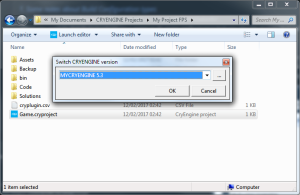
Then right click on your project file and select "Switch Engine Version"
In the drop down select your custom engine, in this example "MyEngine": (MAKE SURE Visual studio is Closed/Not Running!)
Now regenerate your solution, then build your project. Then try to launch the game (AFTER building your engine!)
--------- Not needed/Unnecessary but good to know ---------
Manually changing engine in solution:
You can add a command line option to the debugger launcher params in the "windows launcher" project:
Note: You can make a similar change in the debugging params of your project, so you can debug straight from your project solution with having to open or touch the engine solution.
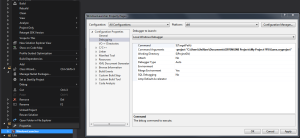
In your Project solution, right click on the "Game" project and go to "Properties".
Make sure "All Configurations" is selected under "Configuration" at the top.
Navigate to "Configuration Properties" > "Debugging" (As shown above) and set the "Command" to the absolute location of your custom engine launcher exe (in this example: C:\git\CRYENGINE\bin\win_x64\GameLauncher.exe)
Then set the "Command Arguments" to your project as shown above. (in this example: -project "C:\Users\Uniflare\Documents\CRYENGINE Projects\My Project FPS\Game.cryproject")
* These may already be set depending on whether you have switched engine version for your project before or after generating your solution.
------------------------------------------------------------------------------------------
g. Using sandbox with your custom engine
First, you need to make sure of a few requirements:
- 64bit Operating System
- Successfully built the engine binaries in "Profile" "x64" configuration
- Custom & Launcher engine versions must match (Differing versions *may* be compatible, like minor releases, but definitely not recommended)
- The default Sandbox, and your built custom engine, work as expected
Assuming you meet the above requirements, this is an easy copy and paste task.
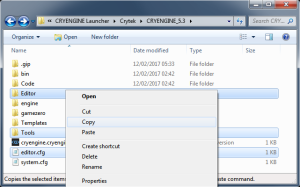
First, Copy "Editor", "Tools" and "Editor.cfg" from launcher engine;
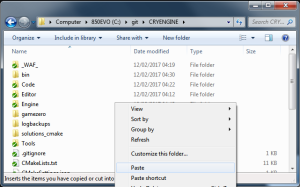
Paste them into your custom engine folder;
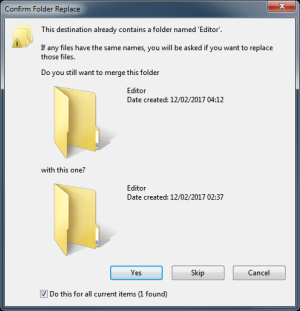
Select yes to merge the folders;
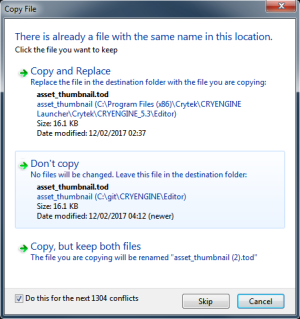
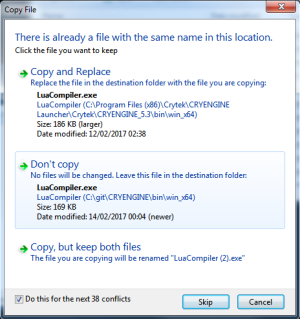
Select "Don't Copy" or "Skip" when asked to overwrite files;
Next, copy the binaries from the launcher engine;
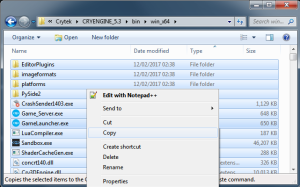
Paste the binaries into your custom engine bin folder;

When asked to overwrite files choose "Don't Copy" or "Skip";
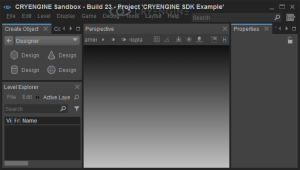
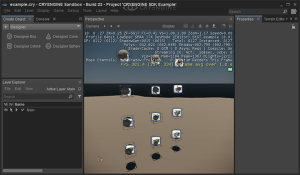
Now we should be able to successfully can open the sandbox;
And open the example level from the GameZero project provided by the engine source code;
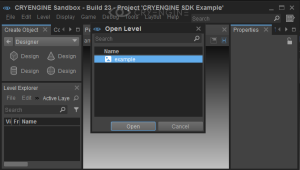
You should now see the gamezero example level loaded and running inside the editor;
h. Some notes about Build Configuration types
For development you should be using "Debug", or at least "RelWithDebInfo" for your project, "Profile" is more compatible for building the engine and combining with the crytek launcher binaries).
When you want to distribute/package your game or do some performance test you should choose "Release" config when building.
Special Note:
If you are _not_ using the crytek launcher engine binaries (is. using your own custom cry engine build from the github source code) then you should be aware that building your custom engine in "Release" mode will produce different binaries than the crytek launcher binaries and will be incompatible with your project dll and any other externally built dlls, including those provided by the launcher engine.
As such, to be able to use your project dll with your custom engine in release, you must add/define the "_RELEASE" macro when building your project. Simply go to your projects "stdafx.h" and add "#define _RELEASE 1" on it's own line after the "#pragma once". DO NOT add this macro if you did not build your custom engine using the "Release" configuration - Only if you built your engine using "Release" config.
^ Back to index
4. Distributing/Sharing your project
a. Requirements for distributing your project
This is sort of a quick checklist
- Your project builds and runs locally succesfully
- If using a custom engine, that your engine runs your project fine, along with plugins, in "release" build configuration. (read the Special Note above)
- Other developers should have the cryengine launcher installed with the same engine version as you.
b. Preparing your project
-- This will be updated later --
c. Sharing your project with other developers
This assumes your developers have the crytek launcher installed with the same engine version as you.
This also assumes you are not using a custom engine. (See below for that).
Simple zip up your project directory (in this example: C:\Users\Uniflare\Documents\CRYENGINE Projects\My Project FPS )
Once your friend has the package, simply unzip somewhere and use just as you are. They can add the project to their launcher by going to the launcher and clicking "Import", then selecting the folder they just extracted the cryproject file too.
d. Distributing a development package to end users
This assumes your developers do not have the cryengine launcher, or wish to test the engine as a standalone entity without installing additional programs such as the crytek launcher.
[USING LAUNCHER BINARIES]
Limitation: Cannot rebuild launcher engine in pure client release mode (we only get profile build). So this should only be for development.
This assumes you are building your project from a template (ie. as a plugin).
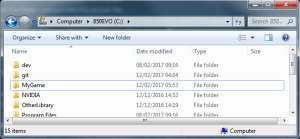
1. Create a new folder "C:\MyGame" for the game package.
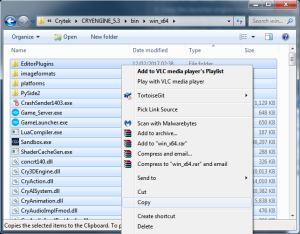
2. Copy the launcher engine binaries from "C:\Program Files (x86)\Crytek\CRYENGINE Launcher\Crytek\CRYENGINE_5.3\bin\win_x64" to "C:\MyGame\bin"

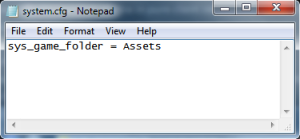
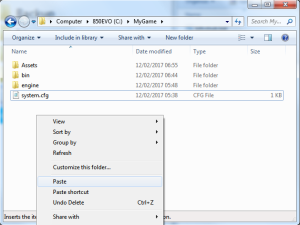
3. Create a new file "C:\MyGame\system.cfg"
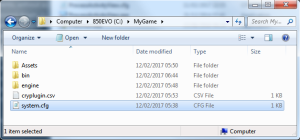
4. Put the contents, without quotes, as: "sys_game_folder = Assets"
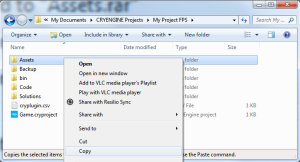
5. Copy your project Assets directory from "My Documents\CRYENGINE Projects\My Project FPS\Assets" to "C:\MyGame\Assets"

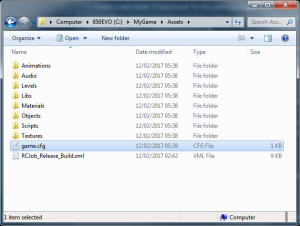
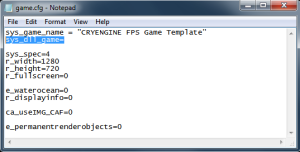
6. In your assets folder open "game.cfg" and add this line, without quotes: "sys_dll_game="
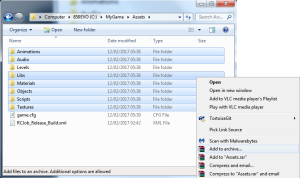
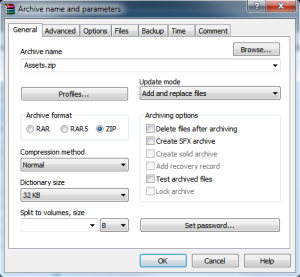
7. In your assets folder select all folders (except levels) and put them into a .zip (7zip or winrar, you can use windows default zip features too).
8. Rename the .zip to a .pak (the actual filename does not matter).
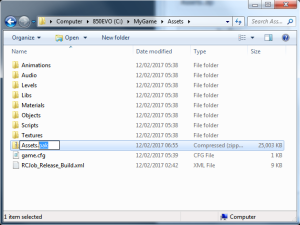
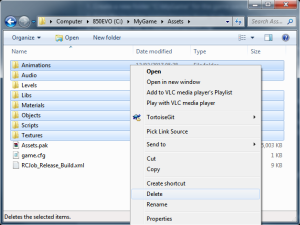
9. To save on space delete the folders you put into the zip/pak file.
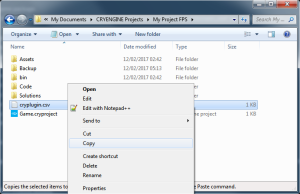
10. Now copy your cryplugin.csv file from "My Documents\CRYENGINE Projects\My Project FPS\cryplugin.csv" to "C:\MyGame\cryplugin.csv"
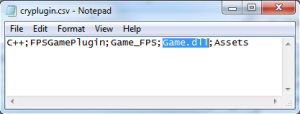
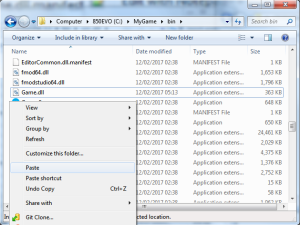
11. Open the copied cryplugin.csv and change "bin/win_x64/Game.dll" to "Game.dll"
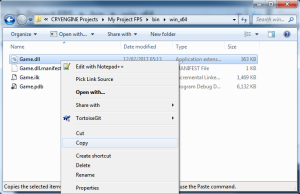
12. Now copy your project Game.dll from "My Documents\CRYENGINE Projects\My Project FPS\bin\win_x64\Game.dll" to "C:\MyGame\bin\Game.dll"
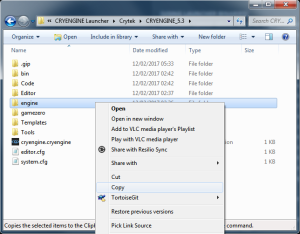
13. Then copy the engine pak folder from "C:\Program Files (x86)\Crytek\CRYENGINE Launcher\Crytek\CRYENGINE_5.3\engine" to "C:\MyGame\engine"
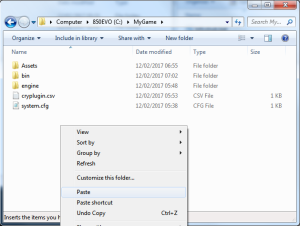
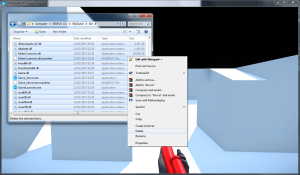
Now try running "C:\MyGame\bin\GameLauncher.exe"
14. To save space and prevent improper usage, while you are still running the gamelauncher.exe, select all files in the bin folder and try delete, whilst skipping the files that are "in-use". NOTE: You may want to skip deleting the render dlls too.

[USING CUSTOM ENGINE BINARIES IN PROFILE/DEBUG MODE]
You will be delighted to know it is pretty much the exact same procedure as the luancher version above, just substitute any launcher path with your custom engine path.
[USING CUSTOM ENGINE BINARIES IN RELEASE MODE]
This will require (for now) a slight modification if you are using the plugin system.
-- This will be updated later --
e. Distributing a release package to end users
-- This will be updated later --
This should be useful for now: https://www.cryengine.com/community_arc ... 2&t=135268
^ Back to index
Took longer than expected, expect updates to this guide regarding distribution/packaging.


 8576
8576

 被折叠的 条评论
为什么被折叠?
被折叠的 条评论
为什么被折叠?
 到【灌水乐园】发言


