


一、学习背景
最近在学习python制图,准备做个模板好出图
目录
二、参考
这个学习系列都参考了B站UP主的视频《【莫烦Python】Matplotlib Python 画图教程》,我是将他的代码重新输入下来后加入了自己的注释和理解,感恩
三、代码学习
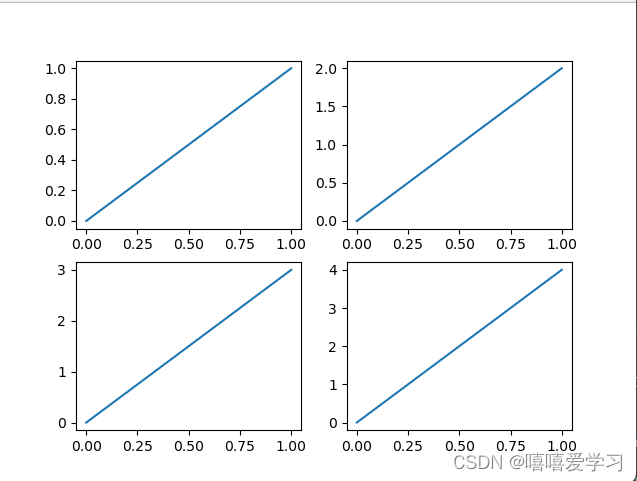
1. 四图合一,都是正方形的图
import matplotlib.pyplot as plt
import numpy as np


plt.figure()

plt.subplot(2,2,1) #将画布分成2行2列的四个,现在将第1个设为活动画布,在上面绘图
plt.plot([0,1],[0,1]) #准备画的线两头x分别为(0,0)和(1,1)

plt.subplot(2,2,2) #将画布分成2行2列的四个,现在将第1个设为活动画布,在上面绘图
plt.plot([0,1],[0,2]) #准备画的线两头x分别为(0,0)和(1,2)

plt.subplot(2,2,3) #将画布分成2行2列的四个,现在将第1个设为活动画布,在上面绘图
plt.plot([0,1],[0,3]) #准备画的线两头x分别为(0,0)和(1,3)

plt.subplot(2,2,4) #将画布分成2行2列的四个,现在将第1个设为活动画布,在上面绘图
plt.plot([0,1],[0,4]) #准备画的线两头x分别为(0,0)和(1,4)


plt.show()
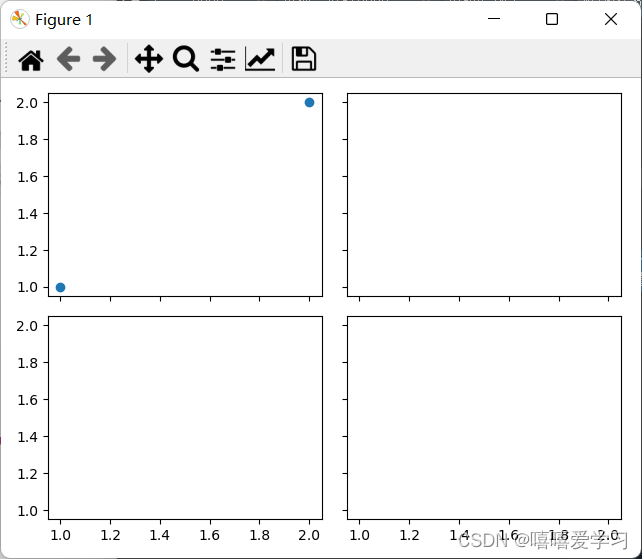
方法2 创建2乘2的网格
import matplotlib.pyplot as plt
import numpy as np

#创建一个2*2图像的网格
f,((ax11,ax12),(ax21,ax22))=plt.subplots(2,2,sharex=True,sharey=True)
ax11.scatter([1,2],[1,2]) #第1行第1列的网格画散点图

plt.tight_layout()
plt.show()
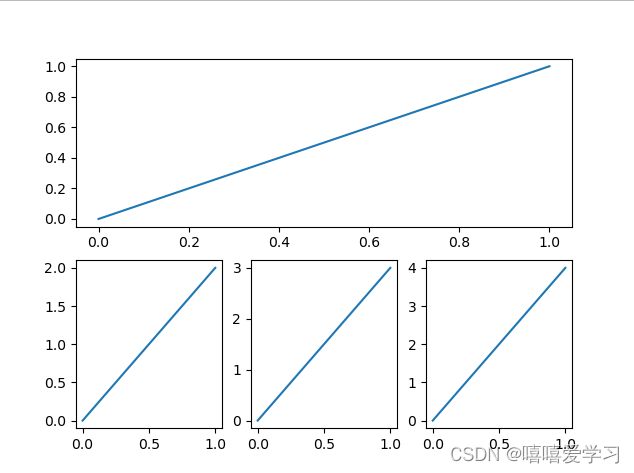
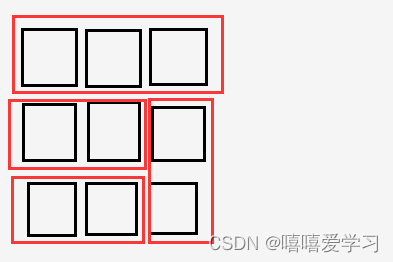
方法3:设置长方形的图像合集,分格显示,第一行设置为一列,第二行设置为三列,索引按照小的来
这一种方法大致是这样的:
import matplotlib.pyplot as plt
import numpy as np


plt.figure()

plt.subplot(2,1,1) #将画布分成2行1列的四个,现在将第1个设为活动画布,在上面绘图
plt.plot([0,1],[0,1]) #准备画的线两头x分别为(0,0)和(1,1)

plt.subplot(2,3,4) #将画布分成2行3列的6个,现在将第4个设为活动画布,在上面绘图
plt.plot([0,1],[0,2]) #准备画的线两头x分别为(0,0)和(1,2)

plt.subplot(2,3,5) #将画布分成2行3列的6个,现在将第5个设为活动画布,在上面绘图
plt.plot([0,1],[0,3]) #准备画的线两头x分别为(0,0)和(1,3)

plt.subplot(2,3,6) #将画布分成2行3列的6个,现在将第6个设为活动画布,在上面绘图
plt.plot([0,1],[0,4]) #准备画的线两头x分别为(0,0)和(1,4)


plt.show()
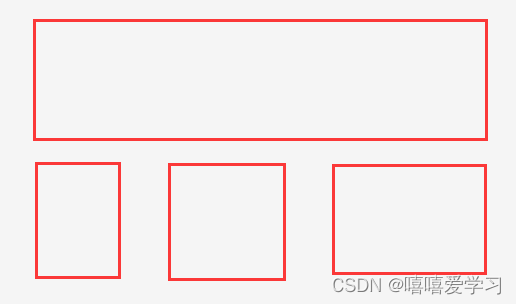
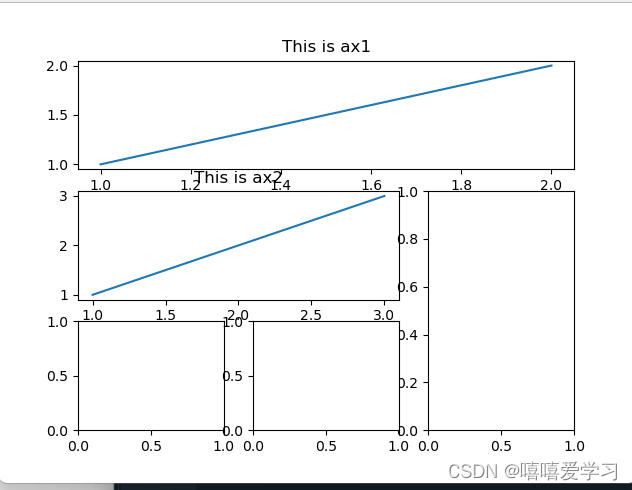
方法4:设置长方形的图像合集,组合正方形为长方形
这一种和下一种的划分是一样的,但是索引不同:
import matplotlib.pyplot as plt
import numpy as np


plt.figure()
#将画布分为3*3个格子,ax1从第1列第1行开始(第二个括号为索引)占据3列1行,
ax1=plt.subplot2grid((3,3), (0,0), colspan=3,rowspan=1)
ax1.plot([1,2],[1,2])
ax1.set_title('This is ax1')
#将画布分为3*3个格子,ax2从第2行第1列开始(第二个括号为索引)占据2列1行,
ax2=plt.subplot2grid((3,3), (1,0), colspan=2,rowspan=1)
ax2.plot([1,3],[1,3])
ax2.set_title('This is ax2')
ax3=plt.subplot2grid((3,3), (1,2), colspan=1,rowspan=2)
ax4=plt.subplot2grid((3,3), (2,0), colspan=1,rowspan=1)
ax5=plt.subplot2grid((3,3), (2,1), colspan=1,rowspan=1)

plt.show()
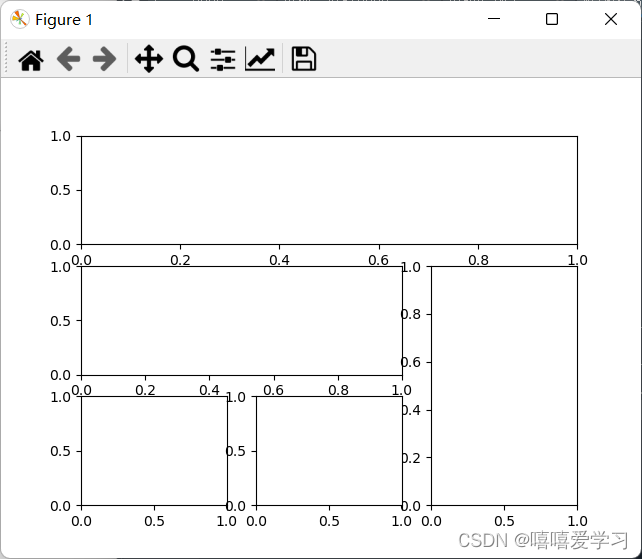
方法5:设置长方形的图像合集,划分大格网
plt.figure()
gs=gridspec.GridSpec(3,3) #划分3*3的网格
ax1=plt.subplot(gs[0,:]) #ax1为占据第1行,所有列的网格
ax2=plt.subplot(gs[1,:2]) #ax2为占据第2行,占据第1列至第2列的网格
ax3=plt.subplot(gs[1:,2]) #ax3为占据第2行至最后一行,占据第2列的网格
ax4=plt.subplot(gs[-1,0]) #ax4为占据最后一行,占据第1列的网格
ax5=plt.subplot(gs[-1,-2]) #ax5为占据最后一行,占据倒数第二列的网格


plt.show()


 369
369


 被折叠的 条评论
为什么被折叠?
被折叠的 条评论
为什么被折叠?
 到【灌水乐园】发言


