目录
API文档路线:
看看我们走过的路,后台写好了HTTP-API接口后,然后开始写接口文档,对于返回数据找个工具格式化一下再粘贴到文档中,字典描述简单的就根据命名理解或者在再写个字典文档,代码中对于入参和字典也要写好注释…
开发中怎样自测接口
- 浏览器地址栏直接请求,不区分http method
- 浏览器 + JsonView
- 写个html
e.g:
<a href="/list">获取列表
<form method="post" ... > </form>提交数据 - 找一些支持Restfull的工具,如:Postman,功能强大,还可以同步和分享,很方便,但还是要单独写协议文档
换个显示方式
综上:
- 我们每次要先写API,然后自己测试请求,然后写接口文档,客户端/前端在看文档,尝试请求数据,写代码,看数据字典 ….
- 后台代码更新了,增加了参数,文档怎么办,现在太忙,过两天在更新吧…
有没有代码和文档同步更新的工具?看下面
Swagger2
简介
Swagger 是一个规范和完整的框架,用于生成、描述、调用和可视化 RESTful 风格的 Web 服务。总体目标是使客户端和文件系统作为服务器以同样的速度来更新。文件的方法,参数和模型紧密集成到服务器端的代码,允许API来始终保持同步。Swagger 让部署管理和使用功能强大的API从未如此简单。
引用官网: The World's Most Popular Framework for APIs.
Swagger 工具
- SWAGGER UI : 在线文档
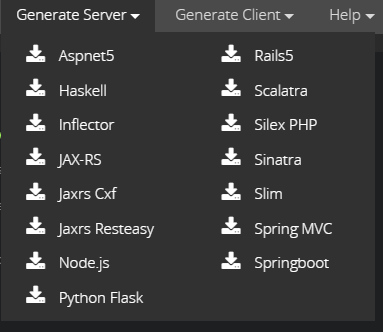
- SWAGGER EDITOR : 编辑YAML ,生成代码,服务端和客户端
- SDK GENERATORS : SDK代码生成工具
基于YMAL描述生成客户端:
基于YMAL描述生成服务端:
本文主要介绍SWAGGER UI
springboot 配置swagger
pom.xml
<dependency>
     <groupId>io.springfox</groupId>
    <artifactId>springfox-swagger2</artifactId>
    <version>${springfox.version}</version>
</dependency>
<dependency>
    <groupId>io.springfox</groupId>
    <artifactId>springfox-swagger-ui</artifactId>
    <version>${springfox.version}</version>
</dependency>
<dependency>
    <groupId>io.springfox</groupId>
    <artifactId>springfox-staticdocs</artifactId>
    <version>${springfox.version}</version>
    <scope>test</scope>
</dependency>
SwaggerConfig.java
@Profile({"local", "dev" , "prod"})
@Configuration
@EnableSwagger2
@EnableAutoConfiguration
public class SwaggerConfig {

    @Value("${app.version}")
    String version;

    String PROJECT_NAME = "项目名称";

    @Bean
    public Docket swaggerSpringfoxDocket() {
        Docket swaggerSpringMvcPlugin = new Docket(DocumentationType.SWAGGER_2)
                .apiInfo(apiInfo())
                .groupName("crm-analysis-task")
                .consumes(Collections.singleton(MediaType.APPLICATION_JSON_UTF8_VALUE))
                .produces(Collections.singleton(MediaType.APPLICATION_JSON_UTF8_VALUE))
                .genericModelSubstitutes(ResponseEntity.class)
                .select()
                .paths(PathSelectors.regex(".*")) // and by paths
                .build().securitySchemes(apiKeys())
                .securityContexts(securityContext());
        return swaggerSpringMvcPlugin;
    }

    private ApiInfo apiInfo(){
        ApiInfo apiInfo = new ApiInfo(
                PROJECT_NAME ,
                "",
                version,
                "http://test.api.xxx.com",
                new Contact("LI","", "myemail@xxx.com"),
                "License",
                "/License");
        return apiInfo;
    }

    private List<SecurityContext> securityContext() {
        List list = Lists.newArrayList();
        list.add(SecurityContext.builder()
                .securityReferences(thirdClient1())
                .forPaths(PathSelectors.regex("/.*?"))
                .build());
        return list;
    }


    private List<ApiKey> apiKeys() {
        List<ApiKey> list = Lists.newArrayList();
        list.add(new ApiKey("thirdClient1_Key", "api_key", "header"));
        list.add(new ApiKey("thirdClient2_Key", "api_key", "header"));
        return list;
    }

    List<SecurityReference> thirdClient1() {
        AuthorizationScope authorizationScope = new AuthorizationScope("thirdClient1", "access /app/*");
        AuthorizationScope[] authorizationScopes = new AuthorizationScope[]{authorizationScope};
        return Lists.newArrayList(new SecurityReference("thirdClient1_Key", authorizationScopes));
    }


    SecurityConfiguration security() {
        return new SecurityConfiguration(
                "test-app-client-id",
                "test-app-client-secret",
                "test-app-realm",
                "test-app",
                "ISDFLISDFJL",
                ApiKeyVehicle.HEADER,
                "api_key",
                "," );
    }

    @Bean
    UiConfiguration uiConfig() {
        return new UiConfiguration(
                "validatorUrl",// url
                "none",       // docExpansion          => none | list
                "alpha",      // apiSorter             => alpha
                "schema",     // defaultModelRendering => schema
                UiConfiguration.Constants.DEFAULT_SUBMIT_METHODS,
                true,        // enableJsonEditor      => true | false
                true);        // showRequestHeaders    => true | false
    }

}
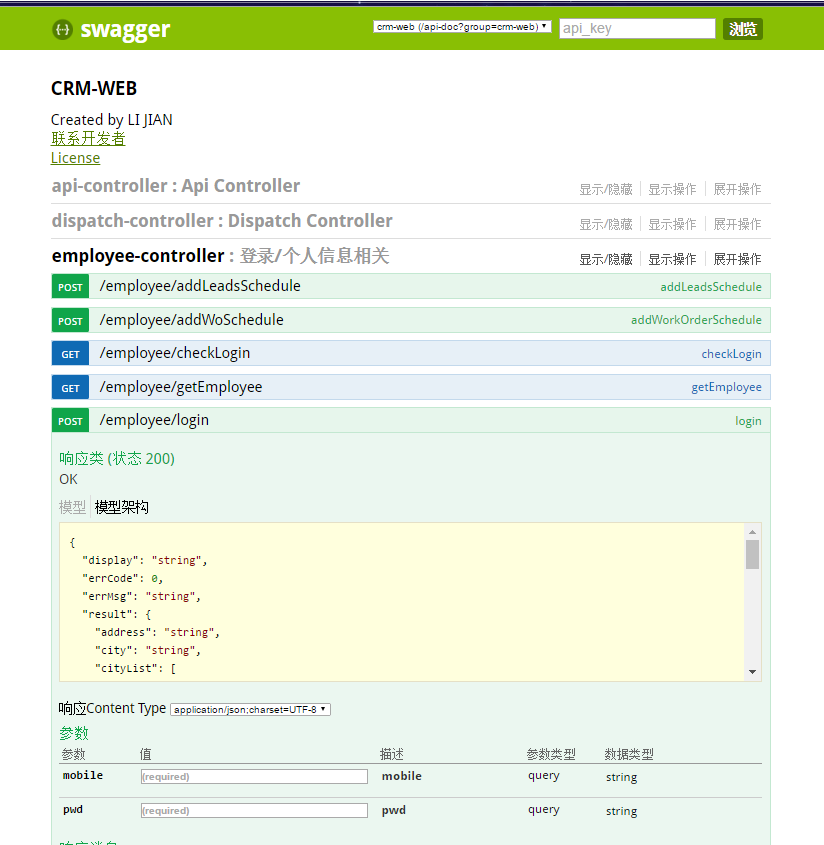
然后启动程序,访问 /swagger-ui.html 即可看到在线文档
来个截图
完美支持RESTFUL,从此就告别了Postman和Wiki写API,再也不担心代码和文档不同步了
另:
- 使用spring的注解Profile可以根据环境决定是否启用在线文档
- swagger支持把API分组(使用Docket),如果需要权限控制请自行解决
新路线总结:
代码
基于spring-boot的swagger-demo代码【点击这里查看】
MORE
后续还会分享
- Spring-boot
- Spring-boot-actuator
- Spring-cloud
- Spring-boot-admin
- NewRelic
- Docker
- Kubernetes
- Mesos
- 基于spring-boot/spring-cloud/docker/kubernetes/Mesos 构建分布式服务


 287
287

 被折叠的 条评论
为什么被折叠?


