


vundle插件管理器安装
1.新建文件夹D:\Vim\vimfiles\bundle\Vundle.vim,然后在命令行运行:
git clone https://github.com/VundleVim/Vundle.vim.git D:\Vim\vimfiles\bundle\Vundle.vim
2.修改_vimrc配置文件:将以下内容添加到_vimrc中,这里主要注意路径要设置为前面创建的路径,由于后面安装了vim-plug插件管理器,所以这里都注释掉了,
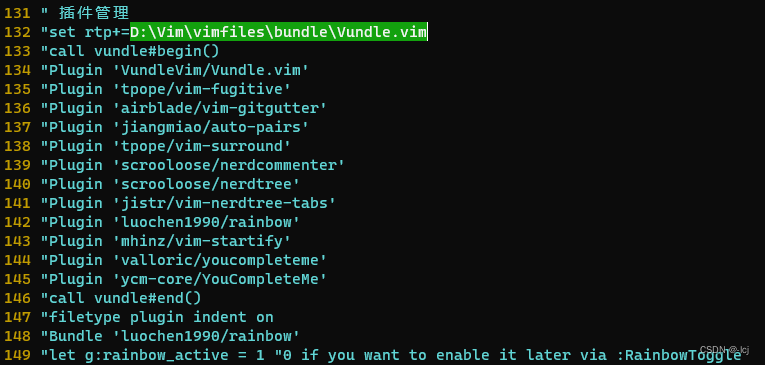
去掉"Plugin 'VundleVim/Vundle.vim'相关注释即可正常安装vundle插件管理器,实际只需要将下面几句:
set rtp+=D:\Vim\vimfiles\bundle\Vundle.vim
call vundle#begin()
Plugin 'VundleVim/Vundle.vim'
call vundle#end()
filetype plugin indent on
添加进_vimrc,保存并退出。
3.进入vim,运行PluginInstall进行安装,保存退出重启,vundle插件管理器本体应该就安装成功了,然后可以在begin()和end()之间添加想要安装的插件了。
------------------------------------------------------------------------------------------------------------------------------
vim-plug插件安装方法
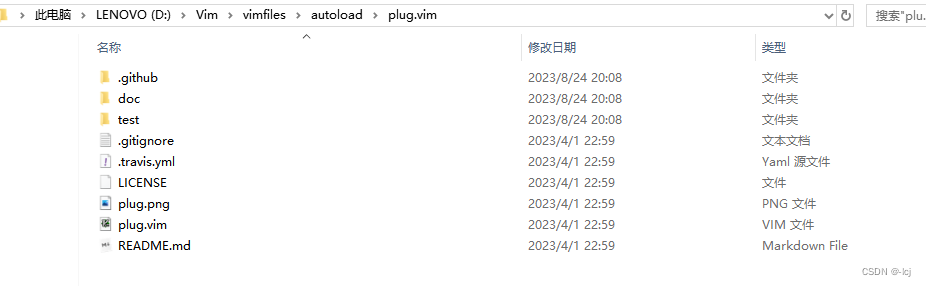
1.去github官网GitHub - junegunn/vim-plug: :hibiscus: Minimalist Vim Plugin Manager下载vim-plug插件包,将其内容复制到vim路径下自己建的文件夹plug.vim下
2.修改_vimrc配置文件:将以下内容添加到_vimrc(这里安装了3个插件,分别是vim-plug本体插件,彩虹括号,炫酷的vim启动页面),这里的路径为上面添加文件夹的路径(D:\Vim\vimfiles\autoload\plug.vim)
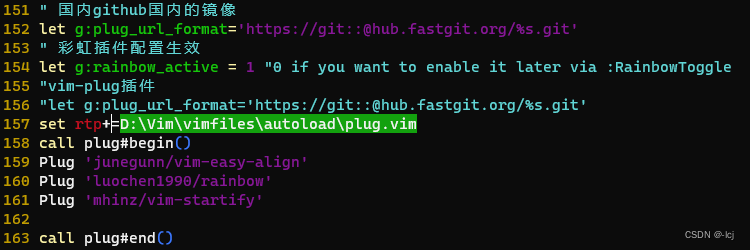
" 国内github国内的镜像
let g:plug_url_format='https://git::@hub.fastgit.org/%s.git'
" 彩虹插件配置生效
let g:rainbow_active = 1 "0 if you want to enable it later via :RainbowToggle
"vim-plug插件
"let g:plug_url_format='https://git::@hub.fastgit.org/%s.git'
set rtp+=D:\Vim\vimfiles\autoload\plug.vim
call plug#begin()
Plug 'junegunn/vim-easy-align'
Plug 'luochen1990/rainbow'
Plug 'mhinz/vim-startify'
call plug#end()
3.输入命令:PlugInstall进行安装,然后保存退出重新打开就可以了。
嗯然后还有一种dein.vim插件管理器https://github.com/Shougo/dein.vim.git,以后有需要再尝试吧。


 1868
1868


 被折叠的 条评论
为什么被折叠?
被折叠的 条评论
为什么被折叠?
 到【灌水乐园】发言


