


一、shp模型拔高切片
shp如果数据量过大,做分类处理,加载会异常慢,所以需要先对其进行分割之后再进行切片(用qgis即可)
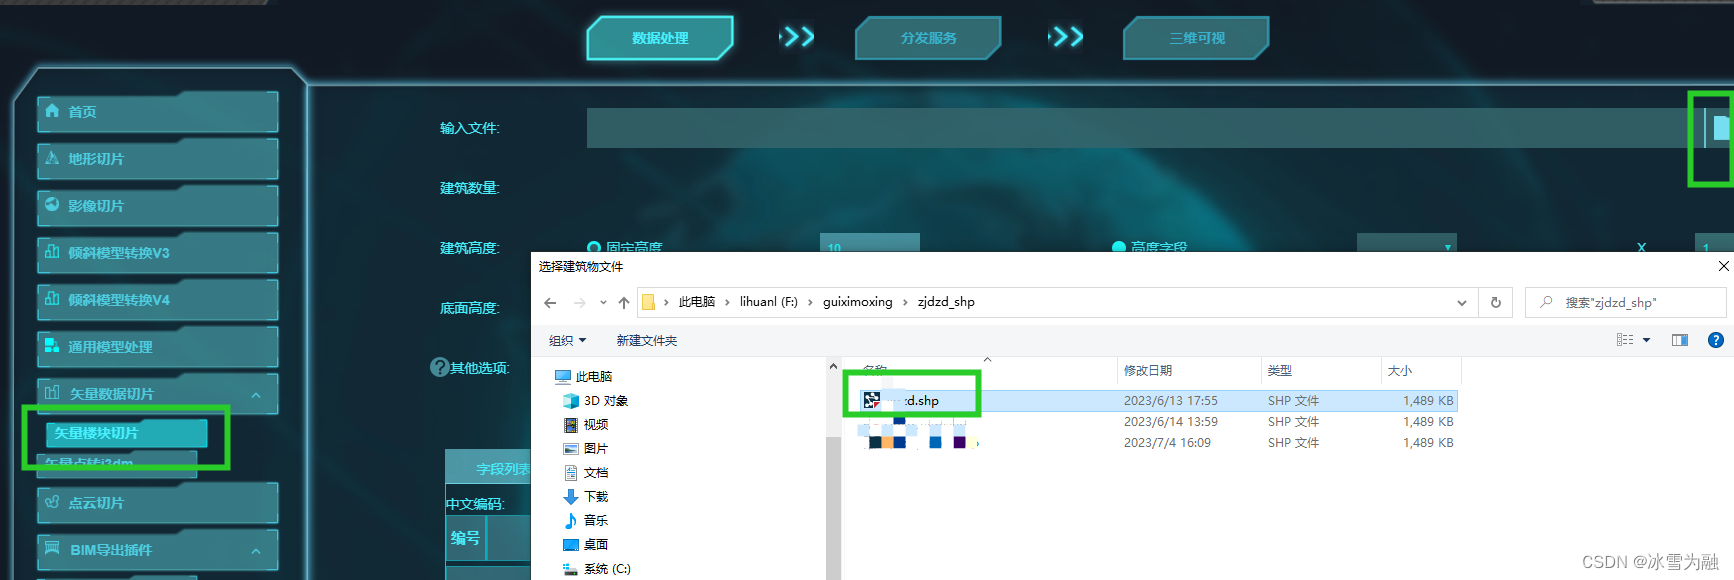
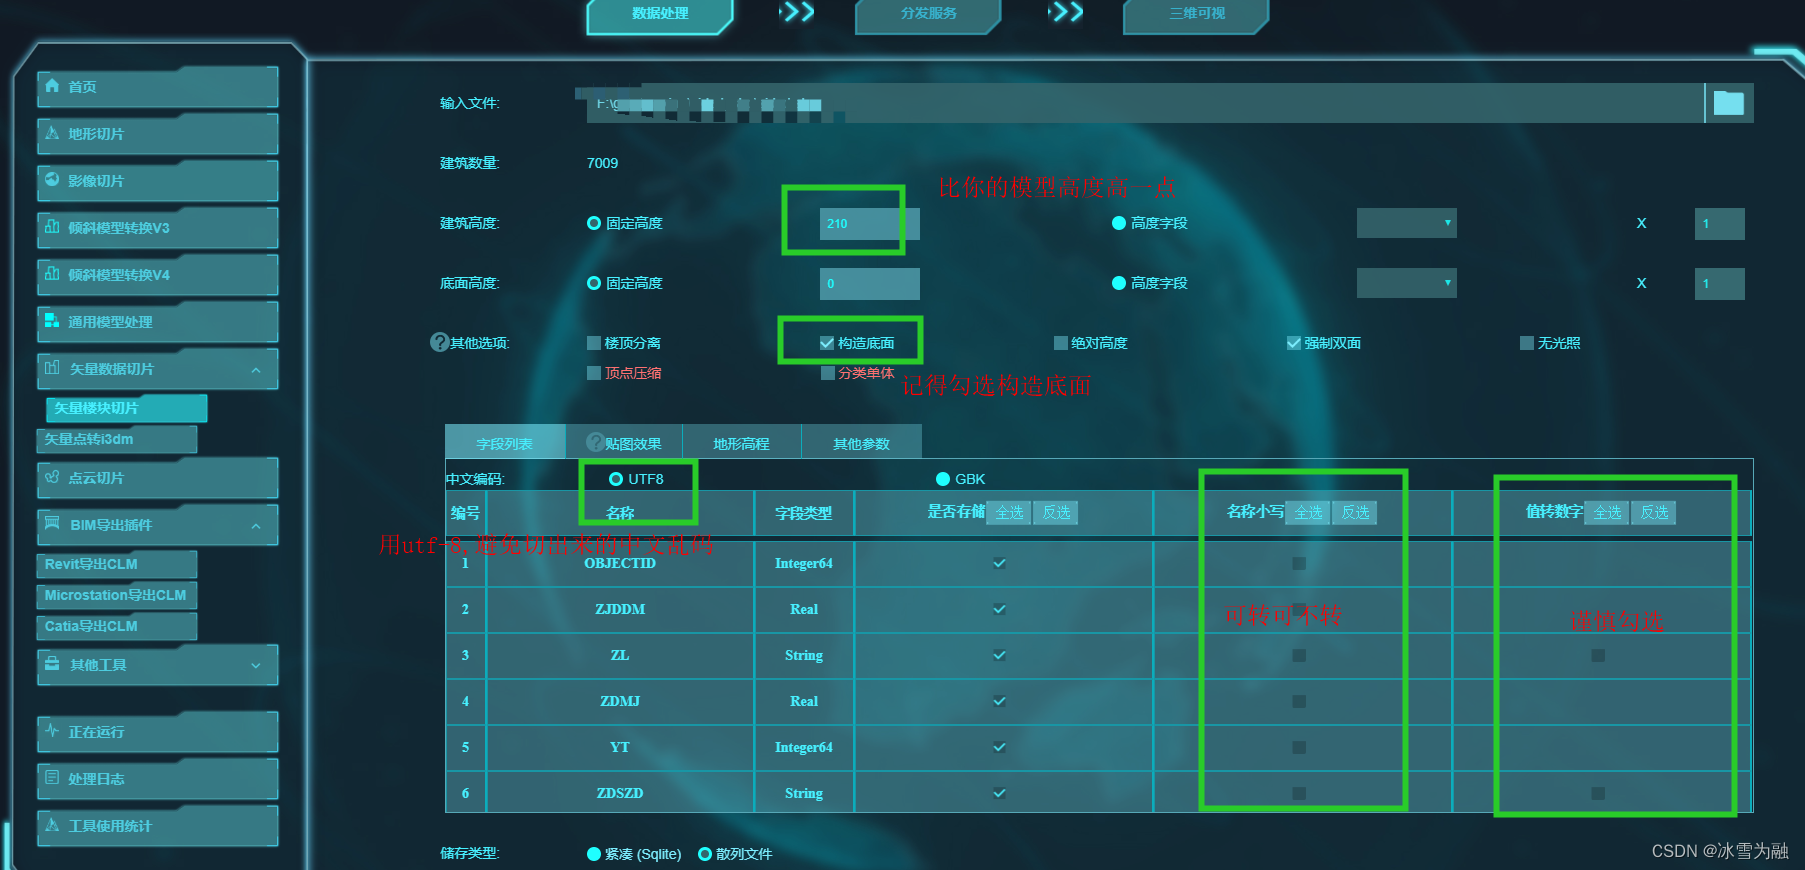
切片规则设置
1、记得勾选构造底面
2、如果你的shp数据中有高度字段的话,可以选择高度字段,如果没有的话,设置固定高度的高度比你的模型稍微高一点,可以保证包着整个模型,也可以对shp数据稍微做一些缓冲区设置,使其可以前后左右包围整个模型
3、如果你的shp数据原始中文编码是GBK的话,最好提前通过QGIS或者ArcGis转成UTF-8
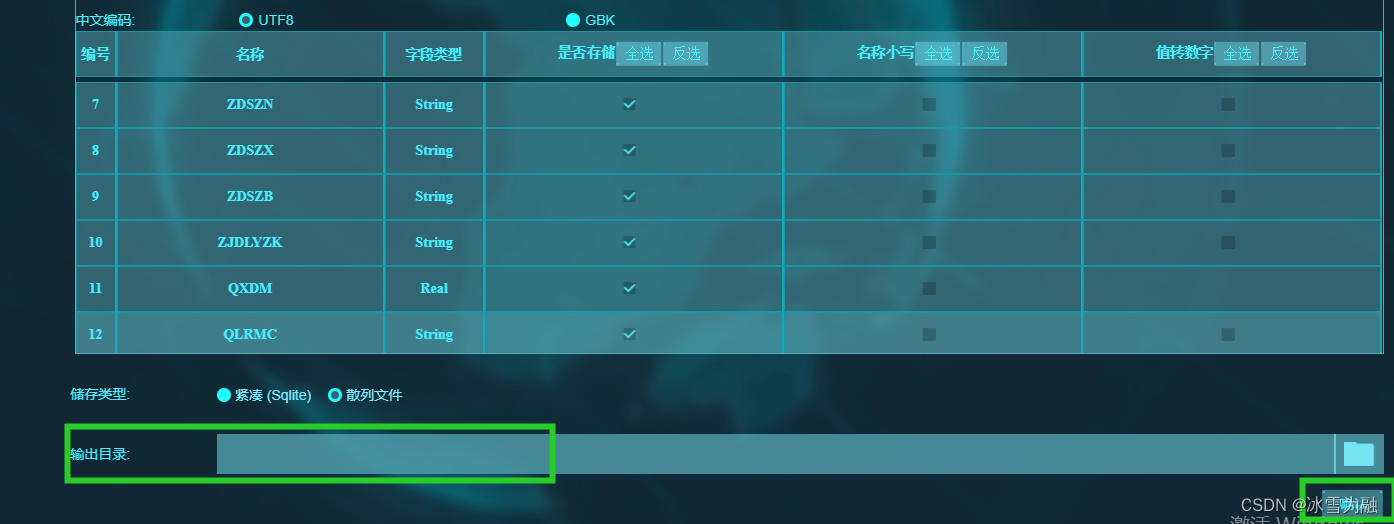
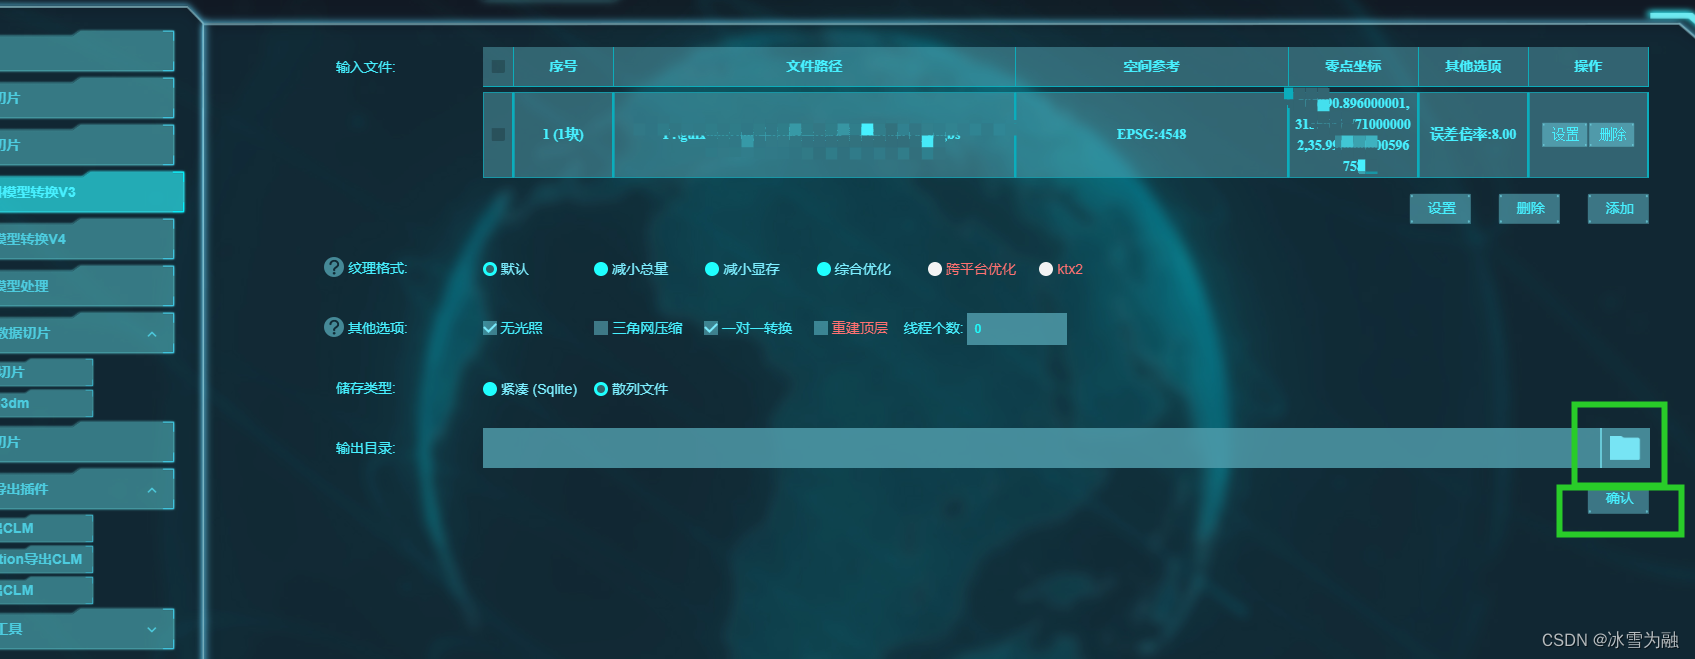
选择输出目录,点击确认即可
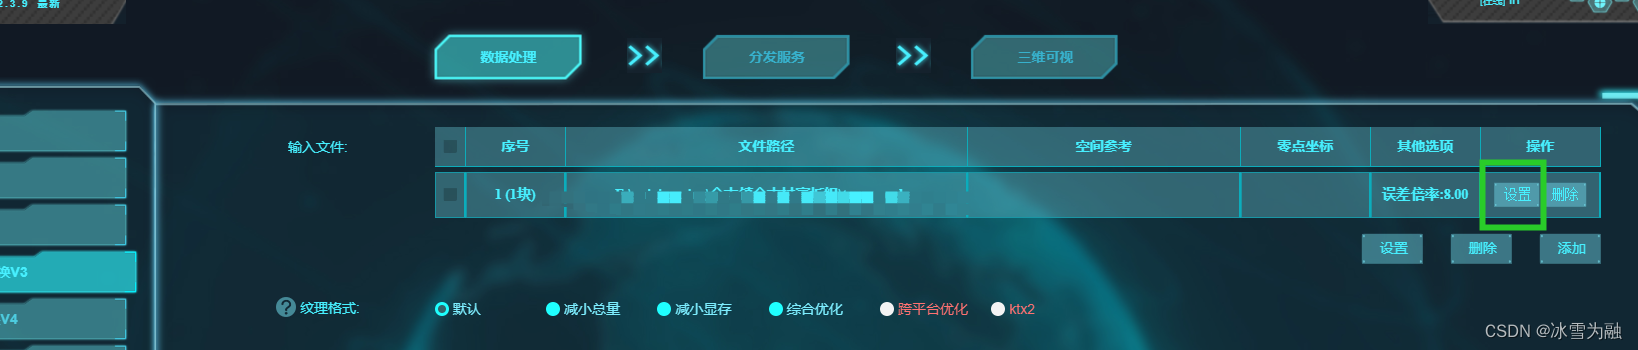
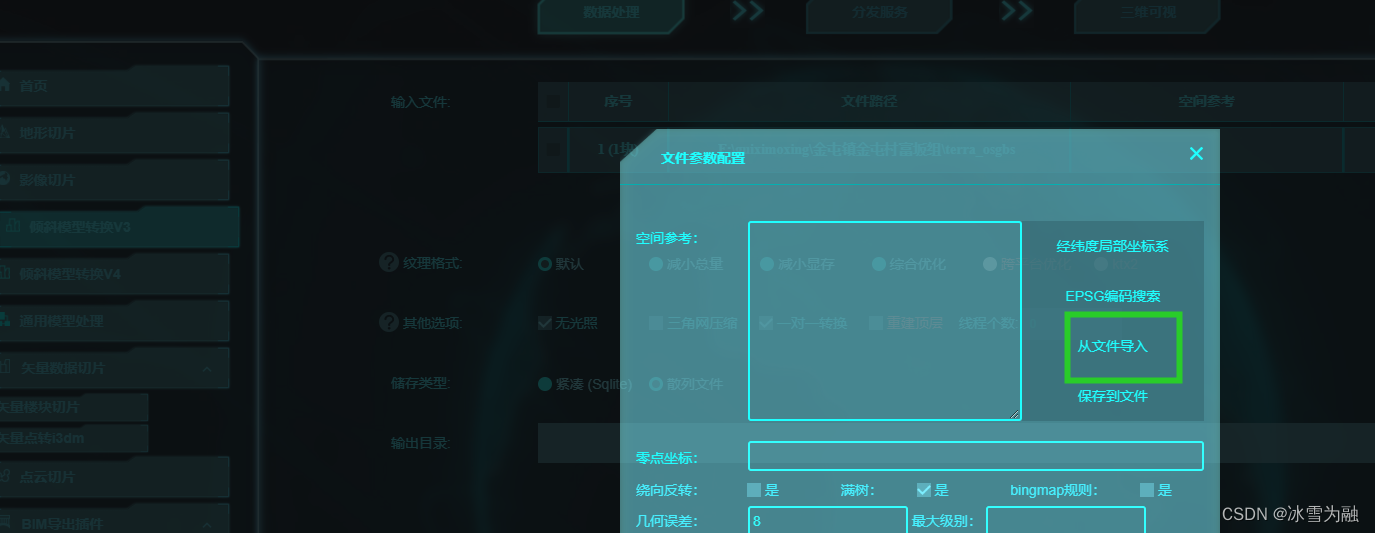
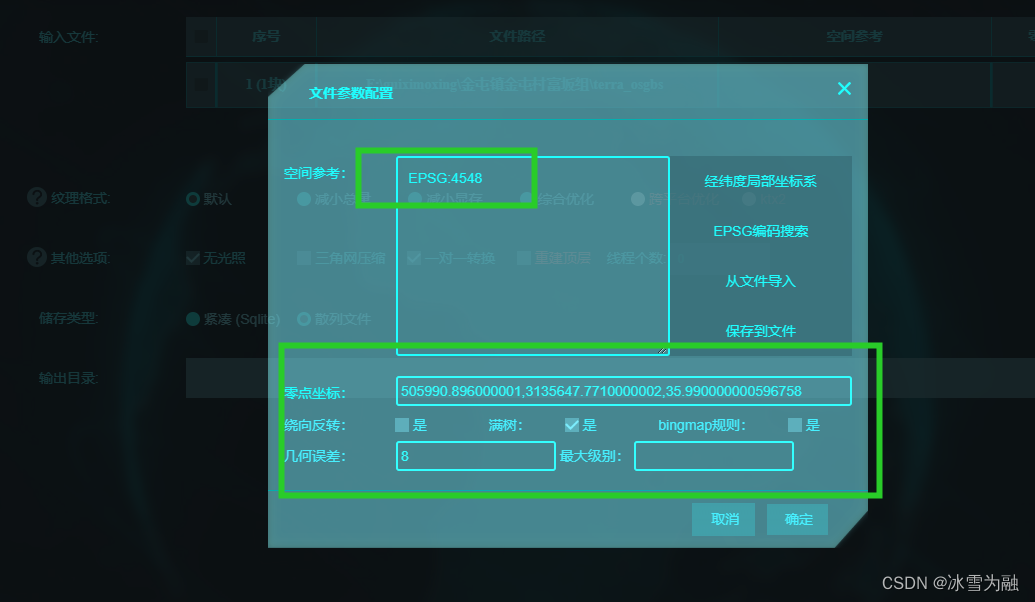
二、osgb切片

设置,选择xml,里面存储着位置信息和投影信息等

三、Cesium 代码加载实现
加载3dtiles模型
     let defaultTilesetConfig = {
        skipLevelOfDetail: true,
        preferLeaves: true,
        maximumMemoryUsage: 256, // 内存分配变小有利于倾斜摄影数据回收,提升性能体验
        // debugShowContentBoundingVolume: true,
        baseScreenSpaceError: 256,
        maximumScreenSpaceError: 16, // 数值加大,能让最终成像变模糊
        skipScreenSpaceErrorFactor: 16,
        skipLevels: 2,//lod级别加载
        immediatelyLoadDesiredLevelOfDetail: true,
        loadSiblings: true, // 如果为true则不会在已加载完概况房屋后,自动从中心开始超清化房屋
        cullWithChildrenBounds: true,
        cullRequestsWhileMoving: true,
        cullRequestsWhileMovingMultiplier: 1, // 值越小能够更快的剔除
        preloadWhenHidden: true,
        progressiveResolutionHeightFraction: 1, // 数值偏于0能够让初始加载变得模糊
        dynamicScreenSpaceErrorDensity: 1, // 数值加大,能让周边加载变快
        dynamicScreenSpaceErrorFactor: 1, // 不知道起了什么作用没,反正放着吧先
        dynamicScreenSpaceError: true // 根据测试,有了这个后,会在真正的全屏加载完之后才清晰化房屋
      }
      //1osgb
      let osgb1 = new Cesium.Cesium3DTileset({
        url: `/upload/3dtiles/cfgzz_3dtiles/tileset.json`,
        ...defaultTilesetConfig
      });

      // 超出可视区的瓦片进行销毁,提高性能
      osgb1.tileLoad.addEventListener(function (tile) {
        tile.tileset.trimLoadedTiles();
      });
      // 贴地处理
      this.handle3dtilesHeight(osgb1, 10.0)
      viewer.scene.primitives.add(osgb1);
      //定位到当前模型位置
      viewer.zoomTo(osgb1)
用shp切片的3dtiles做分类处理
      classificationVector = new Cesium.Cesium3DTileset({
        url: config3dtilesJson.vector,
        classificationType: Cesium.ClassificationType.CESIUM_3D_TILE
      });
      classificationVector.style = new Cesium.Cesium3DTileStyle({
        color: "rgba(255, 255, 255, 0.01)",
        // color: "rgba(0, 255, 0, 0.8)",
      });
      viewer.scene.primitives.add(classificationVector);
添加鼠标移入选中模型效果
      const highlighted = {
        feature: undefined,
        originalColor: new Cesium.Color(),
      };
      viewer.screenSpaceEventHandler.setInputAction(function onMouseMove(
        movement
      ) {
        // If a feature was previously highlighted, undo the highlight
        if (Cesium.defined(highlighted.feature)) {
          highlighted.feature.color = highlighted.originalColor;
          highlighted.feature = undefined;
        }
        // Pick a new feature
        const pickedFeature = viewer.scene.pick(movement.endPosition);
        if (!(pickedFeature instanceof Cesium.Cesium3DTileFeature)) return;
        if (!Cesium.defined(pickedFeature)) return;
        // Highlight the feature if it's not already selected.
        if (pickedFeature !== selected.feature) {
          highlighted.feature = pickedFeature;
          Cesium.Color.clone(
            pickedFeature.color,
            highlighted.originalColor
          );
          pickedFeature.color = new Cesium.Color(1, 1, 0, 0.2);
        }
      },
        Cesium.ScreenSpaceEventType.MOUSE_MOVE);
添加鼠标点击展示弹窗效果
      let _this = this


      // Information about the currently selected feature
      const selected = {
        feature: undefined,
        originalColor: new Cesium.Color(),
      };

      // Get default left click handler for when a feature is not picked on left click
      const clickHandler = viewer.screenSpaceEventHandler.getInputAction(
        Cesium.ScreenSpaceEventType.LEFT_CLICK
      );

      // Color a feature on selection and show metadata in the InfoBox.
      viewer.screenSpaceEventHandler.setInputAction(function onLeftClick(
        movement
      ) {
        // 隐藏模态框
        _this.showMLXCModal = false
        // If a feature was previously selected, undo the highlight
        if (Cesium.defined(selected.feature)) {
          selected.feature.color = selected.originalColor;
          selected.feature = undefined;
        }
        // Pick a new feature
        const pickedFeature = viewer.scene.pick(movement.position);
        if (!(pickedFeature instanceof Cesium.Cesium3DTileFeature)) {
          return;
        }
        if (!Cesium.defined(pickedFeature)) {
          clickHandler(movement);
          return;
        }
        // Select the feature if it's not already selected
        if (selected.feature === pickedFeature) {
          return;
        }
        selected.feature = pickedFeature;

        if (!(pickedFeature instanceof Cesium.Cesium3DTileFeature))  return;


        var position = viewer.scene.pickPosition(movement.position);
        let cartographic = Cesium.Cartographic.fromCartesian(position);
        // 有值则展示模态框,模态框的位置信息
        _this.showMLXCModal = true
        _this.positionXY.lng = Cesium.Math.toDegrees(
          cartographic.longitude
        );
        _this.positionXY.lat = Cesium.Math.toDegrees(cartographic.latitude);
        // height=viewer.camera.positionCartographic.height.toFixed(0);
        _this.positionXY.height = cartographic.height;

        // 获取属性信息
        _this.propertiesObj = pickedFeature.getPropertyNames()


        // Save the selected feature's original color
        if (pickedFeature === highlighted.feature) {
          Cesium.Color.clone(
            highlighted.originalColor,
            selected.originalColor
          );
          highlighted.feature = undefined;
        } else {
          Cesium.Color.clone(pickedFeature.color, selected.originalColor);
        }
        // Highlight newly selected feature
        pickedFeature.color = new Cesium.Color(0, 1, 0, 0.2);
        // Set feature infobox description

      },
        Cesium.ScreenSpaceEventType.LEFT_CLICK);
四、实现过程中遇到的问题记录
1、分类未正常显示,原因:shp数据量过大,导致分类要做很多算法,加载不出来
2、中文乱码问题,因为shp原始数据是gbk格式,即便切片时候选择了gbk编码但是依然未生效
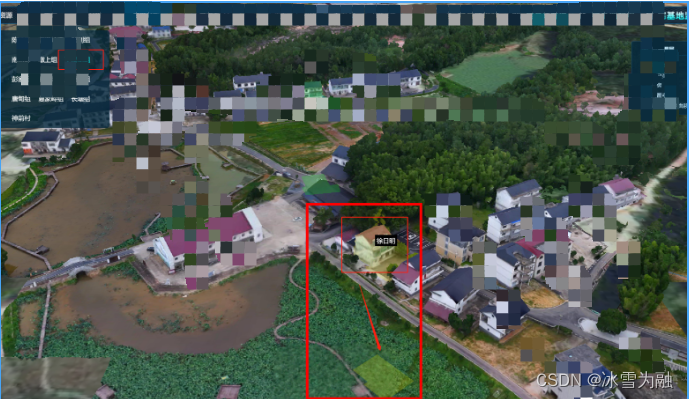
3、鼠标移入,选中区域跑出来,如下图:原因是shp切片的时候没有构造底面
五、注意事项
电脑需要有显卡,配置越高越好

六、优化考虑
模型区域比较大的话,如果一些shp数据变化,就要对所有的shp数据重新切片,比较麻烦,所以有两种方式可以避免这种情况发生
1、请求接口的方式获取数据,通过primite做分类处理,这样不论数据怎么变化都不需要重新处理
2、shp上只存储唯一键值,其他信息通过唯一键值去获取数据


 2222
2222


 被折叠的 条评论
为什么被折叠?
被折叠的 条评论
为什么被折叠?
 到【灌水乐园】发言


