


背景
我们在前面讨论了Scane相关的内容,这一篇文章中我们会讨论一下场景中物体的绘制,其中主要涉及了ATransformable3D,Object3D,Material三个对象,现在让我们来看看它们是怎么把物体绘制到Opengl中的。
实现
IGraphNodeMember
视图中的物体必须实现这个接口
/**
 * Sets the node that this member is contained in.
 *
 * @param node IGraphNode this member was placed inside.
 * @param inside Boolean indicating if this object is inside the graph.
 */
public void setGraphNode(IGraphNode node, boolean inside);

/**
 * Gets the node that this member is contained in.
 *
 * @return IGraphNode this member was placed inside.
 */
public IGraphNode getGraphNode();

/**
 * Gets the objects state in the graph.
 *
 * @return True if the object is inside the graph.
 */
public boolean isInGraph();

/**
 * Retrieve the bounding volume of this member.
 *
 * @return IBoundingVolume which encloses this members "geometry."
 */
public IBoundingVolume getTransformedBoundingVolume();

/**
 * Retrieve the position in the scene of this member.
 *
 * @return Number3D containing the position.
 */
public Vector3 getScenePosition();
ATransformable3D
实现了IGraphNodeMember,在primitives文件下的各种基本图形都是它的子类。Camera也是它的子类。
构造函数
该类提供了模型的一些基本信息,如位置,大小,模型矩阵等
public ATransformable3D() {
    mLookAt = new Vector3(0);           //视角向量
    mLookAtEnabled = false;
    mPosition = new Vector3();          //位置
    mScale = new Vector3(1, 1, 1);      //大小
    mOrientation = new Quaternion();    //方向
    mTmpOrientation = new Quaternion();
    mUpAxis = new Vector3(WorldParameters.UP_AXIS);
}
另外还提供了对模型位置,大小等属性的操作方法,下面以设置Z轴位置为例
public void setZ(double z) {
    mPosition.z = z;                      //设置属性
    if (mLookAtEnabled && mLookAtValid)
        resetToLookAt();
    markModelMatrixDirty();
}

public ATransformable3D resetToLookAt(Vector3 upAxis) {
    mTempVec.subtractAndSet(mLookAt, mPosition);
    // In OpenGL, Cameras are defined such that their forward axis is -Z, not +Z like we have defined objects.
    if (mIsCamera) mTempVec.inverse();
    mOrientation.lookAt(mTempVec, upAxis);  //更新方位方向
    mLookAtValid = true;
    markModelMatrixDirty();                 //标识模型矩阵需要更新
    return this;
}
下面是对接口IGraphNodeMember方法的实现
public void setGraphNode(IGraphNode node, boolean inside) {
    mGraphNode = node;
    mInsideGraph = inside;
}

public IGraphNode getGraphNode() {
    return mGraphNode;
}

public boolean isInGraph() {
    return mInsideGraph;
}

public IBoundingVolume getTransformedBoundingVolume() {
    return null;
}

public Vector3 getScenePosition() {
    return mPosition;
}
Object3D
Object3D实现了ATransformable3D,常见的模型都是继承自Object3D类。
构造函数
public Object3D() {
super();
//内部的子物体List
mChildren = Collections.synchronizedList(new CopyOnWriteArrayList<Object3D>());
//用来存储顶点,法线,纹理,颜色等,并绑定到底层
mGeometry = new Geometry3D();
//物体漫反射颜色
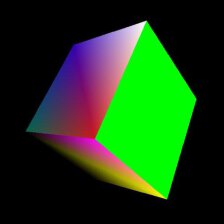
mColor = new float[] { 0, 1, 0, 1.0f};
//用来判定物体是否被选中的颜色参数
mPickingColor = new float[4];
setPickingColor(UNPICKABLE);
}其中mGeometry用于存储顶点,法线,纹理,颜色和索引等数据,并将其写入Opengl底层。
由上一篇我们知道,Scane类中的render方法其实是调用Object3D中的render方法,这里我们看一下Object3D中的render方法。这几个参数都是在Scane中计算出来并在Scane类中的render方法中传入。
public void render(Camera camera, final Matrix4 vpMatrix, final Matrix4 projMatrix, final Matrix4 vMatrix,
        final Matrix4 parentMatrix, Material sceneMaterial) {
    if (!mIsVisible && !mRenderChildrenAsBatch)
        return;

    //设置材质
    Material material = sceneMaterial == null ? mMaterial : sceneMaterial;

    //mGeometry中建立buffer,绑定数据
    preRender();

    //****************************************************************
    //创建MVP矩阵
    // 重新计算模型矩阵
    boolean modelMatrixWasRecalculated = onRecalculateModelMatrix(parentMatrix);

    /**
    * 计算模型视图矩阵,其中模型矩阵是由如下方法计算出来的
    * mMMatrix.setAll(mPosition, mScale, mOrientation);
    * if (parentMatrix != null) {
    *    mMMatrix.leftMultiply(parentMatrix);
    * }
    * 可见,模型矩阵反映了模型的位置,大小,旋转方向等参数,后面我们会分    析这个矩阵是如何计算出来的。parentMatrix为当前模型的父矩阵,一般为null
    */
    mMVMatrix.setAll(vMatrix).multiply(mMMatrix);

    /**
    * vpMatrix为传入参数,由Scane决定
    */
    mMVPMatrix.setAll(vpMatrix).multiply(mMMatrix);
    //****************************************************************

    //计算外围盒子和外围球(包围体),这两者用于碰撞检测
    // Transform the bounding volumes if they exist
    if (mGeometry.hasBoundingBox()) mGeometry.getBoundingBox().transform(getModelMatrix());
    if (mGeometry.hasBoundingSphere()) mGeometry.getBoundingSphere().transform(getModelMatrix());

    //判断当前物体是否在视锥体内
    mIsInFrustum = true; // only if mFrustrumTest == true it check frustum
    if (mFrustumTest && mGeometry.hasBoundingBox()) {
        BoundingBox bbox = mGeometry.getBoundingBox();
        if (!camera.getFrustum().boundsInFrustum(bbox)) {
            mIsInFrustum = false;
        }
    }

    /**
    * 正常非容器的物体mIsContainerOnly均为false
    * 如果在视锥体内部 mIsInFrustum为true
    * 也就是说,如果是一个在视锥体内部的一般物体,这个判断条件就是真,可以绘制
    */
    if (!mIsContainerOnly && mIsInFrustum) {
        mPMatrix = projMatrix;
        //是否允许绘制图形正反面
        if (mDoubleSided) {
            GLES20.glDisable(GLES20.GL_CULL_FACE);
        } else {
            GLES20.glEnable(GLES20.GL_CULL_FACE);
             if (mBackSided) {
                  GLES20.glCullFace(GLES20.GL_FRONT);
             } else {
                  GLES20.glCullFace(GLES20.GL_BACK);
                  GLES20.glFrontFace(GLES20.GL_CCW);
             }
        }
        //是否允许混合
        if (mEnableBlending) {
            GLES20.glEnable(GLES20.GL_BLEND);
            GLES20.glBlendFunc(mBlendFuncSFactor, mBlendFuncDFactor);
        }
        //是否允许深度检测
        if (!mEnableDepthTest) GLES20.glDisable(GLES20.GL_DEPTH_TEST);
        else {
            GLES20.glEnable(GLES20.GL_DEPTH_TEST);
            GLES20.glDepthFunc(GLES20.GL_LESS);
        }

        GLES20.glDepthMask(mEnableDepthMask);

        //设置物体的材质
        if (!mIsPartOfBatch) {
            if (material == null) {
                RajLog.e("[" + this.getClass().getName()
                        + "] This object can't render because there's no material attached to it.");
                throw new RuntimeException(
                        "This object can't render because there's no material attached to it.");
            }
            material.useProgram();

            setShaderParams(camera);
            material.bindTextures();

            //mGeometry中存储的内容在这里赋值给材质
            //为材质设置纹理
            if(mGeometry.hasTextureCoordinates())
                material.setTextureCoords(mGeometry.getTexCoordBufferInfo());
            //为材质设置法线
            if(mGeometry.hasNormals())
                material.setNormals(mGeometry.getNormalBufferInfo());
            //为材质设置顶点颜色
            if(mMaterial.usingVertexColors())
                material.setVertexColors(mGeometry.getColorBufferInfo());
            //设置顶点
            material.setVertices(mGeometry.getVertexBufferInfo());
        }
        material.setCurrentObject(this);
        if(mOverrideMaterialColor) {
            material.setColor(mColor);
        }
        material.applyParams();

        GLES20.glBindBuffer(GLES20.GL_ARRAY_BUFFER, 0);

        material.setMVPMatrix(mMVPMatrix);
        material.setModelMatrix(mMMatrix);
        material.setModelViewMatrix(mMVMatrix);

        if(mIsVisible) {
            int bufferType = mGeometry.getIndexBufferInfo().bufferType == Geometry3D.BufferType.SHORT_BUFFER ? GLES20.GL_UNSIGNED_SHORT : GLES20.GL_UNSIGNED_INT;
            GLES20.glBindBuffer(GLES20.GL_ELEMENT_ARRAY_BUFFER, mGeometry.getIndexBufferInfo().bufferHandle);
            GLES20.glDrawElements(mDrawingMode, mGeometry.getNumIndices(), bufferType, 0);
            GLES20.glBindBuffer(GLES20.GL_ELEMENT_ARRAY_BUFFER, 0);
        }
        if (!mIsPartOfBatch && !mRenderChildrenAsBatch && sceneMaterial == null) {
            material.unbindTextures();
        }

        material.unsetCurrentObject(this);

        if (mEnableBlending) {
            GLES20.glDisable(GLES20.GL_BLEND);
        }

        if (mDoubleSided) {
            GLES20.glEnable(GLES20.GL_CULL_FACE);
        } else if (mBackSided) {
            GLES20.glCullFace(GLES20.GL_BACK);
        }
        if (!mEnableDepthTest) {
            GLES20.glEnable(GLES20.GL_DEPTH_TEST);
            GLES20.glDepthFunc(GLES20.GL_LESS);
        }
    }

    //时候显示包围体,包围体用来进行碰撞检测
    if (mShowBoundingVolume) {
        if (mGeometry.hasBoundingBox())
            mGeometry.getBoundingBox().drawBoundingVolume(camera, vpMatrix, projMatrix, vMatrix, mMMatrix);
        if (mGeometry.hasBoundingSphere())
            mGeometry.getBoundingSphere().drawBoundingVolume(camera, vpMatrix, projMatrix, vMatrix, mMMatrix);
    }

    //绘制子物体
    // Draw children without frustum test
    for (int i = 0, j = mChildren.size(); i < j; i++) {
        Object3D child = mChildren.get(i);
        if(mRenderChildrenAsBatch || mIsPartOfBatch) {
            child.setPartOfBatch(true);
        }
        if(modelMatrixWasRecalculated) child.markModelMatrixDirty();
        child.render(camera, vpMatrix, projMatrix, vMatrix, mMMatrix, sceneMaterial);
    }

    if (mRenderChildrenAsBatch && sceneMaterial == null) {
        material.unbindTextures();
    }
}
总结一下,Object3D的render方法主要干了以下几件事
1.为计算好的物体的模型矩阵,传入投影和视图矩阵,最终合成材质的MVP矩阵(没错,屏幕显示的其实是material。Object3D只是为material提供了数据以及GLES相关的设置,最终做绘制的是material对象)
2.如果需要的话,计算物体的包围体
3.判断物体是否处于视锥体内
4.如果满足物体显示(绘制)的条件,设置当前物体的material,绘制当前物体(的material)。
5.绘制子物体
Material
先来看看注释中对这个类怎么解释的
The Material class is where you define the visual characteristics of your 3D model.
Here you can specify lighting parameters, specular highlights, ambient colors and much more.
This is the place where you add textures as well. For an overview of the different types
of materials and parameters visit the Rajawali Wiki.
这里大概是说Material才是真的可见的模型定义的地方,我们可以在这里设置材质的光线以及纹理。注释还给出来了一组示例,用来展示。
Material material = new Material();
 //指定纹理
 material.addTexture(new Texture("earth", R.drawable.earth_diffuse));
 //使能光照设置
 material.enableLighting(true);
 //设置漫反射参数
 material.setDiffuseMethod(new DiffuseMethod.Lambert());
 //设置镜面反射参数
 material.setSpecularMethod(new SpecularMethod.Phong());
 //将material设置给物体
 myObject.setMaterial(material);
下面我们来看看它的局部变量 首先出场的是我们的老朋友了,看变量名我们就大概知道它们分别是顶点与片元的着色器。
private VertexShader mVertexShader;
private FragmentShader mFragmentShader;
下面是关于光照的一些属性
//用于光照计算
private LightsVertexShaderFragment mLightsVertexShaderFragment;
//漫反射接口
private IDiffuseMethod mDiffuseMethod;
//镜面反射接口
private ISpecularMethod mSpecularMethod;
下面是顶点和片元Shader在程序中的引用Handler
private int mVShaderHandle;
private int mFShaderHandle;
下面是模型矩阵和模型在眼空间的矩阵
private Matrix4 mModelMatrix;
private float[] mModelViewMatrix;
光相关参数
private float[] mColor; //漫反射颜色
private float[] mAmbientColor; //环境光颜色
private float[] mAmbientIntensity; //环境光强度
动画时间属性 在shader中生效,用于设置动画执行时每个动作的时间间隔
private float mTime;具体使用在renderer中设置
public void onDrawFrame(GL10 glUnused) {
    super.onDrawFrame(glUnused);
    mMyMaterial.setTime((SystemClock.elapsedRealtime() - mLastRender) / 1000d);
    ...
}
光List
protected List<ALight> mLights;插件List 其中IMaterialPlugin中包含顶点着色器和片元着色器,用于自定义的shader
protected List<IMaterialPlugin> mPlugins;纹理相关属性
//纹理的最大数量
private int mMaxTextures;
//纹理列表
protected ArrayList<ATexture> mTextureList;
//纹理名字与引用键值对哈希表
protected Map<String, Integer> mTextureHandles;
法线相关属性
protected final float[] mNormalFloats = new float[9];
//shader中做法向量变换的矩阵,猜测应该是没有加投影的MV矩阵
protected Matrix4 mNormalMatrix = new Matrix4();
我们在render方法中使用了material的useProgram方法,现在我们来看看这些底层GL操作是如何在代码中完成的。
public void useProgram() {
    if (mIsDirty) {
        createShaders();
    }
    GLES20.glUseProgram(mProgramHandle);
}
这个函数直接创建了顶点与片元着色器并链接生成相应的program。代码中先遍历了mTextureList列表,然后获取了纹理的类型。对不同类型的处理如下
switch (texture.getTextureType()) {
                case VIDEO_TEXTURE:    //视频相关
                    hasVideoTexture = true;
                    // no break statement, add the video texture to the diffuse textures
                case DIFFUSE:
                case RENDER_TARGET:    //有漫反射
                    if (diffuseTextures == null) diffuseTextures = new ArrayList<>();
                    diffuseTextures.add(texture);
                    break;
                case NORMAL:           //有法线
                    if (normalMapTextures == null) normalMapTextures = new ArrayList<>();
                    normalMapTextures.add(texture);
                    break;
                case CUBE_MAP:         //方形材质
                    hasCubeMaps = true;
                case SPHERE_MAP:       //圆形材质
                    boolean isSkyTexture = false;
                    boolean isEnvironmentTexture = false;

                    if (texture.getClass() == SphereMapTexture.class) {
                        isSkyTexture = ((SphereMapTexture) texture).isSkyTexture();
                        isEnvironmentTexture = ((SphereMapTexture) texture).isEnvironmentTexture();
                    } else if (texture.getClass() == CubeMapTexture.class) {
                        isSkyTexture = ((CubeMapTexture) texture).isSkyTexture();
                        isEnvironmentTexture = ((CubeMapTexture) texture).isEnvironmentTexture();
                    }

                    if (isSkyTexture) {
                        if (skyTextures == null)
                            skyTextures = new ArrayList<>();
                        skyTextures.add(texture);
                    } else if (isEnvironmentTexture) {
                        if (envMapTextures == null)
                            envMapTextures = new ArrayList<>();
                        envMapTextures.add(texture);
                    }
                    break;
                case SPECULAR:           //镜面反射
                    if (specMapTextures == null) specMapTextures = new ArrayList<>();
                    specMapTextures.add(texture);
                    break;
                case ALPHA:             //透明
                    if (alphaMapTextures == null) alphaMapTextures = new ArrayList<>();
                    alphaMapTextures.add(texture);
                    break;
                default:
                    break;
            }
此处根据不同的类型设置不同的选项,注意有些case后面有break有些没有,说明部分类型的处理方法可以共存。
之后的代码就开始创建我们的顶点和片元shader了
mVertexShader = new VertexShader();
        mVertexShader.enableTime(mTimeEnabled);
        mVertexShader.hasCubeMaps(hasCubeMaps);
        mVertexShader.hasSkyTexture(skyTextures != null && skyTextures.size() > 0);
        mVertexShader.useVertexColors(mUseVertexColors);
        mVertexShader.initialize();
        mFragmentShader = new FragmentShader();
        mFragmentShader.enableTime(mTimeEnabled);
        mFragmentShader.hasCubeMaps(hasCubeMaps);
        mFragmentShader.initialize();
此处的Shader类型其实是一个shader动态生成的框架,可以根据我们的设置来自动生成相应的shader字符串(在最开始做光照的时候自己也写了一个简单的shader生成框架,看来对于这种固定格式字符串的问题确实可以考虑写一个框架进行自动生成)。关于shader的原理我们将在后续文章中继续介绍。
有了shader变量,之后要做得就是把我们在前面设置的属性传递给shader,生成最终的shader字符串。然后将字符串编译链接,生成最后的program。
当然,最后Material类还给我们提供了一些方法,对属性或者uniform进行设置,此处用到时具体问题具体分析即可。
总结一下,我们在Material中通过判断纹理的类型,最终借助两个Shader类型的对象完成了program的生成,然后对program中属性和unifom进行相关的赋值与执行。
总结
本文主要介绍了ATransformable3D,Object3D,Material三个类,从外到内分析了图形的绘制过程。通过ATransformable3D提供的方法,我们确定了物体的大小,位置,方向等参数,Object3D中又为父类ATransformable3D补充了顶点,法线,纹理等参数。最终在Object3D的render方法中,创建Material类型的变量,Material拿到前文设置的各种参数,通过两个着色器对象生成着色器字符串,并对两个字符串编译生成program对象,使用这个program完成了OpenGL的绘制。


 2749
2749

 被折叠的 条评论
为什么被折叠?
被折叠的 条评论
为什么被折叠?
 到【灌水乐园】发言


