


nest上传图片
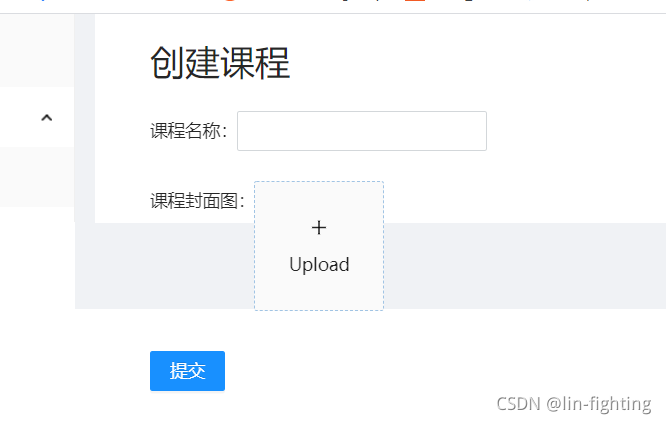
前端使用react+antd的upload
效果
import React, { memo, useState, useEffect } from "react";
import { Upload as AntdUpload, message } from "antd";
import { LoadingOutlined, PlusOutlined } from "@ant-design/icons";

import "./Upload.style.scss";
import { UploadChangeParam } from "antd/lib/upload";
import { RcFile, UploadFile } from "antd/lib/upload/interface";

function getBase64(img: any, callback: any) {
  const reader = new FileReader();
  reader.addEventListener("load", () => callback(reader.result));
  reader.readAsDataURL(img);
}

function beforeUpload1(file: any) {
  const isJpgOrPng = file.type === "image/jpeg" || file.type === "image/png";
  if (!isJpgOrPng) {
    message.error("You can only upload JPG/PNG file!");
  }
  const isLt2M = file.size / 1024 / 1024 < 2;
  if (!isLt2M) {
    message.error("Image must smaller than 2MB!");
  }
  return isJpgOrPng && isLt2M;
}

interface Props {
  onChange?: (imgUrl: string) => void;
  beforeUpload?: (file: any) => boolean;
  value?: string;
  [k: string]: any;
}

export const Upload: React.FC<Props> = memo(
  ({ onChange, value, beforeUpload = beforeUpload1, ...otherProps }: Props) => {
    const [loading, setLoading] = useState(false);
    const [img, setImg] = useState("");
    const uploadButton = (
      <div>
        {loading ? <LoadingOutlined /> : <PlusOutlined />}
        <div style={{ marginTop: 8 }}>Upload</div>
      </div>
    );

    useEffect(() => {
      if (value) {
        setImg(value);
      }
    }, [value]);

    const handleChange = (info: any) => {
      if (info.file.status === "uploading") {
        setLoading(true);
        return;
      }
      if (info.file.status === "done") {
        // Get this url from response in real world.
        getBase64(info.file.originFileObj, () => {
          setImg(info.file.response.url);
          onChange && onChange(info.file.response.url);
        });
      }
    };
    return (
      <div className={"upload"}>
        <AntdUpload
          name="file"
          listType="picture-card"
          showUploadList={false}
          action="http://localhost:5000/upload"
          beforeUpload={beforeUpload}
          onChange={handleChange}
          {...otherProps}
        >
          {img ? (
            <img src={img} alt="avatar" style={{ width: "100%" }} />
          ) : (
            uploadButton
          )}
        </AntdUpload>
      </div>
    );
  }
);
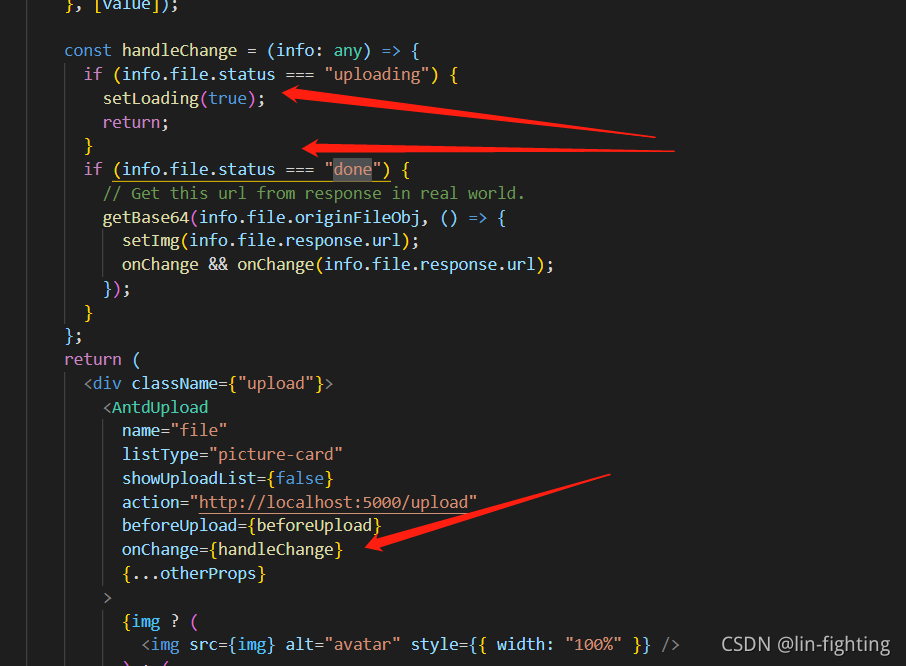
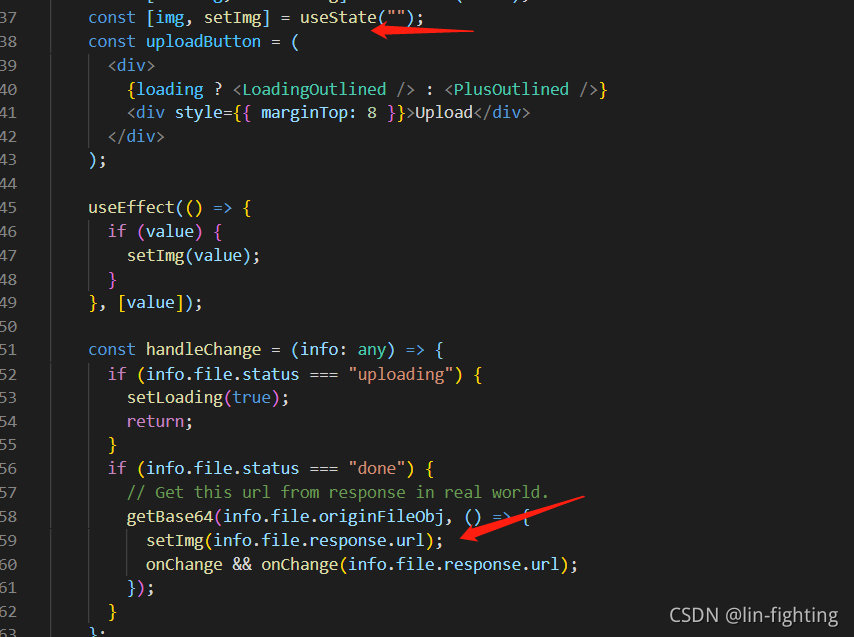
这个handleChange使处理后台返回来的值,我们约定后台的是一个包含文件类型的值,就可以通过状态来判断是否成功,做出对应的操作。
这里是在formItem完成的,所以要实现两个value,和一个onChange
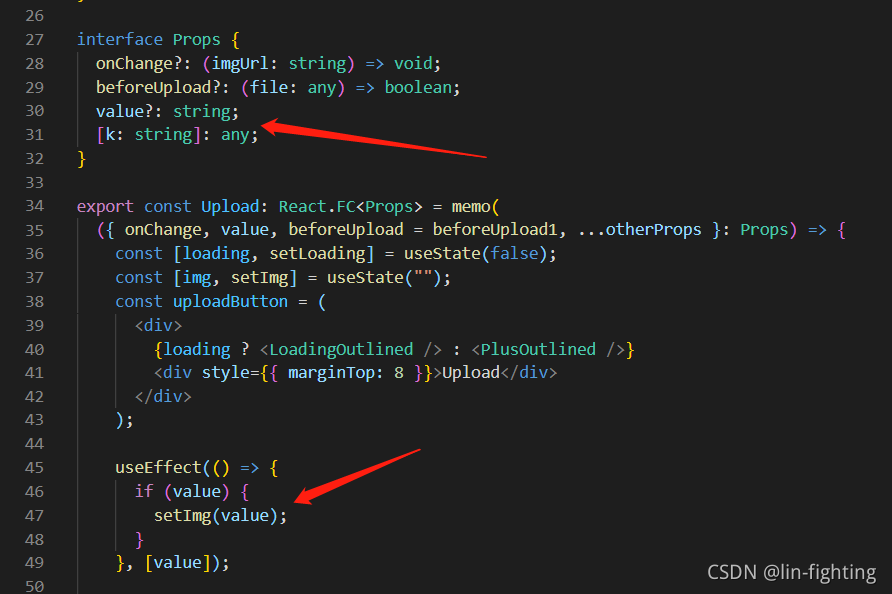
定义内部图片状态,上传后先显示

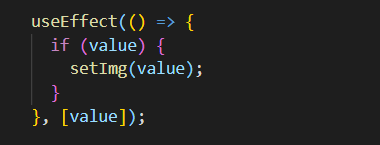
外部value改变时再改变该状态
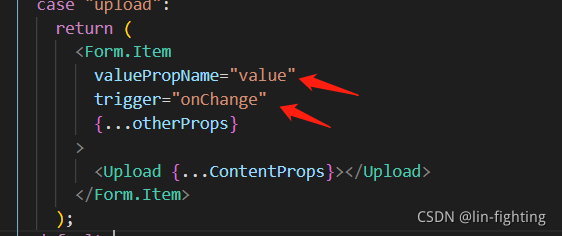
formitem需要执行一个valuePropName的名字为value,而trigger用于设置收集字段值变更的时机。由onChange事件的发生来收集value,这样就相当于一个普通的formItem了。
后台实现:
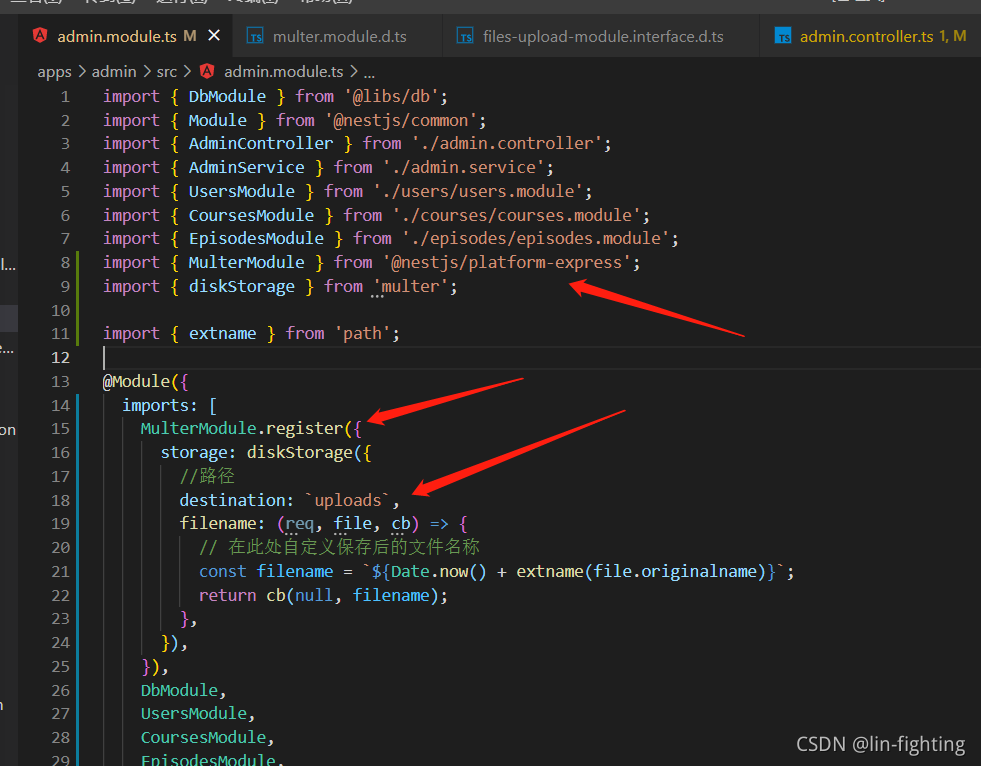
由于我们使用nest并且基于exprss框架的,所以我们使用一个库来完成,有点类似于express的multer。
在主模块中使用import来注册,里面可以配置路劲,还有文件名。
看看express的配置
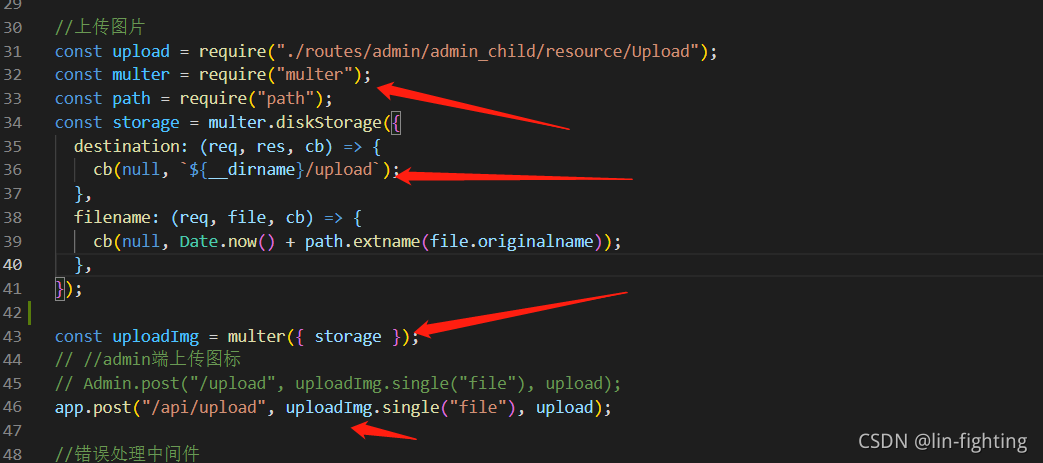
有点类似,都是配置storage,然后注册。这样上传的文件就会到达uploads文件夹里了。
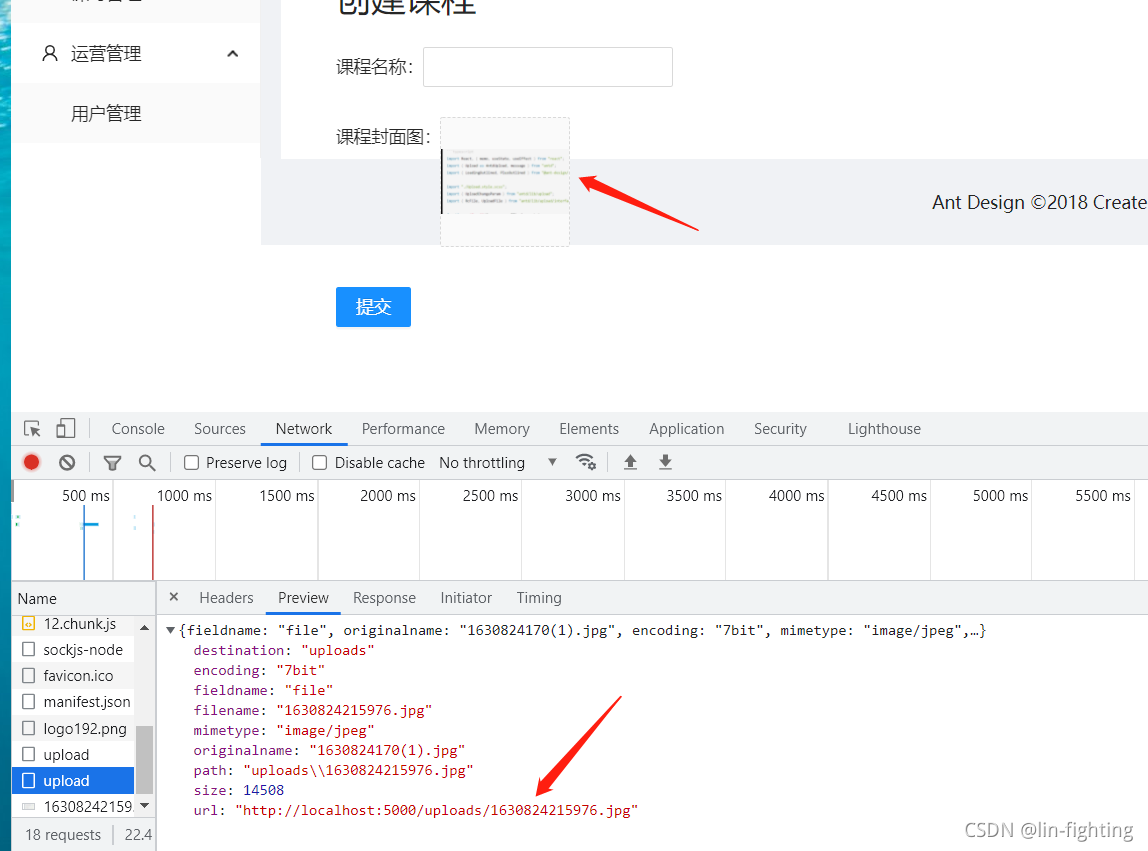
我们上传到uploads文件夹后,需要返回改路劲给前端
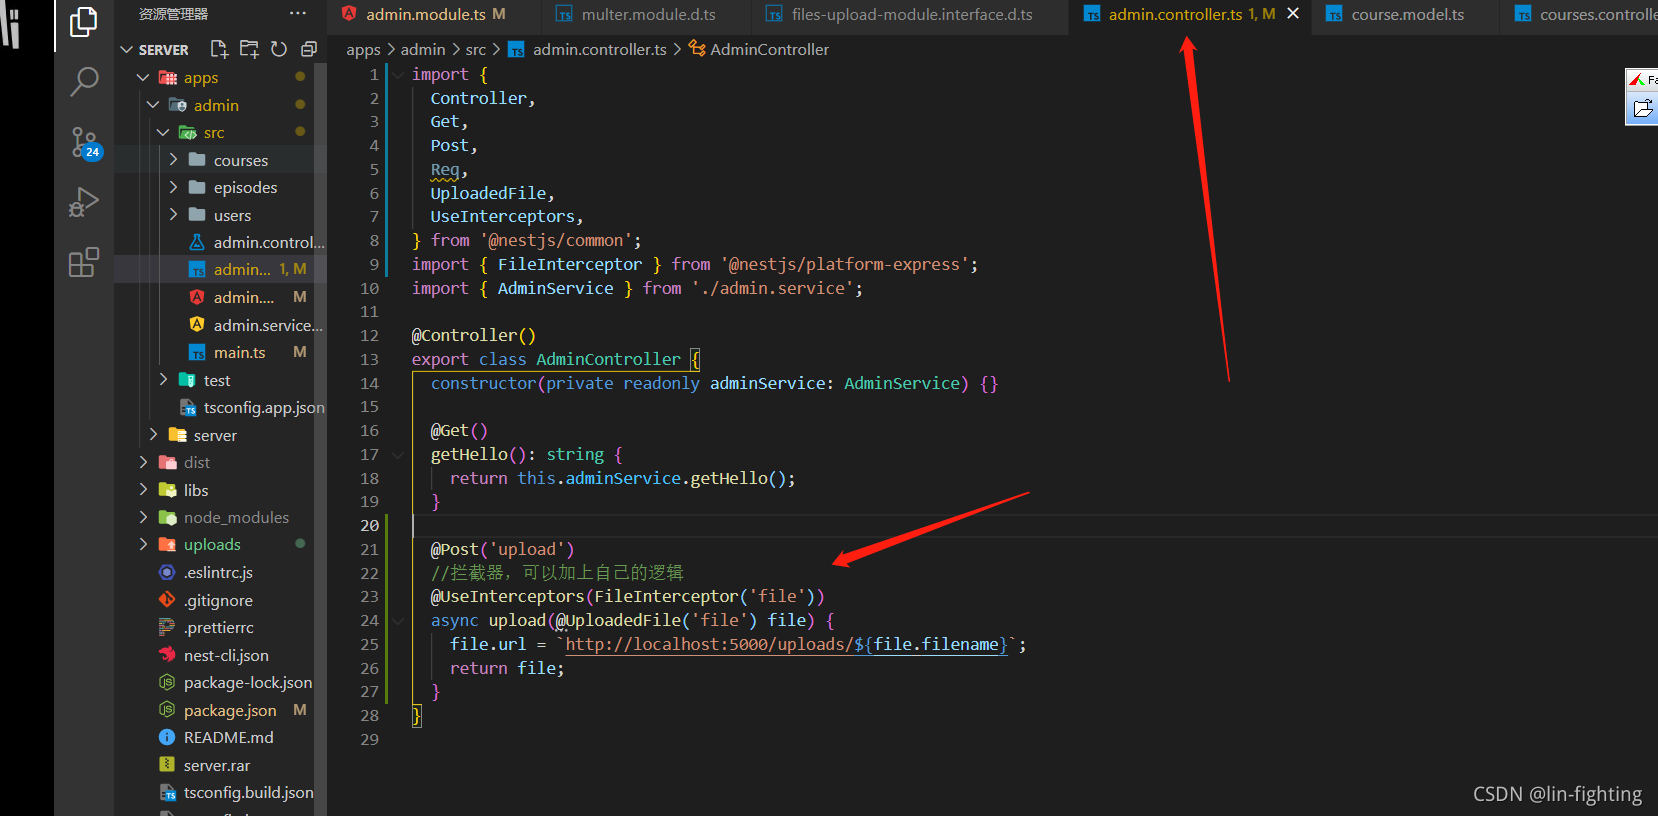
我们在控制器中定义一个接口,处理文件,图中的api是nest提供的,可以获取到上传文件的file。此时的file已经通过处理并且上传到uploads了,所以可以通过file.filename拿到路劲。最后返回该文件即可。
静态资源开放
我们返回文件的路劲之后还要开放静态资源,不然前端访问不到,
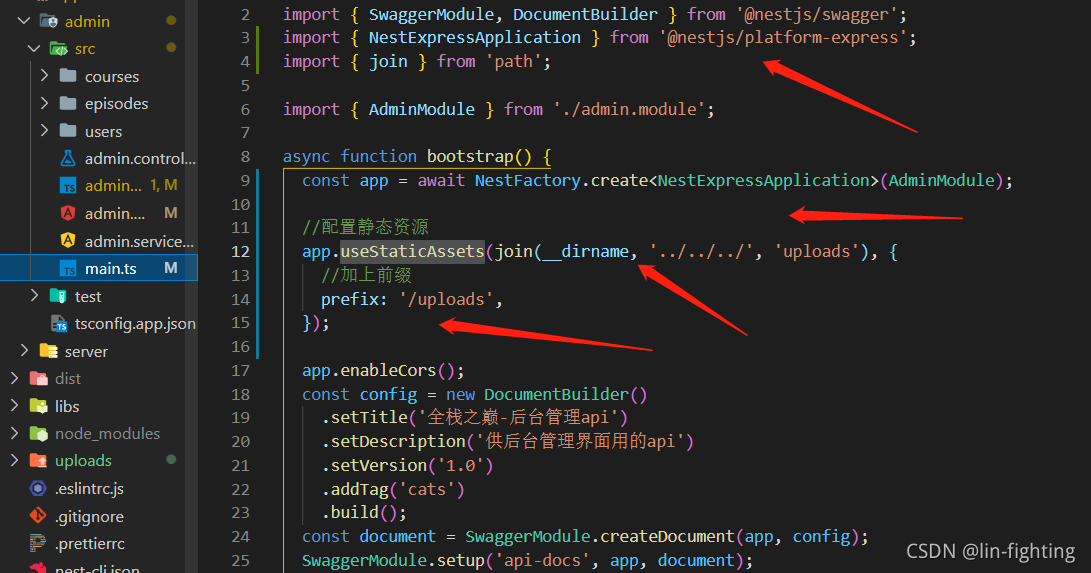
也是基于express,所以使用同一个库,将其uploads的资源开放出来。这样前端就能正常访问了。
效果如开头那样


 561
561


 被折叠的 条评论
为什么被折叠?
被折叠的 条评论
为什么被折叠?
 到【灌水乐园】发言


