


*安装Caffe
打开终端,输入下面命令(注意,需要一行一行的执行)
sudo apt-get install git
sudo apt-get install libprotobuf-dev libleveldb-dev libsnappy-dev libopencv-dev libhdf5-serial-dev protobuf-compiler
sudo apt-get install --no-install-recommends libboost-all-dev
sudo apt-get install libatlas-base-dev
sudo apt-get install python-dev
sudo apt-get install libflags-dev libgoogle-glog-dev liblmdb-dev
git clone https//github.com/bvlc/caffe.git
cd caffe
mv Makefile.config.example Makefile.config
MNIST数据集
MNIST(Mixed National Institute of Standards and Technology)是一个大型的手写体数字数字数据库,广泛用于机器学习领域的训练和测试。
终端命令
首先,先讲目录cd到caffe目录下(前提是你的Caffe已经安装成功)。
cd caffe接着我们需要下载数据集,Caffe下的data下面已经给我们准备了三个数据集(cifar10, ilsvrc12, mnist),今天我们需要使用的是mnist。
cd data/mnist
./get_mnist.sh
接着转换格式。
cd .. # 返回到data
cd .. # 返回到caffe
./examples/mnist/create_mnist.sh
接着开始训练超参数
vim ./examples/mnist/lenet_solver.prototxt
# 没有vim的可以使用vi。
# 将文件最下面的GPU改成CPU即可(对于不是用GPU运行的)。
./examples/mnist/train_lenet.sh
接着,会出来一行一行的运行回馈,当Iteration(迭代)达到10000次的时候,就会停止,出现Optimization Done.
我们还可以对训练后的结果进行测试。
./build/tools/caffe.bin test -model examples/mnist/lenet_train_test.prototxt -weights examples/mnist/lenet_iter_10000.caffemodel -iterations 10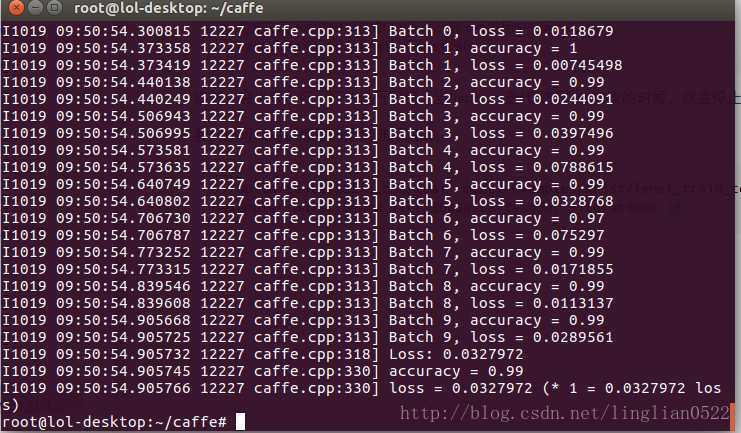
会出现成功率,还可以使用time,查看时间。
./build/tools/caffe.bin time -model examples/mnist/lenet_train_test.prototxt -weights examples/mnist/lenet_iter_10000.caffemodel -iterations 10
使用训练后的模型做预测,识别手写体数字图片
#coding=utf-8

import os
import sys
import numpy as np
from scipy.misc import imread, imresize
import matplotlib.pyplot as plt

caffe_root = '/root/caffe/'
sys.path.insert(0, caffe_root + "python")
import caffe
MODEL_FILE = '/root/caffe/examples/mnist/lenet.prototxt'
PRETRAINED = '/root/caffe/examples/mnist/lenet_iter_10000.caffemodel'
IMAGE_FILE = '/home/lol/图片/temp.bmp' # 判断图片
input_image = caffe.io.load_image(IMAGE_FILE, color=False)
net = caffe.Classifier(MODEL_FILE, PRETRAINED)

prediction = net.predict([input_image], oversample=False)
caffe.set_mode_cpu() # 使用CPU

img = imread('/home/lol/图片/temp.bmp')
plt.imshow(img)
plt.title(prediction[0].argmax())
plt.show()- 运行效果


测试了二个图片,结果是可行的,接着,我们将之作为一个函数并进行封装。
并将网络信息、训练的信息、Caffe搬过来。
#coding=utf-8

def getNumber(IMAGE_FILE, flag):
    import os
    import sys
    import numpy as np
    from scipy.misc import imread, imresize
    import matplotlib.pyplot as plt
    caffe_root = './caffe/'
    sys.path.insert(0, caffe_root + "python")
    import caffe
    MODEL_FILE = './lenet.prototxt' # 网络信息
    PRETRAINED = './lenet_iter_10000.caffemodel' # 训练后的结果
    input_image = caffe.io.load_image(IMAGE_FILE, color=False) # 读取图片
    net = caffe.Classifier(MODEL_FILE, PRETRAINED) # 载入分类器
    prediction = net.predict([input_image], oversample=False) # 对图片进行预测,分类
    caffe.set_mode_cpu() # 使用CPU模式
    if (flag):
        img = imread(IMAGE_FILE)
        plt.imshow(img)
        plt.title(prediction[0].argmax())
        plt.show()
    return prediction[0].argmax();

print(getNumber('/home/lol/图片/temp.bmp', False));
接着,看一下样本库里面的图片
import numpy as np
import struct
import matplotlib.pyplot as pyplot
import Image

def unzip(filename):
    binfile = open(filename, 'rb')
    buf = binfile.read()

    index = 0
    magic, numImages, numRows, numColumns = struct.unpack_from('>IIII', buf, index)
    index += struct.calcsize('>IIII')

    for image in range(0, numImages):
        im = struct.unpack_from('>784B', buf, index)
        index += struct.calcsize('>784B')

        im = np.array(im, dtype='uint8')
        im = im.reshape(28, 28)

        im = Image.fromarray(im)
        im.save('mnist_test/train_%s.bmp' % image, 'bmp')

unzip('./caffe/data/mnist/t10k-images-idx3-ubyte')


 1753
1753

 被折叠的 条评论
为什么被折叠?
被折叠的 条评论
为什么被折叠?
 到【灌水乐园】发言


