Spring boot3 中使用Spring WebFlux 响应式请求ChatGPT 接收text/event-stream流的数据

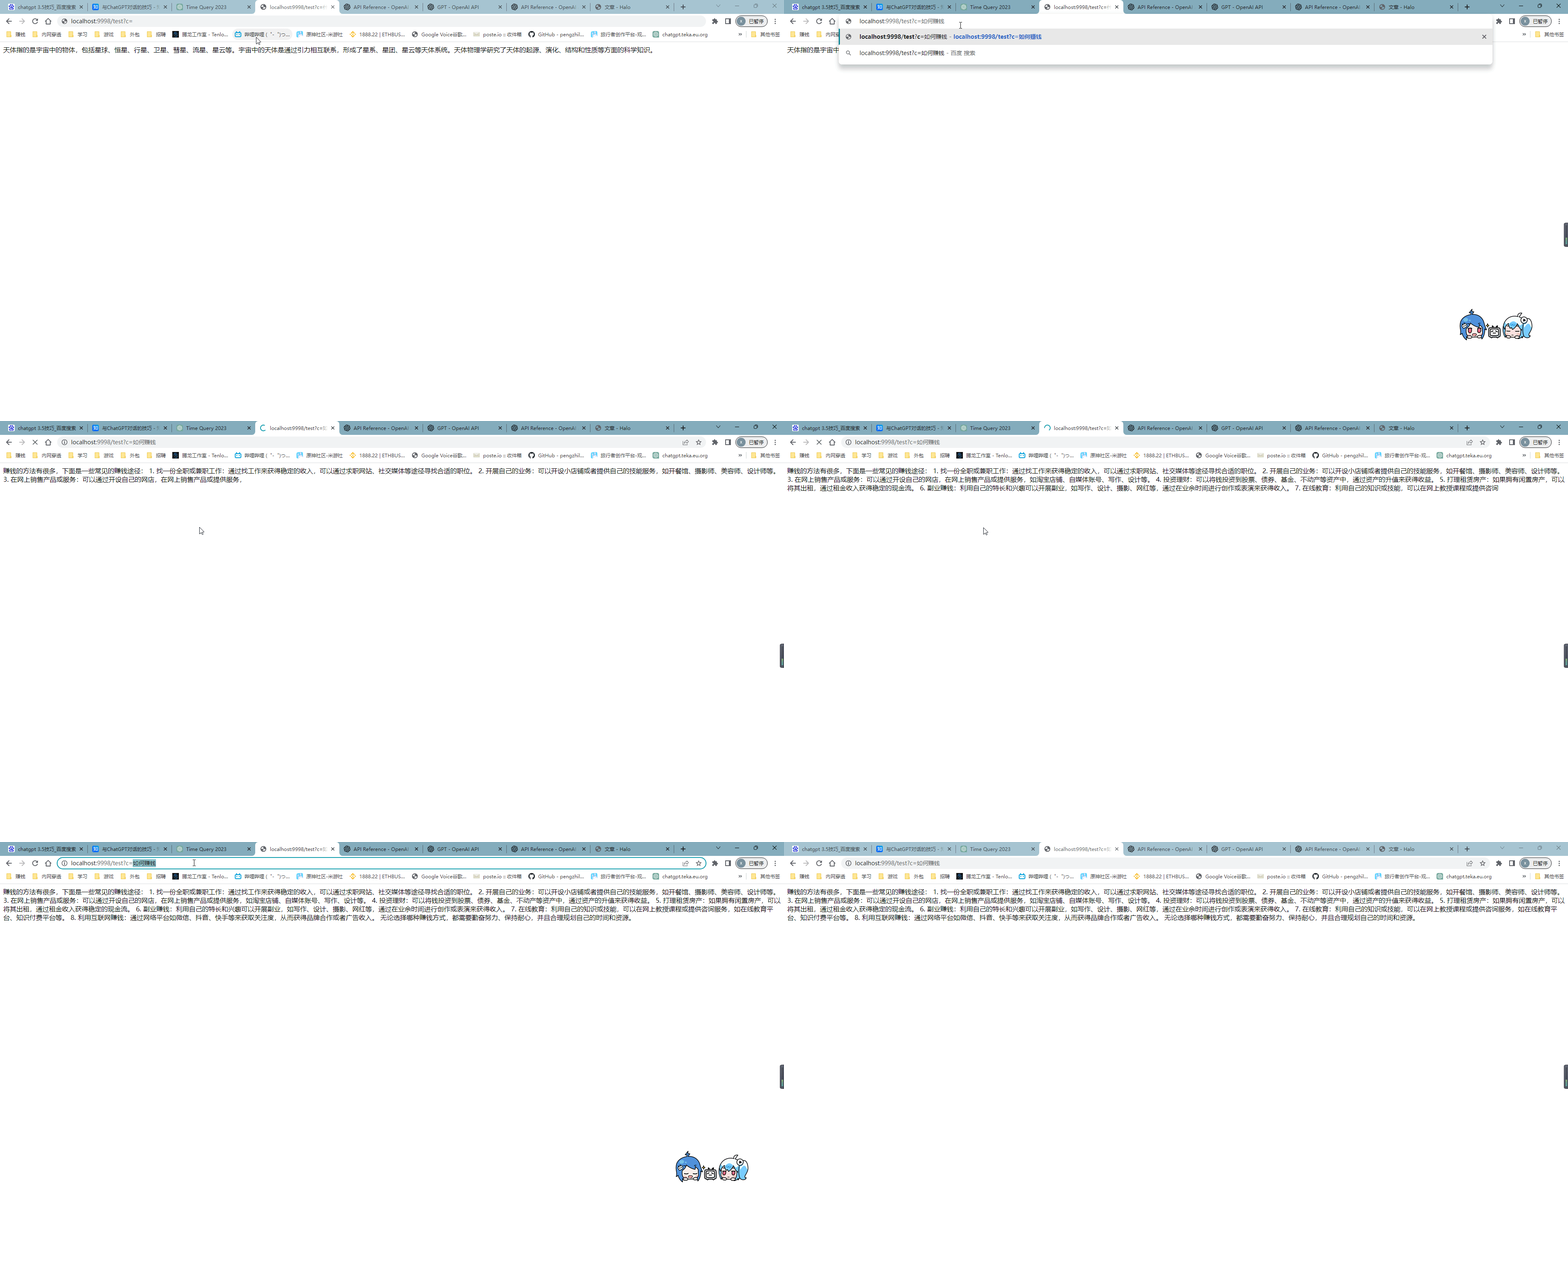
效果

alt

什么是Spring WebFlux?

Spring WebFlux是一种用于构建响应式Web应用程序的模块。它是Spring 5及更高版本引入的新特性,旨在支持响应式编程范式。

响应式编程是一种编程范式,强调通过异步数据流来构建应用程序。与传统的基于线程的同步编程不同,响应式编程侧重于通过异步事件流来处理数据。这种编程风格在处理高并发和大规模数据时特别有用,因为它可以更好地利用资源,并具有更好的伸缩性。

如果使用spring-boot-starter-webflux模块,那么默认的服务器是Netty,使用的是异步非阻塞,可以使用少量资源来获取更高的性能

性能测试:https://zhuanlan.zhihu.com/p/557216826

官方描述:https://spring.io/reactive

什么是ChatGPT?

ChatGPT是OpenAI开发的一种人工智能语言模型,基于GPT)架构。GPT代表"Generative Pre-trained Transformer"(生成式预训练转换器),这意味着它是一个通过预先训练大量数据而得到的模型,可以用于自然语言处理任务。

ChatGPT旨在通过与用户进行对话来提供有意义的回复。它可以理解和生成人类语言,以自然的方式回应用户的提问和输入。这使得ChatGPT成为一个非常强大的工具,可用于各种任务,包括回答问题、提供解释、作为语言翻译工具、自动化写作、编程辅助等。

由于GPT-3.5的先进技术,ChatGPT能够在语义和语法上更好地理解上下文,并生成更加准确、流畅的回答。然而,需要注意的是,它的回答仍然是基于其训练数据,而非真正理解问题。因此,在使用ChatGPT时,用户应该谨慎对待其提供的信息,并将其作为一个辅助工具,而非完全依赖于它的答案。

接口:https://platform.openai.com/docs/api-reference/chat

使用Spring WebFlux+WebClient 响应式请求openai 接口

导入依赖

        <dependency>
            <groupId>org.springframework.boot</groupId>
            <artifactId>spring-boot-starter-webflux</artifactId>
        </dependency>

        <dependency>
            <groupId>com.alibaba</groupId>
            <artifactId>fastjson</artifactId>
            <version>2.0.32</version>
        </dependency>

        <dependency>
            <groupId>org.projectlombok</groupId>
            <artifactId>lombok</artifactId>
            <optional>true</optional>
        </dependency>

ChatGPTController

@Slf4j
@RestController
public class ChatGPTController {

    @GetMapping("/test")
    public Flux<String> stringFlux(String c) {
        return webClient().post()
                .accept(MediaType.TEXT_EVENT_STREAM) //接收text/event-stream流的数据  
                .body(BodyInserters.fromValue(jsonObject(c))) //参数
                .retrieve() 
                .bodyToFlux(String.class) //输出格式
                .map(s -> {  
                    if (!Objects.equals(s, "[DONE]")) {
                        JSONObject jo = JSON.parseObject(s).getJSONArray("choices").getJSONObject(0).getJSONObject("delta");
                        String content = jo.getString("content");
                        if(content != null){
                            return content;
                        }
                    }
                    return "";
                })
                .onErrorResume(WebClientResponseException.class, ex -> Flux.just(ex.getResponseBodyAsString())) //请求失败
                .doFinally(signalType -> log.info("完成")); //请求完成后
    }

    //参数
    private JSONObject jsonObject(String content){
        JSONObject jsonObject = new JSONObject();
        JSONObject userMessage = new JSONObject();
        userMessage.put("role","user");
        userMessage.put("content",content);
        JSONArray jsonArray = new JSONArray();
        jsonArray.add(userMessage);
        jsonObject.put("model", "gpt-3.5-turbo-16k-0613");  //速度快,价格高
        jsonObject.put("messages", jsonArray);
        jsonObject.put("stream", true);
        return jsonObject;
    }
    
    
    private WebClient webClient(){
        return  WebClient.builder()
                .clientConnector(new ReactorClientHttpConnector(
                        HttpClient.create().proxy(proxy -> proxy.type(ProxyProvider.Proxy.HTTP).host("127.0.0.1").port(1080)) //代理
                ))
                .defaultHeader("Content-Type", MediaType.APPLICATION_JSON_VALUE)
                .defaultHeader("Authorization", "Bearer token") //令牌
                .baseUrl("https://api.openai.com/v1/chat/completions") //请求地址
                .build();
    }

}

  • 5
    点赞
  • 13
    收藏
    觉得还不错? 一键收藏
  • 1
    评论
Spring Boot实现事件驱动的远程调用可以使用Spring Cloud Stream和Spring Cloud Function来实现。以下是一个示例代码,演示如何在Spring Boot应用程序实现事件驱动的远程调用: 首先,确保你的项目引入了Spring Cloud Stream和Spring Cloud Function的依赖。 1. 创建一个发送事件的服务: ```java import org.springframework.beans.factory.annotation.Autowired; import org.springframework.boot.SpringApplication; import org.springframework.boot.autoconfigure.SpringBootApplication; import org.springframework.cloud.stream.annotation.EnableBinding; import org.springframework.cloud.stream.messaging.Source; import org.springframework.messaging.support.MessageBuilder; @SpringBootApplication @EnableBinding(Source.class) public class EventSenderApplication { @Autowired private Source source; public static void main(String[] args) { SpringApplication.run(EventSenderApplication.class, args); } public void sendEvent(String message) { source.output().send(MessageBuilder.withPayload(message).build()); } } ``` 在上述代码,我们创建了一个发送事件的服务。通过使用 `@EnableBinding` 注解绑定到 `Source` 接口,我们可以使用它来发送消息。`sendEvent` 方法接受一个消息作为参数,并使用 `MessageBuilder` 构建一个消息对象,然后通过 `source.output().send()` 方法发送消息。 2. 创建一个接收事件的服务: ```java import org.springframework.boot.SpringApplication; import org.springframework.boot.autoconfigure.SpringBootApplication; import org.springframework.cloud.stream.annotation.EnableBinding; import org.springframework.cloud.stream.annotation.StreamListener; import org.springframework.cloud.stream.messaging.Sink; @SpringBootApplication @EnableBinding(Sink.class) public class EventReceiverApplication { public static void main(String[] args) { SpringApplication.run(EventReceiverApplication.class, args); } @StreamListener(Sink.INPUT) public void processEvent(String message) { System.out.println("Received event: " + message); // 在这里处理收到的事件 } } ``` 在上述代码,我们创建了一个接收事件的服务。通过使用 `@EnableBinding` 注解绑定到 `Sink` 接口,我们可以使用 `@StreamListener` 注解来监听消息。`processEvent` 方法将收到的消息作为参数,并在控制台打印出来,你可以在这里处理收到的事件。 3. 使用远程调用发送事件: ```java import org.springframework.beans.factory.annotation.Autowired; import org.springframework.web.bind.annotation.GetMapping; import org.springframework.web.bind.annotation.PathVariable; import org.springframework.web.bind.annotation.RestController; @RestController public class EventController { @Autowired private EventSenderApplication eventSender; @GetMapping("/send/{message}") public String sendEvent(@PathVariable String message) { eventSender.sendEvent(message); return "Event sent: " + message; } } ``` 在上述代码,我们创建了一个REST控制器,其`sendEvent` 方法使用 `EventSenderApplication` 来发送事件。通过调用 `eventSender.sendEvent(message)` 方法来发送消息。 在你的应用程序,你可以通过访问 `http://localhost:8080/send/{message}` 的REST端点来发送事件。事件将被发送到绑定的消息通道,并由接收事件的服务进行处理。 请注意,以上代码只是一个示例,你可以根据实际需求进行扩展和修改。确保在应用程序正确配置和引入了Spring Cloud Stream和Spring Cloud Function的依赖。
评论 1
添加红包

请填写红包祝福语或标题

红包个数最小为10个

红包金额最低5元

当前余额3.43前往充值 >
需支付:10.00
成就一亿技术人!
领取后你会自动成为博主和红包主的粉丝 规则
hope_wisdom
发出的红包
实付
使用余额支付
点击重新获取
扫码支付
钱包余额 0

抵扣说明:

1.余额是钱包充值的虚拟货币,按照1:1的比例进行支付金额的抵扣。
2.余额无法直接购买下载,可以购买VIP、付费专栏及课程。

余额充值