


一、这次聊一聊什么是View和ViewGroup
概念
顾名思义:View就是 视图、视域,ViewGroup就是视图组、视域组。
1、在Android APP中,用户界面元素都是由View和ViewGroup的对象构成的。2、View对象构成了展现给用户缤纷多彩的视图。
3、ViewGroup是一个“容器”里面用于存放View(和ViewGroup——没错ViewGroup里面可以包含ViewGroup)!
4、在View和ViewGroup中,Android提供了一些常用的输入控件(比如按钮和文本域)和各种各样的布局模式(比如线性或相对布局);这些我们在后续章节都会聊到。
1、View
<RelativeLayout xmlns:android="http://schemas.android.com/apk/res/android"
xmlns:tools="http://schemas.android.com/tools"
android:layout_width="match_parent"
android:layout_height="match_parent"
android:paddingBottom="@dimen/activity_vertical_margin"
android:paddingLeft="@dimen/activity_horizontal_margin"
android:paddingRight="@dimen/activity_horizontal_margin"
android:paddingTop="@dimen/activity_vertical_margin"
tools:context="com.example.view.MainActivity" >
<TextView
android:id="@+id/textView1"
android:layout_width="wrap_content"
android:layout_height="wrap_content"
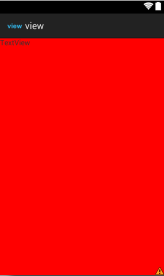
android:background="#F00" //给文本加了底色便于表述(这个底色为红色:如图)
android:text="TextView" />
</RelativeLayout>

1、我们看到现在TextView是红色的底色,之所以这么小是因为:
android:layout_width=“wrap_content”
android:layout_height=“wrap_content”
这两条属性配置中“wrap_content”导致的。
wrap_content:适应文本的大小,跟内容的多少有关系。

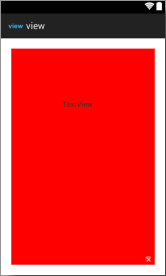
2、我们把属性换成
android:layout_width=“match_parent”
android:layout_height=“match_parent”
在查看效果:

match_parent:宽度或者高度 布满整个屏幕。
‘当我们再去掉一些代码片段副发现边框也没有了,如图所示’
<RelativeLayout xmlns:android="http://schemas.android.com/apk/res/android"
    xmlns:tools="http://schemas.android.com/tools"
    android:layout_width="match_parent"
    android:layout_height="match_parent"
     >

    <TextView
        android:id="@+id/textView1"
        android:layout_width="match_parent"
        android:layout_height="match_parent"
        android:background="#F00"
        android:text="TextView" />
</RelativeLayout>
由此我们又引出了两个属性:
layout_margin:外边距
padding:内边距
们将配置代码修改如下:
<RelativeLayout xmlns:android="http://schemas.android.com/apk/res/android"
    xmlns:tools="http://schemas.android.com/tools"
    android:layout_width="match_parent"
    android:layout_height="match_parent"
     >

    <TextView
        android:id="@+id/textView1"
        android:layout_width="match_parent"
        android:layout_height="match_parent"

        android:layout_margin="20dp"//外边距
        android:padding="100dp"//内边距

        android:background="#F00"
        android:text="TextView" />
</RelativeLayout>

2、ViewGroup
记得在很久之前刚刚接触Android的时候,看了很多关于View和ViewGroup的贴子,误以为只要把有关View的XML代码放到ViewGroup的代码下就行了,可是事实并非如此。
像下面的一段代码的截取一定是不正确的:
	......
 <ViewGroup
        android:layout_width="300dp"
        android:layout_height="300dp"
        android:background="F00" >
        <View
        android:layout_width="30dp"
        android:layout_height="30dp"
        android:background="FF0" />

    </ViewGroup>
    ......
在刚开始我们先使用ViewGroup的手下的几员大将来作为View的容器——
也就是Android中的几大布局方法:
LinearLayout线性布局,
RelativeLayout 相对布局,
AbsoluteLayout 绝对不局,
FrameLayout 帧布局,
TableLayout 表格布局。
总结:
本文是布局讲解得开篇,由于笔者并不是全职Android应用开发,平时工作多侧重于Android系统底层,但是需要为app开发人员提供api接口测试用例,顾最近一段时间闲暇,整理Android应用开发,同时梳理自己的在应用层开发的框架体系,有不足之处多情大家指点。


 1188
1188


 被折叠的 条评论
为什么被折叠?
被折叠的 条评论
为什么被折叠?
 到【灌水乐园】发言


