


(私有容器服务器) 192.168.192.114 ,安装 registry 、docker-registry-web
(测试) 192.168.192.112
安装registry
安装docker
首先在114上安装docker
[root@testnode04 ~]# vim /etc/docker/daemon.json
{
  "registry-mirrors": ["https://cxuueihg.mirror.aliyuncs.com"]
}
[root@testnode04 ~]# sudo systemctl daemon-reload
[root@testnode04 ~]# systemctl start docker
运行registry :
[root@testnode04 ~]# docker run -itd -v /data/registry:/var/lib/registry -p 5000:5000 --restart=always --name registry registry:latest
参数说明
-itd:在容器中打开一个伪终端进行交互操作,并在后台运行;
-v:把宿主机的/data/registry目录绑定 到 容器/var/lib/registry目录(这个目录是registry容器中存放镜像文件的目录),来实现数据的持久化;
-p:映射端口;访问宿主机的5000端口就访问到registry容器的服务了;
--restart=always:这是重启的策略,假如这个容器异常退出会自动重启容器;
--name registry:创建容器命名为registry,你可以随便命名;
registry:latest:这个是刚才pull下来的镜像;
-----------------------------------------------------
测试

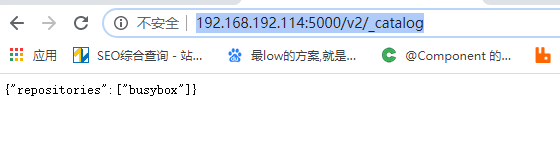
或
http://192.168.192.114:5000/v2/_catalog
安装 docker-registry-web
一、为什么要增加webUI
1、增加仓库的可读性
2、方便所有使用仓库的人查看
二、用哪个WEBUI来做
三、具体步骤
1、拉取镜像
docker pull hyper/docker-registry-web2、启动webui同时连接仓库
docker run -d --restart=always -p 5001:8080 --name registry-web --link registry -e REGISTRY_URL=http://192.168.192.114:5000/v2 -e REGISTRY_NAME=192.168.192.114:5000 hyper/docker-registry-web这里的--link 是上面的容器名registry
docker run --link的作用
docker run --link可以用来链接2个容器,使得源容器(被链接的容器)和接收容器(主动去链接的容器)之间可以互相通信,并且接收容器可以获取源容器的一些数据,如源容器的环境变量。
--link的格式:
--link <name or id>:alias
四、访问结果

如果命令是:
docker run -d --restart=always -p 5001:8080 --name registry-web --link registry -e REGISTRY_URL=http://192.168.192.114:5000/v2 -e REGISTRY_NAME=localhost:5000 hyper/docker-registry-web结果就是IP,否则是localhost
http://192.168.192.114:5001

4、测试镜像仓库(测试端操作)
4.1 修改下镜像源并重启docker服务
[root@node ~]# vim /etc/docker/daemon.json
{
  "registry-mirrors": [ "https://registry.docker-cn.com"]
}

[root@node ~]# systemctl restart docker
自己的阿里云更快:
{
  "registry-mirrors": ["https://cxuueihg.mirror.aliyuncs.com"]
}
4.1 下载busybox镜像(测试用)
[root@node ~]# docker pull busybox
[root@node ~]# docker images
REPOSITORY          TAG                 IMAGE ID            CREATED             SIZE
busybox             latest              f6e427c148a7        36 hours ago        1.15MB
4.2 为镜像打标签
这里可以理解为重命名,貌似这名太长了。192.168.192.114:5000/busybox:v1
[root@node ~]# docker tag busybox:latest 192.168.192.114:5000/busybox:v1

格式说明:Usage: docker tag SOURCE_IMAGE[:TAG] TARGET_IMAGE[:TAG]
busybox:lastest 这是源镜像,也是刚才pull下来的镜像文件;
192.168.192.114:5000/busybox:v1:这是目标镜像,也是registry私有镜像服务器的IP地址和端口;
查看一下打好的tag:
docker:用registry快速搭建私有镜像仓库
4.3 上传到镜像服务器
[root@testnode02 config]# docker push 192.168.192.114:5000/busybox:v1
The push refers to repository [192.168.192.114:5000/busybox]
Get https://192.168.192.114:5000/v2/: http: server gave HTTP response to HTTPS client
注意了,这是报错了,需要https的方法才能上传,我们可以修改下daemon.json来解决:
[root@node ~]# vim /etc/docker/daemon.json
{
  "registry-mirrors": [ "https://registry.docker-cn.com"],
  "insecure-registries": [ "192.168.192.114:5000"]
}
或,用阿里云镜像。
{
  "registry-mirrors": ["https://cxuueihg.mirror.aliyuncs.com"],
  "insecure-registries": [ "192.168.192.114:5000"]
}
这里一定要注意格式,上面的,不要漏了逗号
添加私有镜像服务器的地址,注意书写格式为json,有严格的书写要求,然后重启docker服务:
[root@node ~]# systemctl restart docker
在次上传可以看到没问题 了:
[root@node ~]# docker push 192.168.192.114:5000/busybox:v1
The push refers to repository [172.18.18.90:5000/busybox]
c5183829c43c: Pushed
v1: digest: sha256:c7b0a24019b0e6eda714ec0fa137ad42bc44a754d9cea17d14fba3a80ccc1ee4 size: 527
4.4 测试下载镜像
上传测试没问题了,我们接下来测试一下从registry服务器上下载刚才上传的busybox镜像,先删除node主机上的镜像:
[root@node ~]# docker rmi -f $(docker images -aq)
Untagged: 172.18.18.90:5000/busybox:v1
Untagged: 172.18.18.90:5000/busybox@sha256:c7b0a24019b0e6eda714ec0fa137ad42bc44a754d9cea17d14fba3a80ccc1ee4
Untagged: busybox:latest
Untagged: busybox@sha256:2107a35b58593c58ec5f4e8f2c4a70d195321078aebfadfbfb223a2ff4a4ed21
Deleted: sha256:f6e427c148a766d2d6c117d67359a0aa7d133b5bc05830a7ff6e8b64ff6b1d1d
Deleted: sha256:c5183829c43c4698634093dc38f9bee26d1b931dedeba71dbee984f42fe1270d
查看一下node主机上的镜像全部删除了:
[root@node ~]# docker images
REPOSITORY          TAG                 IMAGE ID            CREATED             SIZE
这是删除所有。。
----------------------------------------------------------------------------------------------------------------------------------------------------------
因为这两个busybox有关系,不能按同一个 容器ID删除。只删除busybox的话,
要先以名字删除源镜像,
[root@testnode02 config]# docker rmi busybox
再以容器ID删除打标记的busybox
[root@testnode02 config]# docker rmi be5888e67be6

然后,从registry服务器上下载busybox镜像:
[root@testnode02 config]# docker pull 192.168.192.114:5000/busybox:v1
v1: Pulling from busybox
e2334dd9fee4: Pull complete
Digest: sha256:a2490cec4484ee6c1068ba3a05f89934010c85242f736280b35343483b2264b6
Status: Downloaded newer image for 192.168.192.114:5000/busybox:v1
192.168.192.114:5000/busybox:v1
[root@testnode02 config]# docker images
REPOSITORY                         TAG                 IMAGE ID            CREATED             SIZE
test/config                        latest              202a0f54ef9a        2 hours ago         197MB
hub.c.163.com/15112673242/config   latest              202a0f54ef9a        2 hours ago         197MB
hub.c.163.com/l690452074/config    latest              202a0f54ef9a        2 hours ago         197MB
test/eureka                        latest              cc7494b99744        5 hours ago         186MB
192.168.192.114:5000/busybox       v1                  be5888e67be6        4 days ago          1.22MB
mongo                              latest              97a9a3e85158        4 weeks ago         386MB
mysql                              latest              9b51d9275906        6 weeks ago         547MB
rancher/server                     stable              4caa4fca1acd        6 months ago        1.08GB
hub.c.163.com/library/java         8-alpine            d991edd81416        3 years ago         145MB
列出所有镜像:
[root@testnode02 config]# curl  http://192.168.192.114:5000/v2/_catalog
{"repositories":["busybox"]}

列出busybox镜像有哪些tag:
[root@testnode02 config]# curl  http://192.168.192.114:5000/v2/busybox/tags/list
{"name":"busybox","tags":["v1"]}
参考:
https://www.cnblogs.com/pcct/p/12127832.html
http://www.mamicode.com/info-detail-2517813.html
http://www.mamicode.com/info-detail-2883832.html
https://blog.51cto.com/joeyang/2116977


 4037
4037


 被折叠的 条评论
为什么被折叠?
被折叠的 条评论
为什么被折叠?
 到【灌水乐园】发言


