


前言
资源分离顾名思义就是把资源(通常是图片)从主工程里抽出来到单独的一个工程或者模块,主工程通过网络或者sd卡等获取到资源apk包,然后动态加载资源apk包里的资源。它的优点有:1、减少主apk包的文件大小;2、动态换肤;缺点:1、资源无法预览;2、额外的性能消耗
原理
接手AppCompatActivity对View的创建过程,解析自定义属性动态加载资源apk包对应的资源,最后设置到View对应的属性上。
查看源码可知,AppCompatActivity.setContentView()加载View时,可以通过实现LayoutInflater.Factory2接口来接手View的创建过程,给AppCompatActivity设置LayoutInflater.Factory2的时机在系统调用AppCompatActivity.onCreate(),下面是调用流程:

项目结构
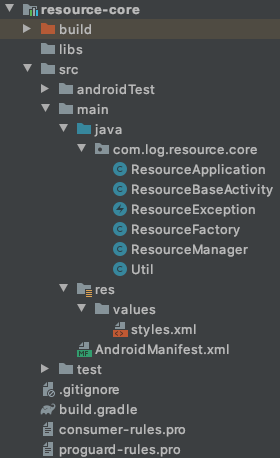
负责动态加载并解析外部资源apk的Android Library模块resource-core:
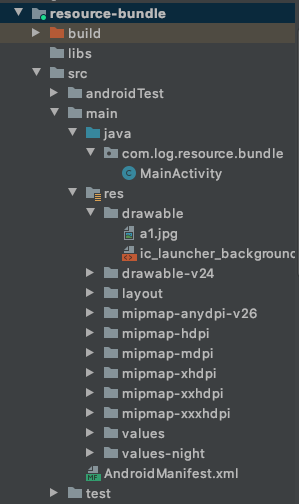
存放需要分离的资源模块resource-bundle:
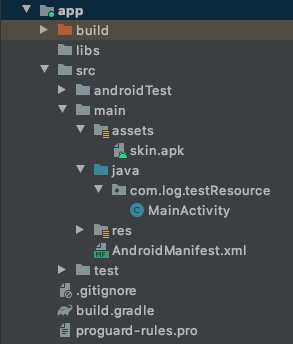
测试用主工程:
具体工程代码
resource-core模块:
package com.log.resource.core;

import android.content.Context;
import android.content.pm.PackageInfo;
import android.content.pm.PackageManager;
import android.content.res.AssetManager;
import android.content.res.Resources;
import android.graphics.drawable.Drawable;

import java.lang.reflect.Method;

/**
 * 加载外部资源包资源的管理类
 */
public class ResourceManager {

    private Context mContext;
    private Resources mResources;
    private String mPackageName;
    public static volatile ResourceManager mInstance;

    private ResourceManager() {
    }

    public static ResourceManager getInstance() {
        if (mInstance == null) {
            synchronized (ResourceManager.class) {
                if (mInstance == null) {
                    mInstance = new ResourceManager();
                }
            }
        }
        return mInstance;
    }

    public void loadResource(Context context, String path) {
        // 这里上下文实例持有的是Application引用,避免传入来的是Activity,造成内存泄漏
        mContext = context.getApplicationContext();
        try {
            // 获取资源包的包名
            PackageManager packageManager = mContext.getPackageManager();
            PackageInfo packageArchiveInfo = packageManager.getPackageArchiveInfo(path, PackageManager.GET_ACTIVITIES);
            mPackageName = packageArchiveInfo.packageName;

            AssetManager assetManager = AssetManager.class.newInstance();
            // 把path指定apk文件作为资源加入到AssetManager里
            Method addAssetPath = assetManager.getClass().getDeclaredMethod("addAssetPath", String.class);
            addAssetPath.invoke(assetManager, path);
            // 初始化Resources,提供后续查找指定path的apk文件里的资源。
            // 因为AssetManager.addAssetPath(path)通过反射已经把apk的资源信息添加到了AssetManager里
            mResources = new Resources(assetManager, mContext.getResources().getDisplayMetrics(), mContext.getResources().getConfiguration());
        } catch (Exception e) {
            e.printStackTrace();
        }
    }

    /**
     * 根据资源名称和类型获取对应的资源id
     *
     * @param resName
     * @param defType
     * @return
     */
    public int getResourceId(String resName, String defType) {
        if (mResources == null) {
            return 0;
        }

        // 根据资源类型和资源名,去资源包里查找对应资源名字的资源id
        return mResources.getIdentifier(resName, defType, mPackageName);
    }

    /**
     * 获取对应资源的Drawable实例
     *
     * @param resName
     * @param defType
     * @return
     */
    public Drawable getDrawable(String resName, String defType) {
        int id = getResourceId(resName, defType);
        if (id == 0) {
            return null;
        }
        return mResources.getDrawable(id);
    }

    /**
     * 获取指定的颜色值
     *
     * @param resName 颜色资源名
     * @param defType
     * @return
     */
    public int getColor(String resName, String defType) {
        int id = getResourceId(resName, defType);
        if (id == 0) {
            return 0;
        }
        return mResources.getColor(id);
    }

}
package com.log.resource.core;

import android.os.Bundle;

import androidx.annotation.Nullable;
import androidx.appcompat.app.AppCompatActivity;

/**
 * 如果要成功加载外部资源包资源,需要继承ResourceBaseActivity
 */
public class ResourceBaseActivity extends AppCompatActivity {

    @Override
    protected void onCreate(@Nullable Bundle savedInstanceState) {
        // 必须在调用super.onCreate()方法前设置Factory2实例
        // 如果设置了LayoutInflater.Factory2实例,在调用AppCompatActivity.setContentView()时,
        // 系统会调用LayoutInflater.Factory2.onCreateView()来创建View,
        // 分离的资源就是在这个自定义的LayoutInflater.Factory2实例里实现动态加载并设置到View对应的属性上。
        getLayoutInflater().setFactory2(new ResourceFactory());
        super.onCreate(savedInstanceState);
    }

}
package com.log.resource.core;

import android.app.Application;

import java.io.IOException;

/**
 * 初始化加载外部资源管理类的入口
 */
public class ResourceApplication extends Application {

    @Override
    public void onCreate() {
        super.onCreate();
        initResourceManager();
    }

    private void initResourceManager() {
        // TODO 这里为了方便测试就写死外部分离资源包路径
        String resourceFileName = "skin.apk";
        try {
            String resourceFilepath = Util.download(this, getAssets().open(resourceFileName), resourceFileName);
            ResourceManager.getInstance().loadResource(this, resourceFilepath);
        } catch (IOException e) {
            e.printStackTrace();
        }
    }

}
package com.log.resource.core;

public class ResourceException extends RuntimeException {

    public ResourceException(String msg) {
        super(msg);
    }

}
package com.log.resource.core;

import android.content.Context;

import java.io.File;
import java.io.FileOutputStream;
import java.io.IOException;
import java.io.InputStream;

public class Util {

    /**
     * 模拟从服务器下载资源apk包
     *
     * @param context
     * @param is
     */
    public static String download(Context context, InputStream is, String fileName) {
        File file = context.getDir("resources", Context.MODE_PRIVATE);
        String resourceFilePath = file.getAbsolutePath() + "/" + fileName;
        FileOutputStream fos = null;
        try {
            File resourceFile = new File(resourceFilePath);
            if (resourceFile.exists()) {
                resourceFile.delete();
            }
            fos = new FileOutputStream(resourceFile);
            byte[] buf = new byte[2048];
            int len;
            while ((len = is.read(buf)) != -1) {
                fos.write(buf, 0, len);
            }
        } catch (Exception e) {
            e.printStackTrace();
        } finally {
            try {
                if (fos != null) {
                    fos.close();
                }
                if (is != null) {
                    is.close();
                }
            } catch (IOException e) {
                e.printStackTrace();
            }
        }
        return resourceFilePath;
    }

}
package com.log.resource.core;

import android.content.Context;
import android.graphics.drawable.Drawable;
import android.util.AttributeSet;
import android.view.LayoutInflater;
import android.view.View;
import android.widget.ImageView;
import android.widget.TextView;

import androidx.annotation.NonNull;
import androidx.annotation.Nullable;
import androidx.collection.SimpleArrayMap;

import java.lang.reflect.Constructor;

/**
 * 拦截系统View实例化,加载外部分离资源
 */
public class ResourceFactory implements LayoutInflater.Factory2 {

    /**
     * 通过反射构造方法的参数列表类型
     */
    private static final Class<?>[] sConstructorSignature = new Class<?>[]{
            Context.class, AttributeSet.class};

    /**
     * 缓存之前已经构造过的View的构造方法
     */
    private static final SimpleArrayMap<String, Constructor<? extends View>> sConstructorMap =
            new SimpleArrayMap<>();

    /**
     * 系统View的包名前缀
     */
    private static final String[] sClassPrefixList = {
            "android.widget.",
            "android.view.",
            "android.webkit."
    };

    @Nullable
    @Override
    public View onCreateView(@NonNull String name, @NonNull Context context, @NonNull AttributeSet attrs) {
        return null;
    }

    @Nullable
    @Override
    public View onCreateView(@Nullable View parent, @NonNull String name, @NonNull Context context, @NonNull AttributeSet attrs) {
        View view = null;
        // 如果没有包名,那么加上系统View的包名前缀遍历,看是否有能够找到的类,如果有则初始化并返回
        if (-1 == name.indexOf(".")) {
            for (int i = 0; i < sClassPrefixList.length; i++) {
                view = createViewByPrefix(context, name, sClassPrefixList[i], attrs);
                if (view != null) {
                    break;
                }
            }
        } else {
            view = createViewByPrefix(context, name, null, attrs);
        }

        // 设置自定义属性
        if (view != null) {
            setViewResource(view, attrs);
        }

        return view;
    }

    /**
     *
     * @param context
     * @param name
     * @param prefix
     * @param attrs
     * @return
     */
    private View createViewByPrefix(Context context, String name, String prefix, AttributeSet attrs) {
        Constructor<? extends View> constructor = sConstructorMap.get(name);
        try {
            // 如果缓存里没有,那么就根据具体View的类型(prefix? + name)找到对应的构造方法
            if (constructor == null) {
                Class<? extends View> clazz = Class.forName(
                        prefix != null ? (prefix + name) : name,
                        false,
                        context.getClass().getClassLoader()).asSubclass(View.class);
                constructor = clazz.getConstructor(sConstructorSignature);
                sConstructorMap.put(name, constructor);
            }
            // 设置构造方法访问权限
            constructor.setAccessible(true);
            // 通过反射实例化对应的View
            return constructor.newInstance(context, attrs);
        } catch (Exception e) {
            return null;
        }
    }

    /**
     * 设置自定义属性
     *
     * @param view 需要设置属性的view
     * @param attrs 具体的View属性信息
     */
    private void setViewResource(View view, AttributeSet attrs) {
        // 遍历这个属性的集合,找到自定义外部资源属性
        int attributeCount = attrs.getAttributeCount();
        for (int i = 0; i < attributeCount; i++) {
            String attributeName = attrs.getAttributeName(i);

            if (!attributeName.equals("resource")) {
                continue;
            }

            /** 获取自定义属性值。
             * 规则:[需要设置的view的属性名]/[资源类型]/[资源名]
             * 例如:background/drawable/a1,表示需要设置View的background属性,资源类型是drawable,资源名是a1
             * 例如:textColor/color/purePink,表示需要设置View的textColor属性,资源类型是color,资源名是purePink
             */
            String attributeValue = attrs.getAttributeValue(i);
            String[] split = attributeValue.split("/");
            if (split == null || split.length != 3) {
                continue;
            }

            String viewAttributeName = split[0];
            String resourceType = split[1];
            String resourceName = split[2];

            if (viewAttributeName.equals("background")) {
                Drawable drawable = ResourceManager.getInstance().getDrawable(resourceName, resourceType);
                if (drawable != null) {
                    view.setBackground(drawable);
                } else {
                    throw new ResourceException("The resource: " + attributeValue + " not found");
                }
            } else if (viewAttributeName.equals("src")) {
                if (view instanceof ImageView) {
                    Drawable drawable = ResourceManager.getInstance().getDrawable(resourceName, resourceType);
                    if (drawable != null) {
                        ((ImageView) view).setImageDrawable(drawable);
                    } else {
                        throw new ResourceException("The resource: " + attributeValue + " not found");
                    }
                } else {
                    throw new ResourceException("The resource: " + attributeValue + " not found");
                }
            } else if (viewAttributeName.equals("textColor")) {
                int color = ResourceManager.getInstance().getColor(resourceName, resourceType);
                ((TextView) view).setTextColor(color);
            }

        }
    }

}
resource-bundle模块:
只在drawable目录下存放了a1.jpg文件,以及values/colors.xml文件里声明了一个<color name="purple_500">#FF6200EE</color>颜色资源。
把这个模块打包成apk之后(这里偷懒直接运行,然后在build文件夹下拿到apk文件)。为了测试简单(懒),这里就直接把apk包丢到测试主工程的assets目录下,主工程运行时把assets下的apk文件拷贝到手机上,这样做主要是为了模拟从服务器上下载apk的流程。
测试主工程模块:
build.gradle依赖:
implementation project(path: ':resource-core')AndroidManifest.xml:
<?xml version="1.0" encoding="utf-8"?>
<manifest xmlns:android="http://schemas.android.com/apk/res/android"
    package="com.log.testResource">

    <!--  为了简单测试效果,在ResourceApplication创建时加载并初始化资源apk包信息  -->
    <application
        android:name="com.log.resource.core.ResourceApplication"


        android:allowBackup="true"
        android:icon="@mipmap/ic_launcher"
        android:label="@string/app_name"
        android:roundIcon="@mipmap/ic_launcher_round"
        android:supportsRtl="true"
        android:theme="@style/Theme.Testresource">
        <activity
            android:name=".MainActivity"
            android:label="@string/app_name"
            android:theme="@style/Theme.Testresource.NoActionBar">
            <intent-filter>
                <action android:name="android.intent.action.MAIN" />

                <category android:name="android.intent.category.LAUNCHER" />
            </intent-filter>
        </activity>
    </application>

</manifest>
启动入口MainActivity:
package com.log.testResource;

import android.os.Bundle;

import com.log.resource.core.ResourceBaseActivity;

public class MainActivity extends ResourceBaseActivity {

    @Override
    protected void onCreate(Bundle savedInstanceState) {
        super.onCreate(savedInstanceState);
        setContentView(R.layout.activity_main);
    }

}
activity_main.xml
<?xml version="1.0" encoding="utf-8"?>
<LinearLayout xmlns:android="http://schemas.android.com/apk/res/android"
    xmlns:app="http://schemas.android.com/apk/res-auto"
    xmlns:tools="http://schemas.android.com/tools"
    android:layout_width="match_parent"
    android:layout_height="match_parent"
    android:orientation="vertical"
    tools:context=".MainActivity">

    <TextView
        android:layout_width="match_parent"
        android:layout_height="wrap_content"
        android:text="来自另外一个apk包的颜色资源"
        android:textSize="18sp"
        android:layout_gravity="center_horizontal"
        android:gravity="center"
        android:layout_margin="15dp"
        app:resource="textColor/color/purple_200"/>

    <ImageView
        android:layout_width="match_parent"
        android:layout_height="wrap_content"
        app:resource="src/drawable/a1"/>


</LinearLayout>
运行主工程效果图:


 2170
2170


 被折叠的 条评论
为什么被折叠?
被折叠的 条评论
为什么被折叠?
 到【灌水乐园】发言


