


一、Pinia快速入门
二、创建项目并精细化配置
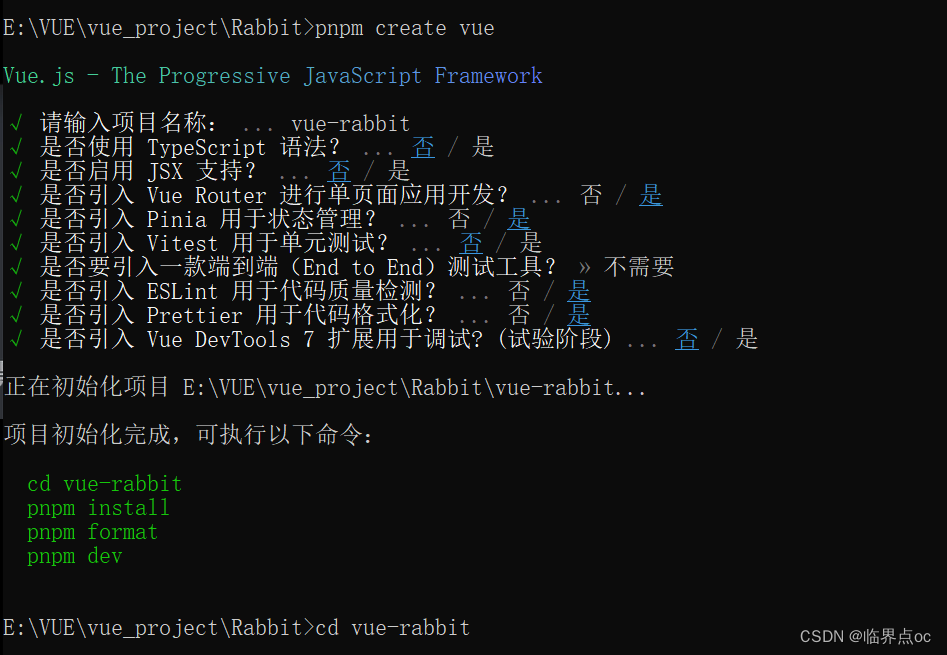
1. 创建项目
2. src目录调整

①删除一些初始化的默认文件
清空assets、components、store、views文件夹下的内容;
②修改剩余代码内容
router/index.js
import { createRouter, createWebHistory } from 'vue-router'

const router = createRouter({
  history: createWebHistory(import.meta.env.BASE_URL),
  routes: []
})

export default router
App.vue
<script setup></script>

<template>
  <el-button type="primary">Primary</el-button>
  <br />
</template>

<style scoped></style>
main.js
import { createApp } from 'vue'
import { createPinia } from 'pinia'

import App from './App.vue'
import router from './router'

// 测试接口函数
import { getCategory } from '@/apis/testAPI.js'
getCategory().then((res) => {
  console.log(res)
})

const app = createApp(App)

app.use(createPinia())
app.use(router)

app.mount('#app')
3. git管理项目
基于create-vue创建出来的项目默认没有初始化git仓库,需要我们手动初始化。
执行命令并完成首次提交
- ①git init
- ②git add .
- ③git commit -m "init"
4. Eslint配置代码风格
配置文件:.eslintrc.cjs
1. prettier 风格配置 https://prettier.io
2. vue组件名称多单词组成(忽略index.vue)
3. props解构(关闭)
/* eslint-env node */
require('@rushstack/eslint-patch/modern-module-resolution')

module.exports = {
  root: true,
  'extends': [
    'plugin:vue/vue3-essential',
    'eslint:recommended',
    '@vue/eslint-config-prettier/skip-formatting'
  ],
  parserOptions: {
    ecmaVersion: 'latest'
  },
  rules: {
    // prettier专注于代码的美观度 (格式化工具)
    // 前置:
    // 1. 禁用格式化插件 prettier  format on save 关闭
    // 2. 安装Eslint插件, 并配置保存时自动修复
    'prettier/prettier': [
      'warn',
      {
        singleQuote: true, // 单引号
        semi: false, // 无分号
        printWidth: 80, // 每行宽度至多80字符
        trailingComma: 'none', // 不加对象|数组最后逗号
        endOfLine: 'auto' // 换行符号不限制(win mac 不一致)
      }
    ],
    // ESLint关注于规范, 如果不符合规范,报错
    'vue/multi-word-component-names': [
      'warn',
      {
        ignores: ['index'] // vue组件名称多单词组成(忽略index.vue)
      }
    ],
    'vue/no-setup-props-destructure': ['off'], // 关闭 props 解构的校验 (props解构丢失响应式)
    // 添加未定义变量错误提示,create-vue@3.6.3 关闭,这里加上是为了支持下一个章节演示。
    'no-undef': 'error'
  }
}前提条件:安装Eslint插件且配置保存修复,不要开启默认的自动保存格式化,把Prettier - Code formatter插件禁用。
settings.json
{
    "workbench.colorTheme": "Default Light+",
    "[html]": {
        "editor.defaultFormatter": "vscode.html-language-features"
    },
    "emmet.triggerExpansionOnTab": true,
    // "[vue]": {
    //    "editor.defaultFormatter": "Vue.volar"
    // },
    // 当保存的时候,eslint自动帮我们修复错误
    "editor.codeActionsOnSave": {
        "source.fixAll": "explicit"
    },
    // 保存代码,不自动格式化
    "editor.formatOnSave": false
}
5. 配置代码检查工作流
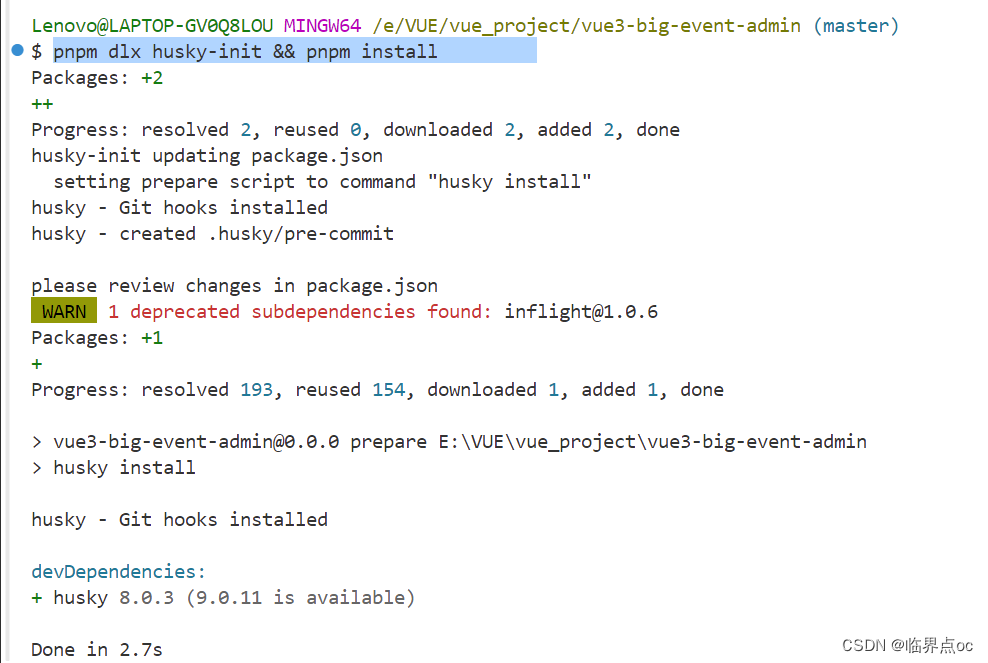
1. 初始化husky工具配置,执行 pnpm dlx husky-init && pnpm install 即可
2. 安装lint-staged包
pnpm i lint-staged -D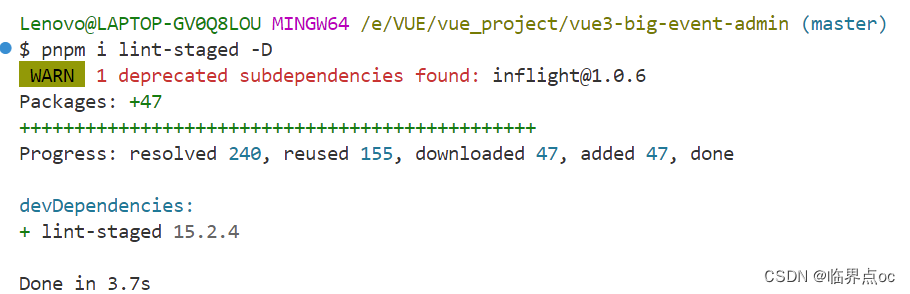
3. package.json配置lint-staged命令
{
    ······
    "prepare": "husky install",
    "lint-staged": "lint-staged"
  },
  ······
  "devDependencies": {
    ······
  },
  "lint-staged": {
    "*.{js,ts,vue}": [
      "eslint --fix"
    ]
  }
}
4. .husky/pre-commit文件修改
#!/usr/bin/env sh
. "$(dirname -- "$0")/_/husky.sh"

pnpm lint-staged
6. 项目起步 - 配置别名路径联想提示
什么是别名路径联想提示
在编写代码的过程中,一旦输入 @/,VSCode会立刻联想出src下的所有子目录和文件,统一文件访问路径,不容易出错。
如何进行配置
1. 在项目的根目录下新增jsconfig.json文件
2. 添加json格式的配置项,如下:(现在的Vue已经自动生成)
{
  "compilerOptions": {
    "paths": {
      "@/*": ["./src/*"]
    }
  },
  "exclude": ["node_modules", "dist"]
}
这个只是做一个联想提示的功能,实际的路径转换由vite.config.js实现
import { fileURLToPath, URL } from 'node:url'

import { defineConfig } from 'vite'
import vue from '@vitejs/plugin-vue'

// https://vitejs.dev/config/
export default defineConfig({
  plugins: [vue()],
  resolve: {
    // 实际的路径转换 @ -> src
    alias: {
      '@': fileURLToPath(new URL('./src', import.meta.url))
    }
  }
})
7. 项目起步 - elementPlus引入
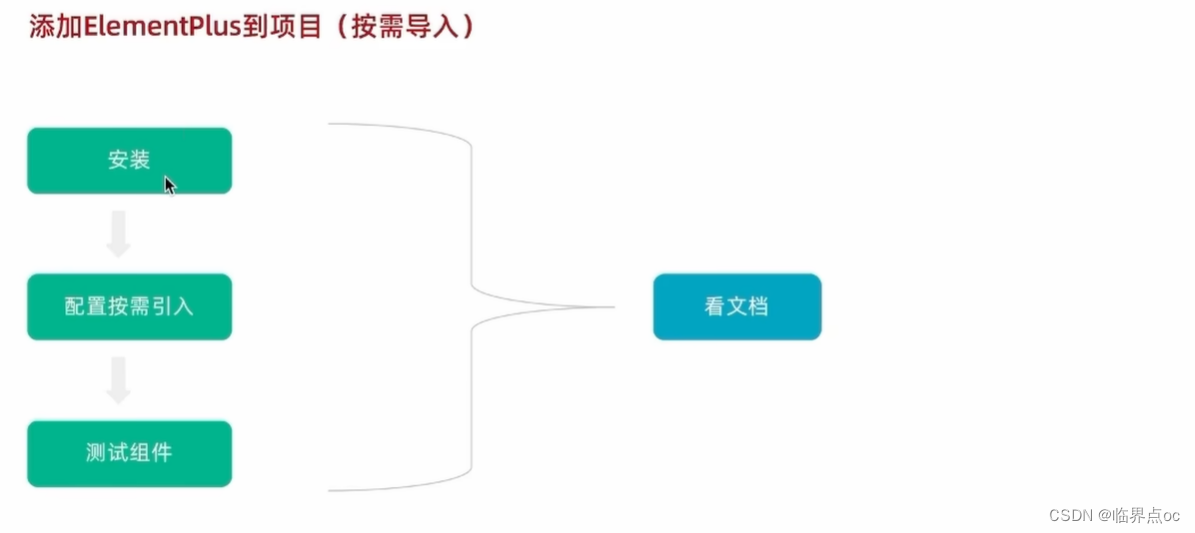
1. 按需引入Element Plus
pnpm add element-plus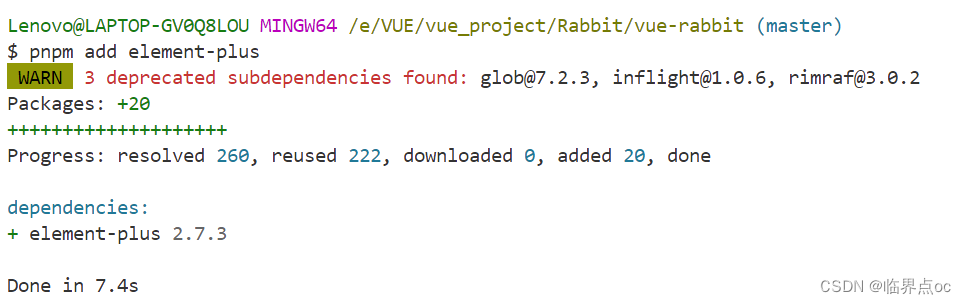
2. 配置按需引入
①首先,安装unplugin-vue-components 和 unplugin-auto-import这两款插件
pnpm add -D unplugin-vue-components unplugin-auto-import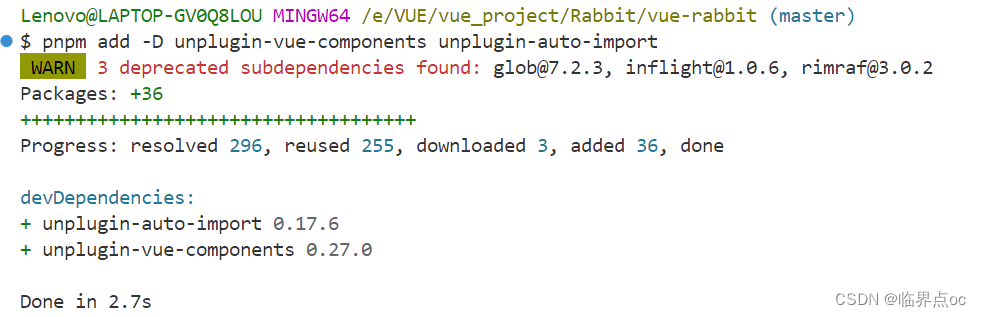
②修改配置文件:vite.config.js
import { fileURLToPath, URL } from 'node:url'

import { defineConfig } from 'vite'
import vue from '@vitejs/plugin-vue'

import AutoImport from 'unplugin-auto-import/vite'
import Components from 'unplugin-vue-components/vite'
import { ElementPlusResolver } from 'unplugin-vue-components/resolvers'

// https://vitejs.dev/config/
export default defineConfig({
  // base: '/jd',
  plugins: [
    vue(),
    AutoImport({
      resolvers: [ElementPlusResolver()]
    }),
    Components({
      resolvers: [ElementPlusResolver()]
    })
  ],
  resolve: {
    alias: {
      '@': fileURLToPath(new URL('./src', import.meta.url))
    }
  }
})
8. 项目起步 - elementPlus主题定制
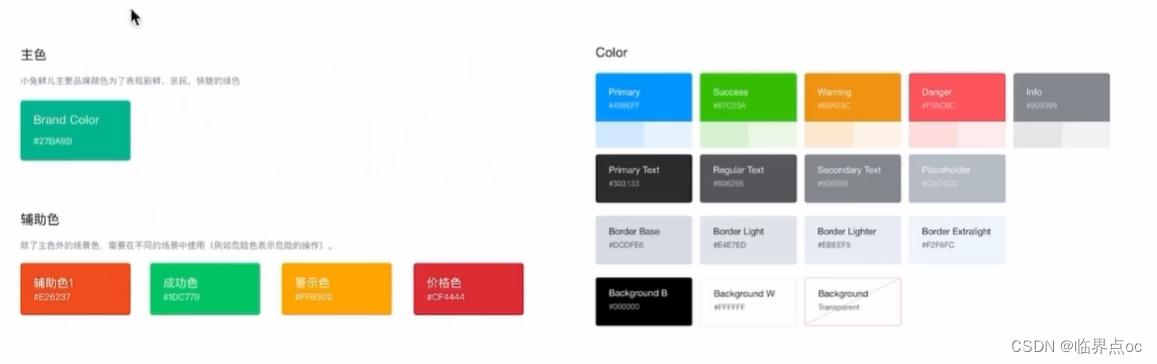
为什么需要主题定制
小兔鲜主题色和elementPlus默认的主题色存在冲突,通过定制主题让elementPlus的主题色和小兔鲜项目保持一致。
如何定制(scss变量替换方案)

①安装sass
pnpm add sass -D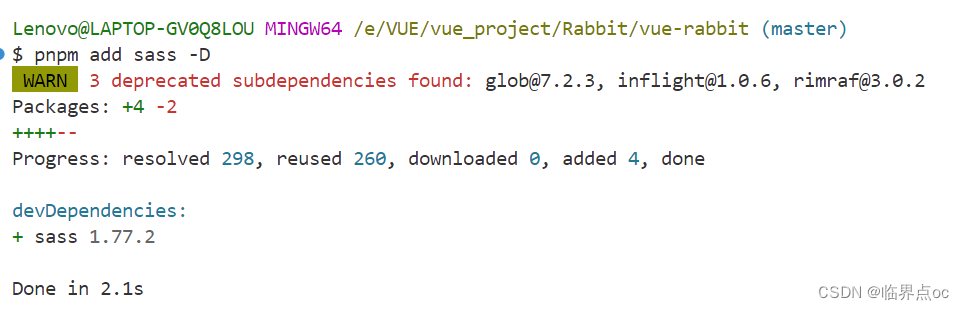
②准备定制化的样式文件 - src/styles/element/index.scss
/* 只需要重写你需要的即可 */
@forward 'element-plus/theme-chalk/src/common/var.scss' with (
  $colors: (
    'primary': (
      // 主色
      'base': #27ba9b,
    ),
    'success': (
      // 成功色
      'base': #1dc779,
    ),
    'warning': (
      // 警告色
      'base': #ffb302,
    ),
    'danger': (
      // 危险色
      'base': #e26237,
    ),
    'error': (
      // 错误色
      'base': #cf4444,
    ),
  )
)
③自动导入配置 - vite.config.js
pnpm add unplugin-element-plus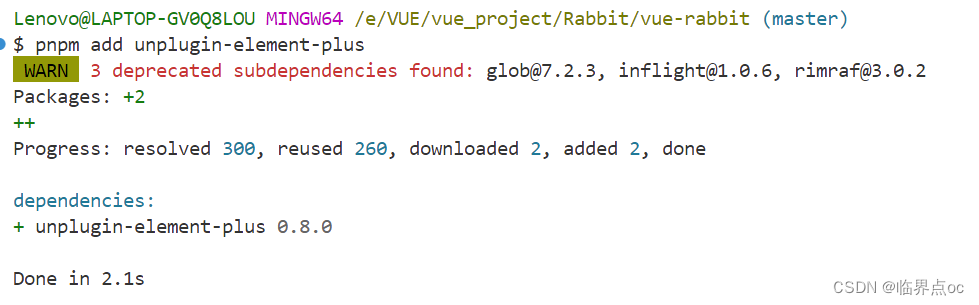
import { fileURLToPath, URL } from 'node:url'
import { defineConfig } from 'vite'
import vue from '@vitejs/plugin-vue'
import AutoImport from 'unplugin-auto-import/vite'
import Components from 'unplugin-vue-components/vite'
import { ElementPlusResolver } from 'unplugin-vue-components/resolvers'
// 导入对应包
import ElementPlus from 'unplugin-element-plus/vite'
export default defineConfig({
  plugins: [
    vue(),
    AutoImport({
      resolvers: [ElementPlusResolver()]
    }),
    Components({
      // 配置elementPlus采用sass样式配色系统
      resolvers: [ElementPlusResolver({ importStyle: 'sass' })]
    }),
    // 按需定制主题配置
    ElementPlus({
      useSource: true
    })
  ],
  resolve: {
    alias: {
      '@': fileURLToPath(new URL('./src', import.meta.url))
    }
  },
  css: {
    preprocessorOptions: {
      scss: {
        // 自动导入定制化样式文件进行样式覆盖
        additionalData: `
          @use "@/styles/element/index.scss" as *;
        `
      }
    }
  }
})
9. axios安装并简单封装
1. 安装axios
pnpm add axios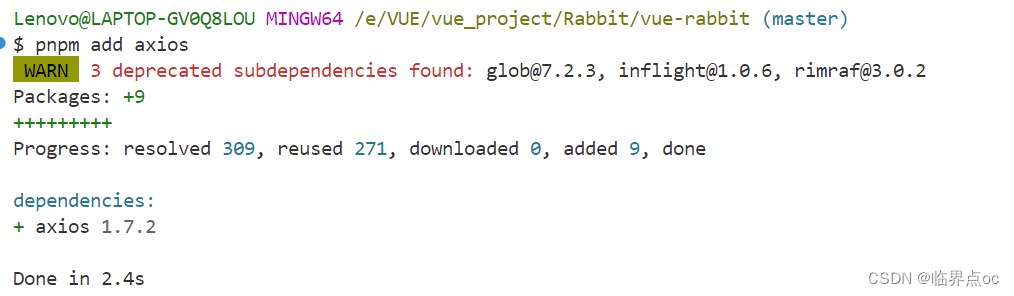
2. 基础配置

src/utils/http.js
import axios from 'axios'

// 创建axios实例
const instance = axios.create({
  baseURL: 'http://pcapi-xiaotuxian-front-devtest.itheima.net',
  timeout: 5000
})

// axios请求拦截器
instance.interceptors.request.use(
  (config) => {
    return config
  },
  (e) => Promise.reject(e)
)

// axios响应式拦截器
instance.interceptors.response.use(
  (res) => res.data,
  (e) => {
    return Promise.reject(e)
  }
)

export default instance
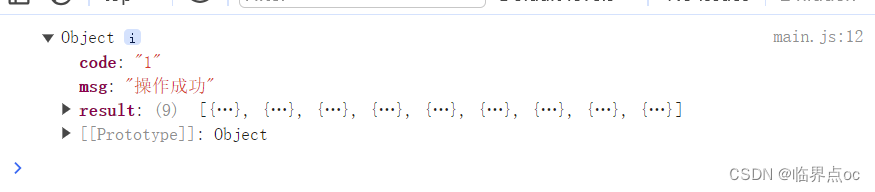
3. 封装请求函数并测试
src/apis/testAPI.js
import instance from '@/utils/http'

export function getCategory() {
  return instance({
    // 默认为get方式请求
    url: 'home/category/head'
  })
}
main.js
import './assets/main.css'

import { createApp } from 'vue'
import { createPinia } from 'pinia'

import App from './App.vue'
import router from './router'

// 测试接口函数
import { getCategory } from '@/apis/testAPI.js'
getCategory().then((res) => {
  console.log(res)
})

const app = createApp(App)

app.use(createPinia())
app.use(router)

app.mount('#app')
4. 思考
如果项目里面不同的业务模块需要的接口基地址不同,该如何来做?
答:axios.create()方法可以执行多次,每次执行就会生成一个新的实例,比如:
const instance1 = axios.create({ baseURL: 'url1' })
const instance2 = axios.create({ baseURL: 'url2' })
10. 项目起步 - 项目路由设计
1. 设计首页和登录页的路由(一级路由)
路由设计原则:按内容切换的区域,如果是页面整体切换,则为一级路由
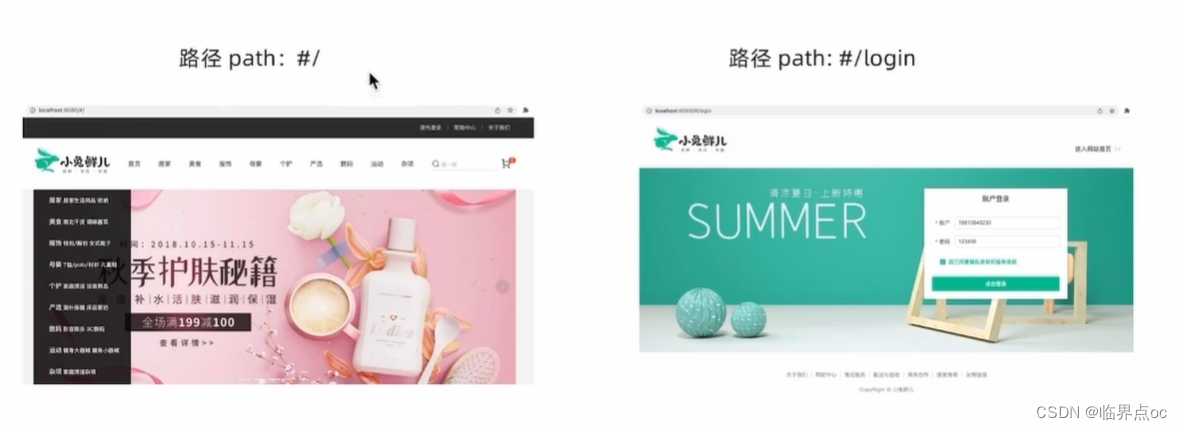
①新增两个文件
src/view/Login/index.vue
<template>
  <div>我是登录页</div>
</template>
src/views/Layout/index.vue
<template>
  <div>我是首页</div>
</template>
②router/index.js
import { createRouter, createWebHistory } from 'vue-router'
import Login from '@/views/Login/index.vue'
import Layout from '@/views/Layout/index.vue'

const router = createRouter({
  history: createWebHistory(import.meta.env.BASE_URL),
  routes: [
    {
      path: '/',
      component: Layout
    },
    {
      path: '/login',
      component: Login
    }
  ]
})

export default router
③App.vue
<script setup></script>

<template>
  <!-- 一级路由出口 -->
  <router-view></router-view>
</template>

<style scoped></style>
2. 设计分类页和默认Home页路由(二级路由)
路由设计原则:找内容切换的区域,如果是在一级路由页的内部切换,则为二级路由
①新增两个文件
src/views/Category/index.vue
<template>
  <div>我是分类页</div>
</template>
src/views/Home/index.vue
<template>
  <div>我是Home页</div>
</template>
②配置路由
router/index.js
// createRouter:创建router实例对象
// createWebHistory:创建history模式的路由

import { createRouter, createWebHistory } from 'vue-router'
import Login from '@/views/Login/index.vue'
import Layout from '@/views/Layout/index.vue'
import Home from '@/views/Home/index.vue'
import Category from '@/views/Category/index.vue'

const router = createRouter({
  history: createWebHistory(import.meta.env.BASE_URL),
  // path和component对应关系的位置
  routes: [
    {
      path: '/',
      component: Layout,
      children: [
        {
          path: '',
          component: Home
        },
        {
          path: 'category',
          component: Category
        }
      ]
    },
    {
      path: '/login',
      component: Login
    }
  ]
})

export default router
③配置二级路由出口
src/views/Layout/index.vue
<template>
  <div>
    我是首页
    <!-- 二级路由出口 -->
    <RouterView />
  </div>
</template>
3. 总结
①路由设计的依据是什么?
答:内容切换的方式
②默认二级路由如何进行设置?
答:path配置项置空
11. 项目起步 - 静态资源初始化 和 Error Lens安装
1. 图片资源和样式资源
1. 实际工作中的图片资源通常由UI设计师提供,常见的图片格式有png, svg等都是由UI切图交给前端
2. 样式资源通常是指项目初始化的时候进行样式重置,常见的比如开源的 normalize.css 或者 手写
①资源操作
- 图片资源 - 把images文件夹放到assets目录下
- 样式资源 - 把common.scss文件放到styles目录下
②引入初始化样式文件 - main.js
// 引入初始化样式文件
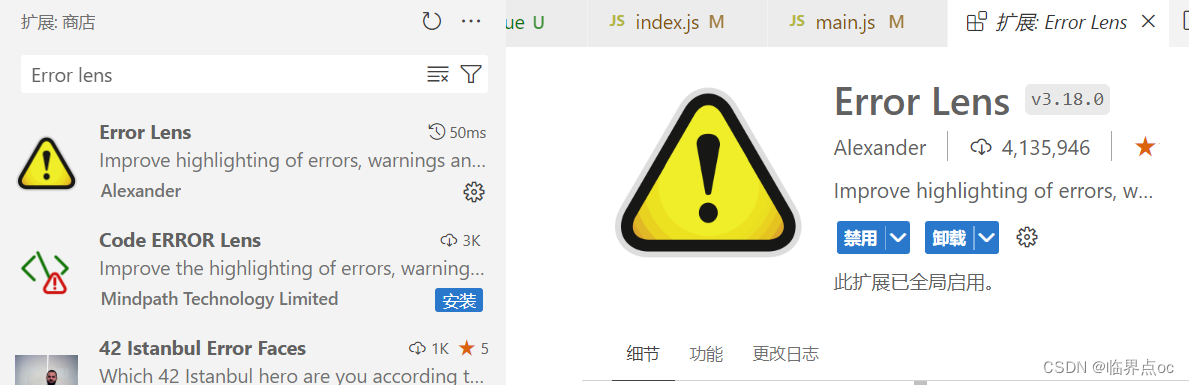
import '@/styles/common.scss'2. error lens安装
error lens是一个实时提供错误警告信息的VScode插件,方便开发
12. 项目起步 - scss文件自动导入
为什么要自动导入
在项目里一些组件共享的色值会以scss变量的方式统一放到一个名为var.scss的文件中,正常组件中使用,需要先导入scss文件,再使用内部的变量,比较繁琐,自动导入可以免去手动导入的步骤,直接使用内部的变量。
自动导入配置
新增一个var.scss文件,存入色值变量
$xtxColor: #27ba9b;
$helpColor: #e26237;
$sucColor: #1dc779;
$warnColor: #ffb302;
$priceColor: #cf4444;
通过vite.config.js配置自动导入文件
  css: {
    preprocessorOptions: {
      scss: {
        // 自动导入定制化样式文件进行样式覆盖
        additionalData: `
          @use "@/styles/element/index.scss" as *;
          @use "@/styles/var.scss" as *;
        `
      }
    }
  }
测试使用 - App.vue
<script setup></script>

<template>
  <!-- 路由出口 -->
  <router-view></router-view>
  <div class="test">test scss</div>
</template>

<style lang="scss" scoped>
.test {
  color: $priceColor;
}
</style>

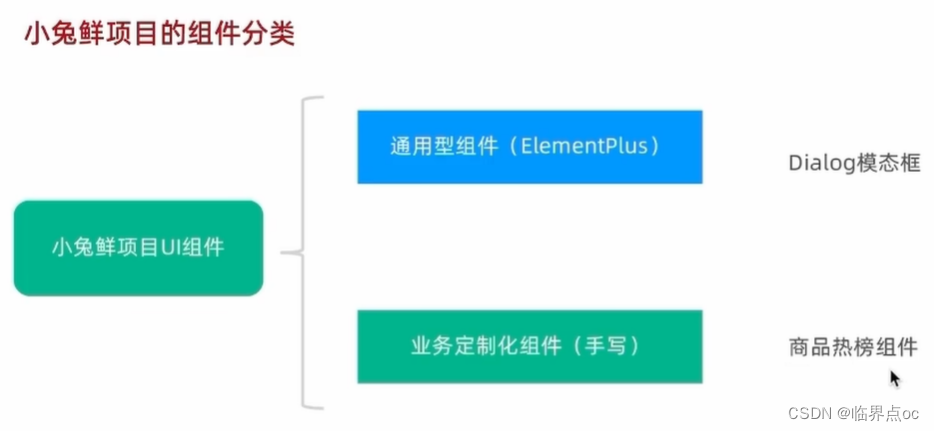
三、Layout模块静态模板搭建
1. 组件结构快速搭建
src/views/Layout/components/LayoutNav.vue
<script setup></script>

<template>
  <nav class="app-topnav">
    <div class="container">
      <ul>
        <template v-if="true">
          <li>
            <a href="javascript:;"><i class="iconfont icon-user"></i>周杰伦</a>
          </li>
          <li>
            <el-popconfirm
              title="确认退出吗?"
              confirm-button-text="确认"
              cancel-button-text="取消"
            >
              <template #reference>
                <a href="javascript:;">退出登录</a>
              </template>
            </el-popconfirm>
          </li>
          <li><a href="javascript:;">我的订单</a></li>
          <li><a href="javascript:;">会员中心</a></li>
        </template>
        <template v-else>
          <li><a href="javascript:;">请先登录</a></li>
          <li><a href="javascript:;">帮助中心</a></li>
          <li><a href="javascript:;">关于我们</a></li>
        </template>
      </ul>
    </div>
  </nav>
</template>

<style scoped lang="scss">
.app-topnav {
  background: #333;
  ul {
    display: flex;
    height: 53px;
    justify-content: flex-end;
    align-items: center;
    li {
      a {
        padding: 0 15px;
        color: #cdcdcd;
        line-height: 1;
        display: inline-block;

        i {
          font-size: 14px;
          margin-right: 2px;
        }

        &:hover {
          color: $xtxColor;
        }
      }

      ~ li {
        a {
          border-left: 2px solid #666;
        }
      }
    }
  }
}
</style>
src/views/Layout/components/LayoutHeader.vue
<script setup>
</script>
<template>
<header class='app-header'>
<div class="container">
<h1 class="logo">
<RouterLink to="/">小兔鲜</RouterLink>
</h1>
<ul class="app-header-nav">
<li class="home">
<RouterLink to="/">首页</RouterLink>
</li>
<li> <RouterLink to="/">居家</RouterLink> </li>
<li> <RouterLink to="/">美食</RouterLink> </li>
<li> <RouterLink to="/">服饰</RouterLink> </li>
</ul>
<div class="search">
<i class="iconfont icon-search"></i>
<input type="text" placeholder="搜一搜">
</div>
<!-- 头部购物车 -->
</div>
</header>
</template>
<style scoped lang='scss'>
.app-header {
background: #fff;
.container {
display: flex;
align-items: center;
}
.logo {
width: 200px;
a {
display: block;
height: 132px;
width: 100%;
text-indent: -9999px;
background: url('@/assets/images/logo.png') no-repeat center 18px / contain;
}
}
.app-header-nav {
width: 820px;
display: flex;
padding-left: 40px;
position: relative;
z-index: 998;
li {
margin-right: 40px;
width: 38px;
text-align: center;
a {
font-size: 16px;
line-height: 32px;
height: 32px;
display: inline-block;
&:hover {
color: $xtxColor;
border-bottom: 1px solid $xtxColor;
}
}
.active {
color: $xtxColor;
border-bottom: 1px solid $xtxColor;
}
}
}
.search {
width: 170px;
height: 32px;
position: relative;
border-bottom: 1px solid #e7e7e7;
line-height: 32px;
.icon-search {
font-size: 18px;
margin-left: 5px;
}
input {
width: 140px;
padding-left: 5px;
color: #666;
}
}
.cart {
width: 50px;
.curr {
height: 32px;
line-height: 32px;
text-align: center;
position: relative;
display: block;
.icon-cart {
font-size: 22px;
}
em {
font-style: normal;
position: absolute;
right: 0;
top: 0;
padding: 1px 6px;
line-height: 1;
background: $helpColor;
color: #fff;
font-size: 12px;
border-radius: 10px;
font-family: Arial;
}
}
}
}
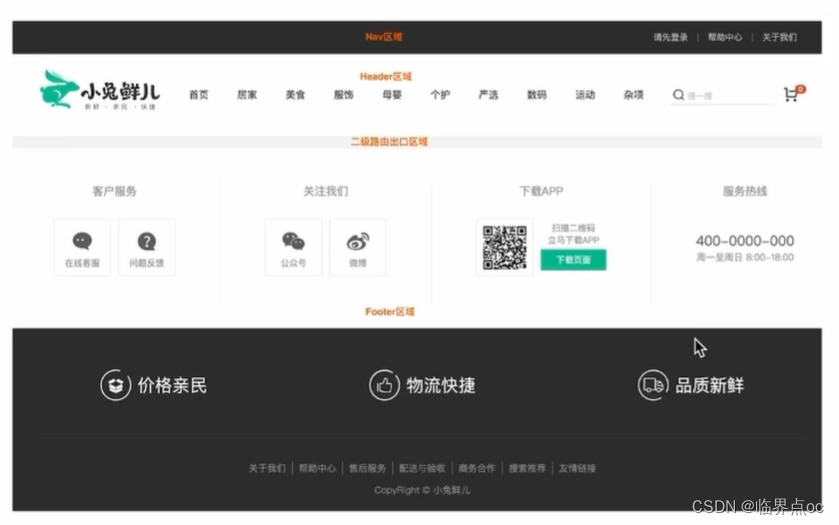
</style>src/views/Layout/components/LayoutFooter.vue
<template>
  <footer class="app_footer">
    <!-- 联系我们 -->
    <div class="contact">
      <div class="container">
        <dl>
          <dt>客户服务</dt>
          <dd><i class="iconfont icon-kefu"></i> 在线客服</dd>
          <dd><i class="iconfont icon-question"></i> 问题反馈</dd>
        </dl>
        <dl>
          <dt>关注我们</dt>
          <dd><i class="iconfont icon-weixin"></i> 公众号</dd>
          <dd><i class="iconfont icon-weibo"></i> 微博</dd>
        </dl>
        <dl>
          <dt>下载APP</dt>
          <dd class="qrcode"><img src="@/assets/images/qrcode.jpg" /></dd>
          <dd class="download">
            <span>扫描二维码</span>
            <span>立马下载APP</span>
            <a href="javascript:;">下载页面</a>
          </dd>
        </dl>
        <dl>
          <dt>服务热线</dt>
          <dd class="hotline">400-0000-000 <small>周一至周日 8:00-18:00</small></dd>
        </dl>
      </div>
    </div>
    <!-- 其它 -->
    <div class="extra">
      <div class="container">
        <div class="slogan">
          <a href="javascript:;">
            <i class="iconfont icon-footer01"></i>
            <span>价格亲民</span>
          </a>
          <a href="javascript:;">
            <i class="iconfont icon-footer02"></i>
            <span>物流快捷</span>
          </a>
          <a href="javascript:;">
            <i class="iconfont icon-footer03"></i>
            <span>品质新鲜</span>
          </a>
        </div>
        <!-- 版权信息 -->
        <div class="copyright">
          <p>
            <a href="javascript:;">关于我们</a>
            <a href="javascript:;">帮助中心</a>
            <a href="javascript:;">售后服务</a>
            <a href="javascript:;">配送与验收</a>
            <a href="javascript:;">商务合作</a>
            <a href="javascript:;">搜索推荐</a>
            <a href="javascript:;">友情链接</a>
          </p>
          <p>CopyRight © 小兔鲜儿</p>
        </div>
      </div>
    </div>
  </footer>
</template>

<style scoped lang='scss'>
.app_footer {
  overflow: hidden;
  background-color: #f5f5f5;
  padding-top: 20px;

  .contact {
    background: #fff;

    .container {
      padding: 60px 0 40px 25px;
      display: flex;
    }

    dl {
      height: 190px;
      text-align: center;
      padding: 0 72px;
      border-right: 1px solid #f2f2f2;
      color: #999;

      &:first-child {
        padding-left: 0;
      }

      &:last-child {
        border-right: none;
        padding-right: 0;
      }
    }

    dt {
      line-height: 1;
      font-size: 18px;
    }

    dd {
      margin: 36px 12px 0 0;
      float: left;
      width: 92px;
      height: 92px;
      padding-top: 10px;
      border: 1px solid #ededed;

      .iconfont {
        font-size: 36px;
        display: block;
        color: #666;
      }

      &:hover {
        .iconfont {
          color: $xtxColor;
        }
      }

      &:last-child {
        margin-right: 0;
      }
    }

    .qrcode {
      width: 92px;
      height: 92px;
      padding: 7px;
      border: 1px solid #ededed;
    }

    .download {
      padding-top: 5px;
      font-size: 14px;
      width: auto;
      height: auto;
      border: none;

      span {
        display: block;
      }

      a {
        display: block;
        line-height: 1;
        padding: 10px 25px;
        margin-top: 5px;
        color: #fff;
        border-radius: 2px;
        background-color: $xtxColor;
      }
    }

    .hotline {
      padding-top: 20px;
      font-size: 22px;
      color: #666;
      width: auto;
      height: auto;
      border: none;

      small {
        display: block;
        font-size: 15px;
        color: #999;
      }
    }
  }

  .extra {
    background-color: #333;
  }

  .slogan {
    height: 178px;
    line-height: 58px;
    padding: 60px 100px;
    border-bottom: 1px solid #434343;
    display: flex;
    justify-content: space-between;

    a {
      height: 58px;
      line-height: 58px;
      color: #fff;
      font-size: 28px;

      i {
        font-size: 50px;
        vertical-align: middle;
        margin-right: 10px;
        font-weight: 100;
      }

      span {
        vertical-align: middle;
        text-shadow: 0 0 1px #333;
      }
    }
  }

  .copyright {
    height: 170px;
    padding-top: 40px;
    text-align: center;
    color: #999;
    font-size: 15px;

    p {
      line-height: 1;
      margin-bottom: 20px;
    }

    a {
      color: #999;
      line-height: 1;
      padding: 0 10px;
      border-right: 1px solid #999;

      &:last-child {
        border-right: none;
      }
    }
  }
}
</style>
在src/views/Layout/index.vue中导入
<script setup>
import LayoutNav from './components/LayoutNav.vue'
import LayoutHeader from './components/LayoutHeader.vue'
import LayoutFooter from './components/LayoutFooter.vue'
</script>

<template>
  <LayoutNav />
  <LayoutHeader />
  <RouterView />
  <LayoutFooter />
</template>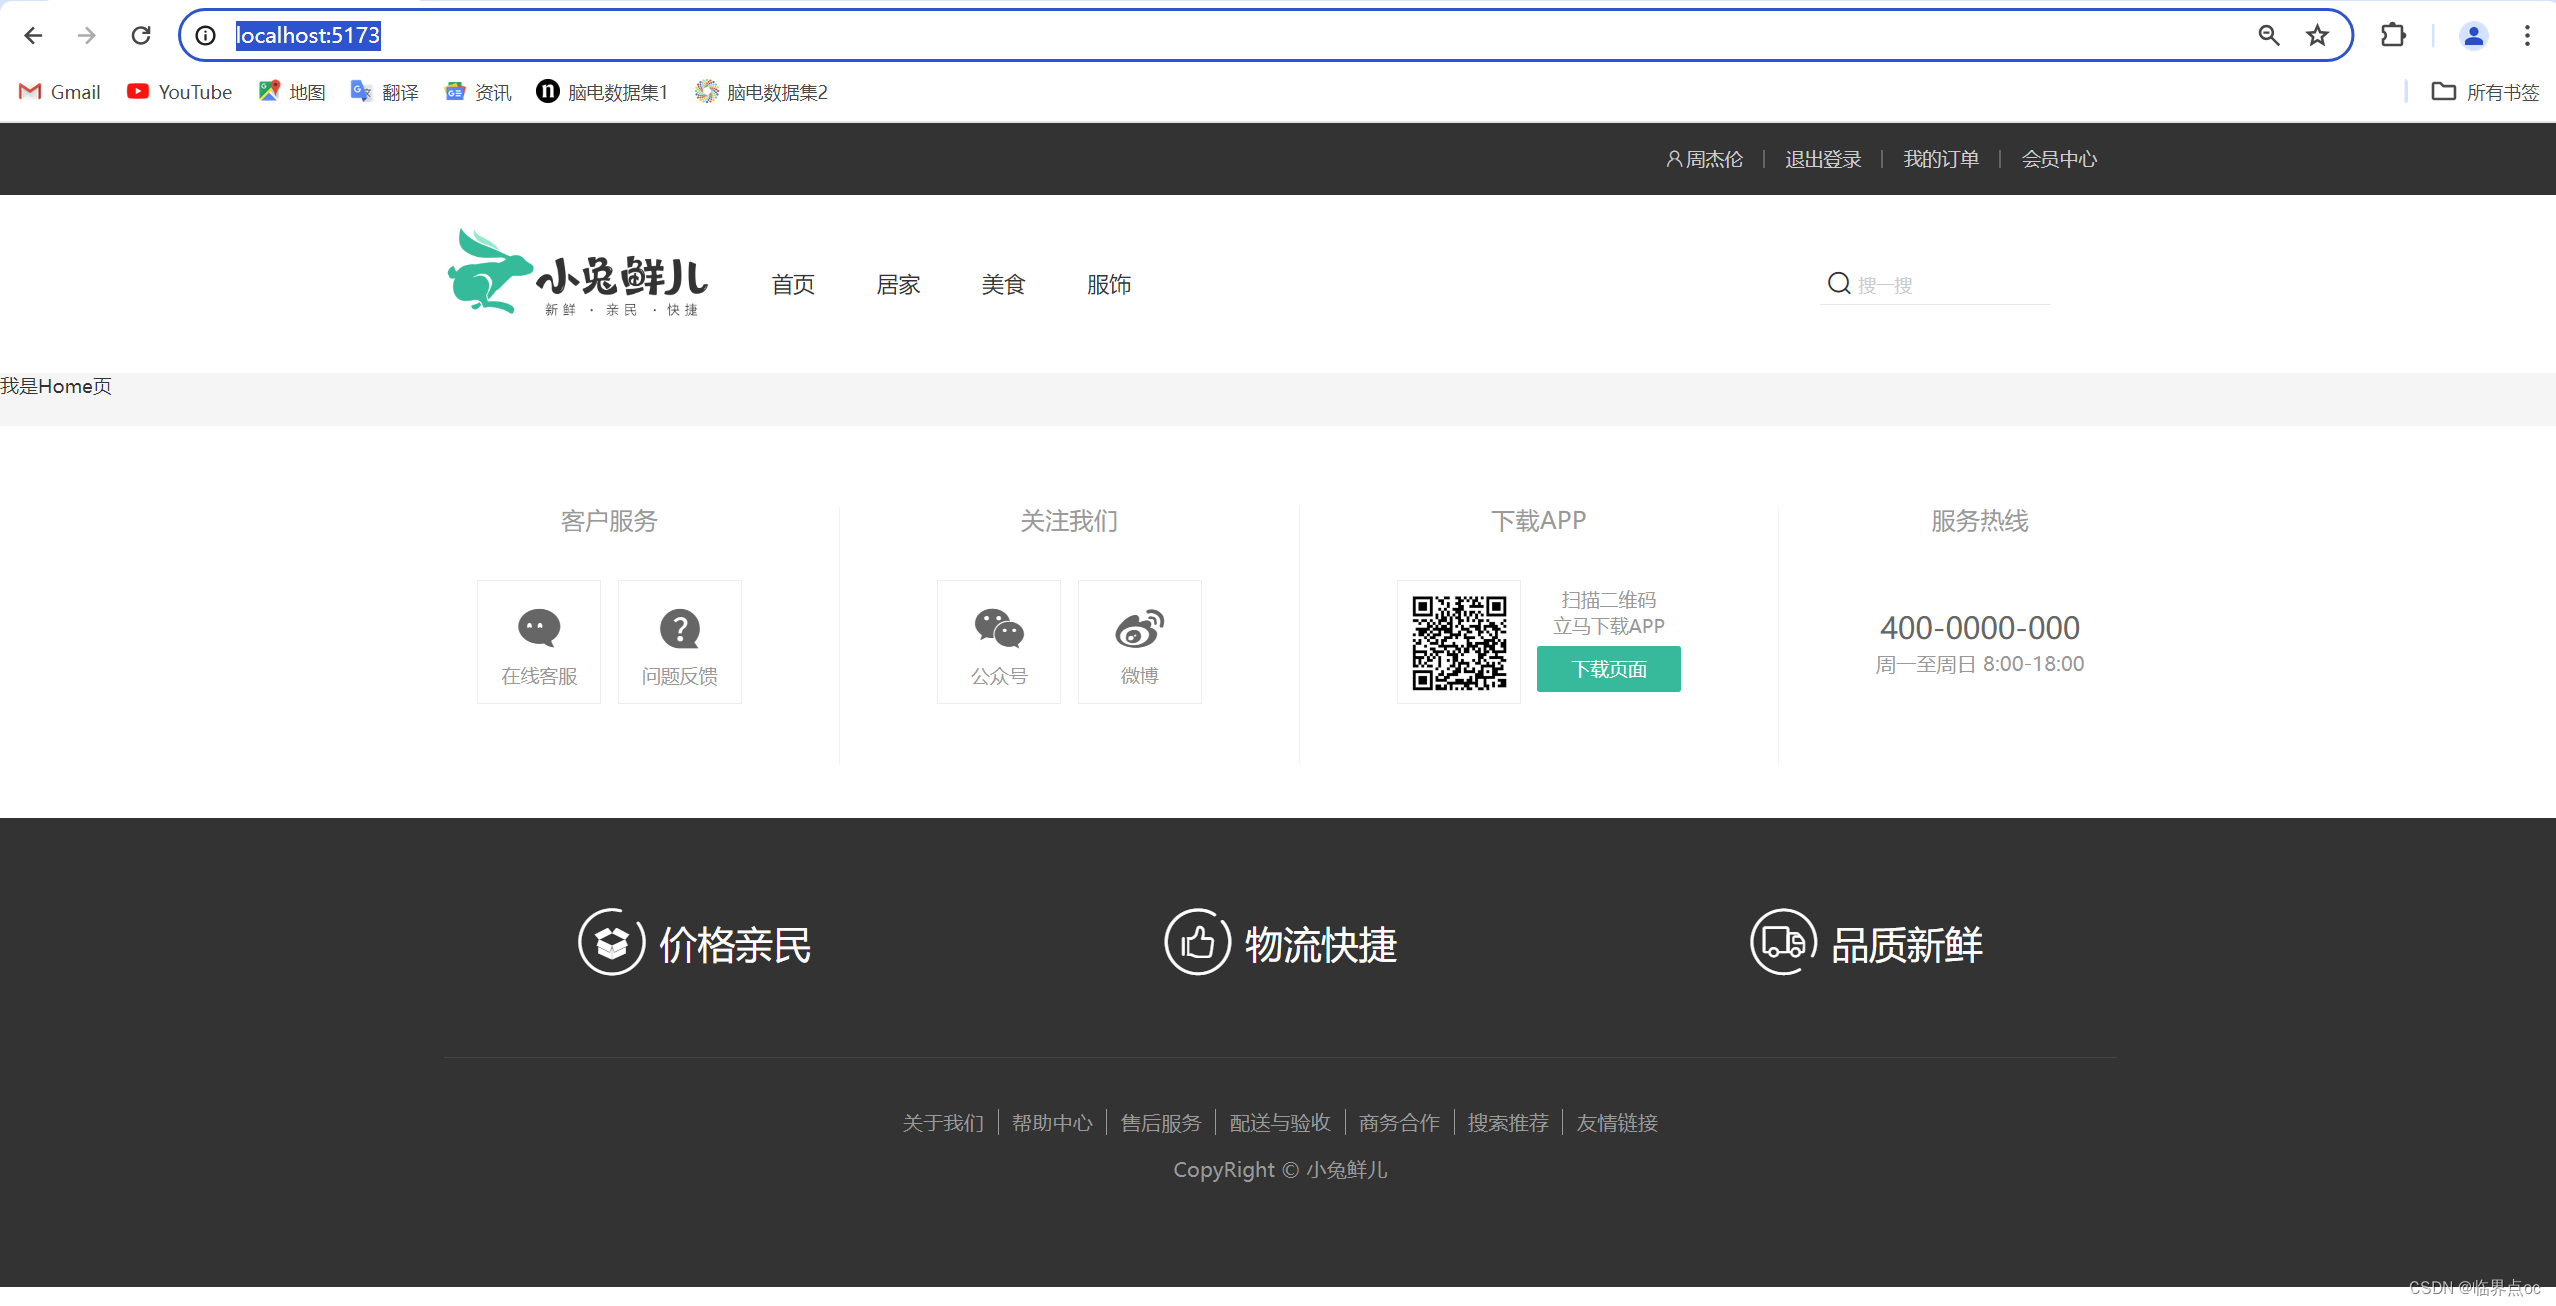
四、页面渲染
1. 字体图标渲染
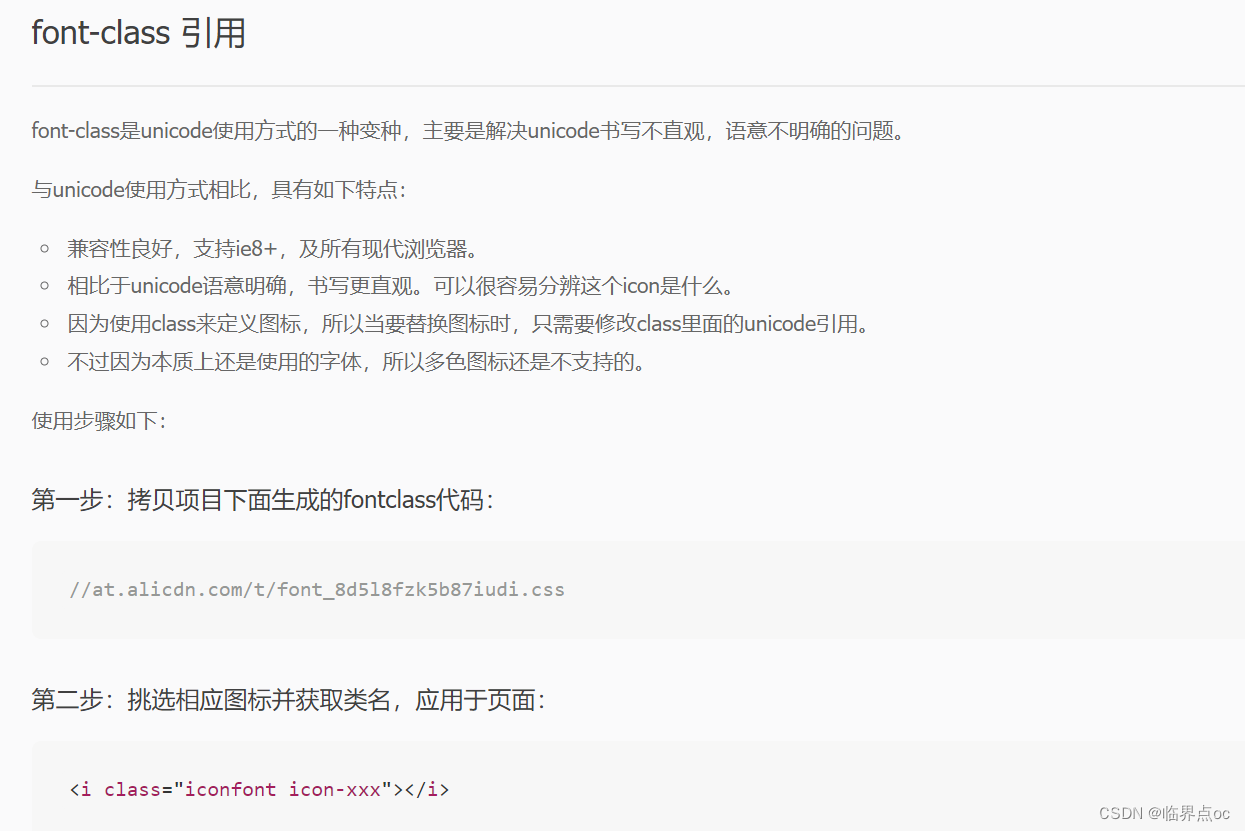
字体图标采用的是阿里的字体图标库,样式文件已经准备好,在index.html文件中引入即可
<!DOCTYPE html>
<html lang="en">

<head>
  <meta charset="UTF-8">
  <link rel="icon" href="/favicon.ico">
  <link rel="stylesheet" href="//at.alicdn.com/t/font_2143783_iq6z4ey5vu.css">
  <meta name="viewport" content="width=device-width, initial-scale=1.0">
  <title>小兔鲜</title>
</head>

<body>
  <div id="app"></div>
  <script type="module" src="/src/main.js"></script>
</body>

</html>
2. 一级导航渲染

1. 封装接口函数 - src/api/layout.js
import instance from '@/utils/http.js'

export function getCategoryAPI() {
  return instance({
    url: '/home/category/head'
  })
}
2. 调用接口函数 - src/views/Layout/components/LayoutHeader.vue
3. v-for渲染模板
<script setup>
import { getCategoryAPI } from '@/apis/layout.js'
import { ref } from 'vue'

const categoryList = ref([])
const getCategory = async () => {
  const res = await getCategoryAPI()
  categoryList.value = res.result
}

// 一进页面就调用
getCategory()
</script>

<template>
  <header class="app-header">
    <div class="container">
      <h1 class="logo">
        <RouterLink to="/">小兔鲜</RouterLink>
      </h1>
      <ul class="app-header-nav">
        <li class="home" v-for="item in categoryList" :key="item.id">
          <RouterLink to="/">{{ item.name }}</RouterLink>
        </li>
      </ul>
      <div class="search">
        <i class="iconfont icon-search"></i>
        <input type="text" placeholder="搜一搜" />
      </div>
      <!-- 头部购物车 -->
    </div>
  </header>
</template>
五、吸顶导航交互实现
吸顶交互
要求:浏览器在上下滚动的过程中,如果距离顶部的滚动距离大于78px,吸顶导航显示,小于78px隐藏

1. 准备组件静态结构
src/views/Layout/components/LayoutFixed.vue
<script setup></script>

<template>
  <div class="app-header-sticky show">
    <div class="container">
      <RouterLink class="logo" to="/" />
      <!-- 导航区域 -->
      <ul class="app-header-nav">
        <li class="home">
          <RouterLink to="/">首页</RouterLink>
        </li>
        <li>
          <RouterLink to="/">居家</RouterLink>
        </li>
        <li>
          <RouterLink to="/">美食</RouterLink>
        </li>
        <li>
          <RouterLink to="/">服饰</RouterLink>
        </li>
        <li>
          <RouterLink to="/">母婴</RouterLink>
        </li>
        <li>
          <RouterLink to="/">个护</RouterLink>
        </li>
        <li>
          <RouterLink to="/">严选</RouterLink>
        </li>
        <li>
          <RouterLink to="/">数码</RouterLink>
        </li>
        <li>
          <RouterLink to="/">运动</RouterLink>
        </li>
        <li>
          <RouterLink to="/">杂项</RouterLink>
        </li>
      </ul>

      <div class="right">
        <RouterLink to="/">品牌</RouterLink>
        <RouterLink to="/">专题</RouterLink>
      </div>
    </div>
  </div>
</template>

<style scoped lang="scss">
.app-header-sticky {
  width: 100%;
  height: 80px;
  position: fixed;
  left: 0;
  top: 0;
  z-index: 999;
  background-color: #fff;
  border-bottom: 1px solid #e4e4e4;
  // 此处为关键样式!!!
  // 状态一:往上平移自身高度 + 完全透明
  transform: translateY(-100%);
  opacity: 0;

  // 状态二:移除平移 + 完全不透明
  &.show {
    transition: all 0.3s linear;
    transform: none;
    opacity: 1;
  }

  .container {
    display: flex;
    align-items: center;
  }

  .logo {
    width: 200px;
    height: 80px;
    background: url('@/assets/images/logo.png') no-repeat right 2px;
    background-size: 160px auto;
  }

  .right {
    width: 220px;
    display: flex;
    text-align: center;
    padding-left: 40px;
    border-left: 2px solid $xtxColor;

    a {
      width: 38px;
      margin-right: 40px;
      font-size: 16px;
      line-height: 1;

      &:hover {
        color: $xtxColor;
      }
    }
  }
}

.app-header-nav {
  width: 820px;
  display: flex;
  padding-left: 40px;
  position: relative;
  z-index: 998;

  li {
    margin-right: 40px;
    width: 38px;
    text-align: center;

    a {
      font-size: 16px;
      line-height: 32px;
      height: 32px;
      display: inline-block;

      &:hover {
        color: $xtxColor;
        border-bottom: 1px solid $xtxColor;
      }
    }

    .active {
      color: $xtxColor;
      border-bottom: 1px solid $xtxColor;
    }
  }
}
</style>
src/views/Layout/index.vue中导入
<script setup>
import LayoutNav from './components/LayoutNav.vue'
import LayoutHeader from './components/LayoutHeader.vue'
import LayoutFooter from './components/LayoutFooter.vue'
import LayoutFixed from './components/LayoutFixed.vue'
</script>

<template>
  <LayoutFixed />
  <LayoutNav />
  <LayoutHeader />
  <RouterView />
  <LayoutFooter />
</template>

2. 获取滚动距离
Get Started | VueUse | useScroll | VueUse
①安装
pnpm add @vueuse/core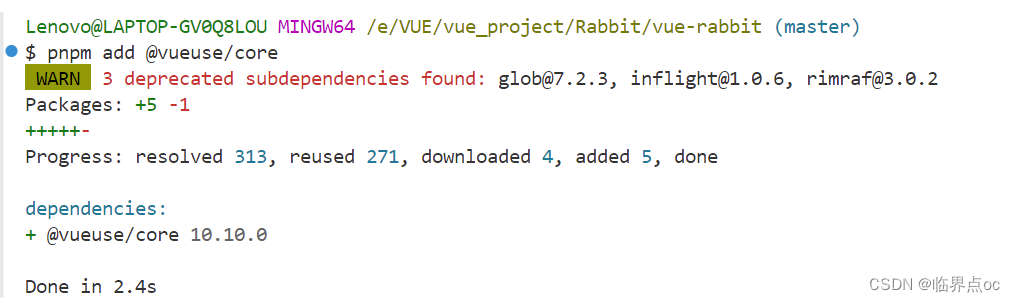
②导入使用 - src/views/Layout/components/LayoutFixed.vue
<script setup>
import { useScroll } from '@vueuse/core'
const { y } = useScroll(window)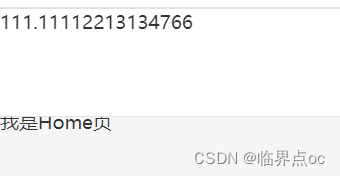
</script>③模拟 - src/views/Home/index.vue
<template>
  <div>我是Home页</div>
  <div style="height: 500px"></div>
</template>
3. 以滚动距离做判断条件控制组件
LayoutFixed.vue
<div class="app-header-sticky" :class="{ show: y > 78 }">
六、Pinia优化重复请求

1. 如何优化
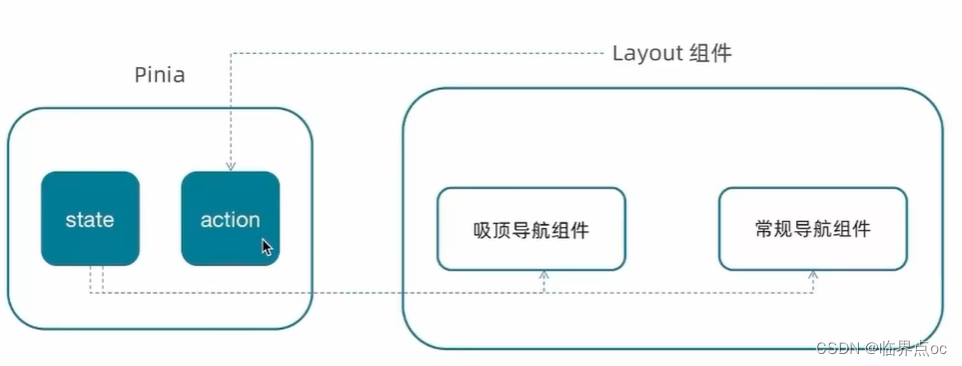
2. 实现
①src/stores/category.js
import { ref } from 'vue'
import { defineStore } from 'pinia'
import { getCategoryAPI } from '@/apis/layout.js'
export const useCategoryStore = defineStore('category', () => {
  // 导航列表的数据管理
  const categoryList = ref([])
  const getCategory = async () => {
    const res = await getCategoryAPI()
    categoryList.value = res.result
  }

  return { categoryList, getCategory }
})
②src/views/Layout/index.vue
<script setup>
// ......
import { useCategoryStore } from '@/stores/category.js'

// 触发获取导航列表的action
const categoryStore = useCategoryStore()
// 一进页面就调用
categoryStore.getCategory()
</script>
③组件中使用数据
LayoutFixed.vue
<script setup>
import { useScroll } from '@vueuse/core'
import { useCategoryStore } from '@/stores/category.js'
const { y } = useScroll(window)

// 使用pinia中的数据
const categoryStore = useCategoryStore()
</script>

<template>
  <div class="app-header-sticky" :class="{ show: y > 78 }">
    <!-- {{ y }} -->
    <div class="container">
      <RouterLink class="logo" to="/" />
      <!-- 导航区域 -->
      <ul class="app-header-nav">
        <li
          class="home"
          v-for="item in categoryStore.categoryList"
          :key="item.id"
        >
          <RouterLink to="/">{{ item.name }}</RouterLink>
        </li>
      </ul>

      <div class="right">
        <RouterLink to="/">品牌</RouterLink>
        <RouterLink to="/">专题</RouterLink>
      </div>
    </div>
  </div>
</template>
LayoutHeader.vue
<script setup>
import { useCategoryStore } from '@/stores/category.js'
// 使用pinia中的数据
const categoryStore = useCategoryStore()
</script>

<template>
  <header class="app-header">
    <div class="container">
      <h1 class="logo">
        <RouterLink to="/">小兔鲜</RouterLink>
      </h1>
      <ul class="app-header-nav">
        <li
          class="home"
          v-for="item in categoryStore.categoryList"
          :key="item.id"
        >
          <RouterLink to="/">{{ item.name }}</RouterLink>
        </li>
      </ul>
      <div class="search">
        <i class="iconfont icon-search"></i>
        <input type="text" placeholder="搜一搜" />
      </div>
      <!-- 头部购物车 -->
    </div>
  </header>
</template>


 745
745


 被折叠的 条评论
为什么被折叠?
被折叠的 条评论
为什么被折叠?
 到【灌水乐园】发言


