


My Environment
System Requirement for Standard Edition Server
Lync Server 2010 is available only in a 64-bit edition, which requires 64-bit hardware and a 64-bit edition of the Windows Server operating system. A 32-bit edition of Lync Server 2010 is not available with this release. So Standard Edition server can use one of the following: Windows Server 2008 X64 SP2 and Windows Server 2008 R2
The difference between Lync Server 2010 Enterprise Edition and Standard Edition
1) Microsoft Lync Server 2010 Standard Edition servers are intended for smaller organizations and remote locations from the main organization deployment. A Standard Edition server is designed for a user count of approximately 5000 homed users.
The SQL Server database that Standard Edition uses is a collocated SQL Server Express version of SQL Server that is right sized for the workloads of a Standard Edition server. This is not to say that all roles must reside on a Standard Edition server. You can have stand-alone Mediation Servers, Edge Servers, Archiving Servers, and Monitoring Servers. The SQL Server database for the Central Management store and for the purposes of Lync Server 2010 must reside on the Standard Edition collocated SQL Server-based server. The A/V Conferencing Server must also remain collocated with the Standard Edition server. The Monitoring Server and Archiving Server use a stand-alone server with the SQL Server database.
要求在单台计算机上配置主服务器组件以及用于存储用户和会议信息的数据库。对于不要求通过群集实现更高可用性的组织,建议使用 Standard Edition。
2) Enterprise Edition is intended for large organizations as the main organizational deployment. Enterprise Edition server is designed to scale to approximately 80,000 homed users per pool. For high availability, multiple Front End Servers are deployed to a pool, the SQL Server-based server can be clustered, and the SQL Server database is deployed as a dedicated SQL Server-based server and maintains instances of data for the Front End pools. With Enterprise Edition server you can choose to collocate or define stand-alone servers for A/V Conferencing Server and Mediation Server. The Monitoring Server and Archiving Server can use a stand-alone SQL Server-based database server, or can have instances created on the SQL Server-based server for the Front End Servers and pools.
许将服务器功能和数据存储分隔开,以实现更高的容量和可用性。对于要求通过群集实现更高可用性的组织,建议使用 Enterprise Edition。
High-level Preparation Steps
l Apply all windows updates
l Add the computer (will install Lync server) to your domain, because the Lync server installation will fail when attempting to deploy on a DC, and login as domain admin or equivalent.
l On the DC, deploy windows Enterprise Certificate Authority.
1) Select Active Directory Certificate Services role
2) Set setup type is Enterprise
3) Specify CA type is Root CA
4) Create a new private key
5) The rest settings as default, it’s better to restart computer to make configuration take effect.
l In lync server computer, add RSAT(AD DS and AD LDS tools) , and this will also prompt to add the .NET framework 3.5 SP1 feature, must accept it.
Open Server Manager and select Features, click Add Features,expand Remote Server Administration Tools and Role Administration Tools,and then select AD DS and AD LDS Tools and then click Next to install them.
l Add IIS, this is easier by running the command line:
ServerManagerCmd.exe -Install Web-Server Web-Http-Redirect Web-Scripting-Tools Web-Windows-Auth Web-Client-Auth Web-Asp-Net Web-Log-Libraries Web-Http-Tracing Web-Basic-Auth
IIS Role Services
| Role Heading | Role Service |
| Common HTTP features installed | Static content |
| Common HTTP features installed | Default document |
| Common HTTP features installed | HTTP errors |
| Application development | ASP.NET |
| Application development | .NET extensibility |
| Application development | Internet Server API (ISAPI) extensions |
| Application development | ISAPI filters |
| Health and diagnostics | HTTP logging |
| Health and diagnostics | Logging tools |
| Health and diagnostics | Tracing |
| Security | Anonymous authentication (installed and enabled by default) |
| Security | Windows authentication |
| Security | Client Certificate Mapping authentication |
| Security | Request filtering |
| Performance | Static content compression |
| Management Tools | IIS Management Console |
| Management Tools | IIS Management Scripts and Tools |
l Deploy DNS: When you deploy your Standard Edition servers or Front End pools, you can configure your clients to use automatic discovery to sign in to the appropriate Standard Edition server or Front End pool. If you plan to require your clients to connect manually to Microsoft Lync Server 2010 communications software, you can skip this Step.
1) Create SRV
2) Create A records
l Edit Windows Firewall Inbound Rules, otherwise the error maybe occur when you publish topology. The error is “Error: An error occurred: "Microsoft.Rtc.Management.Deployment.DeploymentException" "Cannot determine where to install database files because Windows Management Instrumentation on the database server is unavailable from your computer or user account. To continue, you can resolve this issue, or you can specify where you want to install the files."
-
- You must create a port exception for TCP port 1433 for the SQL Server service.
- You must create a port exception for UDP port 1434 for the SQL Server Browser service.
Note: On a SQL Server installation that is hosted as a named instance, the SQL Server service uses a dynamic TCP port assignment to listen on. The SQL Server Browser service is hosted by the SQL Server installation. The SQL Server Browser service listens for client application requests for named instances on UDP port 1434. The SQL Server Browser service responds to these client requests by providing specific TCP port information for that named instance.
o You must create a port exception for the dynamic TCP port information for a SQL Server named instance that will host the Lync Server 2010 databases
To locate the dynamic TCP port information for a SQL Server named instance that will host the Lync Server 2010 databases, follow these steps:
1. Start SQL Server.
2. Click Configuration Tools.
3. Select the SQL Server Configuration Manager.
4. Expand the SQL Server Network Configuration.
5. Select the protocols for the specific SQL Server named instance. Note: For a named instance, the TCP/IP protocol must be enabled.
6. When you have selected the protocols for the specific named instance, select TCP/IP in the details pane on the right side.
7. Right-click the TCP/IP network protocol to open its properties dialog box, and then click the IP Addresses tab.
8. Scroll down to locate the IP All section of the IP Addresses tab, and then note the value for TCP Dynamic Ports. This number represents the TCP port number of the SQL Server named instance that will host the Lync Server 2010 databases.
9. Click OK to close the TCP/IP properties dialog box.
l Create a file share, create it locally and ensure the account you are currently using to run the topology builder has read/write access to this folder. I’ll call my folder and share name “LyncShare”
l Install Silverlight, it is required to execute the lync server UI or lync server control Panel.
Install Lync server
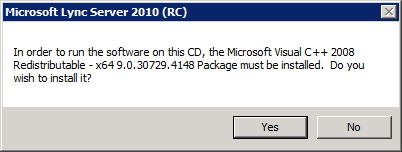
Upon inserting (or mounting) your Lync RC ISO Internet Explorer will present the following options.
Click yes to install.
A few minutes later the following dialogue will appear. I choose to accept the default installation directory.
In my case I have already completed the Active Directory preparation steps and provided you are logged in with a Domain Admin or equivalent account and your AD is in good shape this should complete without a hitch.(if you have completed the Preparation Steps successfully, it should complete without a hitch) As per the installation steps, once this is completed add your chosen admin account to the newly created CSAdministrator group.
Head back to the main deployment wizard screen and select the option to Prepare first Standard Edition Server (top right hand option). This will install a copy of SQL 2008 Express, Lync Server core installation files and create an RTC database –once complete you’ll be presented with the following dialogue.
Next install the Topology Builder via the main deployment screen, when this completes you gain a green tick to signify a successful install. We need to define our topology by launching the topology builder via the start menu, Upon launching the Topology Builder we are presented with three options, choose New Topology (see below).
A dialogue will ask you to choose a save file/location, I’m going to accept the default location and call the file MyTopology.tbxml. Next you are asked for your primary SIP domain, I’ll be using my test AD domain for this ldap.com (see below).
Click next, I didn’t choose to add any additional SIP domains. Next give your site a name, and with this completed you are prompted to open the New Front End Wizard, leave this checked.
First of all we need to input the pool’s FQDN, in my case it will be lynnyan09.ldap.com (lynnyan09 is the name of my server). I’ll also be opting for the Standard Edition Server Topology (they’ll be no high availability and an additional SQL Express instance, this will host the user and application store and will be installed automatically upon publishing the policy).
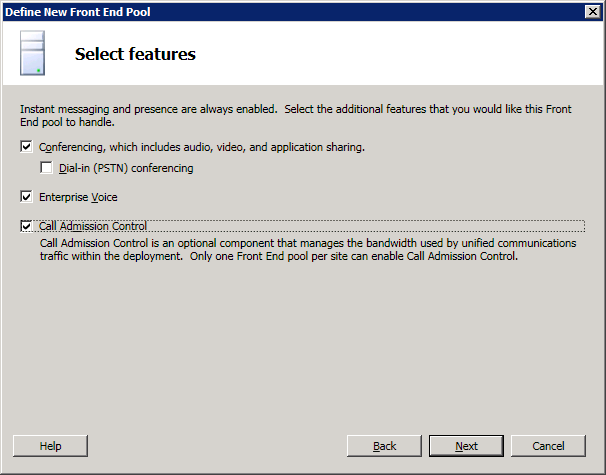
We are now going to select the features required and therefore destined to be collocated, I’ll be installing Conferencing (without Dial-in, I’m not going for PSTN voice integration for this lab setup), Enterprise Voice and Call Admission Control.
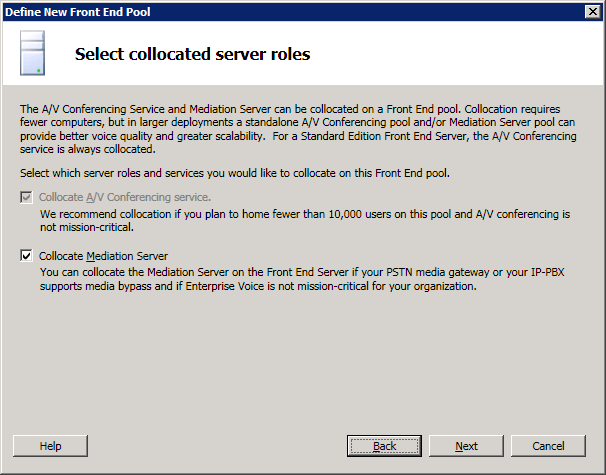
I’ll choose to collocate the Mediation Server (it will be redundant for now, given my choice to hang fire on voice integration).
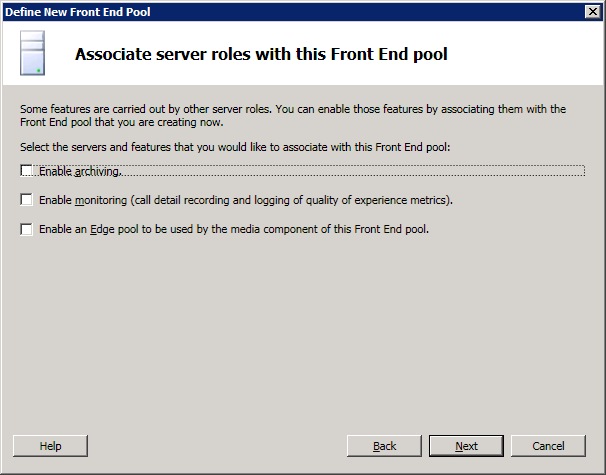
Given my single server approach and lack of any need to archive, monitor or federate within my lab, I’ll choose to not select any additional server roles within the next screen.
I don’t need to define my SQL store as my Standard Edition will perform the SQL Express installation automatically.
Now we’ll need to create a file share.
The next screen will ask you for an external URL, if you have a public facing FQDN for this server, it goes here. On the next screen (specify PSTN gateways, click finish, if you, like me are not configuring PSTN integration). You will now be taken back to the main topology builder screen, where you can view a detailed summary of your chosen setup. Click edit properties on the top right (below New Central Site) as you will need to add a few final tweaks.
First, you need to add an administrative URL, in my case https://admin.ldap.com and select the front end server to install your CMS on (all things being equal you should have one option here, your previously specified pool FQDN).
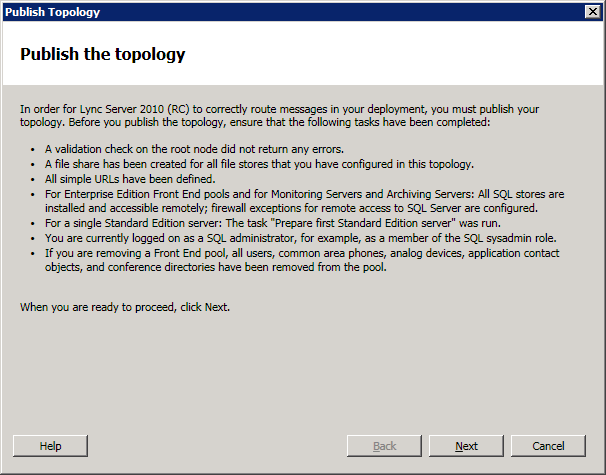
You are all set to publish your topology! To do so select this option from the right hand side of the main topology builder screen.If you followed the guide correctly validation should succeed, click next on the publish topology wizard.
Accept the front end pool default by clicking next.
Next the Central Management Store is created. When the wizard completes a text based to-do list can be presented with remaining tasks, you’ll need to create three DNS A records for the simple URLs specified – these should be directed to the IP address of your Lync Server (I won’t cover this). I will cover the final install step – the server components install.
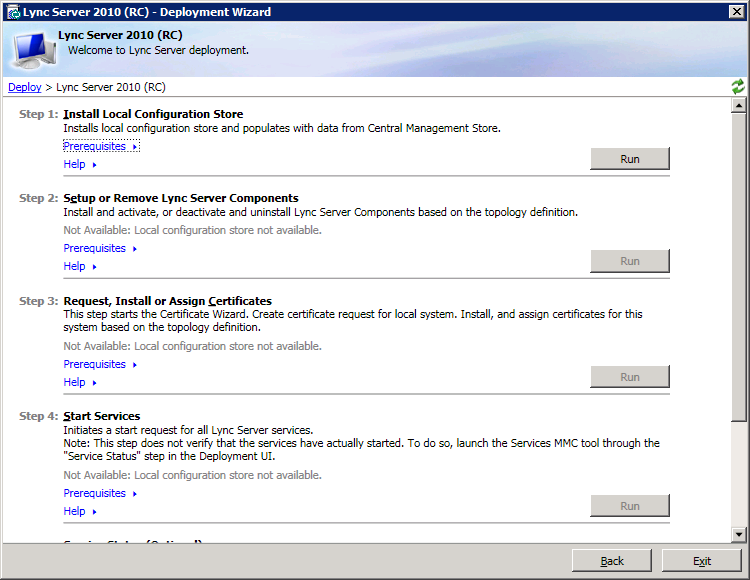
To finish your server installation you need to head back to the Lync Server Deployment Wizard, now accessible via the start menu. Choose Install or Update Lync Server System to continue.
Choose step 1 to install a local CMS and choose the option to retrieve directly from the CMS.
Upon completion, click finish.(need a long time)
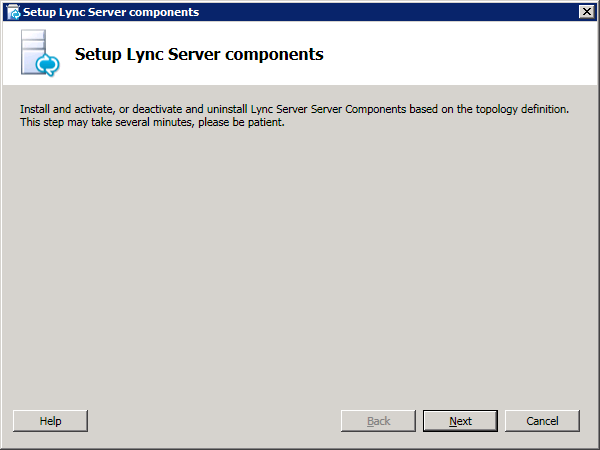
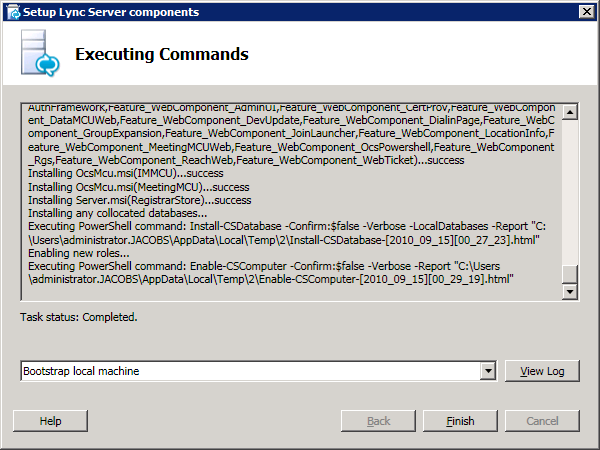
Choose step 2 to install Lync Server Components.
You may be asked to restart, should this occur click finish and manually restart your server. After logging back in re-execute the deployment wizard and click step 2 from within Install or Update Lync Server System for the second time, it will automatically resume from where it left off. With this complete, click finish.
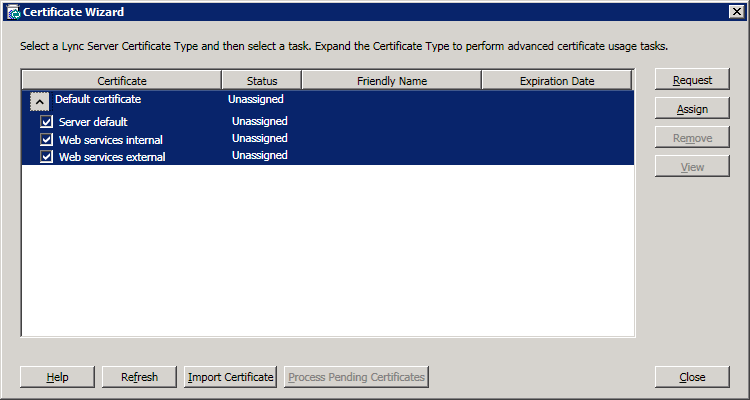
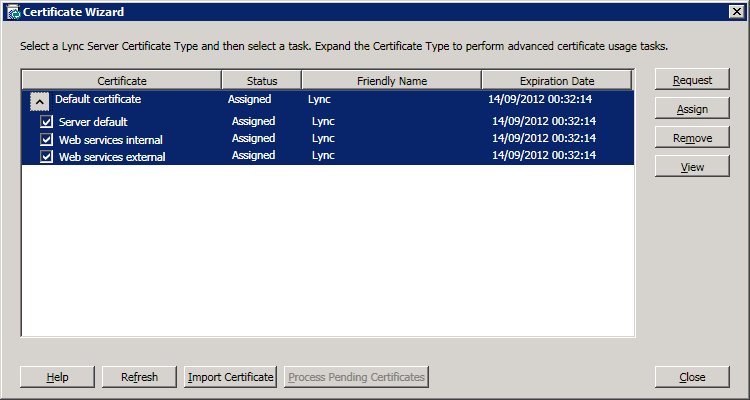
Step 3 is where certificates are requested and assigned to the server and both internal/external web services. Click request (see below).
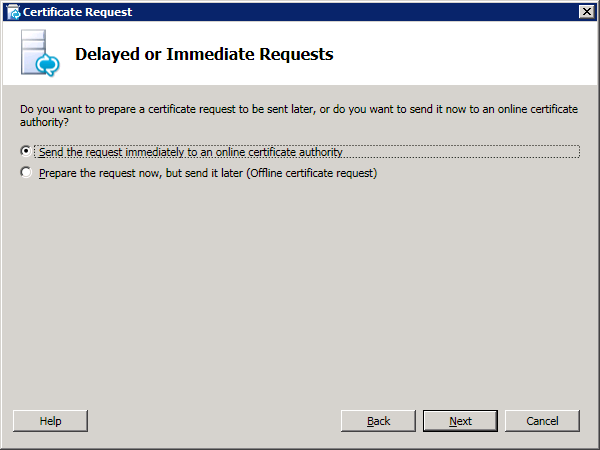
The following dialogue will be presented, choose to send the request immediately to an online certificate authority (this will submit via AD Certificate Services).
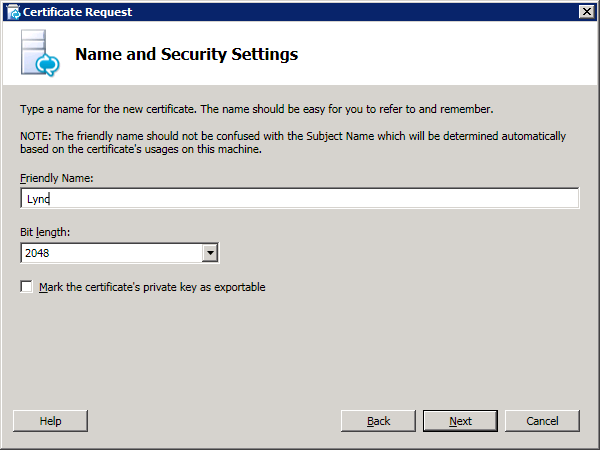
Select your local CA via the detected server list, click next until you see the option to specify a friendly name, I’ll use Lync.
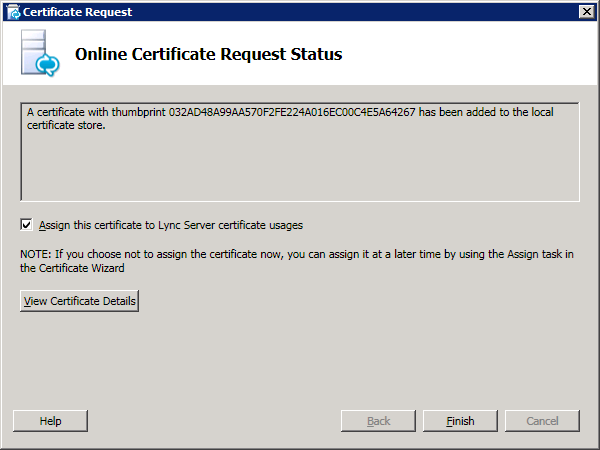
Choose friendly organisation names, country, state/city and click next. You now need to configure and accept subject alternate names (SAN) – this is where a single certificate can handle multiple common names or domain names. In my case I’ll accept my locally configured SIP domain. You can add additional names where you have a public facing FQDN, click finish to execute certificate commands. The assign the requested certificates (see below).
Upon completion the following screen will be presented.
Gentlemen start your services, or just click step 4! If you want to verify everything went A okay there is an option to launch services.msc. Looking good!
Launch Lync server
Launch the Lync Server Control Panel via the start menu and enable two test users.
Note: The login user should have CSAdministrator admin authority.
All things being equal you should now be able to install and login with your Lync client by using the corresponding sign-in address.
Note:
You need to configure the lync server manually, type server’s name not the IP address, if you type the IP address, you can’t log in lync client, it will pop up an error message” Error: An error occurred: "System.UnauthorizedAccessException" Access is denied. (Exception from HRESULT: 0x80070005 (E_ACCESSDENIED))".


 96
96

 被折叠的 条评论
为什么被折叠?
被折叠的 条评论
为什么被折叠?
 到【灌水乐园】发言


