


 本文详细介绍了如何在Docker中基于nvidia/cuda:11.3.0-runtime-ubuntu20.04镜像创建PyTorch GPU版本的环境,包括检查驱动、CUDA版本和PyTorch的对应关系,编写Dockerfile,安装依赖,创建和运行容器,并最终将镜像发布到阿里云的过程。
用docker创建pytorch gpu版本
自制镜像, 以nvidia/cuda:11.3.0-runtime-ubuntu20.04为基础镜像
一、显卡驱动、镜像cuda版本、pytorch cuda版本三者对应
1. 查看驱动版本
nvidia-smi查看显卡驱动版本

可以看到显卡驱动版本为:470.103.01
2. 查看该驱动版本支持的cuda版本
https://docs.nvidia.com/cuda/cuda-toolkit-release-notes/index.html
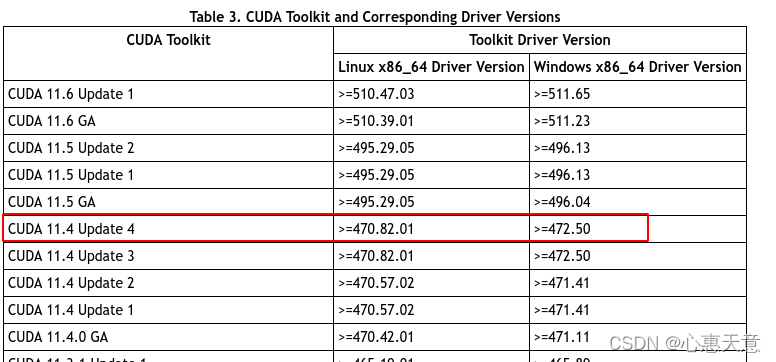 可以看到最高支持到cuda版本为:11.4
3. 查看pytorch是否支持该cuda版本
https://pytorch.org/get-started/locally/
pytorch_install
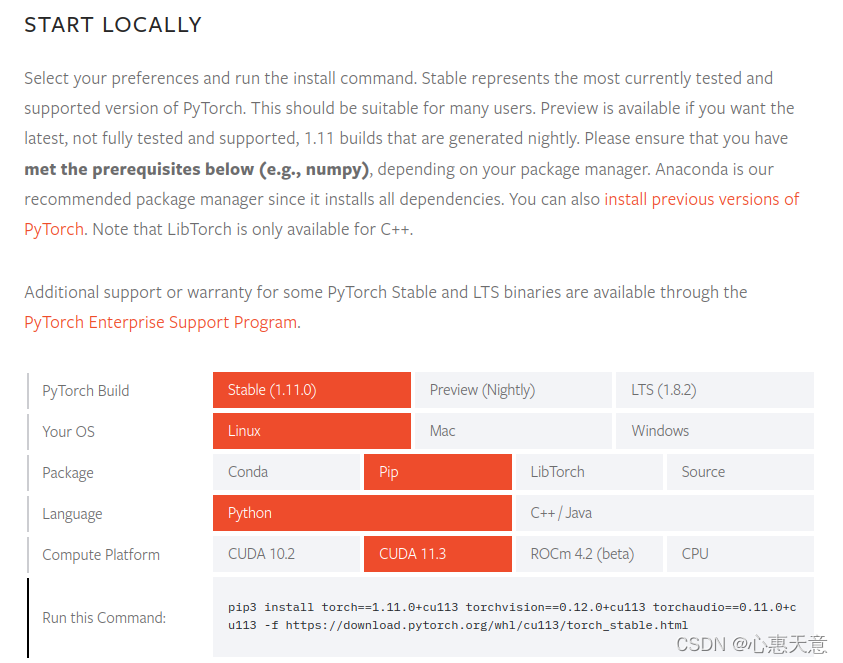
可以看到是支持的
二、找镜像
找该cuda版本镜像
https://hub.docker.com/r/nvidia/cuda/tags?page=1&ordering=last_updated
搜索:nvidia/cuda:11.3.0-runtime-ubuntu20.04
电脑系统版本为ubuntu20.04,就下20.04的
拉取 镜像
docker pull nvidia/cuda:11.3.0-runtime-ubuntu20.04
更新pip 的另一种方式
dockerfile同路径下要有get-pip.py,之所以要这个是因为这样安装pip是最精简的,其他方式十分冗余
get-pip.py获取地址:
https://bootstrap.pypa.io/get-pip.py
三、编写Dockerfile
资料下载:
链接: https://pan.baidu.com/s/1Ds1z81ghfssJcj-wE_GauQ 密码: 9bgd
FROM nvidia/cuda:11.3.0-runtime-ubuntu20.04

MAINTAINER yyq
#添加python的安装包
ADD Python-3.7.10.tar.xz /opt
#为了执行apt-get update
RUN mv /etc/apt/sources.list /etc/apt/sources.list.bak
COPY sources.list /etc/apt/sources.list
RUN chmod a+x /etc/apt/sources.list

ENV DEBIAN_FRONTEND=noninteractive
#更新apt
RUN apt-get update

RUN mkdir /root/.pip
COPY pip.conf /root/.pip/.

RUN mkdir /usr/local/python-3.7
#安装依赖

RUN apt-get install gcc -y && apt-get install make -y \
		&& apt-get install vim -y && apt-get install openssl -y \
		&& apt-get install libssl-dev -y && apt-get install python3-pip -y
RUN /opt/Python-3.7.10/configure --prefix=/usr/local/python-3.7 \
		&& make && make install

RUN apt-get install vim ffmpeg libsm6 libxext6 cron openssh-server -y
RUN pip install aio-pika==7.1.0 asyncio==3.4.3 APScheduler==3.7.0 matplotlib==3.3.4 opencv-python==4.5.2.52 && \
    Pillow==8.2.0 pika==1.2.0 pymongo==3.11.4 requests==2.25.1
RUN pip install pandas==1.5.3 pyyaml==6.0 tqdm==4.64.1 seaborn==0.12.2
RUN pip install torch==1.11.0+cu113 torchvision==0.12.0+cu113 torchaudio==0.11.0+cu113 -f https://download.pytorch.org/whl/cu113/torch_stable.html

RUN cp /usr/share/zoneinfo/Asia/Shanghai /etc/localtime && echo 'Asia/Shanghai'>/etc/timezone

RUN sed -i 's/#PermitRootLogin prohibit-password/PermitRootLogin yes/'  /etc/ssh/sshd_config
RUN sed -i 's/UsePAM yes/UsePAM no/' /etc/ssh/sshd_config
RUN echo "root:123456" | chpasswd

RUN echo  "alias ll='ls -l'" >> ~/.bash_profile
RUN /bin/bash -c 'source  ~/.bash_profile;'

CMD [""]
四、创建环境
docker build -t cuda-11.3-pytorch:v1 .
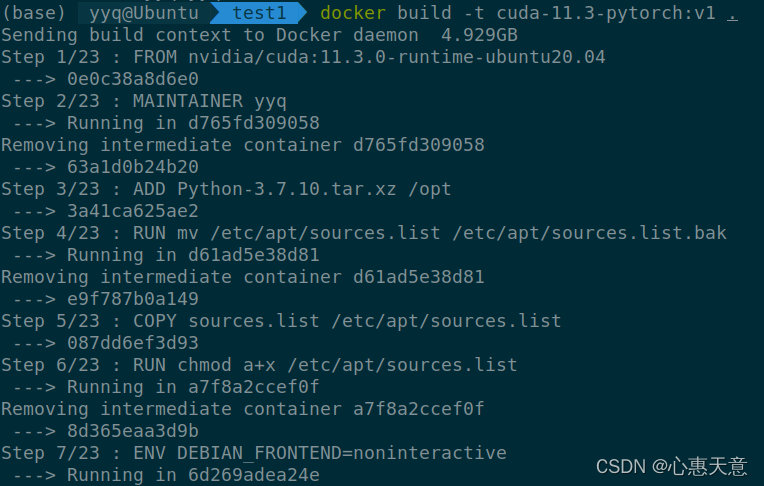
docker images 查看刚刚定制的镜像

五、 生成容器并进入容器
注:创建容器的时候一定要加 --runtime=nvidia 否则无法使用GPU
docker run --name py_gpu --runtime=nvidia -it cuda-11.3-pytorch:v1 /bin/bash
检测pytorch的 gpu 是否安装成功,可以看我的另一篇博客 pytorch_gpu

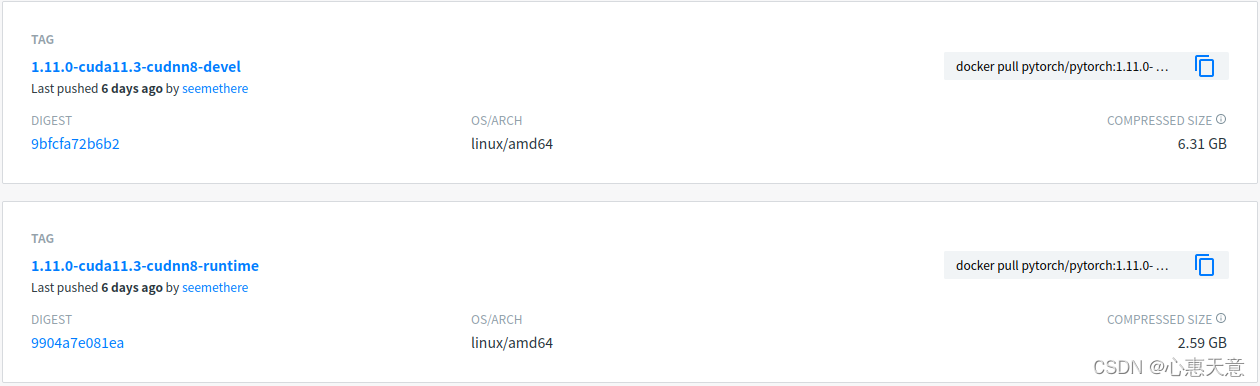
六、官方镜像
后面我发现pytorch有官方的镜像,官方的runtime 2.59G, devel 6.31G,我的8.46G, 明显官方的小很多
https://hub.docker.com/r/pytorch/pytorch/tags?page=1&ordering=last_updated
七、将生成镜像发布到阿里云
具体步骤可以看我的另一篇博客 镜像发布到阿里云
注:必须要有生成的容器
docker commit -a yyq -m "cuda-11.3-pytorch" b86212f4836c cuda11.3_pytorch:v1
 于是镜像就多了一个

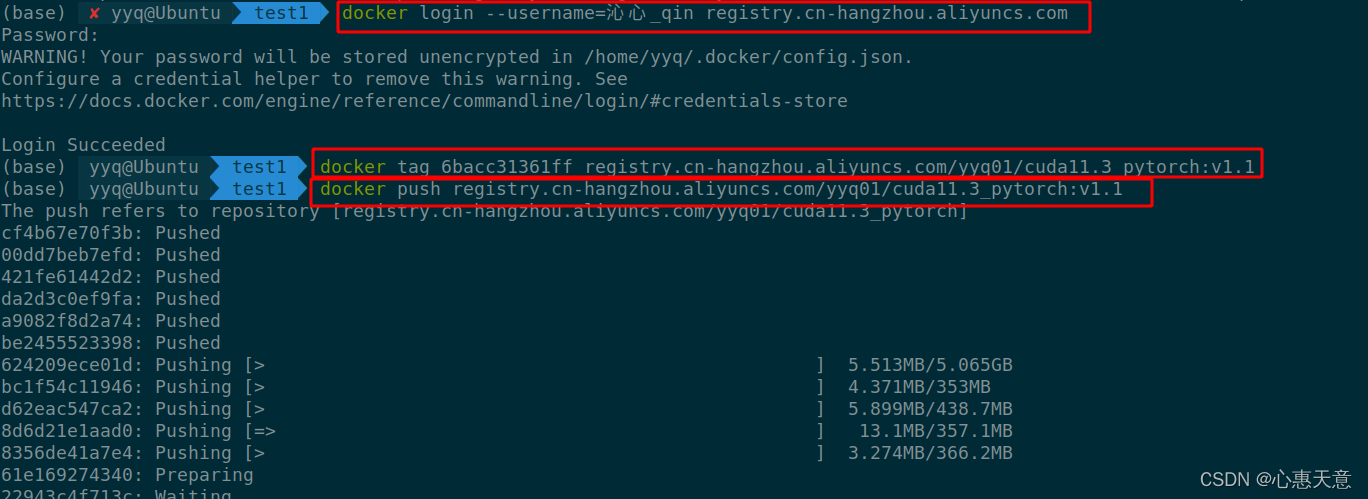
将镜像推送到registry
docker login --username=沁心_qin registry.cn-hangzhou.aliyuncs.com
docker tag 6bacc31361ff registry.cn-hangzhou.aliyuncs.com/yyq01/cuda11.3_pytorch:v1.1
docker push registry.cn-hangzhou.aliyuncs.com/yyq01/cuda11.3_pytorch:v1.1
 上传完成后可以看到

八、保存镜像
docker save cuda-11.3-pytorch:v1 | gzip -c > cuda11.3_pytorch.tar.gz

注:为什么选runtime
仔细看dockerhub nvidia/cuda 有base runtime devel
看官方给的说明
https://github.com/NVIDIA/nvidia-docker/wiki/CUDA
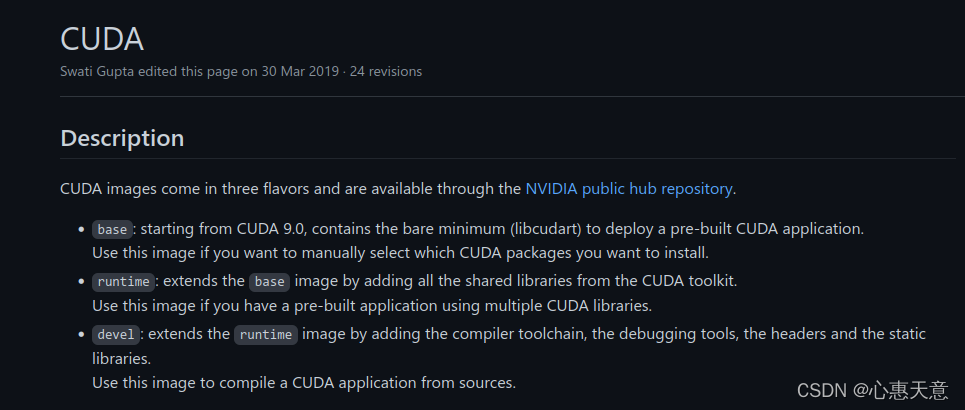 大概含义就是
base:最低要求,什么也没有,东西自己安装
runtime:基础用的都有
devel:基础用的+调试
镜像大小的一个比一个大,所以就选runtime


 765
765

 被折叠的 条评论
为什么被折叠?
被折叠的 条评论
为什么被折叠?
 到【灌水乐园】发言


