SpringSecurity
Spring Security的安全管理有两个重要概念,分别是Authentication(认证)和Authorization(授权)
基本环境
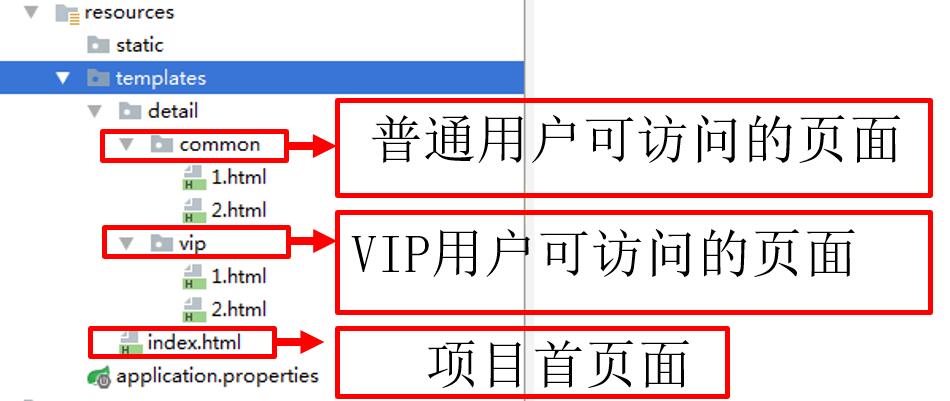
创建一个springboot项目,导入相关依赖。在templates中引入相关资源,如下:
controller层
@GetMapping("/detail/{type}/{path}")
public String toDetail(@PathVariable("type") String type, @PathVariable("path") String path) {
    return "detail/" + type + "/" + path;
}
定义了跳转至详情页的方法
开启安全管理
只需引入依赖即可
<dependency>
    <groupId>org.springframework.boot</groupId>
    <artifactId>spring-boot-starter-security</artifactId>
</dependency>
一旦引入,即会生效
运行测试
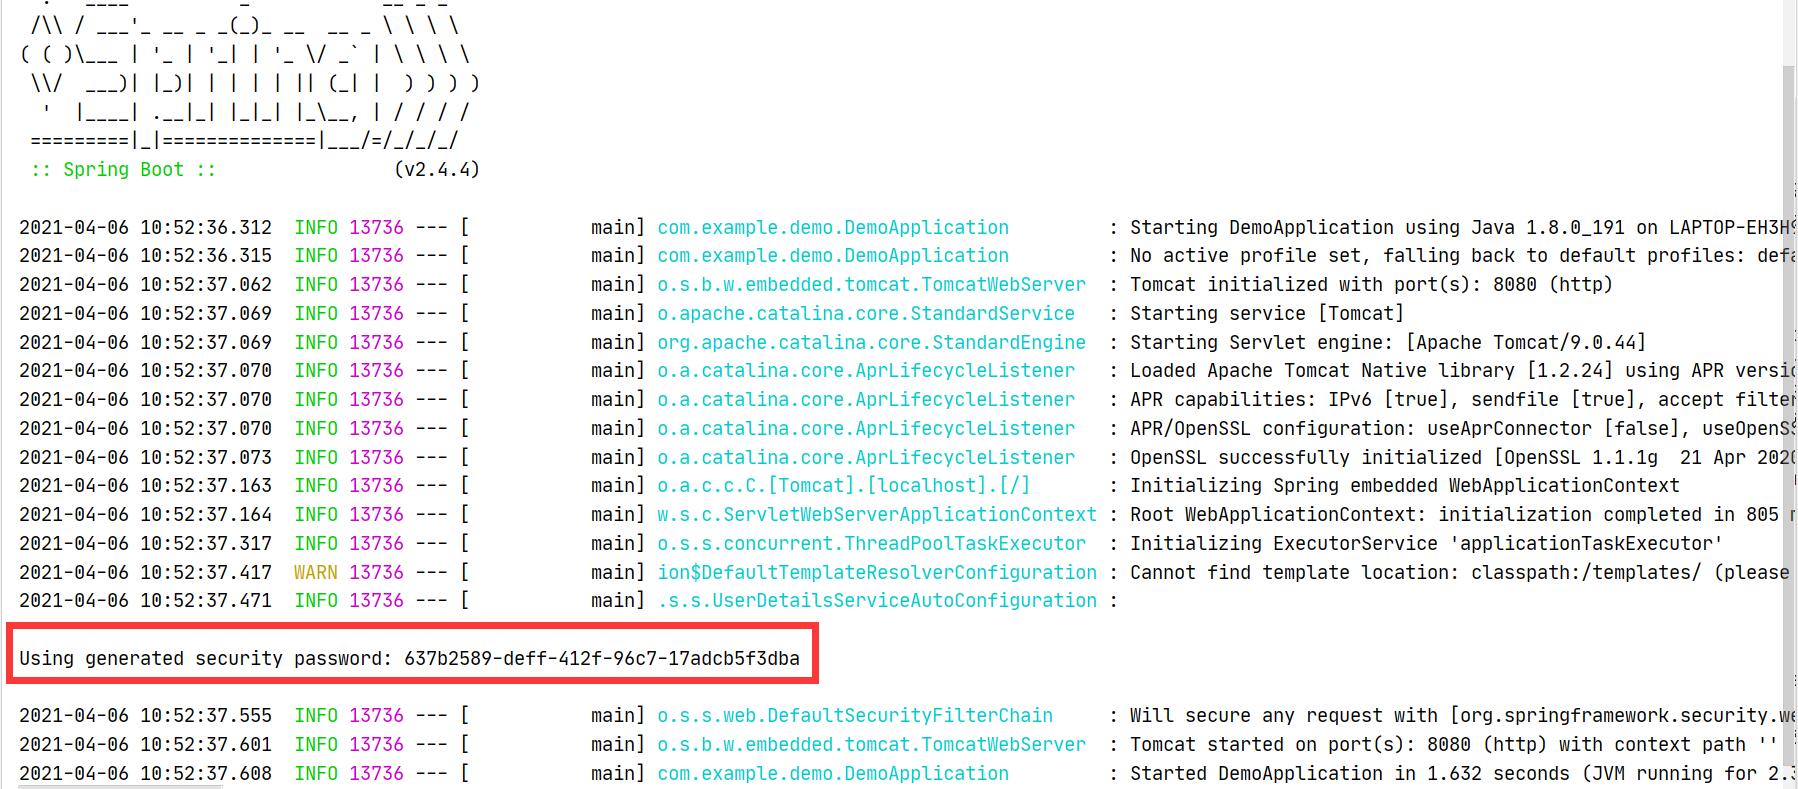
启动项目,会产生一个随机的密码,用来登陆
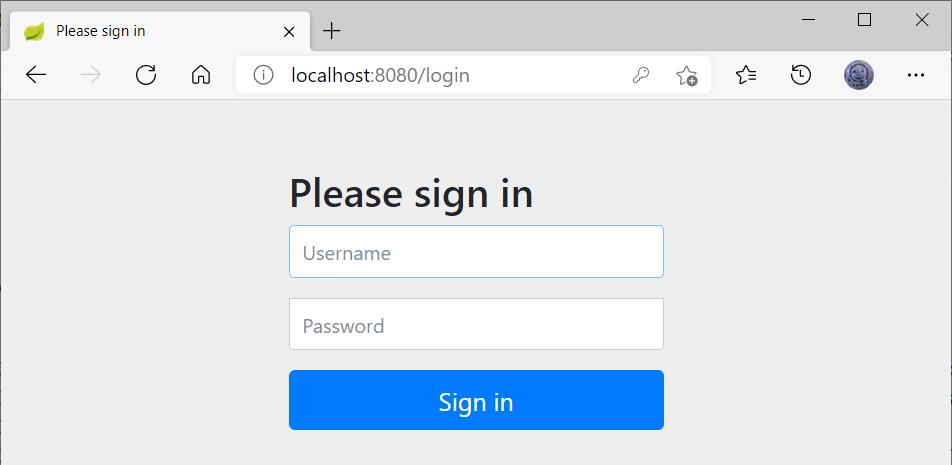
此时访问http://localhost:8080,会自动重定向到http://localhost:8080/login,要求登陆
这时采用默认用户名user以及随机生成的密码登陆后,才可进行访问
自定义用户认证
通过自定义WebSecurityConfigurerAdapter类型的Bean组件,并重写configure(AuthenticationManagerBuilder auth)方法,实现自定义用户认证
内存认证
@EnableWebSecurity
/*
@EnableWebSecurity等同于
    @EnableGlobalAuthentication
    @Import(WebSecurityConfiguration.class)
    @Configuration同时使用
@EnableGlobalAuthentication:开启自定义的全局认证
@Import(WebSecurityConfiguration.class):进行自动化配置
@Configuration:将当前类作为配置类
 */
public class SecurityConfig extends WebSecurityConfigurerAdapter {
    //用户身份认证自定义配置
    @Override
    protected void configure(AuthenticationManagerBuilder auth) throws Exception {
        //  密码需要设置编码器
        BCryptPasswordEncoder encoder = new BCryptPasswordEncoder();
        // 1、使用内存用户信息,作为测试使用
        auth.inMemoryAuthentication().passwordEncoder(encoder)
                .withUser("shitou").password(encoder.encode("123456")).roles("common")
                .and()
                .withUser("李四").password(encoder.encode("123456")).roles("vip");
        /*
        自定义用户认证,必须设置密码编码器保护,推荐BCryptPasswordEncoder
        自定义用户认证时,可以自定义用户角色roles,也可以自定义用户权限authorities
        在自定义时,可以为同一个用户指定多个角色或者权限
         */
}
运行测试此时不会自动生成密码,使用自定义的配置进行登录即可
JDBC身份认证
数据库表结构
t_customer
t_authorityt_customer_authority
导入依赖,并在yml文件中进行数据库相关配置
<!-- JDBC数据库连接启动器 -->
<dependency>
    <groupId>org.springframework.boot</groupId>
    <artifactId>spring-boot-starter-jdbc</artifactId>
</dependency>
<!-- MySQL数据连接驱动 -->
<dependency>
    <groupId>mysql</groupId>
    <artifactId>mysql-connector-java</artifactId>
    <scope>runtime</scope>
</dependency>
重写configure(AuthenticationManagerBuilder auth)方法方法
@EnableWebSecurity
public class SecurityConfig extends WebSecurityConfigurerAdapter {
    @Autowired
    private DataSource dataSource;

    //用户身份认证自定义配置
    @Override
    protected void configure(AuthenticationManagerBuilder auth) throws Exception {
        //  密码需要设置编码器
        BCryptPasswordEncoder encoder = new BCryptPasswordEncoder();
        //使用JDBC进行身份认证
        String userSQL ="select username,password,valid from t_customer " +
                "where username = ?";
        String authoritySQL="select c.username,a.authority from t_customer c,t_authority a,"+
                "t_customer_authority ca where ca.customer_id=c.id " +
                "and ca.authority_id=a.id and c.username =?";
        auth.jdbcAuthentication().passwordEncoder(encoder)
                .dataSource(dataSource)
                .usersByUsernameQuery(userSQL)
                .authoritiesByUsernameQuery(authoritySQL);
        /*
        自定义用户查询的SQL语句时,必须返回username、password、valid三个字段信息
        自定义其权限查询SQL语句时,必须返回username、authority两个字段信息
        否则会报异常
         */
    }
}
此时再次进行测试,需要输入数据库中保存的用户名与密码即可
使用Service进行身份认证
在service层,有如下服务
@Service
public class CustomerService {
    @Autowired
    private CustomerRepository customerRepository;
    @Autowired
    private AuthorityRepository authorityRepository;
    @Autowired
    private RedisTemplate redisTemplate;

    // 业务控制:使用唯一用户名查询用户信息
    public Customer getCustomer(String username) {
        Customer customer = null;
        Object o = redisTemplate.opsForValue().get("customer_" + username);
        if (o != null) {
            customer = (Customer) o;
        } else {
            customer = customerRepository.findByUsername(username);
            if (customer != null) {
                redisTemplate.opsForValue().set("customer_" + username, customer);
            }
        }
        return customer;
    }

    // 业务控制:使用唯一用户名查询用户权限
    public List<Authority> getCustomerAuthority(String username) {
        List<Authority> authorities = null;
        Object o = redisTemplate.opsForValue().get("authorities_" + username);
        if (o != null) {
            authorities = (List<Authority>) o;
        } else {
            authorities = authorityRepository.findAuthoritiesByUsername(username);
            if (authorities.size() > 0) {
                redisTemplate.opsForValue().set("authorities_" + username, authorities);
            }
        }
        return authorities;
    }
}
其中结合了Redis缓存,另:AuthorityRepository和CustomerRepository如下
public interface AuthorityRepository extends JpaRepository<Authority,Integer> {
    @Query(value = "select a.* from t_customer c,t_authority a,t_customer_authority ca where ca.customer_id=c.id and ca.authority_id=a.id and c.username =?1",nativeQuery = true)
    public List<Authority> findAuthoritiesByUsername(String username);
}
public interface CustomerRepository extends JpaRepository<Customer,Integer> {
    Customer findByUsername(String username);
}
自定义UserDetailsService,用于封装认证用户信息
@Service
public class UserDetailsServiceImpl implements UserDetailsService {
    @Autowired
    private CustomerService customerService;

    @Override
    public UserDetails loadUserByUsername(String s) throws UsernameNotFoundException {
        // 通过业务方法获取用户及权限信息
        Customer customer = customerService.getCustomer(s);
        List<Authority> authorities = customerService.getCustomerAuthority(s);
        // 对用户权限进行封装
        List<SimpleGrantedAuthority> list = authorities.stream().map(authority -> new SimpleGrantedAuthority(authority.getAuthority())).collect(Collectors.toList());
        // 返回封装的UserDetails用户详情类
        if (customer != null) {
            UserDetails userDetails = new User(customer.getUsername(), customer.getPassword(), list);
            return userDetails;
        } else {
            // 如果查询的用户不存在(用户名不存在),必须抛出此异常
            throw new UsernameNotFoundException("当前用户不存在!");
        }
    }
}
最后重写configure(AuthenticationManagerBuilder auth)方法即可
@EnableWebSecurity
public class SecurityConfig extends WebSecurityConfigurerAdapter {
    @Autowired
    private UserDetailsServiceImpl userDetailsService;

    //用户身份认证自定义配置
    @Override
    protected void configure(AuthenticationManagerBuilder auth) throws Exception {
        //  密码需要设置编码器
        BCryptPasswordEncoder encoder = new BCryptPasswordEncoder();
        //使用UserDetailsService进行身份认证
        auth.userDetailsService(userDetailsService).passwordEncoder(encoder);
    }
}
运行测试,效果与上面相同
源码下载
此节源码与下一节整合在一起,请前往下一节处下载


 831
831


 被折叠的 条评论
为什么被折叠?


