


初始化项目
环境
- node 16+
- pnpm 8.0.0
命令
pnpm create vite
进行以下选择 👇
– 项目名
– VUe
– Ts
– cd/目录
– pnpm run dev
浏览器自动打开
package.json
配置eslint
安装依赖包
pnpm i eslint -D
npx eslint --init // 生成配置文件
进行以下选择 👇
– problems
– esm
– vue.js
– yes
– Browser
– JS
– yes
– pnpm
安装环境代码校验插件
# 让所有与prettier规则存在冲突的Eslint rules失效,并使用prettier进行代码检查
"eslint-config-prettier": "^8.6.0",
"eslint-plugin-import": "^2.27.5",
"eslint-plugin-node": "^11.1.0",
# 运行更漂亮的Eslint,使prettier规则优先级更高,Eslint优先级低
"eslint-plugin-prettier": "^4.2.1",
# vue.js的Eslint插件(查找vue语法错误,发现错误指令,查找违规风格指南
"eslint-plugin-vue": "^9.9.0",
# 该解析器允许使用Eslint校验所有babel code
"@babel/eslint-parser": "^7.19.1",
pnpm install -D eslint-plugin-import eslint-plugin-vue eslint-plugin-node eslint-plugin-prettier eslint-config-prettier eslint-plugin-node @babel/eslint-parser
修改.eslintrc.cjs配置文件
// @see https://eslint.bootcss.com/docs/rules/

module.exports = {
    env: {
        browser: true,
        es2021: true,
        node: true,
        jest: true,
    },
    /* 指定如何解析语法 */
    parser: 'vue-eslint-parser',
    /** 优先级低于 parse 的语法解析配置 */
    parserOptions: {
        ecmaVersion: 'latest',
        sourceType: 'module',
        parser: '@typescript-eslint/parser',
        jsxPragma: 'React',
        ecmaFeatures: {
            jsx: true,
        },
    },
    /* 继承已有的规则 */
    extends: [
        'eslint:recommended',
        'plugin:vue/vue3-essential',
        'plugin:@typescript-eslint/recommended',
        'plugin:prettier/recommended',
    ],
    plugins: ['vue', '@typescript-eslint'],
    /*
     * "off" 或 0    ==>  关闭规则
     * "warn" 或 1   ==>  打开的规则作为警告(不影响代码执行)
     * "error" 或 2  ==>  规则作为一个错误(代码不能执行,界面报错)
     */
    rules: {
        // eslint(https://eslint.bootcss.com/docs/rules/)
        'no-var': 'error', // 要求使用 let 或 const 而不是 var
        'no-multiple-empty-lines': ['warn', { max: 1 }], // 不允许多个空行
        'no-console': process.env.NODE_ENV === 'production' ? 'error' : 'off',
        'no-debugger': process.env.NODE_ENV === 'production' ? 'error' : 'off',
        'no-unexpected-multiline': 'error', // 禁止空余的多行
        'no-useless-escape': 'off', // 禁止不必要的转义字符

        // typeScript (https://typescript-eslint.io/rules)
        '@typescript-eslint/no-unused-vars': 'error', // 禁止定义未使用的变量
        '@typescript-eslint/prefer-ts-expect-error': 'error', // 禁止使用 @ts-ignore
        '@typescript-eslint/no-explicit-any': 'off', // 禁止使用 any 类型
        '@typescript-eslint/no-non-null-assertion': 'off',
        '@typescript-eslint/no-namespace': 'off', // 禁止使用自定义 TypeScript 模块和命名空间。
        '@typescript-eslint/semi': 'off',

        // eslint-plugin-vue (https://eslint.vuejs.org/rules/)
        'vue/multi-word-component-names': 'off', // 要求组件名称始终为 “-” 链接的单词
        'vue/script-setup-uses-vars': 'error', // 防止<script setup>使用的变量<template>被标记为未使用
        'vue/no-mutating-props': 'off', // 不允许组件 prop的改变
        'vue/attribute-hyphenation': 'off', // 对模板中的自定义组件强制执行属性命名样式
    },
}
.eslintignore 配置文件
dist
node_modules
添加运行脚本
package.json
	"lint": "eslint src",
    "fix": "eslint src --fix"
配置prettier
安装依赖包
pnpm install -D eslint-plugin-prettier prettier eslint-config-prettier
.prettierrc.json(自己创建)添加规则
{
  "singleQuote": true,
  "semi": false,
  "bracketSpacing": true,
  "htmlWhitespaceSensitivity": "ignore",
  "endOfLine": "auto",
  "trailingComma": "all",
  "tabWidth": 2
}
.prettierignore忽略文件
/dist/*
/html/*
.local
/node_modules/**
**/*.svg
**/*.sh
/public/*
通过pnpm run lint去检测语法,如果出现不规范格式,通过pnpm run fix 修改
配置stylelint
安装依赖包
pnpm add sass sass-loader stylelint postcss postcss-scss postcss-html stylelint-config-prettier stylelint-config-recess-order stylelint-config-recommended-scss stylelint-config-standard stylelint-config-standard-vue stylelint-scss stylelint-order stylelint-config-standard-scss -D
.stylelintrc.cjs配置文件
// @see https://stylelint.bootcss.com/

module.exports = {
  extends: [
    'stylelint-config-standard', // 配置stylelint拓展插件
    'stylelint-config-html/vue', // 配置 vue 中 template 样式格式化
    'stylelint-config-standard-scss', // 配置stylelint scss插件
    'stylelint-config-recommended-vue/scss', // 配置 vue 中 scss 样式格式化
    'stylelint-config-recess-order', // 配置stylelint css属性书写顺序插件,
    'stylelint-config-prettier', // 配置stylelint和prettier兼容
  ],
  overrides: [
    {
      files: ['**/*.(scss|css|vue|html)'],
      customSyntax: 'postcss-scss',
    },
    {
      files: ['**/*.(html|vue)'],
      customSyntax: 'postcss-html',
    },
  ],
  ignoreFiles: [
    '**/*.js',
    '**/*.jsx',
    '**/*.tsx',
    '**/*.ts',
    '**/*.json',
    '**/*.md',
    '**/*.yaml',
  ],
  /**
   * null  => 关闭该规则
   * always => 必须
   */
  rules: {
    'value-keyword-case': null, // 在 css 中使用 v-bind,不报错
    'no-descending-specificity': null, // 禁止在具有较高优先级的选择器后出现被其覆盖的较低优先级的选择器
    'function-url-quotes': 'always', // 要求或禁止 URL 的引号 "always(必须加上引号)"|"never(没有引号)"
    'no-empty-source': null, // 关闭禁止空源码
    'selector-class-pattern': null, // 关闭强制选择器类名的格式
    'property-no-unknown': null, // 禁止未知的属性(true 为不允许)
    'block-opening-brace-space-before': 'always', //大括号之前必须有一个空格或不能有空白符
    'value-no-vendor-prefix': null, // 关闭 属性值前缀 --webkit-box
    'property-no-vendor-prefix': null, // 关闭 属性前缀 -webkit-mask
    'selector-pseudo-class-no-unknown': [
      // 不允许未知的选择器
      true,
      {
        ignorePseudoClasses: ['global', 'v-deep', 'deep'], // 忽略属性,修改element默认样式的时候能使用到
      },
    ],
  },
}
.stylelintignore忽略文件
/node_modules/*
/dist/*
/html/*
/public/*
最后配置统一的prettier来格式化我们的js和css,html代码
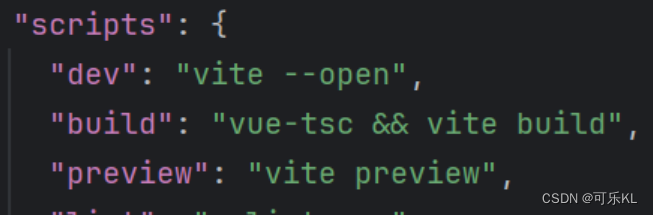
"scripts": {
    "dev": "vite --open",
    "build": "vue-tsc && vite build",
    "preview": "vite preview",
    "lint": "eslint src",
    "fix": "eslint src --fix",
    "format": "prettier --write \"./**/*.{html,vue,ts,js,json,md}\"",
    "lint:eslint": "eslint src/**/*.{ts,vue} --cache --fix",
    "lint:style": "stylelint src/**/*.{css,scss,vue} --cache --fix"
  },
当我们运行pnpm run format的时候,会把代码直接格式化
配置husky
安装依赖包
pnpm install -D husky
执行(需要先连接远程仓库)
npx husky-init
在.husky/pre-commit文件添加如下命令:
#!/usr/bin/env sh
. "$(dirname -- "$0")/_/husky.sh"

pnpm run format
当我们对代码进行commit操作的时候,就会执行命令,对代码进行格式化,然后再提交。
(如果远程仓库代码没有更新的话,重新提交一下)
配置commitlint
安装依赖包
pnpm add @commitlint/config-conventional @commitlint/cli -D
新建commitlint.config.cjs
module.exports = {
  extends: ['@commitlint/config-conventional'],
  // 校验规则
  rules: {
    'type-enum': [
      2,
      'always',
      [
        'feat',
        'fix',
        'docs',
        'style',
        'refactor',
        'perf',
        'test',
        'chore',
        'revert',
        'build',
      ],
    ],
    'type-case': [0],
    'type-empty': [0],
    'scope-empty': [0],
    'scope-case': [0],
    'subject-full-stop': [0, 'never'],
    'subject-case': [0, 'never'],
    'header-max-length': [0, 'always', 72],
  },
}
在package.json中配置scripts命令
# 在scrips中添加下面的代码
{
"scripts": {
    "commitlint": "commitlint --config commitlint.config.cjs -e -V"
  },
}
配置结束,现在当我们填写commit信息的时候,前面就需要带着下面的subject‘
'feat',//新特性、新功能
'fix',//修改bug
'docs',//文档修改
'style',//代码格式修改, 注意不是 css 修改
'refactor',//代码重构
'perf',//优化相关,比如提升性能、体验
'test',//测试用例修改
'chore',//其他修改, 比如改变构建流程、或者增加依赖库、工具等
'revert',//回滚到上一个版本
'build',//编译相关的修改,例如发布版本、对项目构建或者依赖的改动
配置husky
npx husky add .husky/commit-msg
在生成的commit-msg文件中添加下面的命令
#!/usr/bin/env sh
. "$(dirname -- "$0")/_/husky.sh"
pnpm commitlint
当我们 commit 提交信息时,就不能再随意写了,必须是 git commit -m ‘fix: xxx’ 符合类型的才可以,需要注意的是类型的后面需要用英文的 :,并且冒号后面是需要空一格的,这个是不能省略的
强制使用pnpm包管理器工具
在根目录创建scripts/preinstall.js文件,添加下面的内容
if (!/pnpm/.test(process.env.npm_execpath || '')) {
  console.warn(
    `\u001b[33mThis repository must using pnpm as the package manager ` +
    ` for scripts to work properly.\u001b[39m\n`,
  )
  process.exit(1)
}
配置命令
"scripts": {
    "preinstall": "node ./scripts/preinstall.js"
}
当我们使用yarn来安装包的时候,就会报错了。
👆以上初始化项目及配置就好啦~


 1724
1724


 被折叠的 条评论
为什么被折叠?
被折叠的 条评论
为什么被折叠?
 到【灌水乐园】发言


