


7.2TensorFlow实现简单的CNN
import matplotlib.pyplot as plt
import numpy as np
import tensorflow as tf
from tensorflow.examples.tutorials.mnist import input_data
from tensorflow.python.framework import ops
ops.reset_default_graph()

# 创建计算图
sess = tf.Session()

# 加载数据集
data_dir = 'temp'
mnist = input_data.read_data_sets(data_dir, one_hot=False)

# 将图像数据转换成28*28的数组
train_xdata = np.array([np.reshape(x, (28, 28)) for x in mnist.train.images])
test_xdata = np.array([np.reshape(x, (28, 28)) for x in mnist.test.images])

# 将数据预处理成独热编码
train_labels = mnist.train.labels
test_labels = mnist.test.labels

# 设置模型参数
batch_size = 100
learning_rate = 0.001
evaluation_size = 500
image_width = train_xdata[0].shape[0]
image_height = train_xdata[0].shape[1]
target_size = np.max(train_labels) + 1
num_channels = 1  # greyscale = 1 channel
generations = 500#次数
eval_every = 5
conv1_features = 25
conv2_features = 50
max_pool_size1 = 2  # NxN window for 1st max pool layer
max_pool_size2 = 2  # NxN window for 2nd max pool layer
fully_connected_size1 = 100

# 声明模型占位符
x_input_shape = (batch_size, image_width, image_height, num_channels)
x_input = tf.placeholder(tf.float32, shape=x_input_shape)
y_target = tf.placeholder(tf.int32, shape=(batch_size))
eval_input_shape = (evaluation_size, image_width, image_height, num_channels)
eval_input = tf.placeholder(tf.float32, shape=eval_input_shape)
eval_target = tf.placeholder(tf.int32, shape=(evaluation_size))

# 声明模型卷积层权重值参数和偏置值
conv1_weight = tf.Variable(tf.truncated_normal([4, 4, num_channels, conv1_features],
                                               stddev=0.1, dtype=tf.float32))
conv1_bias = tf.Variable(tf.zeros([conv1_features], dtype=tf.float32))

conv2_weight = tf.Variable(tf.truncated_normal([4, 4, conv1_features, conv2_features],
                                               stddev=0.1, dtype=tf.float32))
conv2_bias = tf.Variable(tf.zeros([conv2_features], dtype=tf.float32))

# 声明模型全连接层权重参数和偏置值
resulting_width = image_width // (max_pool_size1 * max_pool_size2)
resulting_height = image_height // (max_pool_size1 * max_pool_size2)
full1_input_size = resulting_width * resulting_height * conv2_features
full1_weight = tf.Variable(tf.truncated_normal([full1_input_size,
                  fully_connected_size1],
                  stddev=0.1, dtype=tf.float32))
full1_bias = tf.Variable(tf.truncated_normal([fully_connected_size1], stddev=0.1, dtype=tf.float32))
full2_weight = tf.Variable(tf.truncated_normal([fully_connected_size1,
                  target_size], stddev=0.1, dtype=tf.float32))
full2_bias = tf.Variable(tf.truncated_normal([target_size], stddev=0.1,
                dtype=tf.float32))

# 初始化模型
def my_conv_net(conv_input_data):
    # 第1层Conv-ReLU-MaxPool层
    conv1 = tf.nn.conv2d(conv_input_data, conv1_weight,
              strides=[1, 1, 1, 1], padding='SAME')
    relu1 = tf.nn.relu(tf.nn.bias_add(conv1, conv1_bias))
    max_pool1 = tf.nn.max_pool(relu1, ksize=[1, max_pool_size1,
                  max_pool_size1, 1],
                  strides=[1, max_pool_size1, max_pool_size1, 1],
                  padding='SAME')

    # 第2层Conv-ReLU-MaxPool层
    conv2 = tf.nn.conv2d(max_pool1, conv2_weight, strides=[1, 1, 1, 1],
              padding='SAME')
    relu2 = tf.nn.relu(tf.nn.bias_add(conv2, conv2_bias))
    max_pool2 = tf.nn.max_pool(relu2, ksize=[1, max_pool_size2,
                  max_pool_size2, 1],
                  strides=[1, max_pool_size2, max_pool_size2, 1],
                  padding='SAME')

    # 将输出数据转换成方便全连接层接收的1*N形式
    final_conv_shape = max_pool2.get_shape().as_list()
    final_shape = final_conv_shape[1] * final_conv_shape[2] * final_conv_shape[3]
    flat_output = tf.reshape(max_pool2, [final_conv_shape[0],
                    final_shape])

    # 第1个全连接层
    fully_connected1 = tf.nn.relu(tf.add(tf.matmul(flat_output,
                           full1_weight), full1_bias))

    # 第2个全连接层
    final_model_output = tf.add(tf.matmul(fully_connected1,
                             full2_weight), full2_bias)

    return final_model_output

model_output = my_conv_net(x_input)
test_model_output = my_conv_net(eval_input)

# 指定损失函数为softmax函数为损失函数
loss = tf.reduce_mean(
        tf.nn.sparse_softmax_cross_entropy_with_logits(
        logits=model_output, labels=y_target))

# 指定准确度函数以评估模型精度
prediction = tf.nn.softmax(model_output)
test_prediction = tf.nn.softmax(test_model_output)


# 创建准确度函数。
def get_accuracy(logits, targets):
    batch_predictions = np.argmax(logits, axis=1)
    num_correct = np.sum(np.equal(batch_predictions, targets))
    return 100. * num_correct/batch_predictions.shape[0]

# 创建优化器
my_optimizer = tf.train.MomentumOptimizer(learning_rate, 0.9)
train_step = my_optimizer.minimize(loss)

# 初始化变量
init = tf.global_variables_initializer()
sess.run(init)

# 开始训练
train_loss = []
train_acc = []
test_acc = []
for i in range(generations):
    rand_index = np.random.choice(len(train_xdata), size=batch_size)
    rand_x = train_xdata[rand_index]
    rand_x = np.expand_dims(rand_x, 3)
    rand_y = train_labels[rand_index]
    train_dict = {x_input: rand_x, y_target: rand_y}

    sess.run(train_step, feed_dict=train_dict)
    temp_train_loss, temp_train_preds = sess.run([loss, prediction], feed_dict=train_dict)
    temp_train_acc = get_accuracy(temp_train_preds, rand_y)

    if (i+1) % eval_every == 0:
        eval_index = np.random.choice(len(test_xdata), size=evaluation_size)
        eval_x = test_xdata[eval_index]
        eval_x = np.expand_dims(eval_x, 3)
        eval_y = test_labels[eval_index]
        test_dict = {eval_input: eval_x, eval_target: eval_y}
        test_preds = sess.run(test_prediction, feed_dict=test_dict)
        temp_test_acc = get_accuracy(test_preds, eval_y)

        # 记录并输出结果
        train_loss.append(temp_train_loss)
        train_acc.append(temp_train_acc)
        test_acc.append(temp_test_acc)
        acc_and_loss = [(i+1), temp_train_loss, temp_train_acc, temp_test_acc]
        acc_and_loss = [np.round(x, 2) for x in acc_and_loss]
        print('Generation # {}. Train Loss: {:.2f}. Train Acc (Test Acc): {:.2f} ({:.2f})'.format(*acc_and_loss))


# 通过Matlotlib模块绘制损失函数和准确度
eval_indices = range(0, generations, eval_every)
plt.plot(eval_indices, train_loss, 'k-')
plt.title('Softmax Loss per Generation')
plt.xlabel('Generation')
plt.ylabel('Softmax Loss')
plt.show()

plt.plot(eval_indices, train_acc, 'k-', label='Train Set Accuracy')
plt.plot(eval_indices, test_acc, 'r--', label='Test Set Accuracy')
plt.title('Train and Test Accuracy')
plt.xlabel('Generation')
plt.ylabel('Accuracy')
plt.legend(loc='lower right')
plt.show()

# 输出最新结果中的抽样图(此处选取了4幅)
actuals = rand_y[0:4]
predictions = np.argmax(temp_train_preds, axis=1)[0:4]
images = np.squeeze(rand_x[0:4])

Nrows = 2
Ncols = 3
for i in range(4):
    plt.subplot(Nrows, Ncols, i+1)
    plt.imshow(np.reshape(images[i], [28, 28]), cmap='Greys_r')
    plt.title('Actual: ' + str(actuals[i]) + ' Pred: ' +
                str(predictions[i]),
                fontsize=10)
    frame = plt.gca()
    frame.axes.get_xaxis().set_visible(False)
    frame.axes.get_yaxis().set_visible(False)
代码中的这句:from tensorflow.examples.tutorials.mnist import input_data,所以记得把源代码中mnist下的四个压缩包放到相关路径。
补充:本人使用的是1.14.0的tensorflow,对于2.x版本的,是没有tutorials包的,需要找到相关资源下载后,放到相关路径下(D:\anaconda\envs\yxy\Lib\site-packages\tensorflow\examples),envs\yxy是本人在anaconda中新建的环境。并且1.14.0版本有些时候会提示compat.v1的问题,如果影响运行,记得删掉。
//记得安装
pip install matplotlib效果展示:


7.2TensorFlow实现进阶CNN
import os
import sys
import tarfile
import matplotlib.pyplot as plt
import numpy as np
import tensorflow as tf
from six.moves import urllib
from tensorflow.python.framework import ops
ops.reset_default_graph()
sess = tf.Session()
batch_size = 128
data_dir = 'temp'
output_every = 50
generations = 2000
eval_every = 500
image_height = 32
image_width = 32
crop_height = 24
crop_width = 24
num_channels = 3
num_targets = 10
extract_folder = 'cifar-10-batches-bin'
learning_rate = 0.1
lr_decay = 0.1
num_gens_to_wait = 250.0
image_vec_length = image_height * image_width * num_channels
record_length = 1 + image_vec_length # ( + 1 for the 0-9 label)
data_dir = 'temp'
def read_cifar_files(filename_queue, distort_images = True):
reader = tf.FixedLengthRecordReader(record_bytes=record_length)
key, record_string = reader.read(filename_queue)
record_bytes = tf.decode_raw(record_string, tf.uint8)
image_label = tf.cast(tf.slice(record_bytes, [0], [1]), tf.int32)
# 读取图片
image_extracted = tf.reshape(tf.slice(record_bytes, [1],
[image_vec_length]),
[num_channels, image_height, image_width])
# 调整图片的规格
image_uint8image = tf.transpose(image_extracted, [1, 2, 0])
reshaped_image = tf.cast(image_uint8image, tf.float32)
# 随机裁剪图片
final_image = tf.image.resize_image_with_crop_or_pad(reshaped_image,
crop_width, crop_height)
if distort_images:
# 对图片进行随机的剪裁、翻转和亮度调节
final_image = tf.image.random_flip_left_right(final_image)
final_image = tf.image.random_brightness(final_image,max_delta=63)
final_image = tf.image.random_contrast(final_image,lower=0.2, upper=1.8)
# 白化处理去除各观测信号之间的相关性
final_image = tf.image.per_image_standardization(final_image)
return(final_image, image_label)
def input_pipeline(batch_size, train_logical=True):
if train_logical:
files = [os.path.join(data_dir, extract_folder, 'data_batch_{}.bin'.format(i)) for i in range(1,6)]
else:
files = [os.path.join(data_dir, extract_folder, 'test_batch.bin')]
filename_queue = tf.train.string_input_producer(files)
image, label = read_cifar_files(filename_queue)
#通过min_after_dequeue参数设置抽样图片缓存最小值
min_after_dequeue = 5000
capacity = min_after_dequeue + 3 * batch_size
#tf.train.batch表示样本和样本标签, batch_size是返回的一个batch样本集的
#样本个数。capacity是队列中的容量。这主要是按顺序组合成一个batch。
example_batch, label_batch = tf.train.shuffle_batch([image, label],batch_size=batch_size, capacity=capacity,min_after_dequeue=min_after_dequeue)
return(example_batch, label_batch)
def cifar_cnn_model(input_images, batch_size, train_logical=True):
def truncated_normal_var(name, shape, dtype):
return(tf.get_variable(name=name, shape=shape, dtype=dtype, initializer=tf.truncated_normal_initializer(stddev=0.05)))
def zero_var(name, shape, dtype):
return(tf.get_variable(name=name, shape=shape, dtype=dtype, initializer=tf.constant_initializer(0.0)))
# 第一层卷积层
with tf.variable_scope('conv1') as scope:
# 卷积核尺寸为5x5对应3个色彩通道,创建64个特征
conv1_kernel = truncated_normal_var(name='conv_kernel1', shape=[5, 5, 3, 64], dtype=tf.float32)
# 设定卷积操作的步长值为1
conv1 = tf.nn.conv2d(input_images, conv1_kernel, [1, 1, 1, 1], padding='SAME')
# 初始化并添加偏置项
conv1_bias = zero_var(name='conv_bias1', shape=[64], dtype=tf.float32)
conv1_add_bias = tf.nn.bias_add(conv1, conv1_bias)
# 指定激活函数为ReLU函数
relu_conv1 = tf.nn.relu(conv1_add_bias)
# 最大池化操作
pool1 = tf.nn.max_pool(relu_conv1, ksize=[1, 3, 3, 1], strides=[1, 2, 2, 1],padding='SAME', name='pool_layer1')
# 局部响应归一化
norm1 = tf.nn.lrn(pool1, depth_radius=5, bias=2.0, alpha=1e-3, beta=0.75, name='norm1')
# 第二层卷积层
with tf.variable_scope('conv2') as scope:
# 卷积核规格为5x5, 再次创建64个特征
conv2_kernel = truncated_normal_var(name='conv_kernel2', shape=[5, 5, 64, 64], dtype=tf.float32)
# 指定卷积操作的步长值为1
conv2 = tf.nn.conv2d(norm1, conv2_kernel, [1, 1, 1, 1], padding='SAME')
# 初始化参数并添加偏置项
conv2_bias = zero_var(name='conv_bias2', shape=[64], dtype=tf.float32)
conv2_add_bias = tf.nn.bias_add(conv2, conv2_bias)
# 指定激活函数为ReLU函数
relu_conv2 = tf.nn.relu(conv2_add_bias)
# 最大池化
pool2 = tf.nn.max_pool(relu_conv2, ksize=[1, 3, 3, 1], strides=[1, 2, 2, 1], padding='SAME', name='pool_layer2')
# 局部响应归一化
norm2 = tf.nn.lrn(pool2, depth_radius=5, bias=2.0, alpha=1e-3, beta=0.75, name='norm2')
# 调整输出数据的格式以适应全连接层
reshaped_output = tf.reshape(norm2, [batch_size, -1])
reshaped_dim = reshaped_output.get_shape()[1].value
# 第一层全连接层
with tf.variable_scope('full1') as scope:
# 指定384个节点
full_weight1 = truncated_normal_var(name='full_mult1',
shape=[reshaped_dim, 384], dtype=tf.float32)
full_bias1 = zero_var(name='full_bias1', shape=[384],
dtype=tf.float32)
full_layer1 = tf.nn.relu(tf.add(tf.matmul(reshaped_output,
full_weight1), full_bias1))
# 第二个全连接层
with tf.variable_scope('full2') as scope:
# 指定192个节点.
full_weight2 = truncated_normal_var(name='full_mult2',
shape=[384, 192], dtype=tf.float32)
full_bias2 = zero_var(name='full_bias2', shape=[192],
dtype=tf.float32)
full_layer2 = tf.nn.relu(tf.add(tf.matmul(full_layer1,
full_weight2), full_bias2))
# 第三层全连接层,将第二层全连接层的192个节点连接到10个输出分类
with tf.variable_scope('full3') as scope:
full_weight3 = truncated_normal_var(name='full_mult3', shape=[192, num_targets], dtype=tf.float32)
full_bias3 = zero_var(name='full_bias3',
shape=[num_targets], dtype=tf.float32)
final_output = tf.add(tf.matmul(full_layer2,
full_weight3), full_bias3)
return(final_output)
def cifar_loss(logits, targets):
# Get rid of extra dimensions and cast targets into integers
targets = tf.squeeze(tf.cast(targets, tf.int32))
# 计算评估值与目标值的Sofltmax交叉熵
cross_entropy = tf.nn.sparse_softmax_cross_entropy_with_logits(logits=logits, labels=targets)
# 求解基于batch size的平均损失值
cross_entropy_mean = tf.reduce_mean(cross_entropy, name='cross_entropy')
return(cross_entropy_mean)
def train_step(loss_value, generation_num):
model_learning_rate = tf.train.exponential_decay(learning_rate,generation_num, num_gens_to_wait, lr_decay, staircase=True)
my_optimizer = tf.train.GradientDescentOptimizer(model_learning_rate)
train_step = my_optimizer.minimize(loss_value)
return(train_step)
def accuracy_of_batch(logits, targets):
# 指定目标向量为整数型,并去除extra dimensions
targets = tf.squeeze(tf.cast(targets, tf.int32))
# 获取logit 回归最大的值作为预测值
batch_predictions = tf.cast(tf.argmax(logits, 1), tf.int32)
# 确保不同batch间的值相等
predicted_correctly = tf.equal(batch_predictions, targets)
# 计算准确度
accuracy = tf.reduce_mean(tf.cast(predicted_correctly, tf.float32))
return(accuracy)
# 初始化图像管道
images, targets = input_pipeline(batch_size, train_logical=True)
# 从图像管道获取测试图像和目标图像的batch
test_images, test_targets = input_pipeline(batch_size, train_logical=False)
with tf.variable_scope('model_definition') as scope:
# 声明训练网络模型
model_output = cifar_cnn_model(images, batch_size)
# 通过scope.reuse_variables()保存模型的参数,方便以后重用
scope.reuse_variables()
test_output = cifar_cnn_model(test_images, batch_size)
#声明损失函数
loss = cifar_loss(model_output, targets)
#声明准确度函数
accuracy = accuracy_of_batch(test_output, test_targets)
#声明命迭代变量
generation_num = tf.Variable(0, trainable=False)
train_op = train_step(loss, generation_num)
init = tf.global_variables_initializer()
sess.run(init)
tf.train.start_queue_runners(sess=sess)
train_loss = []
test_accuracy = []
for i in range(generations):
_, loss_value = sess.run([train_op, loss])
if (i+1) % output_every == 0:
train_loss.append(loss_value)
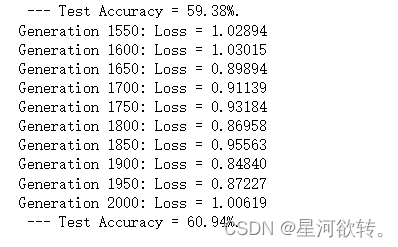
output = 'Generation {}: Loss = {:.5f}'.format((i+1), loss_value)
print(output)
if (i+1) % eval_every == 0:
[temp_accuracy] = sess.run([accuracy])
test_accuracy.append(temp_accuracy)
acc_output = ' --- Test Accuracy = {:.2f}%.'.format(100.*temp_accuracy)
print(acc_output)
eval_indices = range(0, generations, eval_every)
output_indices = range(0, generations, output_every)
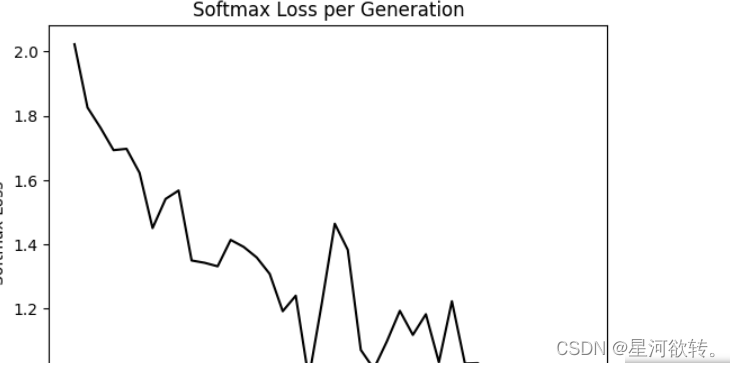
plt.plot(output_indices, train_loss, 'k-')
plt.title('Softmax Loss per Generation')
plt.xlabel('Generation')
plt.ylabel('Softmax Loss')
plt.show()
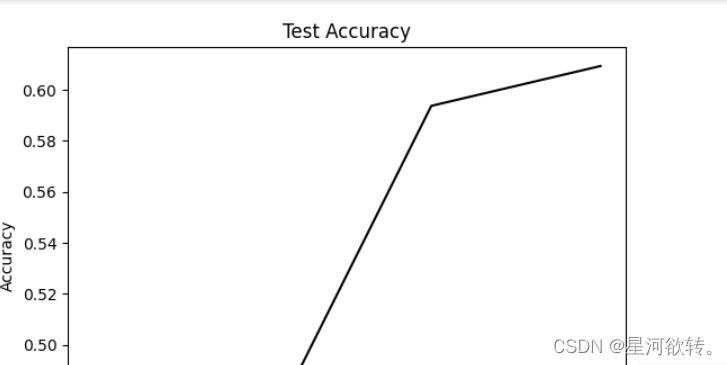
plt.plot(eval_indices, test_accuracy, 'k-')
plt.title('Test Accuracy')
plt.xlabel('Generation')
plt.ylabel('Accuracy')
plt.show()
7.4实现图片风格渲染
import os
import scipy.io
import scipy.misc
import imageio
from skimage.transform import resize
from operator import mul
from functools import reduce
import numpy as np
import tensorflow as tf
from tensorflow.python.framework import ops
ops.reset_default_graph()
# 指定原始图片与风格图片的文件夹
original_image_file = 'images/cover.jpg'
style_image_file = 'images/starry_night.jpg'
# 设置模型参数
vgg_path = 'imagenet-vgg-verydeep-19.mat'
original_image_weight = 5.0
style_image_weight = 500.0
regularization_weight = 100
learning_rate = 10
generations = 20000#通过generations控制迭代次数
output_generations = 25
beta1 = 0.9
beta2 = 0.999
# 读取图片
original_image = imageio.imread(original_image_file)
style_image = imageio.imread(style_image_file)
# 获取目标规格并使风格图像与之相同
target_shape = original_image.shape
style_image = resize(style_image, target_shape)
# 设置VGG-19 Layer
vgg_layers = ['conv1_1', 'relu1_1',
'conv1_2', 'relu1_2', 'pool1',
'conv2_1', 'relu2_1',
'conv2_2', 'relu2_2', 'pool2',
'conv3_1', 'relu3_1',
'conv3_2', 'relu3_2',
'conv3_3', 'relu3_3',
'conv3_4', 'relu3_4', 'pool3',
'conv4_1', 'relu4_1',
'conv4_2', 'relu4_2',
'conv4_3', 'relu4_3',
'conv4_4', 'relu4_4', 'pool4',
'conv5_1', 'relu5_1',
'conv5_2', 'relu5_2',
'conv5_3', 'relu5_3',
'conv5_4', 'relu5_4']
# 提取权重和矩阵方法
def extract_net_info(path_to_params):
vgg_data = scipy.io.loadmat(path_to_params)
normalization_matrix = vgg_data['normalization'][0][0][0]
mat_mean = np.mean(normalization_matrix, axis=(0,1))
network_weights = vgg_data['layers'][0]
return mat_mean, network_weights
# 创建VGG-19 神经网络
def vgg_network(network_weights, init_image):
network = {}
image = init_image
for i, layer in enumerate(vgg_layers):
if layer[0] == 'c':
weights, bias = network_weights[i][0][0][0][0]
weights = np.transpose(weights, (1, 0, 2, 3))
bias = bias.reshape(-1)
conv_layer = tf.nn.conv2d(image, tf.constant(weights), (1, 1, 1, 1), 'SAME')
image = tf.nn.bias_add(conv_layer, bias)
elif layer[0] == 'r':
image = tf.nn.relu(image)
else: # pooling
image = tf.nn.max_pool(image, (1, 2, 2, 1), (1, 2, 2, 1), 'SAME')
network[layer] = image
return network
# 定义将哪一层网络用于原始图片还是风格图片
original_layers = ['relu4_2', 'relu5_2']
style_layers = ['relu1_1', 'relu2_1', 'relu3_1', 'relu4_1', 'relu5_1']
# 获取网络的参数
normalization_mean, network_weights = extract_net_info(vgg_path)
shape = (1,) + original_image.shape
style_shape = (1,) + style_image.shape
original_features = {}
style_features = {}
# 设置风格权重
style_weights = {l: 1./(len(style_layers)) for l in style_layers}
# 计算原始图片的特征值
g_original = tf.Graph()
with g_original.as_default(), tf.Session() as sess1:
image = tf.placeholder('float', shape=shape)
vgg_net = vgg_network(network_weights, image)
original_minus_mean = original_image - normalization_mean
original_norm = np.array([original_minus_mean])
for layer in original_layers:
original_features[layer] = vgg_net[layer].eval(feed_dict={image: original_norm})
# 获取风格图片的网络层
g_style = tf.Graph()
with g_style.as_default(), tf.Session() as sess2:
image = tf.placeholder('float', shape=style_shape)
vgg_net = vgg_network(network_weights, image)
style_minus_mean = style_image - normalization_mean
style_norm = np.array([style_minus_mean])
for layer in style_layers:
features = vgg_net[layer].eval(feed_dict={image: style_norm})
features = np.reshape(features, (-1, features.shape[3]))
gram = np.matmul(features.T, features) / features.size
style_features[layer] = gram
# 根据损失值进行图片的合并
with tf.Graph().as_default():
# 获取网络参数
initial = tf.random_normal(shape) * 0.256
init_image = tf.Variable(initial)
vgg_net = vgg_network(network_weights, init_image)
# 原始图片的损失值
original_layers_w = {'relu4_2': 0.5, 'relu5_2': 0.5}
original_loss = 0
for o_layer in original_layers:
temp_original_loss = original_layers_w[o_layer] * original_image_weight *\
(2 * tf.nn.l2_loss(vgg_net[o_layer] - original_features[o_layer]))
original_loss += (temp_original_loss / original_features[o_layer].size)
# 风格图片的损失值
style_loss = 0
style_losses = []
for style_layer in style_layers:
layer = vgg_net[style_layer]
feats, height, width, channels = [x.value for x in layer.get_shape()]
size = height * width * channels
features = tf.reshape(layer, (-1, channels))
style_gram_matrix = tf.matmul(tf.transpose(features), features) / size
style_expected = style_features[style_layer]
style_losses.append(style_weights[style_layer] * 2 *
tf.nn.l2_loss(style_gram_matrix - style_expected) /
style_expected.size)
style_loss += style_image_weight * tf.reduce_sum(style_losses)
total_var_x = reduce(mul, init_image[:, 1:, :, :].get_shape().as_list(), 1)
total_var_y = reduce(mul, init_image[:, :, 1:, :].get_shape().as_list(), 1)
first_term = regularization_weight * 2
second_term_numerator = tf.nn.l2_loss(init_image[:, 1:, :, :] - init_image[:, :shape[1]-1, :, :])
second_term = second_term_numerator / total_var_y
third_term = (tf.nn.l2_loss(init_image[:, :, 1:, :] - init_image[:, :, :shape[2]-1, :]) / total_var_x)
total_variation_loss = first_term * (second_term + third_term)
# 合并后的损失值
loss = original_loss + style_loss + total_variation_loss
# 声明算法操作
optimizer = tf.train.AdamOptimizer(learning_rate, beta1, beta2)
train_step = optimizer.minimize(loss)
# 初始化全部变量并开始操作
with tf.Session() as sess:
tf.global_variables_initializer().run()
for i in range(generations):
train_step.run()
# 输出跟新并保存最新的输出
if (i+1) % output_generations == 0:
print('Generation {} out of {}, loss: {}'.format(i + 1, generations,sess.run(loss)))
image_eval = init_image.eval()
best_image_add_mean = image_eval.reshape(shape[1:]) + normalization_mean
output_file = 'temp_output_{}.jpg'.format(i)
imageio.imwrite(output_file, best_image_add_mean)
# 保存最终图片
image_eval = init_image.eval()
best_image_add_mean = image_eval.reshape(shape[1:]) + normalization_mean
output_file = 'final_output.jpg'
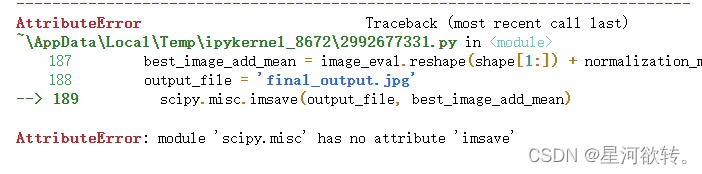
scipy.misc.imsave(output_file, best_image_add_mean)
//需要安装(pip install 包名 -i https://pypi.tuna.tsinghua.edu.cn/simple/ ,这样安装速度更快,有时候网络慢会产生报错)
#pip install scipy
#pip install imgaug
//漏斗标志表示程序正在运行
![]()
报错

generations=20s,报错,暂时未解决
//记得把代码所需的材料放到相关路径下

//其实说白了,就是我们的代码中的路径问题,可以自己进行设置,如果你放在桌面,要么通过jupyter导入,要么修改代码中的路径。一般来说代码中的路径默认在根目录下,也就是运行结果的保存目录,例如我的就放到如下
上述问题并未解决不过我的同学提供了另一个方法:修改版代码:
# -*- coding: utf-8 -*-
"""
Created on Wed Apr 22 22:04:16 2020

@author: Harry
"""

import os
import scipy.io
import scipy.misc
import imageio.v2 as imageio
from skimage.transform import resize
from operator import mul
from functools import reduce
import numpy as np
from PIL import Image
import tensorflow as tf
from tensorflow.python.framework import ops
ops.reset_default_graph()

# 指定原始图片与风格图片的文件夹
original_image_file = r'D:\QQ主用\教材源代码 (1)\源代码\第7章\images\cover.jpg'
style_image_file = r'D:\QQ主用\教材源代码 (1)\源代码\第7章\images\starry_night.jpg'

# 设置模型参数
vgg_path = r'D:\QQ主用\教材源代码 (1)\源代码\第7章\imagenet-vgg-verydeep-19.mat'
original_image_weight = 5.0
style_image_weight = 500.0
regularization_weight = 100
learning_rate = 10
generations = 50
output_generations = 25
beta1 = 0.9
beta2 = 0.999


# 读取图片
original_image = imageio.imread(original_image_file)
style_image = imageio.imread(style_image_file)

# 获取目标规格并使风格图像与之相同
target_shape = original_image.shape
style_image = resize(style_image, target_shape)

# 设置VGG-19 Layer
vgg_layers = ['conv1_1', 'relu1_1',
              'conv1_2', 'relu1_2', 'pool1',
              'conv2_1', 'relu2_1',
              'conv2_2', 'relu2_2', 'pool2',
              'conv3_1', 'relu3_1',
              'conv3_2', 'relu3_2',
              'conv3_3', 'relu3_3',
              'conv3_4', 'relu3_4', 'pool3',
              'conv4_1', 'relu4_1',
              'conv4_2', 'relu4_2',
              'conv4_3', 'relu4_3',
              'conv4_4', 'relu4_4', 'pool4',
              'conv5_1', 'relu5_1',
              'conv5_2', 'relu5_2',
              'conv5_3', 'relu5_3',
              'conv5_4', 'relu5_4']


# 提取权重和矩阵方法
def extract_net_info(path_to_params):
    vgg_data = scipy.io.loadmat(path_to_params)
    normalization_matrix = vgg_data['normalization'][0][0][0]
    mat_mean = np.mean(normalization_matrix, axis=(0,1))
    network_weights = vgg_data['layers'][0]
    return mat_mean, network_weights


# 创建VGG-19 神经网络
def vgg_network(network_weights, init_image):
    network = {}
    image = init_image

    for i, layer in enumerate(vgg_layers):
        if layer[0] == 'c':
            weights, bias = network_weights[i][0][0][0][0]
            weights = np.transpose(weights, (1, 0, 2, 3))
            bias = bias.reshape(-1)
            conv_layer = tf.nn.conv2d(image, tf.constant(weights), (1, 1, 1, 1), 'SAME')
            image = tf.nn.bias_add(conv_layer, bias)
        elif layer[0] == 'r':
            image = tf.nn.relu(image)
        else:  # pooling
            image = tf.nn.max_pool(image, (1, 2, 2, 1), (1, 2, 2, 1), 'SAME')
        network[layer] = image
    return network

# 定义将哪一层网络用于原始图片还是风格图片
original_layers = ['relu4_2', 'relu5_2']
style_layers = ['relu1_1', 'relu2_1', 'relu3_1', 'relu4_1', 'relu5_1']

# 获取网络的参数
normalization_mean, network_weights = extract_net_info(vgg_path)

shape = (1,) + original_image.shape
style_shape = (1,) + style_image.shape
original_features = {}
style_features = {}

# 设置风格权重
style_weights = {l: 1./(len(style_layers)) for l in style_layers}

# 计算原始图片的特征值
g_original = tf.Graph()
with g_original.as_default(), tf.Session() as sess1:
    image = tf.placeholder('float', shape=shape)
    vgg_net = vgg_network(network_weights, image)
    original_minus_mean = original_image - normalization_mean
    original_norm = np.array([original_minus_mean])
    for layer in original_layers:
        original_features[layer] = vgg_net[layer].eval(feed_dict={image: original_norm})

# 获取风格图片的网络层
g_style = tf.Graph()
with g_style.as_default(), tf.Session() as sess2:
    image = tf.placeholder('float', shape=style_shape)
    vgg_net = vgg_network(network_weights, image)
    style_minus_mean = style_image - normalization_mean
    style_norm = np.array([style_minus_mean])
    for layer in style_layers:
        features = vgg_net[layer].eval(feed_dict={image: style_norm})
        features = np.reshape(features, (-1, features.shape[3]))
        gram = np.matmul(features.T, features) / features.size
        style_features[layer] = gram

# 根据损失值进行图片的合并
with tf.Graph().as_default():
    # 获取网络参数
    initial = tf.random_normal(shape) * 0.256
    init_image = tf.Variable(initial)
    vgg_net = vgg_network(network_weights, init_image)

    # 原始图片的损失值
    original_layers_w = {'relu4_2': 0.5, 'relu5_2': 0.5}
    original_loss = 0
    for o_layer in original_layers:
        temp_original_loss = original_layers_w[o_layer] * original_image_weight *\
                             (2 * tf.nn.l2_loss(vgg_net[o_layer] - original_features[o_layer]))
        original_loss += (temp_original_loss / original_features[o_layer].size)

    # 风格图片的损失值
    style_loss = 0
    style_losses = []
    for style_layer in style_layers:
        layer = vgg_net[style_layer]
        feats, height, width, channels = [x.value for x in layer.get_shape()]
        size = height * width * channels
        features = tf.reshape(layer, (-1, channels))
        style_gram_matrix = tf.matmul(tf.transpose(features), features) / size
        style_expected = style_features[style_layer]
        style_losses.append(style_weights[style_layer] * 2 *
                            tf.nn.l2_loss(style_gram_matrix - style_expected) /
                            style_expected.size)
    style_loss += style_image_weight * tf.reduce_sum(style_losses)

    total_var_x = reduce(mul, init_image[:, 1:, :, :].get_shape().as_list(), 1)
    total_var_y = reduce(mul, init_image[:, :, 1:, :].get_shape().as_list(), 1)
    first_term = regularization_weight * 2
    second_term_numerator = tf.nn.l2_loss(init_image[:, 1:, :, :] - init_image[:, :shape[1]-1, :, :])
    second_term = second_term_numerator / total_var_y
    third_term = (tf.nn.l2_loss(init_image[:, :, 1:, :] - init_image[:, :, :shape[2]-1, :]) / total_var_x)
    total_variation_loss = first_term * (second_term + third_term)

    # 合并后的损失值
    loss = original_loss + style_loss + total_variation_loss

    # 声明算法操作
    optimizer = tf.train.AdamOptimizer(learning_rate, beta1, beta2)
    train_step = optimizer.minimize(loss)

    # 初始化全部变量并开始操作
    with tf.Session() as sess:
        tf.global_variables_initializer().run()
        for i in range(generations):

            train_step.run()
            # 输出跟新并保存最新的输出
            if (i+1) % output_generations == 0:
                print('Generation {} out of {}, loss: {}'.format(i + 1, generations,sess.run(loss)))
                image_eval = init_image.eval()
                best_image_add_mean = image_eval.reshape(shape[1:]) + normalization_mean
                output_file = r'D:\QQ主用\教材源代码 (1)\源代码\第7章\temp_output_{}.jpg'.format(i)
                if best_image_add_mean.shape != (1, 1, 437, 690, 3):
                # 如果形状不正确,则需要进行调整
                    best_image_add_mean = np.reshape(best_image_add_mean, (437, 690, 3))
                    # 检查调整后的形状
                    if best_image_add_mean.shape == (437, 690, 3):
                        # 如果调整后的形状正确,则继续处理
                        pass
                    else:
                        # 如果调整后的形状仍然不正确,则引发异常
                        raise ValueError("Array shape is not valid.")
                else:
                    # 如果形状正确,则不需要进行调整
                    best_image_add_mean = np.squeeze(best_image_add_mean)
                # 将数组转换为float32类型
                best_image_add_mean = best_image_add_mean.astype(np.float32)
                # 转换数组类型
                best_image_add_mean = (best_image_add_mean * 255).astype(np.uint8)
                # 调整数组形状
                best_image_add_mean = np.transpose(best_image_add_mean, (2, 0, 1))
                # 创建PIL图像对象
                pil_image = Image.fromarray(best_image_add_mean.transpose(1, 2, 0))
                # 保存图像
                pil_image.save(output_file)

        # 保存最终图片
        image_eval = init_image.eval()
        best_image_add_mean = image_eval.reshape(shape[1:]) + normalization_mean
        output_file = r'D:\QQ主用\教材源代码 (1)\源代码\第7章\final_output.jpg'
        best_image_add_mean = best_image_add_mean.astype(np.float32)
        if best_image_add_mean.shape != (1, 1, 437, 690, 3):
            # 如果形状不正确,则需要进行调整
            best_image_add_mean = np.reshape(best_image_add_mean, (437, 690, 3))
            # 检查调整后的形状
            if best_image_add_mean.shape == (437, 690, 3):
        # 如果调整后的形状正确,则继续处理
                pass
            else:
        # 如果调整后的形状仍然不正确,则引发异常
                raise ValueError("Array shape is not valid.")
        else:
        # 如果形状正确,则不需要进行调整
            best_image_add_mean = np.squeeze(best_image_add_mean)
        # 将数组转换为float32类型
        best_image_add_mean = best_image_add_mean.astype(np.float32)
        # 转换数组类型
        best_image_add_mean = (best_image_add_mean * 255).astype(np.uint8)
        # 调整数组形状
        best_image_add_mean = np.transpose(best_image_add_mean, (2, 0, 1))
        # 创建PIL图像对象
        pil_image = Image.fromarray(best_image_add_mean.transpose(1, 2, 0))
        # 保存图像
        pil_image.save(output_file)
修改方法:
1.对应地址位置要修改
2.将import  imageio改为import imageio.v2 as imageio
3.加入from PIL import Image
4.将两处的imageio.imwrite(output_file, best_image_add_mean)
修改为
if best_image_add_mean.shape != (1, 1, 437, 690, 3):
                # 如果形状不正确,则需要进行调整
                    best_image_add_mean = np.reshape(best_image_add_mean, (437, 690, 3))
                    # 检查调整后的形状
                    if best_image_add_mean.shape == (437, 690, 3):
                        # 如果调整后的形状正确,则继续处理
                        pass
                    else:
                        # 如果调整后的形状仍然不正确,则引发异常
                        raise ValueError("Array shape is not valid.")
                else:
                    # 如果形状正确,则不需要进行调整
                    best_image_add_mean = np.squeeze(best_image_add_mean)
                # 将数组转换为float32类型
                best_image_add_mean = best_image_add_mean.astype(np.float32)
                # 转换数组类型
                best_image_add_mean = (best_image_add_mean * 255).astype(np.uint8)
                # 调整数组形状
                best_image_add_mean = np.transpose(best_image_add_mean, (2, 0, 1))
                # 创建PIL图像对象
                pil_image = Image.fromarray(best_image_add_mean.transpose(1, 2, 0))
                # 保存图像
                pil_image.save(output_file)
运行在对应位置可以找到对应位置
//最后结果如下,因为迭代次数为小(运行很耗时),所以图片模糊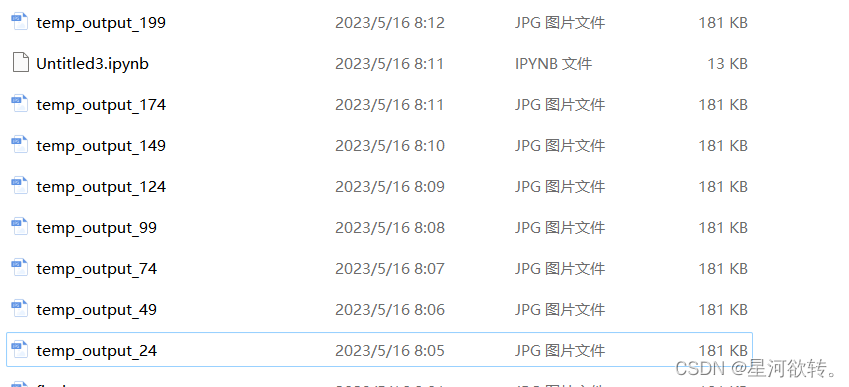


 5174
5174


 被折叠的 条评论
为什么被折叠?
被折叠的 条评论
为什么被折叠?
 到【灌水乐园】发言


