


嵌入式Linux学习笔记
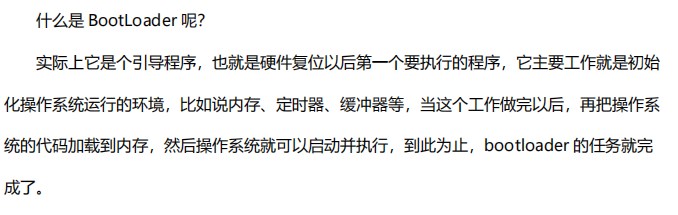
嵌入式Linux的基本框架
为BootLoader、Linux内核、文件系统。
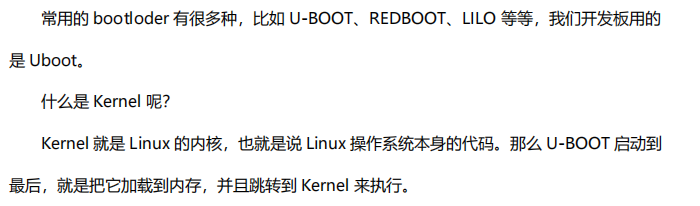
Linux 内核和文件系统之间,什么关系?
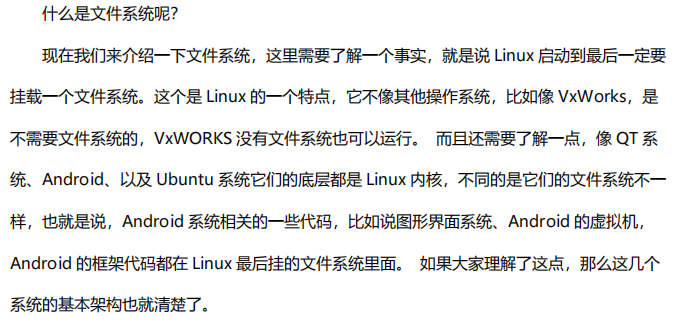
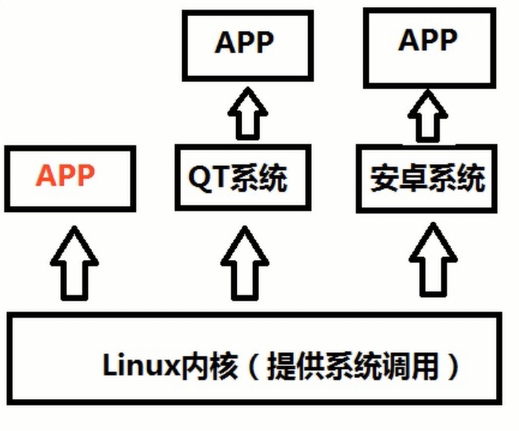
答案:文件系统是操作系统用于明确存储设备(常见的是磁盘,也有基于NAND Flash的固态硬盘)或分区上的文件的方法和数据结构;即在存储设备上组织文件的方法。操作系统中负责管理和存储文件信息的软件机构称为文件管理系统,简称文件系统。
注意:
1.Linux必须要挂接一个文件系统
2.Linux启动到最后,等所以驱动初始化完成以后,最后一步才挂载文件系统
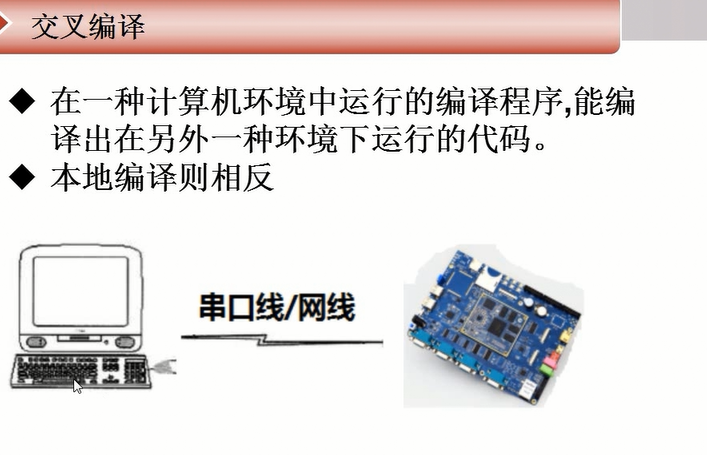
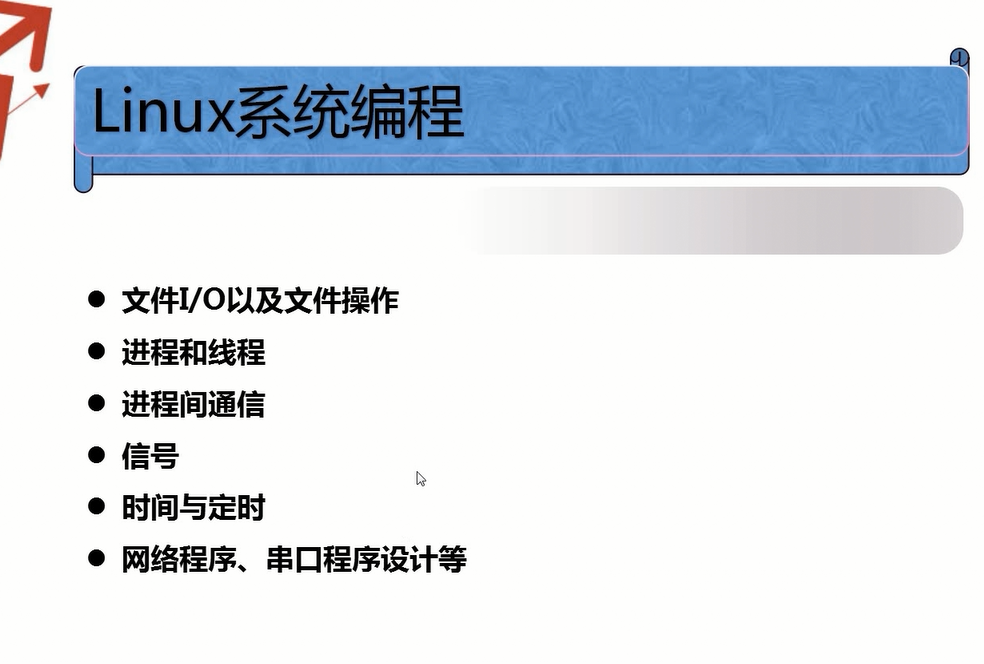
Linux系统编程
su/su root 进入超级用户


ls -il显示文件节点和详细信息 ls -a 显示隐藏文件 ls -i 显示文件节点
pwd 显示当前路径 ls -R 显示其子目录 ls -d 显示其目录名称
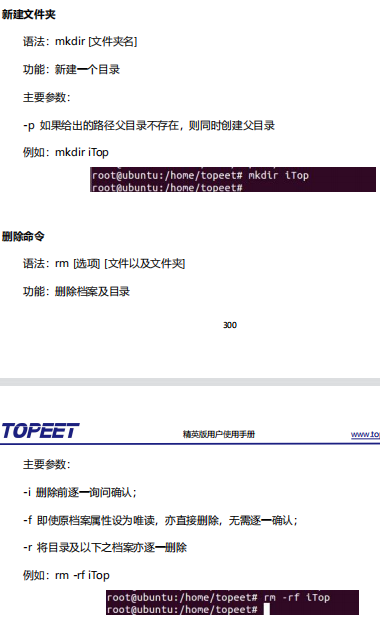
mkdir -p 建立文件夹及其上一级文件夹 mkdir -v 建立文件夹显示详细信息
touch 创建文件 cd … 回到上一级 cd /进入根目录 cd ~ 进入操作者主目录
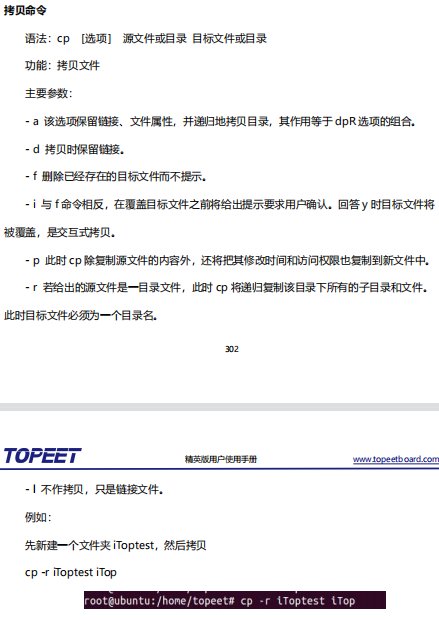
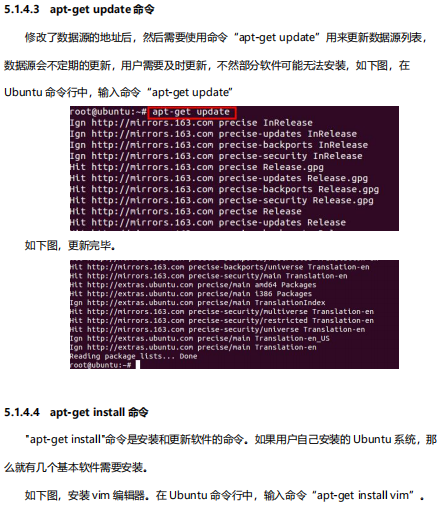
mv 移动文件 cp -r 复制文件夹及其文件 cp -i 覆盖文件前询问用户
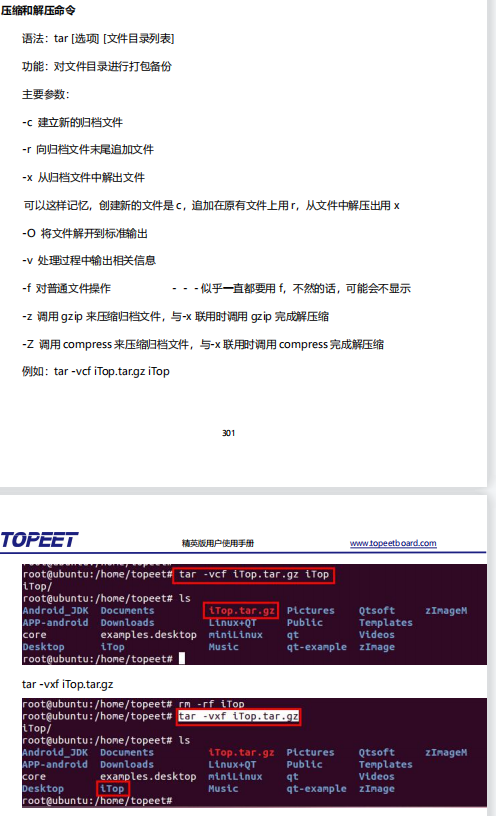
rm -rf 强制删除文件夹 rm 删除文件
ln 文件1 文件2 硬链接 ln -s 文件1 文件2 软链接
硬连接的优点是不同目录通过不同路径访问同一文件,节约磁盘空间,又便于数据一致性。
缺点是不能连接目录,不能跨越不同文件系统。
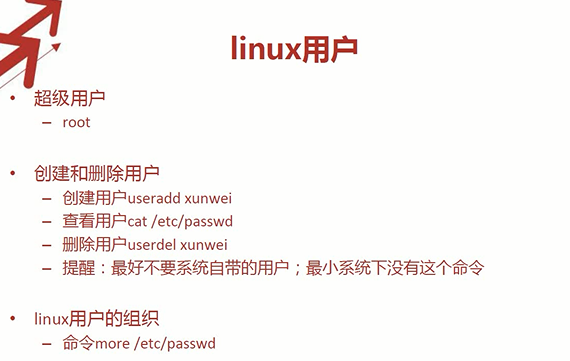
adduser 用户名 只需配置密码就行 useradd 用户名 配置密码和文件等等


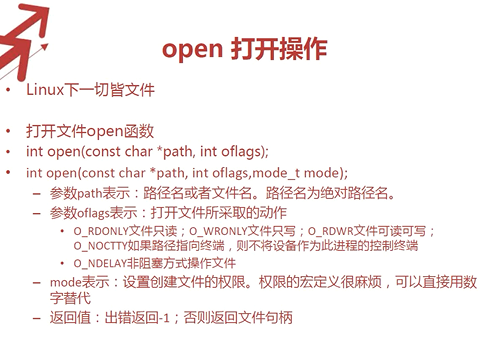
文件IO函数之open函数


实战字符设备控制**
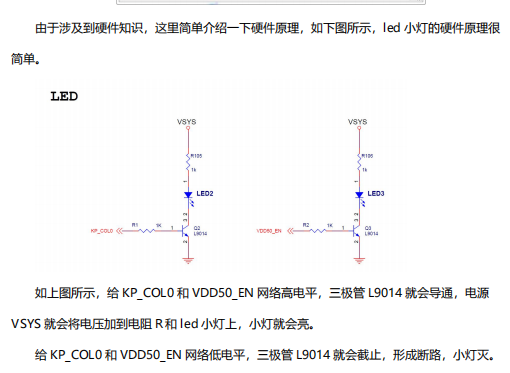
点灯大师测试例程
#include <stdio.h>
#include <sys/types.h>
#include <sys/stat.h>
#include <fcntl.h>
#include <unistd.h>
#include <string.h>

#define LED_NUM 2
#define LED_C 2
//cmd为0,则灭;为1,则亮
//io为0则是靠近蜂鸣器,为1,则靠近独立按键的小灯
int main(int argc,char *argv[])
{
    int fd,led_num,led_c;
    char *leds ="/dev/leds";
	led_c=LED_C;
	led_num =LED_NUM;

	printf("argv1 is cmd;argv2 is io\n");
    if(atoi(argv[1])>=led_c)
	{
      printf("argv[1] is 0 or 1\n");
      exit(1);
	}
	if(atoi(argv[2])>=led_c)
	{
      printf("argv[2] is 0 or 1\n");
      exit(1);
	}
	if((fd=open(leds,O_RDWR|O_NOCTTY|O_NDELAY))<0)
	{
		printf("open %s failed\n",leds);
	}
	else
	{
		ioctl(fd,atoi(argv[1]),atoi(argv[2]));
		printf("ioctl %s success\n",leds);
	}
	close(fd);
    return 0;

}
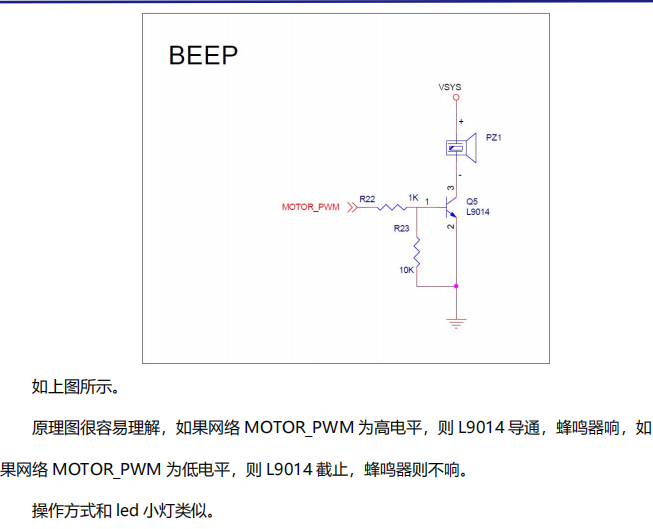
蜂鸣器测试例程
#include <stdio.h>
#include <stdlib.h>
#include <string.h>
#include <sys/types.h>
#include <sys/stat.h>
#include <fcntl.h>
#include <unistd.h>
#include <termios.h>
#include <string.h>
#define BUZZER_C 2
int main(int argc,char *argv[])
{
 char *buzzer_ctl ="/dev/buzzer_ctl";
 int fd,ret,buzzer_c;

   buzzer_c =BUZZER_C;
  if(atoi(argv[1]) >=buzzer_c )
{
     printf("argv[1] is 0 or 1\n");
     exit(1);
}

   if((fd = open (buzzer_ctl,O_RDWR|O_NOCTTY|O_NDELAY))<0)
{
   printf("open %s failed\n",buzzer_ctl);
      exit(1);

}
   ret =ioctl(fd,atoi(argv[1]),atoi(argv[2]));
     close(fd);

    return 0;
}

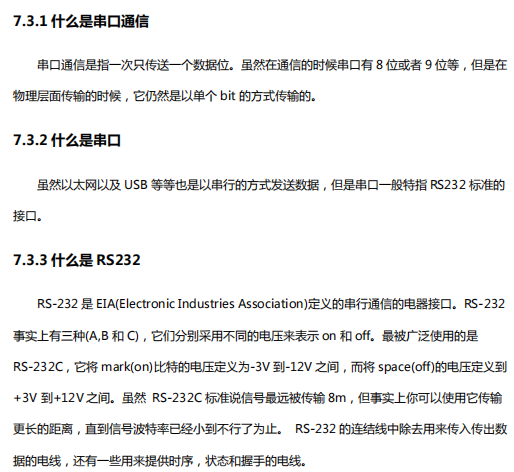
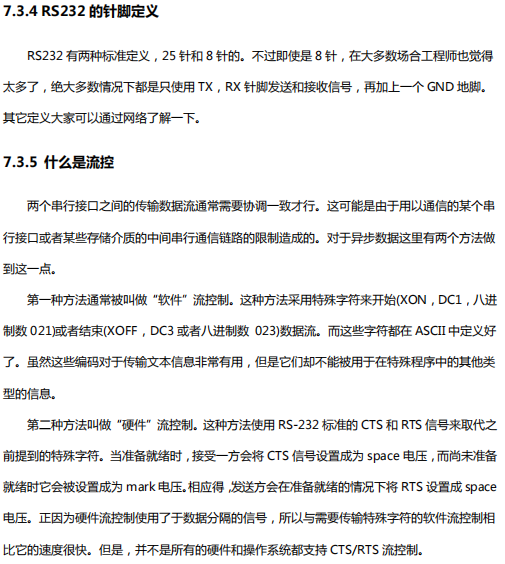
串口通信(重要掌握)
几个关于串口的基本概念
串口编程之开机自启动测试程序
• 开机启动运行程序
• 通过设置将helloworld程序开机运行
• 实验操作
1、cp -r 测试程序文件路径 /bin
2、 vi /etc/init.d/rcS

shift+g 调到最后一行添加 /bin/hello &

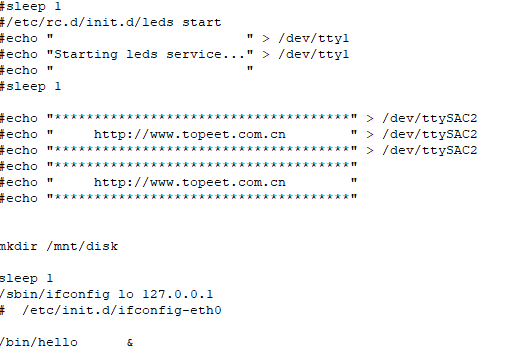
ESC 然后shift+;输入wq保存该文件
在超级终端菜单栏的控制选择日志设置
选择Log type 为Standard ,点击…保存日志在电脑自己指定位置
点击日志文件Ctrl+f 查找测试程序打印结果
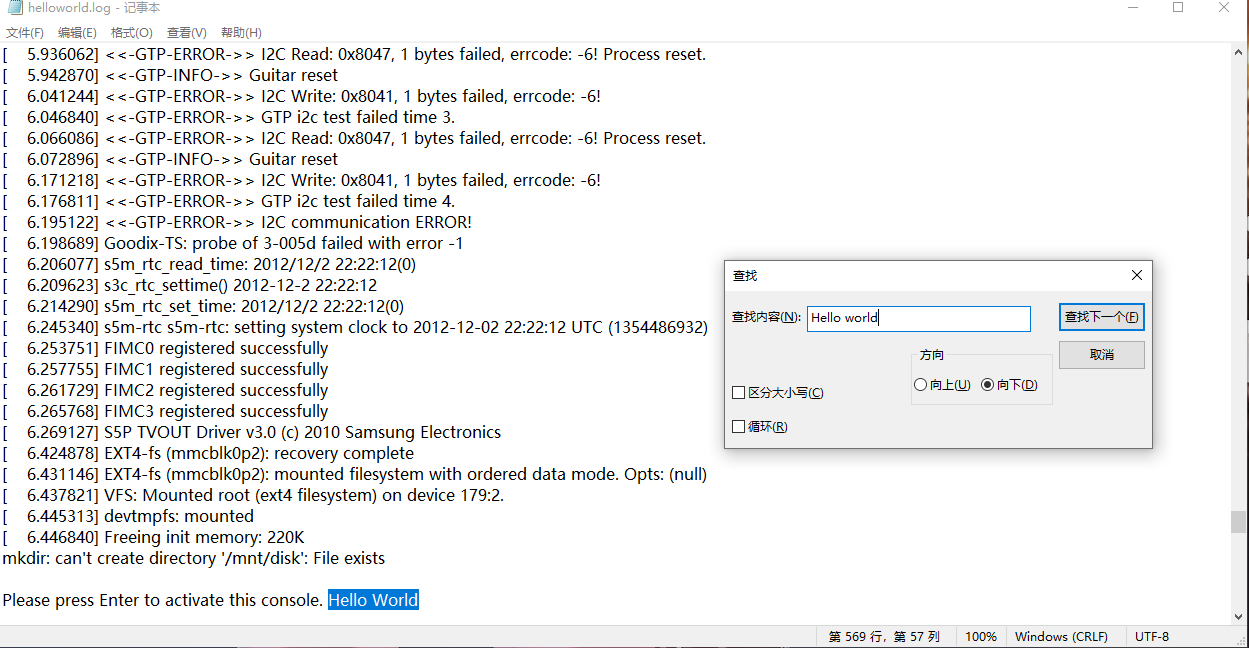
3、输入reboot重启开发板


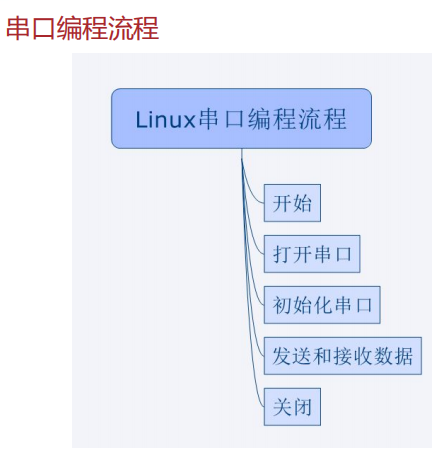
串口编程之打开串口
测试例程
#include <stdio.h>
#include <sys/types.h>
#include <sys/stat.h>
#include <fcntl.h>
#include <unistd.h>
#include <string.h>
void main()
{
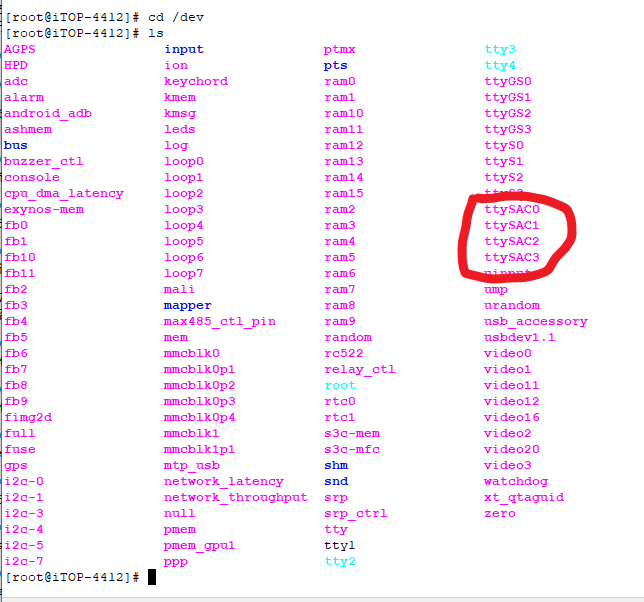
int fd;
char *uart3="/bin/ttySAC3";
if((fd=open(uart3,O_RDWR|O_CREAT,0777))<0)
{
printf("open %s failed\n",uart3);
}
else
{
printf("open %s is success!\n",uart3);
}
close(fd);
}
串口初始化


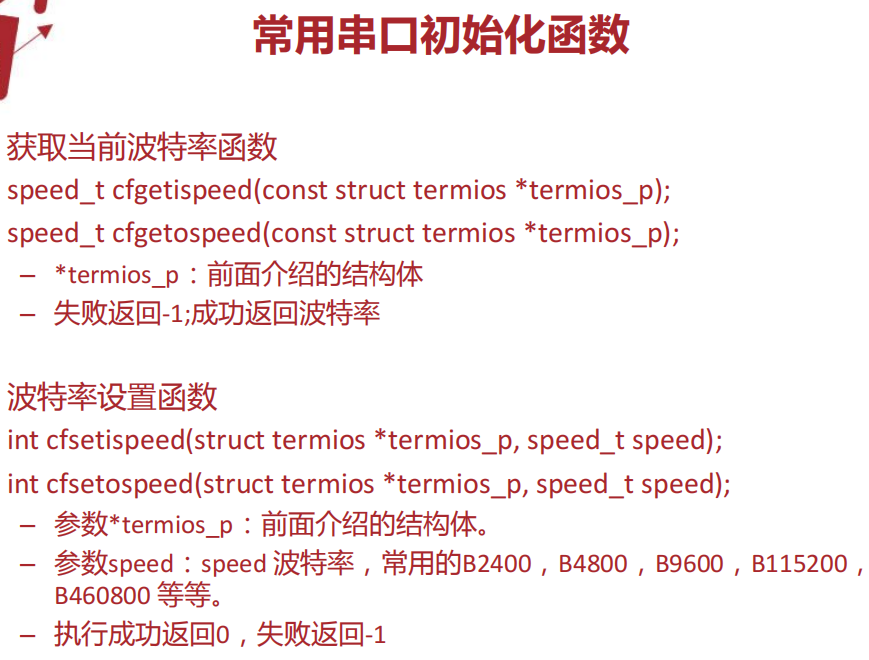
测试代码
#include <stdio.h>
#include <sys/types.h>
#include <sys/stat.h>
#include <fcntl.h>
#include <unistd.h>
#include <string.h>

int set_opt(int,int,int,char,int);
void main(void)
{
  int fd,wr_static,i=10;
  char *uart3="/dev/ttySAC3";
  char *buffer="hello world!\n";
  printf("\r\nitop4412 uart3 writetest start\r\n");
  if((fd = open(uart3,O_RDWR|O_NOCTTY|O_NDELAY))<0)
  {
    printf("open %s is failed",uart3);
  }
  else
  {
	printf("open %s is success\n",uart3);
	set_opt(fd,115200,8,'N',1);
	while(i--)
	{
     wr_static =write(fd,buffer,strlen(buffer));
     if(wr_static<0)
         printf("write failed\n");
     else
	 {
		 printf("wr_static is %d\n",wr_static);
	 }
      sleep(1);
	}
  }
}
              //标识符 波特率     数据位   奇偶效验位   停止位
int set_opt(int fd,int nSpeed,int nBits,char nEvent,int nStop)
{
   struct termios newtio,oldtio;
   if(tcgetattr(fd,&oldtio) != 0)
   {
    perror ("SetupSerial 1");
    return -1;
   }
   bzero(&newtio,sizeof(newtio));
   newtio.c_cflag |=CLOCAL |CREAD;   //控制模式
   newtio.c_cflag &=~CSIZE;

   switch(nBits)
   {
	case 7: newtio.c_cflag |=CS7;break;
	case 8: newtio.c_cflag |=CS8;break;
   }

   switch(nEvent)
   {
	case 'O':
	 newtio.c_cflag |=PARENB;
	 newtio.c_cflag |=PARODD;
	 newtio.c_iflag |=(INPCK | ISTRIP);
	 break;
	case 'E':
	 newtio.c_cflag |=PARENB;
	 newtio.c_cflag &=~PARODD;
	 newtio.c_iflag |=(INPCK | ISTRIP);
	 break;
	 case 'N':
	 newtio.c_cflag &=~PARENB;
	 break;
   }

    switch(nSpeed)
	{
		case 2400:
		cfsetispeed(&newtio,B2400);
		cfsetispeed(&newtio,B2400);
		break;
		case 4800:
		cfsetispeed(&newtio,B4800);
		cfsetispeed(&newtio,B4800);
		break;
		case 9600:
		cfsetispeed(&newtio,B9600);
		cfsetispeed(&newtio,B9600);
		break;
		case 115200:
		cfsetispeed(&newtio,B115200);
		cfsetispeed(&newtio,B115200);
		break;
		case 460800:
		cfsetispeed(&newtio,B460800);
		cfsetispeed(&newtio,B460800);
		break;
		default:
		cfsetispeed(&newtio,B9600);
		cfsetispeed(&newtio,B9600);
		break;
	}
     if(nSTOP ==1)
	 {
		 newtio.c_cflag  &=~CSTOPB;
	 }
	 else if(nSTOP ==2)
	 {
		 newtio.c_cflag |=~CSTOPB;
		 newtio.c_cc[VTIME]=0;
		 newtio.c_cc[VMIN]=0;
		 tcflush(fd,TCIFLUSH);//清空数据函数
		 if((tcsetattr(fd,TCSANOW,&newtio))!=0)//不等数据传输完毕立即改变属性
		 {
			 perror("com set error");
			 return -1;
		 }
		 return 0;
	 }
}
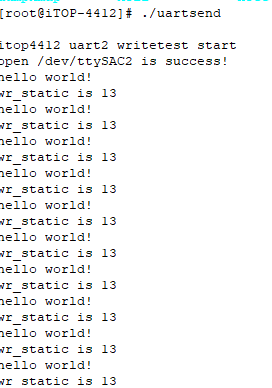
串口编程之使用串口发送数据

测试代码
#include <stdio.h>
#include <sys/types.h>
#include <sys/stat.h>
#include <unistd.h>
#include <fcntl.h>
#include <termios.h>
#include <errno.h>
#include <string.h>

int set_opt(int,int,int,char,int);
void main()
{
	int fd,i=10,wr_static;
	char  *uart3="/dev/ttySAC3"; //选择的串口
	char  *buffer="hello world!\n";//发送的数据
printf("\r\nitop4412 uart3 writetest start\r\n");
    if((fd=open(uart3,O_RDWR|O_CREAT,0777))<0)
	{
		printf("open %s failed!\n",uart3);
	}
	else
	{
		printf("open %s is success!\n",uart3);
         set_opt(fd,115200,8,'N',1);
		 while(i--)
		 {
			wr_static =write(fd,buffer,strlen(buffer));
			if(wr_static<0)
			{
                 printf("write failed\n");
			}
			else
			{
                printf("wr_static is %d\n",wr_static);
			}
			sleep(1);
		 }
	}
}

int set_opt(int fd,int nSpeed,int nBits,char nEvent,int nStop)
{
   struct termios newtio,oldtio;
   if(tcgetattr(fd,&oldtio) != 0)
   {
    perror ("SetupSerial 1");
    return -1;
   }
   bzero(&newtio,sizeof(newtio));
   newtio.c_cflag |=CLOCAL |CREAD;   //控制模式
   newtio.c_cflag &=~CSIZE;

   switch(nBits)
   {
	case 7: newtio.c_cflag |=CS7;break;
	case 8: newtio.c_cflag |=CS8;break;
   }

   switch(nEvent)
   {
	case 'O':
	 newtio.c_cflag |=PARENB;
	 newtio.c_cflag |=PARODD;
	 newtio.c_iflag |=(INPCK | ISTRIP);
	 break;
	case 'E':
	 newtio.c_cflag |=PARENB;
	 newtio.c_cflag &=~PARODD;
	 newtio.c_iflag |=(INPCK | ISTRIP);
	 break;
	 case 'N':
	 newtio.c_cflag &=~PARENB;
	 break;
   }

    switch(nSpeed)
	{
		case 2400:
		cfsetispeed(&newtio,B2400);
		cfsetispeed(&newtio,B2400);
		break;
		case 4800:
		cfsetispeed(&newtio,B4800);
		cfsetispeed(&newtio,B4800);
		break;
		case 9600:
		cfsetispeed(&newtio,B9600);
		cfsetispeed(&newtio,B9600);
		break;
		case 115200:
		cfsetispeed(&newtio,B115200);
		cfsetispeed(&newtio,B115200);
		break;
		case 460800:
		cfsetispeed(&newtio,B460800);
		cfsetispeed(&newtio,B460800);
		break;
		default:
		cfsetispeed(&newtio,B9600);
		cfsetispeed(&newtio,B9600);
		break;
	}
     if(nStop ==1)
	 {
		 newtio.c_cflag  &=~CSTOPB;
	 }
	 else if(nStop ==2)
	 {
		 newtio.c_cflag |=~CSTOPB;
		 newtio.c_cc[VTIME]=0;
		 newtio.c_cc[VMIN]=0;
		 tcflush(fd,TCIFLUSH);//清空数据函数
 if((tcsetattr(fd,TCSANOW,&newtio))!=0)//不等数据传输完毕立即改变属性
		 {
			 perror("com set error");
			 return -1;
		 }
		 return 0;
	 }
}
实验效果
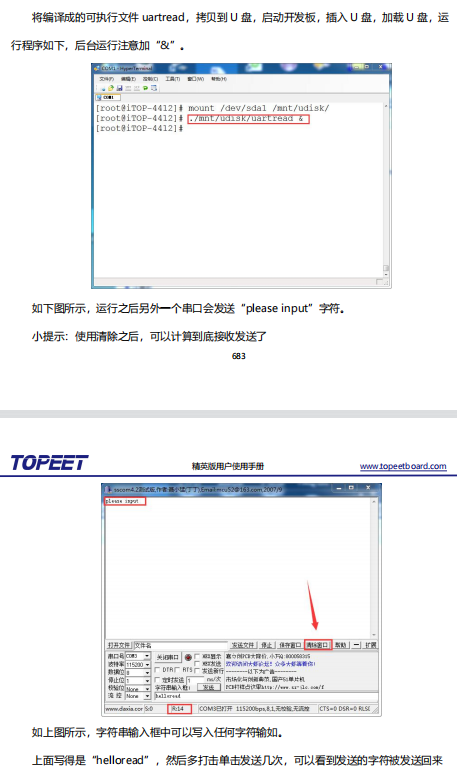
串口编程之使用串口接收数据

测试代码
#include <stdio.h>

#include <string.h>

#include <unistd.h>

#include <sys/types.h>

#include <sys/stat.h>

#include <fcntl.h>

#include <termios.h>

#include <errno.h>

int set_opt(int,int,int,char,int);
//"/dev/ttySAC3"是con2,靠近耳机接口的串口
void main()
{
	int fd,nByte;
	char *uart3 = "/dev/ttySAC3";
	char buffer[512];
	char *uart_out = "please input\r\n";
	memset(buffer, 0, sizeof(buffer));
	if((fd = open(uart3, O_RDWR|O_NOCTTY))<0)
		printf("open %s is failed",uart3);
	else{
		set_opt(fd, 115200, 8, 'N', 1);
		write(fd,uart_out, strlen(uart_out));
		while(1){
			while((nByte = read(fd, buffer, 512))>0){
				buffer[nByte+1] = '\0';
				write(fd,buffer,strlen(buffer));
				memset(buffer, 0, strlen(buffer));
				nByte = 0;
			}
		}
	}
}

int set_opt(int fd,int nSpeed, int nBits, char nEvent, int nStop)
{
	struct termios newtio,oldtio;
	if  ( tcgetattr( fd,&oldtio)  !=  0) {
		perror("SetupSerial 1");
		return -1;
	}
	bzero( &newtio, sizeof( newtio ) );
	newtio.c_cflag  |=  CLOCAL | CREAD;
	newtio.c_cflag &= ~CSIZE;
    switch( nBits )
{
	case 7:
		newtio.c_cflag |= CS7;
		break;
	case 8:
		newtio.c_cflag |= CS8;
		break;
}

switch( nEvent )
{
case 'O':
	newtio.c_cflag |= PARENB;
	newtio.c_cflag |= PARODD;
	newtio.c_iflag |= (INPCK | ISTRIP);
	break;
case 'E':
	newtio.c_iflag |= (INPCK | ISTRIP);
	newtio.c_cflag |= PARENB;
	newtio.c_cflag &= ~PARODD;
	break;
case 'N':
	newtio.c_cflag &= ~PARENB;
	break;
}

switch( nSpeed )
{
	case 2400:
		cfsetispeed(&newtio, B2400);
		cfsetospeed(&newtio, B2400);
		break;
	case 4800:
		cfsetispeed(&newtio, B4800);
		cfsetospeed(&newtio, B4800);
		break;
	case 9600:
		cfsetispeed(&newtio, B9600);
		cfsetospeed(&newtio, B9600);
		break;
	case 115200:
		cfsetispeed(&newtio, B115200);
		cfsetospeed(&newtio, B115200);
		break;
	case 460800:
		cfsetispeed(&newtio, B460800);
		cfsetospeed(&newtio, B460800);
		break;
	default:
		cfsetispeed(&newtio, B9600);
		cfsetospeed(&newtio, B9600);
		break;
}
if( nStop == 1 )
	newtio.c_cflag &=  ~CSTOPB;
else if ( nStop == 2 )
	newtio.c_cflag |=  CSTOPB;
	newtio.c_cc[VTIME]  = 0;
	newtio.c_cc[VMIN] = 0;
	tcflush(fd,TCIFLUSH);
if((tcsetattr(fd,TCSANOW,&newtio))!=0)
{
	perror("com set error");
	return -1;
}
//	printf("set done!\n\r");
return 0;
}
TFTP服务器搭建
搭建服务器
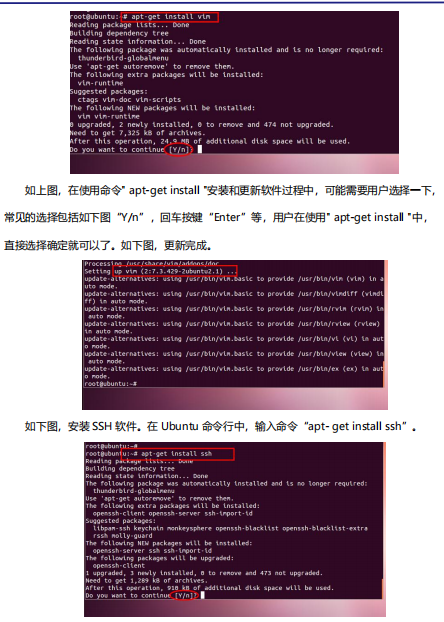
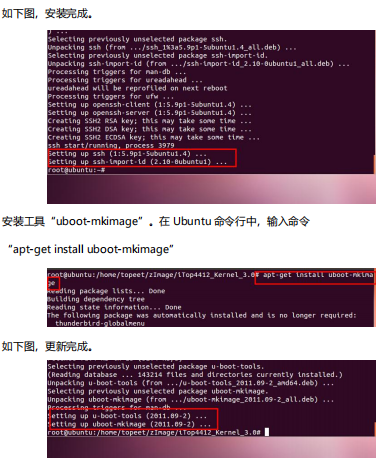
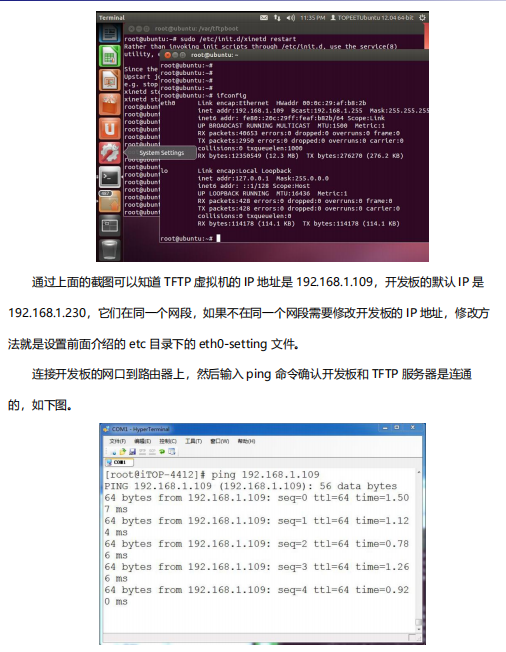
首先输入命令“sudo apt-get install xinetd”,安装 xinetd。
接下来输入命令“sudo apt-get install tftp tftpd”安装 tftp 和 tftpd,
然后建立 TFTP 的配置文件,使用命令“vi /etc/xinetd.d/tftp”建立文件,
写入下面的内容:
service tftp
{
      socket_type 			= dgram
      protocol  		    = udp
      wait 				    = yes
      user                   = root
      server                 = /usr/sbin/in.tftpd
      server_args  		     = -s /var/tftpboot/
      disable 			    = no
      per_source		     = 11
      cps                        = 100 2
      flags                      = IPv4
}
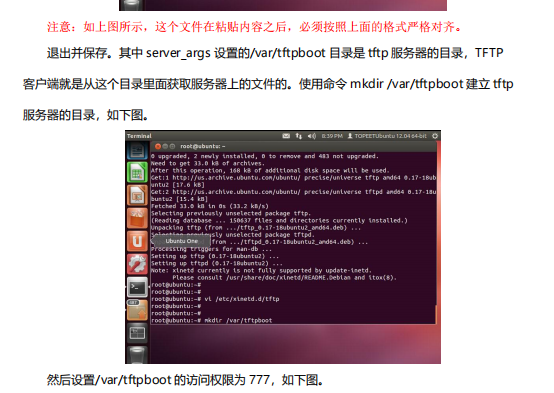
sudo /etc/init.d/xinetd restart 命令重启 xinetd 服务
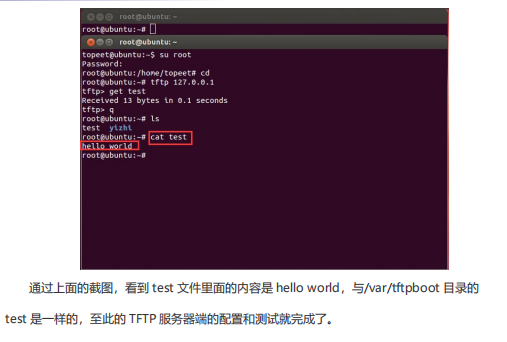
服务器到这一步就搭建好了,后面来进行测试。
服务器测试
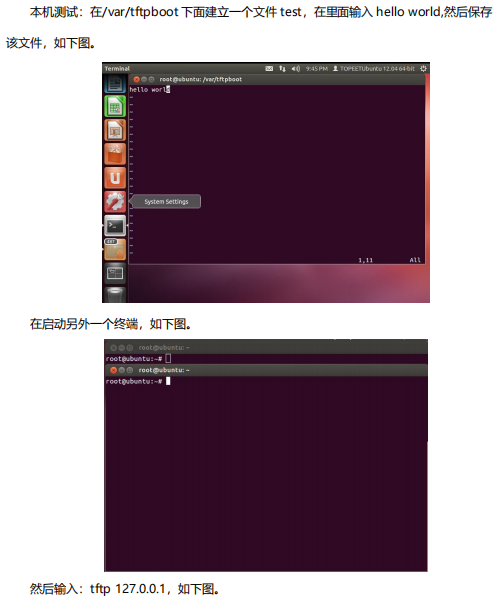

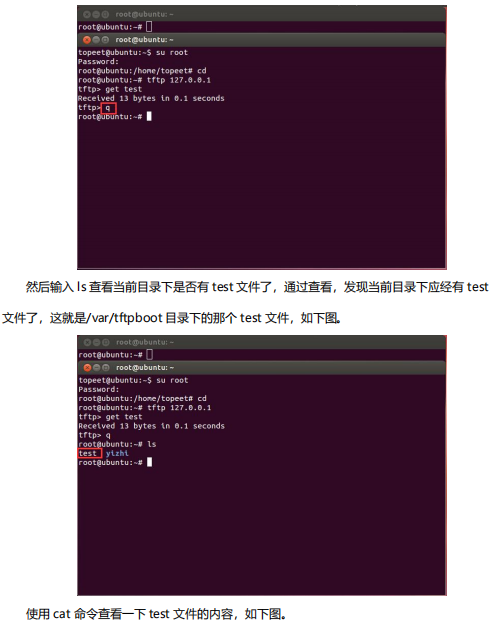
后面一个终端是客户端,前面那个是服务器端。
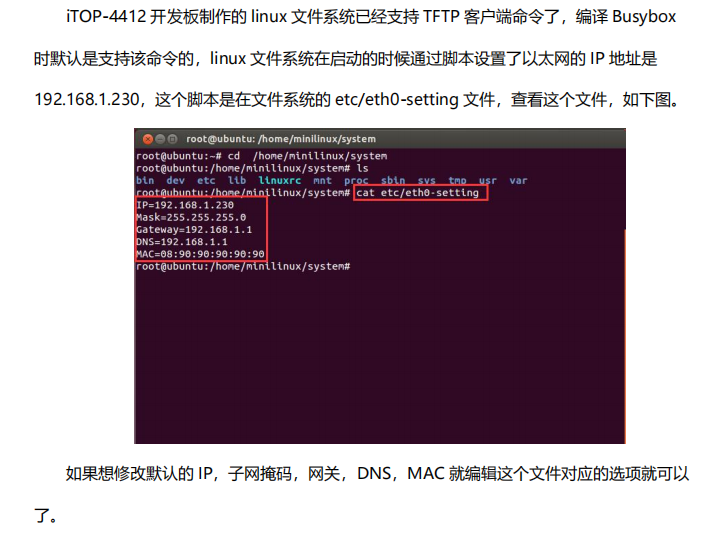
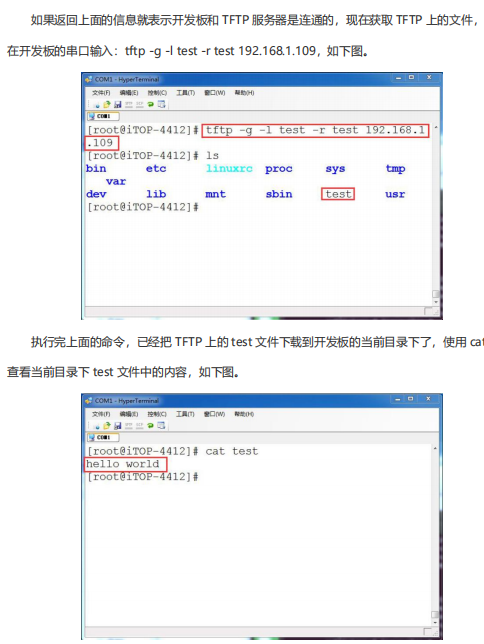
开发板实现 TFTP 文件传输


 389
389


 被折叠的 条评论
为什么被折叠?
被折叠的 条评论
为什么被折叠?
 到【灌水乐园】发言


