Tensorflow_gpu安装_windows系统下用GPU训练tensorflow模型

Tensorflow_gpu安装_windows系统下用GPU训练tensorflow模型

为了后续的实验,需要使用Tensorflow_gpu,故记录一下实验环境的安装过程,下面是环境所需各个库的版本

cudatoolkit==10.0.130 
cudnn==7.6.5
gensim==3.4.0 
huggingface-hub==0.16.4 
imbalanced-learn==0.9.0  数据不平衡
keras==2.2.5 
myutils==0.0.21 
python==3.7.10 
scikit-learn==1.0.2 
TensorFlow-gpu==1.15.0
torch==1.9.1+cu102  
transformers==4.16.2
xgboost==1.6.2

1.关于tensorflow的介绍

2.python环境,由于为了方便管理python版本和库版本的关系,使用Anaconda来代替

点击 Anaconda的下载地址可以下载

在这里插入图片描述

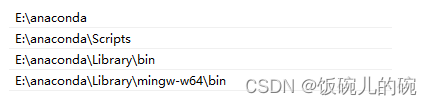
如果没有自动帮你设置环境变量的话,按照下面图片自己设置就好了

在这里插入图片描述

添加镜像源(方便后续库的安装)
进行cmd:输入

conda config --add channels    https://mirrors.tuna.tsinghua.edu.cn/anaconda/pkgs/free/
conda config --add channels    https://mirrors.tuna.tsinghua.edu.cn/anaconda/pkgs/main/
conda config --add channels    https://mirrors.tuna.tsinghua.edu.cn/anaconda/cloud/conda-forge/

注意!!!考虑好anaconda的版本选择,虽然可以创建自己需要的python虚拟环境,py版本向下兼容,但也最好别下最新版本,作者实验的python环境是3.7.10,anaconda选择的版本是Anaconda3-2021.05-Windows-x86_64.exe点击即可下载,使用的是镜像源。会比官网下载得快,其中包含的python版本是3.9.7

3.用conda创建虚拟环境

在这里将要创建一个虚拟的python环境,为了后续tensorflow的使用

conda create --name gpu_work python==3.7.10
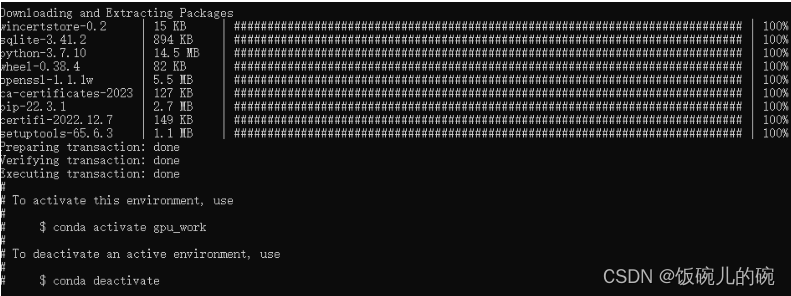
在这里插入图片描述
在这里插入图片描述

如上图就是创建虚拟环境创建成功了

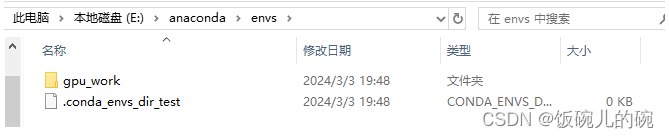
cmd中执行以上命令后,创建一个名为gpu_work的python的虚拟环境,并配备一个版本为3.7.10的python解释器,在你的Anaconda3安装路径下的envs文件夹中应该会出现一个名为gpu_work的一个文件夹,那便是我们刚刚创建好的环境

activate gpu_work

再执行以上命令后又可以激活已存在的环境gpu_work,如下图,可以检查一下虚拟环境中一些库的版本号,以此确认是否创建成功

在这里插入图片描述

做了以上准备工作,接下里就是正式安装tensorflow了,需要特别注意!的是(cudatoolkit,cudnn,tensorflow-gpu,在当前python版本满足的前提下,三者的版本必须对应正确,否则就无法正常使用GPU!!!

这里我选择的是最稳妥的方法,也就是cuda,cudnn,tensorflow-gpu分别安装,但是特别注意的是版本要对应

4.cuda安装

CUDA官方下载地址,选择自己对应的版本号即可,我要下载的tensorflow_gpu版本是1.15.0,所以这里cuda我选择10.0的下载

在这里插入图片描述

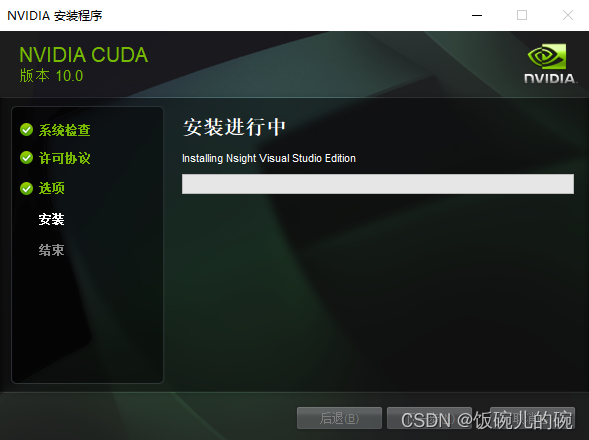
一路默认安装后即可,然后就是环境变量的检查
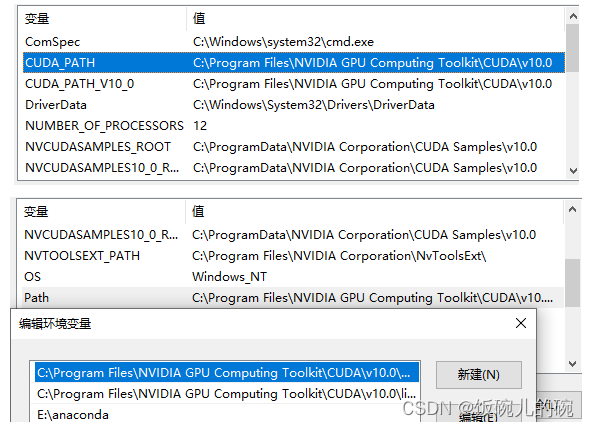
在这里插入图片描述

检查没问题后CUDA就安装成功了

5.cudnn安装

https://developer.nvidia.com/rdp/cudnn-archive这是cudnn的官方下载地址,第一次单击下载时,会让你先注册登录,然后再进行下载,注册信息就正常填写就行,我要下载的tensorflow_gpu版本是1.15.0,所以这里cudnn我选择7.6.5的下载

官网下载慢,而且需要登录账号,从国内镜像源下载后解压,再复制到对应文件夹即可。网址https://mirrors.tuna.tsinghua.edu.cn/anaconda/pkgs/main/win-64/

下载完成后,这里我们需要把cudnn里的三个文件移动或者copy到cuda的对应文件夹里面去

在这里插入图片描述

自此cudnn的安装也成功完成

6.tensorflow-gpu的安装

直接win+R打开cmd,先activate激活并进入到我们创建的python环境中去:选择合适的版本**(必须和cuda和cudnn版本对应)**

pip install tensorflow-gpu==1.15.0-i https://pypi.tuna.tsinghua.edu.cn/simple

自此就全部安装成功了

参考:

Tensorflow-gpu安装教程(详细)!!!_安装tensorflow-gpu-CSDN博客

cudnn 清华源下载地址_cudnn下载清华源-CSDN博客

  • 20
    点赞
  • 29
    收藏
    觉得还不错? 一键收藏
  • 打赏
    打赏
  • 0
    评论
自编译tensorflow: 1.python3.5,tensorflow1.12; 2.支持cuda10.0,cudnn7.3.1,TensorRT-5.0.2.6-cuda10.0-cudnn7.3; 3.支持mkl,无MPI; 软硬件硬件环境:Ubuntu16.04,GeForce GTX 1080 配置信息: hp@dla:~/work/ts_compile/tensorflow$ ./configure WARNING: --batch mode is deprecated. Please instead explicitly shut down your Bazel server using the command "bazel shutdown". You have bazel 0.19.1 installed. Please specify the location of python. [Default is /usr/bin/python]: /usr/bin/python3 Found possible Python library paths: /usr/local/lib/python3.5/dist-packages /usr/lib/python3/dist-packages Please input the desired Python library path to use. Default is [/usr/local/lib/python3.5/dist-packages] Do you wish to build TensorFlow with XLA JIT support? [Y/n]: XLA JIT support will be enabled for TensorFlow. Do you wish to build TensorFlow with OpenCL SYCL support? [y/N]: No OpenCL SYCL support will be enabled for TensorFlow. Do you wish to build TensorFlow with ROCm support? [y/N]: No ROCm support will be enabled for TensorFlow. Do you wish to build TensorFlow with CUDA support? [y/N]: y CUDA support will be enabled for TensorFlow. Please specify the CUDA SDK version you want to use. [Leave empty to default to CUDA 10.0]: Please specify the location where CUDA 10.0 toolkit is installed. Refer to README.md for more details. [Default is /usr/local/cuda]: /usr/local/cuda-10.0 Please specify the cuDNN version you want to use. [Leave empty to default to cuDNN 7]: 7.3.1 Please specify the location where cuDNN 7 library is installed. Refer to README.md for more details. [Default is /usr/local/cuda-10.0]: Do you wish to build TensorFlow with TensorRT support? [y/N]: y TensorRT support will be enabled for TensorFlow. Please specify the location where TensorRT is installed. [Default is /usr/lib/x86_64-linux-gnu]:/home/hp/bin/TensorRT-5.0.2.6-cuda10.0-cudnn7.3/targets/x86_64-linux-gnu Please specify the locally installed NCCL version you want to use. [Default is to use https://github.com/nvidia/nccl]: Please specify a list of comma-separated Cuda compute capabilities you want to build with. You can find the compute capability of your device at: https://developer.nvidia.com/cuda-gpus. Please note that each additional compute capability significantly increases your build time and binary size. [Default is: 6.1,6.1,6.1]: Do you want to use clang as CUDA compiler? [y/N]: nvcc will be used as CUDA compiler. Please specify which gcc should be used by nvcc as the host compiler. [Default is /usr/bin/gcc]: Do you wish to build TensorFlow with MPI support? [y/N]: No MPI support will be enabled for TensorFlow. Please specify optimization flags to use during compilation when bazel option "--config=opt" is specified [Default is -march=native -Wno-sign-compare]: Would you like to interactively configure ./WORKSPACE for Android builds? [y/N]: Not configuring the WORKSPACE for Android builds. Preconfigured Bazel build configs. You can use any of the below by adding "--config=" to your build command. See .bazelrc for more details. --config=mkl # Build with MKL support. --config=monolithic # Config for mostly static monolithic build. --config=gdr # Build with GDR support. --config=verbs # Build with libverbs support. --config=ngraph # Build with Intel nGraph support. --config=dynamic_kernels # (Experimental) Build kernels into separate shared objects. Preconfigured Bazel build configs to DISABLE default on features: --config=noaws # Disable AWS S3 filesystem support. --config=nogcp # Disable GCP support. --config=nohdfs # Disable HDFS support. --config=noignite # Disable Apacha Ignite support. --config=nokafka # Disable Apache Kafka support. --config=nonccl # Disable NVIDIA NCCL support. Configuration finished 编译: hp@dla:~/work/ts_compile/tensorflow$ bazel build --config=opt --config=mkl --verbose_failures //tensorflow/tools/pip_package:build_pip_package 卸载已有tensorflow: hp@dla:~/temp$ sudo pip3 uninstall tensorflow 安装自己编译的成果: hp@dla:~/temp$ sudo pip3 install tensorflow-1.12.0-cp35-cp35m-linux_x86_64.whl

“相关推荐”对你有帮助么?

  • 非常没帮助
  • 没帮助
  • 一般
  • 有帮助
  • 非常有帮助
提交
评论
添加红包

请填写红包祝福语或标题

红包个数最小为10个

红包金额最低5元

当前余额3.43前往充值 >
需支付:10.00
成就一亿技术人!
领取后你会自动成为博主和红包主的粉丝 规则
hope_wisdom
发出的红包

打赏作者

饭碗儿的碗

你的鼓励将是我创作的最大动力

¥1 ¥2 ¥4 ¥6 ¥10 ¥20
扫码支付:¥1
获取中
扫码支付

您的余额不足,请更换扫码支付或充值

打赏作者

实付
使用余额支付
点击重新获取
扫码支付
钱包余额 0

抵扣说明:

1.余额是钱包充值的虚拟货币,按照1:1的比例进行支付金额的抵扣。
2.余额无法直接购买下载,可以购买VIP、付费专栏及课程。

余额充值