


目录
<1>先删除app.json里的pages路径,再删除对应的文件,最后点保存。
<2>新建pages,直接在app.json里添加新的pages路径
一.小程序的目录结构及其作用
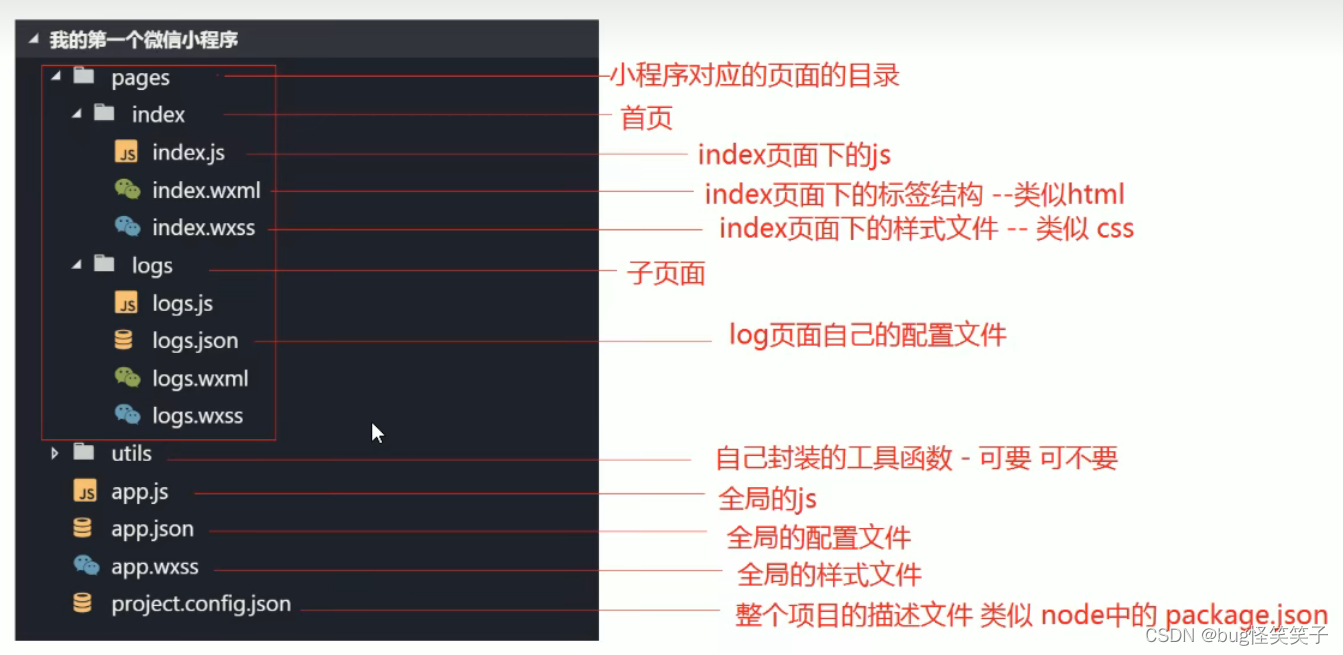
例如:app.json可以设置全局的上方标题。
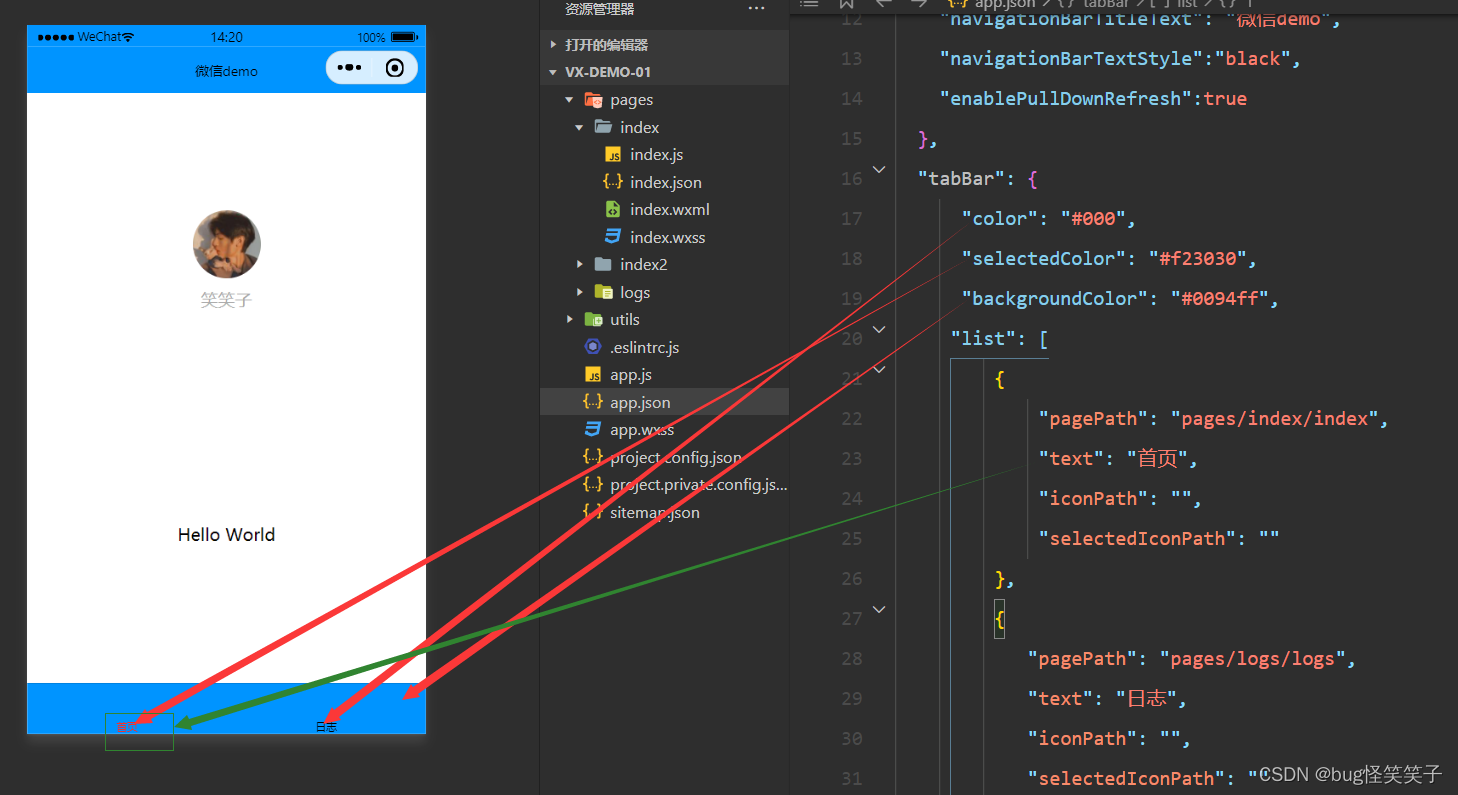
(1)app.json全局配置
<1>.pages属性
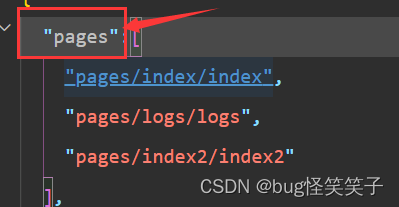
1> 在这里面填写路径,可以直接生成对应的页面。
2>每个页面的显示顺序和代码的顺序有关。
例如: "pages/index/index",在最前面,我们打开微信小程序,最先看到的就是index的页面。
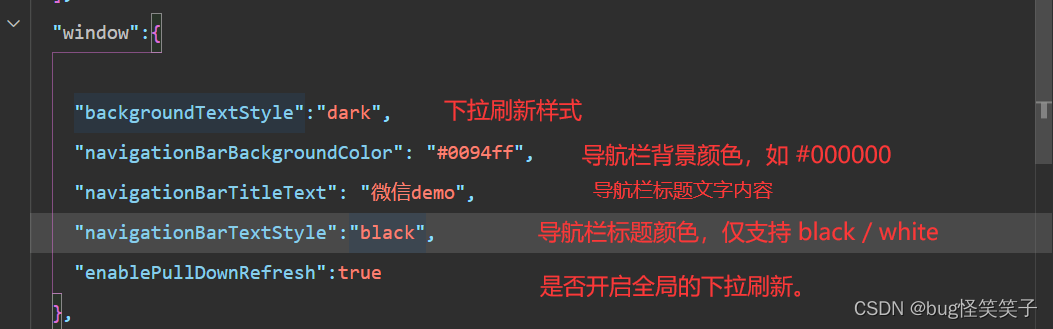
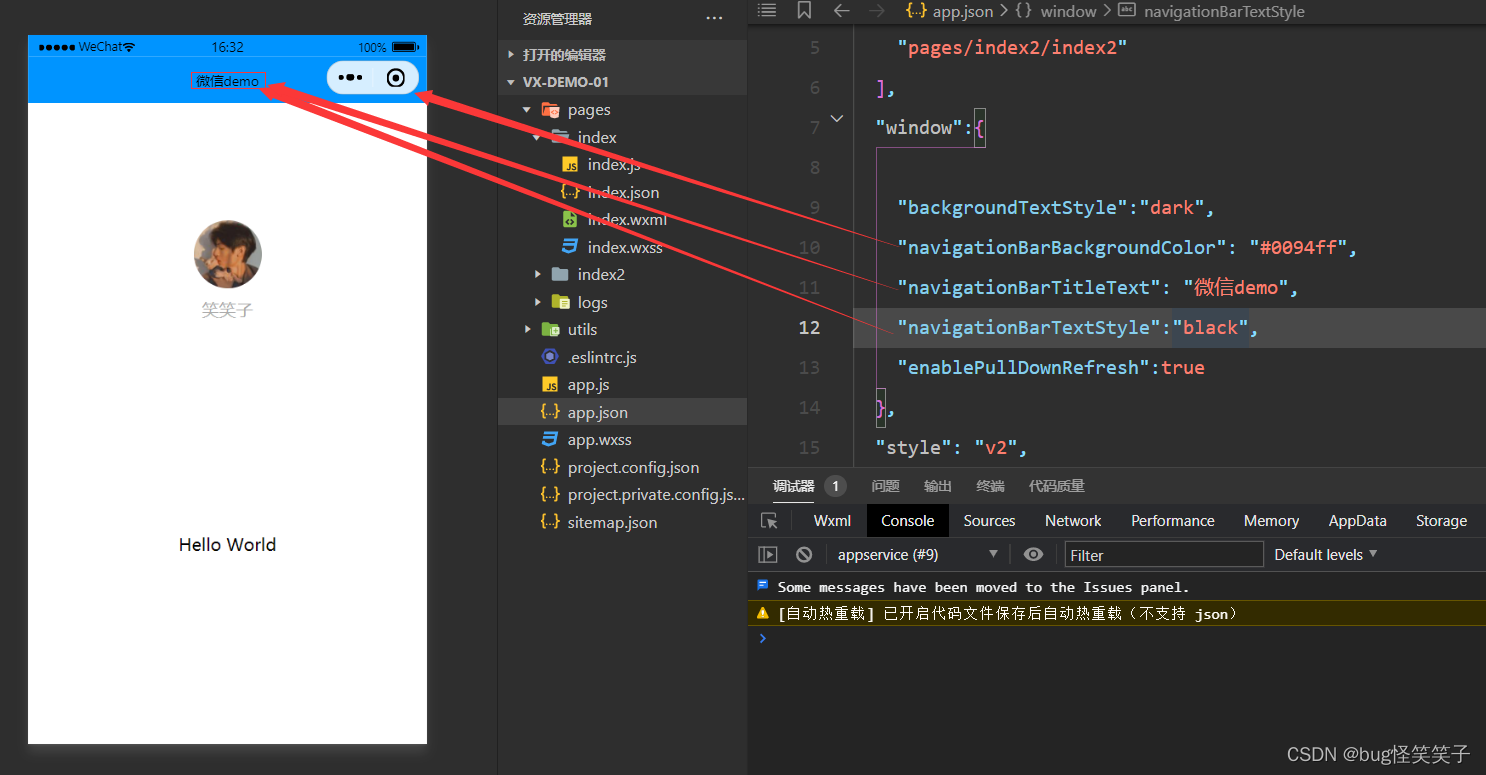
<2>windows属性
 "window":{

    "backgroundTextStyle":"dark",
    "navigationBarBackgroundColor": "#0094ff",
    "navigationBarTitleText": "微信demo",
    "navigationBarTextStyle":"black",
    "enablePullDownRefresh":true
  }
<3>tabBar
"tabBar": {
      "color": "#000",
      "selectedColor": "#f23030",
      "backgroundColor": "#0094ff",
     "list": [
         {
             "pagePath": "pages/index/index",
             "text": "首页",
             "iconPath": "",
             "selectedIconPath": ""
         },
         {
            "pagePath": "pages/logs/logs",
            "text": "日志",
            "iconPath": "",
            "selectedIconPath": ""
        }
     ]
  }
(2)wxss样式扩展
<1>尺寸单位
1rpx=2px,建议在ipone 6上进行模拟调试,rpx单位会自适应
<2>***.wxss和app.wxss的优先级
1.***.wxss的优先级比全局的高
2.在局部的wxss和app.wxss修改的不是同一样式的时候,都生效
<3>wxss样式的导入
1.使用@import "相对路径 " 例如:@import './pages/index2/index2.wxss '

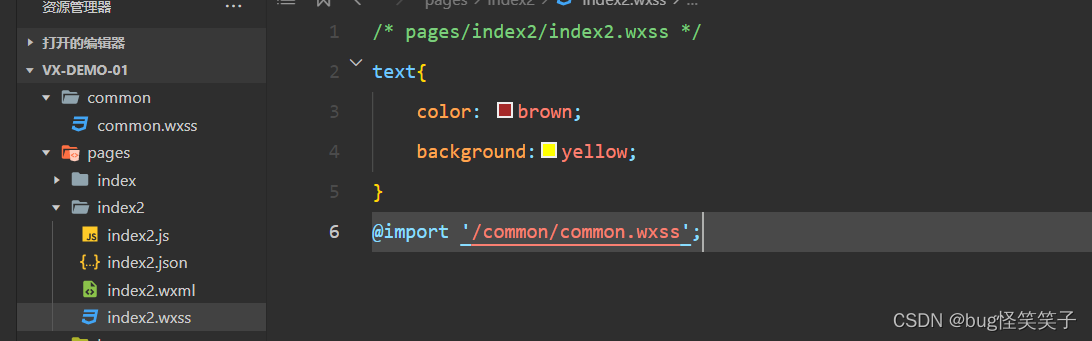
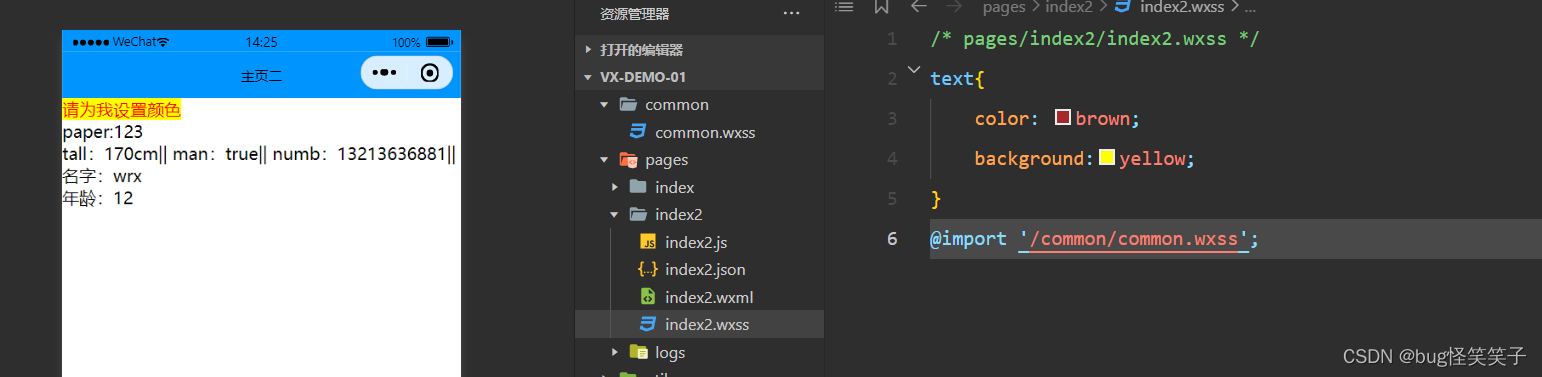
我们发现字体颜色位红色,而不是brown色。说明导入成功,重写了text的颜色属性。
(3)数据绑定
<1>标签
<view></view> :相当于<div>或者<span>
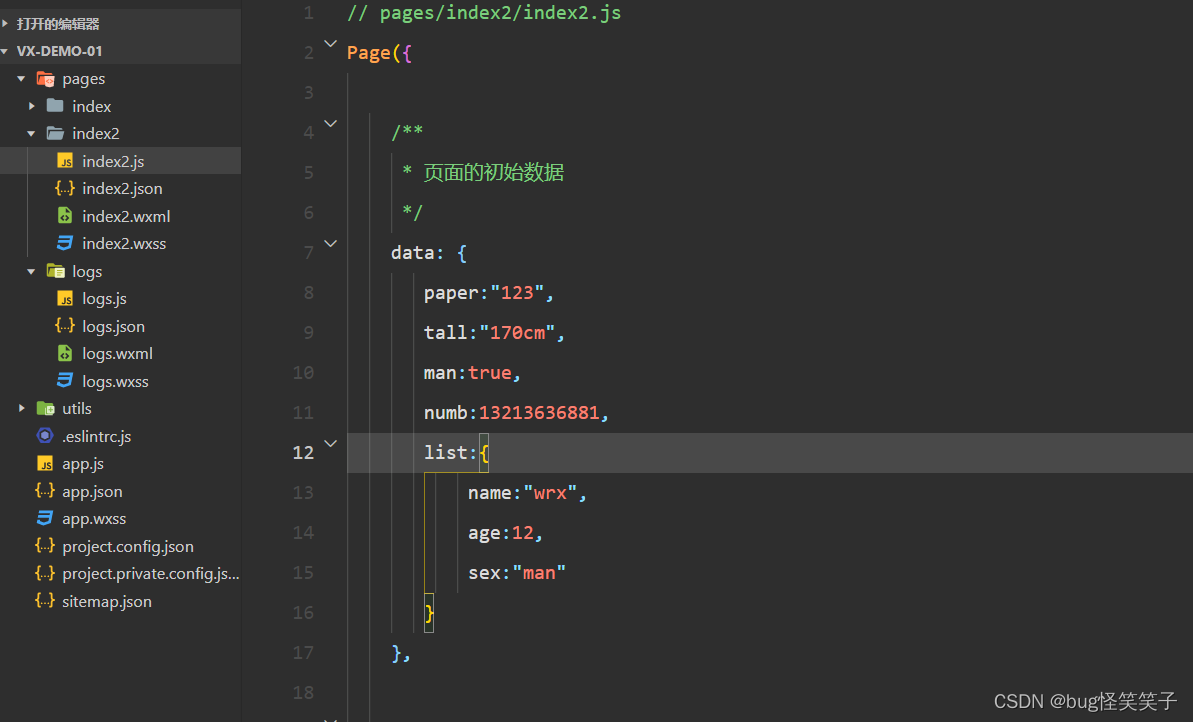
<2>****.js
在这个文件里,主要用来写js,他与vue极其相似。
<3>****.wxml
这个文件用来写界面,也就是html,那么如何调用***.js里的数据呢?
使用 {{ }}

注意:在标签里引用boolen类型的值时,也要使用 {{ }}
例如:

(4)视图组件
<1>view
view和div非常相似
<2>swiper 滑块视图组件 轮播图
在swiper里应该嵌套swiper-item
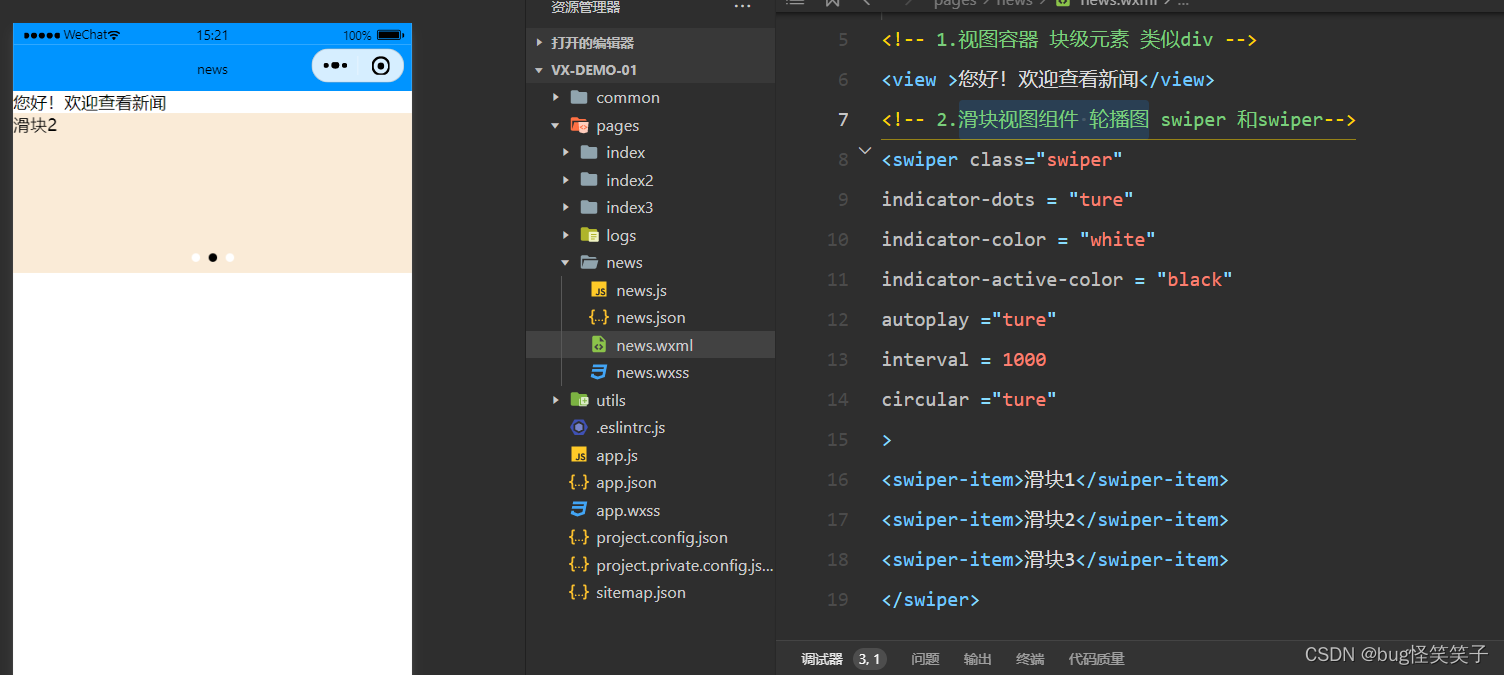
<swiper class="swiper"
indicator-dots = "ture"
indicator-color = "white"
indicator-active-color = "black"
autoplay ="ture"
interval = 1000
circular ="ture"
>
<swiper-item>滑块1</swiper-item>
<swiper-item>滑块2</swiper-item>
<swiper-item>滑块3</swiper-item>
</swiper>
<3>text
<view><text>text : 你有异议?哦,我没有</text></view><4>进度条 progress
<!-- 普通进度条 -->
<progress percent= '20'></progress>
<!-- 显示进度条百分比 -->
<progress percent= '40' show-info='ture' font-size ='16'></progress>
<!-- 调整进度条颜色,字体大小 -->
<progress percent= '60' show-info='ture'  font-size ='32' color="red"></progress>
<!-- 进度条动画,动画颜色 -->
<progress percent= '80' active activeColor="black"></progress>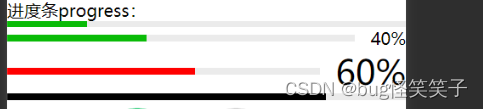
<5>icon
<icon class="icon-small" type="cancel" size="23"></icon>
<icon class="icon-small" type="search" size="30"></icon>
<icon class="icon-small" type="download" size="23"></icon>
<icon class="icon-box-img" type="success" size="93"></icon>
<icon class="icon-box-img" type="warn" size="93" color="#C9C9C9"></icon>
<6>button
<button>按钮</button>
<button size="mini" type="primary">按钮</button>
<button type="warn" >按钮</button>
<!-- 两个强大的的属性
1:form-type :submit/reset   提交和重置表单
2.open-type : 获取微信的相关权限
 -->
 <button open-type="openSetting" >授权</button>
 <button open-type="share" >转发</button>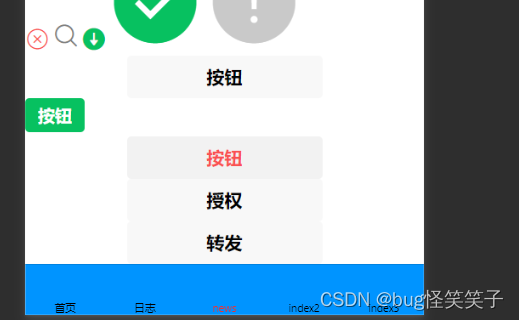
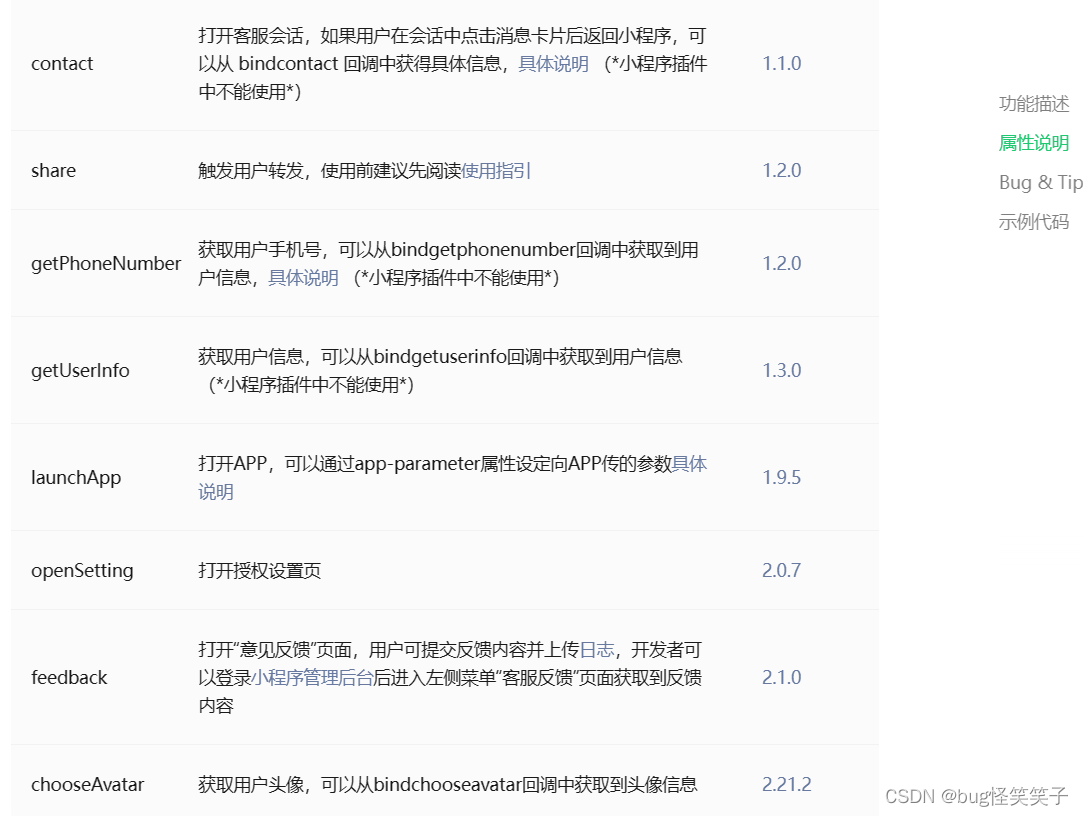
button有两个很强的属性:
1.form-type 见上面的代码示例
2.open-type 用于开放微信的权限和功能
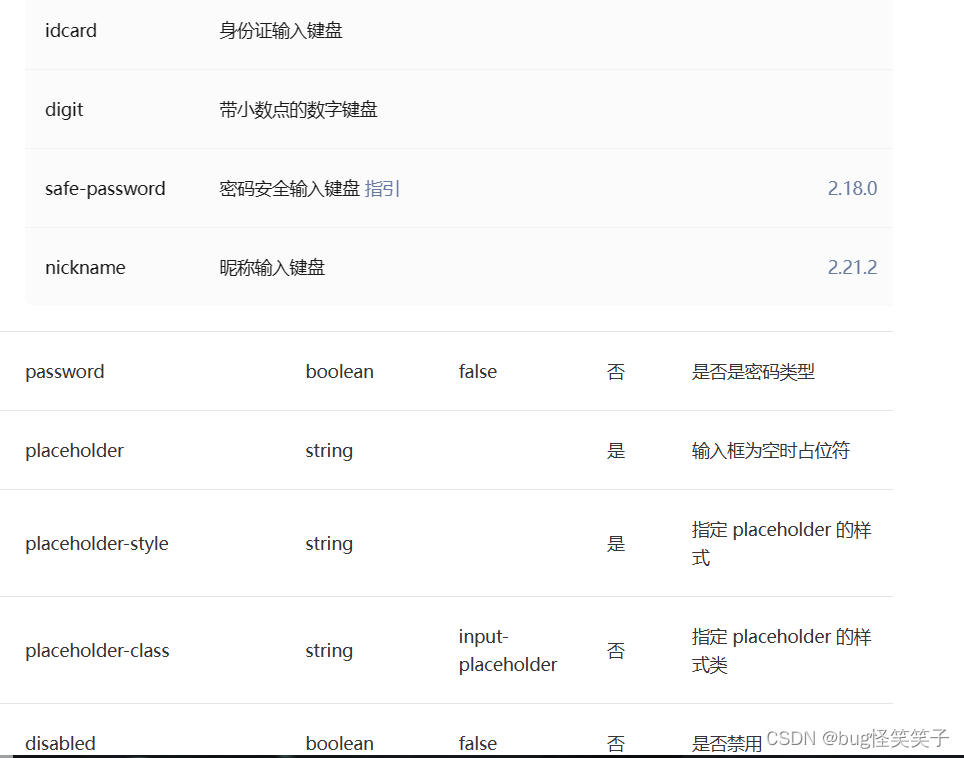
<7>input
<!-- 7.input输入框 -->
 <input type="text" placeholder="请输入"/>

<8>image图片标签
<image src="../../images/beijing.jpg"></image>在src属性里添加,图片的相对路径就可以展示照片了。
注意:记得使用添加class的方式,在wxss文件里,调整图片的height和width的大小。
注意:当image和swiper轮播图嵌套使用时:
应该调整两者的width长度都是100%,高度相同,最好不让图片变形
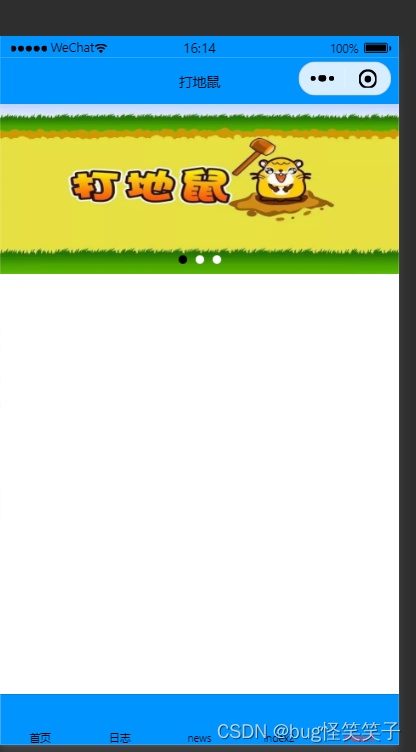
.json代码:
<swiper class="swiper"
indicator-dots = "ture"
indicator-color = "white"
indicator-active-color = "black"
autoplay ="ture"
circular ="ture"
interval = '2000'
>
<swiper-item>
<image src="../../images/dadishu.jpg"></image>
</swiper-item>
<swiper-item>
    <image src="../../images/caodibeijing.jpg"></image>
</swiper-item>
<swiper-item><image src="../../images/beijing.jpg"></image></swiper-item>
</swiper>
wxss代码:
.swiper{
    background-color: antiquewhite;
    height: 320rpx;
}
.swiper image {
    height: 320rpx;
    width: 100%;
}
<9>navigatoer
详情:navigator | 微信开放文档 (qq.com)
 <!-- 8.导航 <navigator url='相对路径'></navigator>-->
 <!-- <1>open-type默认属性 navigate
        保存当前页面,跳到某个页面,但是不能调tabber页面 -->
    <navigator class="navigator1" url="../index4/index4" >点击我,跳转到index4</navigator>
<!--  <2>redirect   关闭当前页,跳到某一页,但是不能是tabbar页 -->
    <navigator class="navigator3" url="../index4/index4" open-type="redirect" >点击我,跳转到index4</navigator>
<!--  <3>switchTab   跳转到tabber页面,并且关闭其他所有非tabber页面  -->
    <navigator class="navigator3" url="../index3/index3" open-type="switchTab" >点击我,跳转到index3</navigator>
<!--  <4>navigateBack    关闭当前页面,返回上一页-->
    <navigator class="navigator3"  open-type="navigateBack" >点击我,关闭当前页,返回上一页</navigator>
<!--  <5>reLaunch    关闭所有页面,打开应用内的某个页面-->
    <navigator class="navigator3" url="../index3/index3" open-type="reLaunch" >点击我,关闭所有页面,打开index3</navigator>
    <!-- <6> exit 退出小程序,退出小程序,`target="miniProgram"`时生效 -->
        <navigator class="navigator3" target="miniProgram"  open-type="exit" >点我,退出小程序</navigator>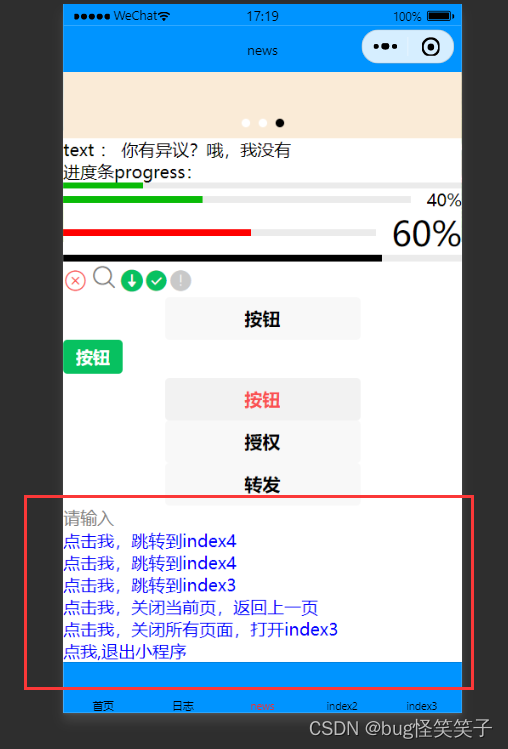
(5)如何删除页面,处理新创建的工程。
以删除index和logs为例。
<1>先删除app.json里的pages路径,再删除对应的文件,最后点保存。
<2>新建pages,直接在app.json里添加新的pages路径
<3>清除app.js里的东西,留下方法体。

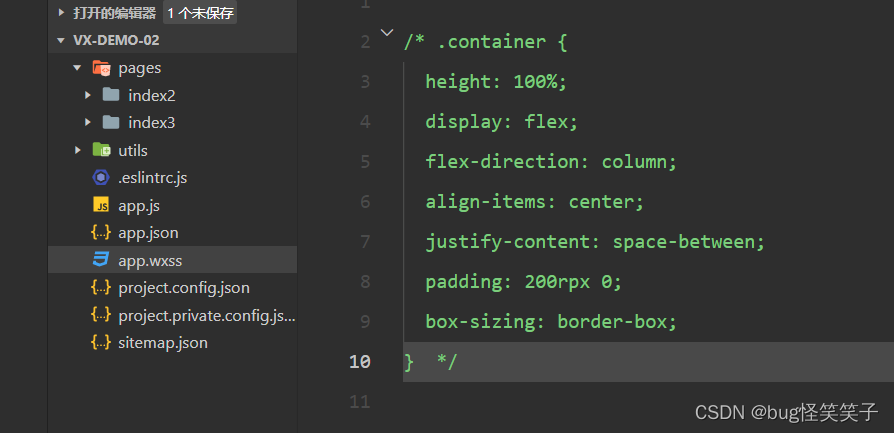
<4>清除app.wxss的所有样式
(6)js
<1>app.js
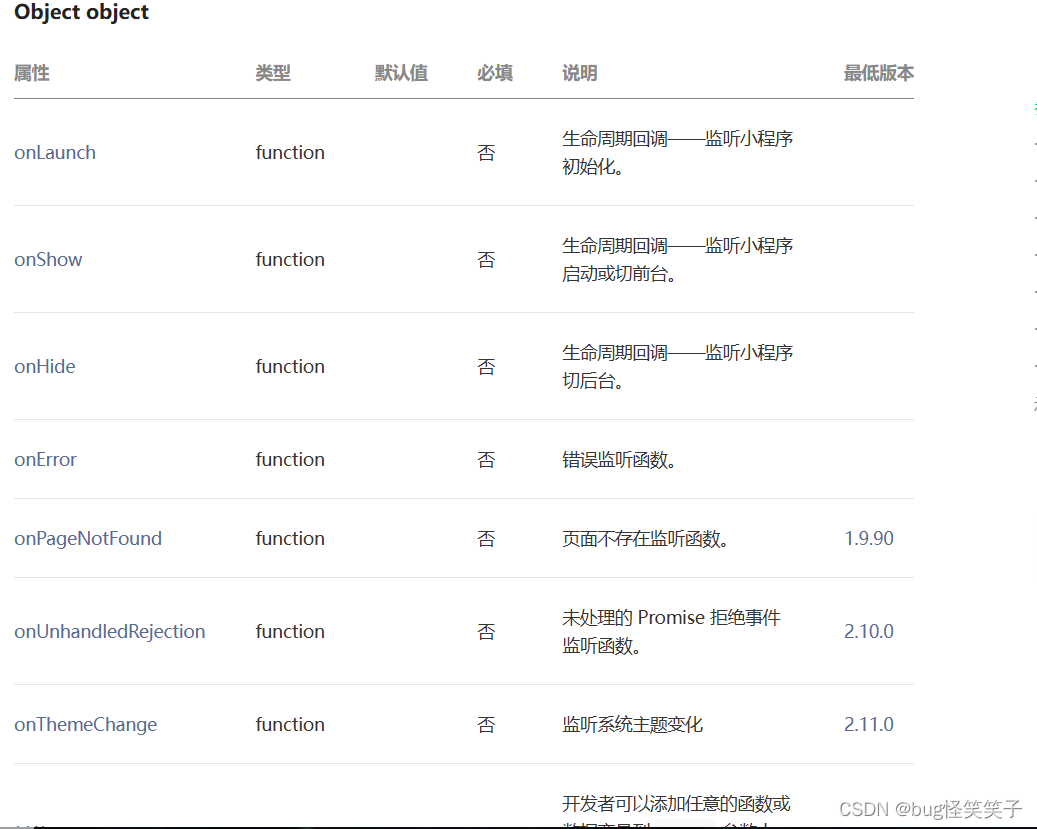
App(Object object) | 微信开放文档 (qq.com)
以下是各个函数的作用

App({
    onLaunch (options) {
        // Do something initial when launch.
      },
      onShow (options) {
        // Do something when show.
      },
      onHide () {
        // Do something when hide.
      },
      onError (msg) {
        console.log(msg)
      },
      globalData: 'I am global data'
})
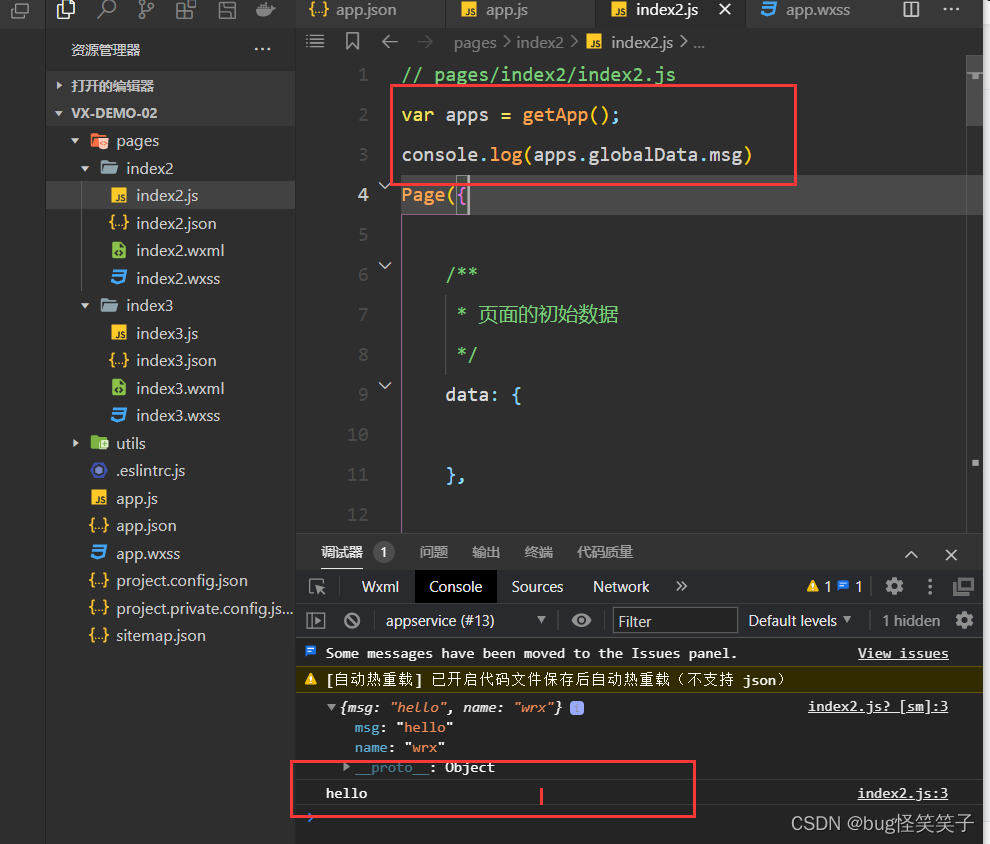
globalData为全局变量,在其他任何界面都可以也能用。只需要使用方法getApps()。
若是调用app.js的方法也是相同的方法即可。
var apps = getApp();
console.log(apps.globalData.msg)
效果图:

<2>模块化(引用其他js文件的内容)

1.在外部定义,方法或者变量
创建use.js文件,在里面创建a,b方法,还有card对象。
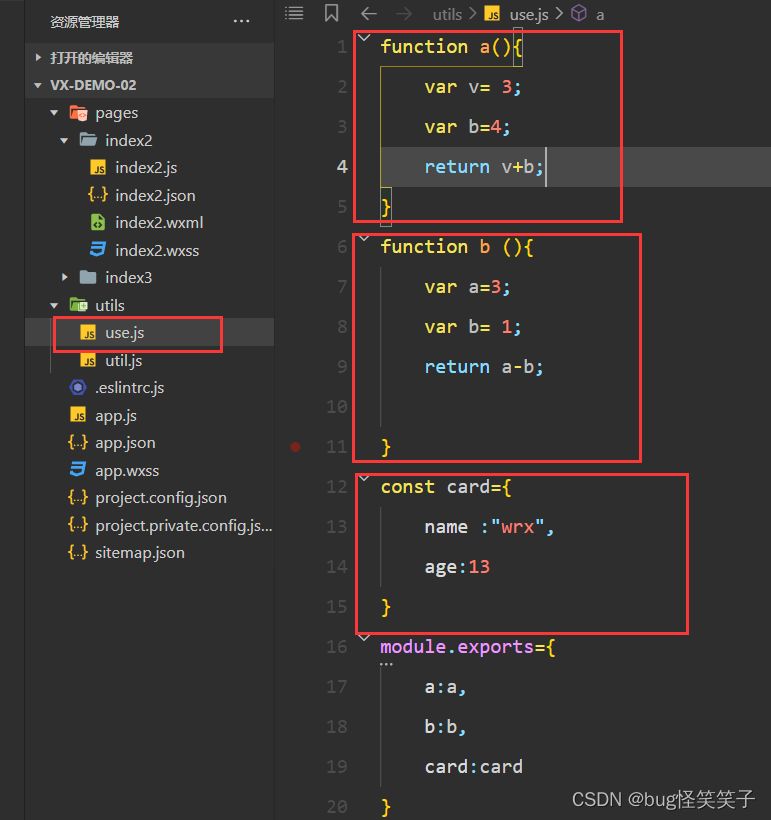
2.暴露出接口
//   module.exports{
//       f1:f1,
//       f2:f2,
//       ...
//       fn:fn
//   }
module.exports={
    a:a,
    b:b,
    card:card
}
3.哪里使用,哪里调用外部方法
引用js
var wxs = require('相对路径')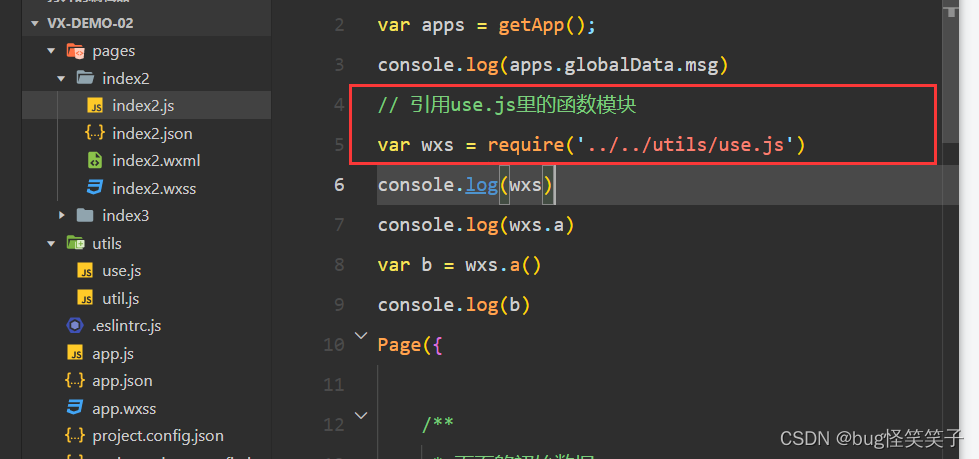
我知道a:a,而且我知道a是一个函数,我这样使用:
var wxs = require('../../utils/use.js')
var b = wxs.a()
此时b就是函数a()运行的结果。
<3>列表渲染
wx:for="{{循环的数组或者对象 }}"
我在***.js的data里创建一个数组,一个对象
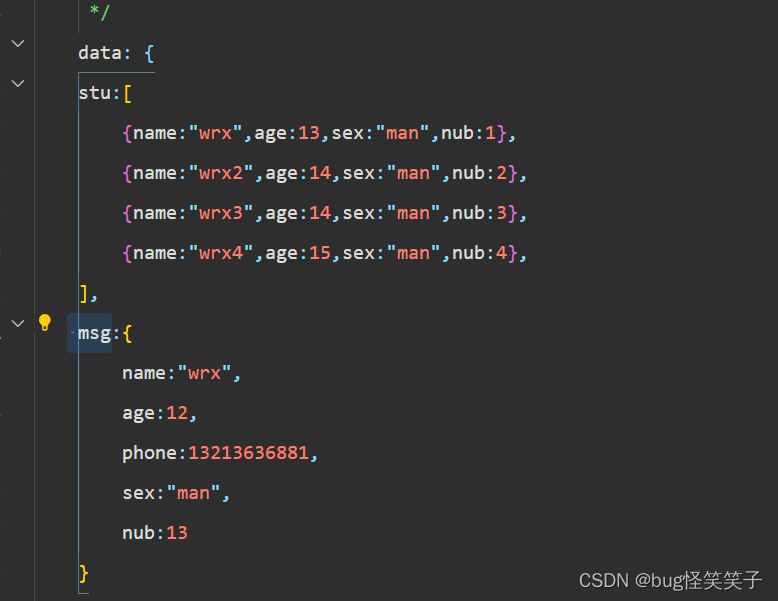
循环渲染msg(对象):
<view wx:for="{{msg}}" wx:key="index">{{index}}---{{item}}</view>
循环渲染stu(数组):
<view wx:for="{{stu}}" wx:key="index">
{{index}}---
{{item.name}}-
{{item.age}}-
{{item.sex}}-
{{item.nub}}
</view>
<4>条件渲染
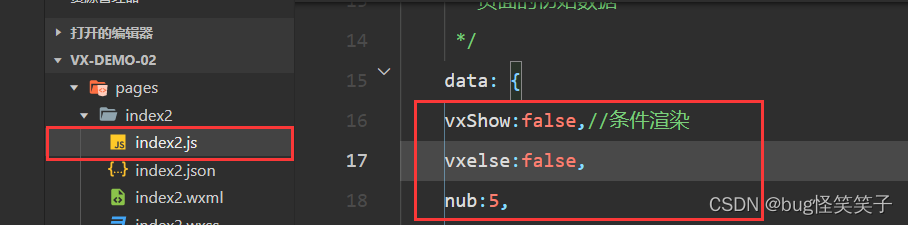
1.wx:if='{{布尔值或者布尔表达式}}'
<!-- 1.wx:if='{{变量}}' -->
<view wx:if ='{{vxShow}}'> wx:if===false   </view>
<view wx:if ='{{!vxShow}}'> wx:if===true </view>![]()
2.wx:else 紧挨着上一个wx:if才会生效
<!-- 2.wx:else 紧挨着的wx:if起作用  -->
<view wx:if ='{{vxelse}}'> if不显示   </view>
<view wx:else > else不显示   </view>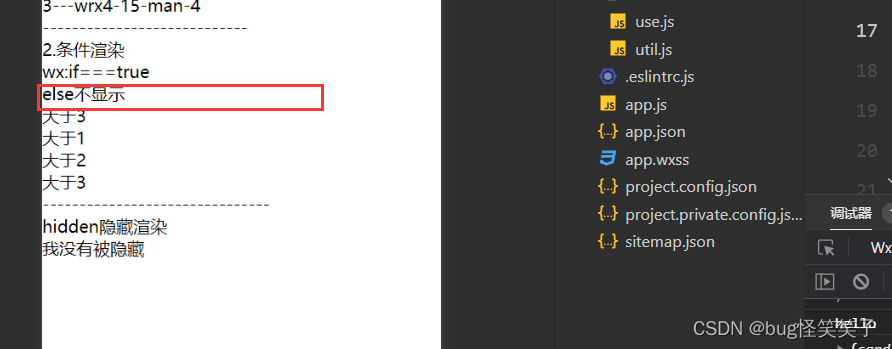
3.wx:elif
<!-- 3.wx:elif -->
<view wx:if ='{{nub < 3}}'> 小于3  </view>
<view wx:elif ='{{nub > 3}}'> 大于3  </view>
<view wx:else > 5   </view>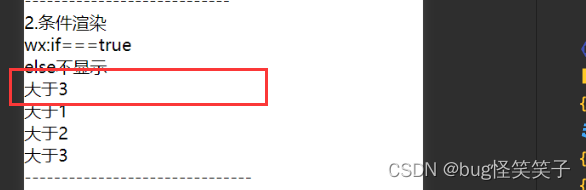
4.hidden = '{{布尔值或者布尔表达式}}'
用于隐藏标签
<!-- 5.条件隐藏渲染 hidden -->
<view hidden="{{vxShow}}">我没有被隐藏</view>
<view hidden="{{!vxShow}}">我被隐藏</view> 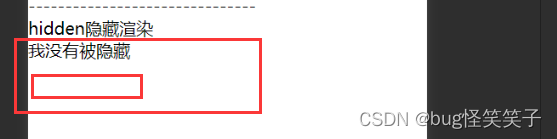
需要经常切换显示的时候用hidden,否则用wx:if
5.block包裹标签
<!-- 4.block 包裹元素标签 -->
<block wx:if ='{{nub > 3}}'>
<view> 大于1  </view>
<view> 大于2 </view>
<view> 大于3  </view>
</block>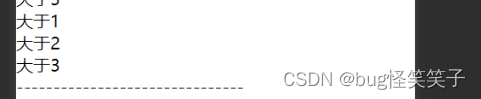
其实block在渲染时,不被渲染,它不算标签,只起到包裹的作用。
(7)事件绑定
<1>事件分类
<!-- 事件绑定
冒泡事件:bind+事件名='函数名'
    如果子事件上方还有父组件,那么父组件的事件同时触发
 例如 bindtap='click'函数名不加()
非冒泡事件:catch+事件名='函数名'
如果子事件上方还有父组件,那么父组件的事件不触发
例如 catchtap='click'
-->
事件名有很多,作用也不同:

<2>冒泡事件和非冒泡事件
冒泡
<button bindtap="click">bindtap</button>
<!-- bindtap冒泡事件 -->
<view bindtap="parents">
我是父组件
<button bindtap="click">我是儿子</button>
</view>
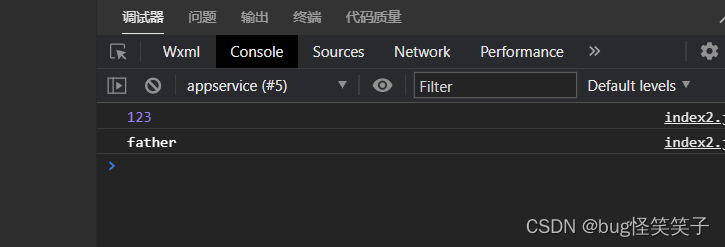
当我们点击button时候, 我们发现在使用bindtap时,两者子组件和父组件的事件都被触发了,这是冒泡事件。
非冒泡
<!-- catchtap非冒泡事件 -->
<view bindtap="parents">
我是父组件
<button catchtap="click">我是儿子</button>
</view>
当我们点击button时候, 我们发现在使用catchtap时,父组件的事件不会被触发了,只触发了子组件的事件。
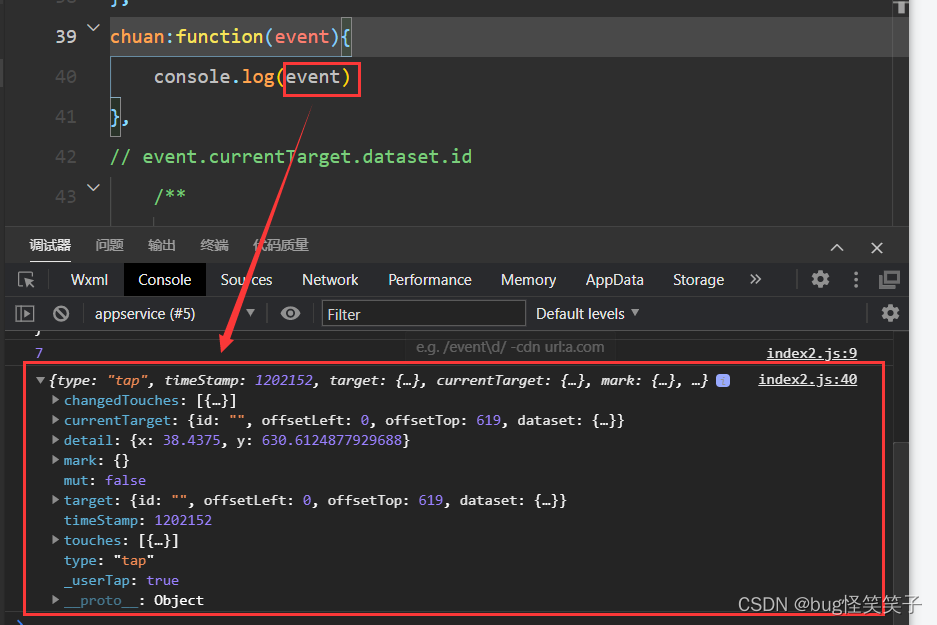
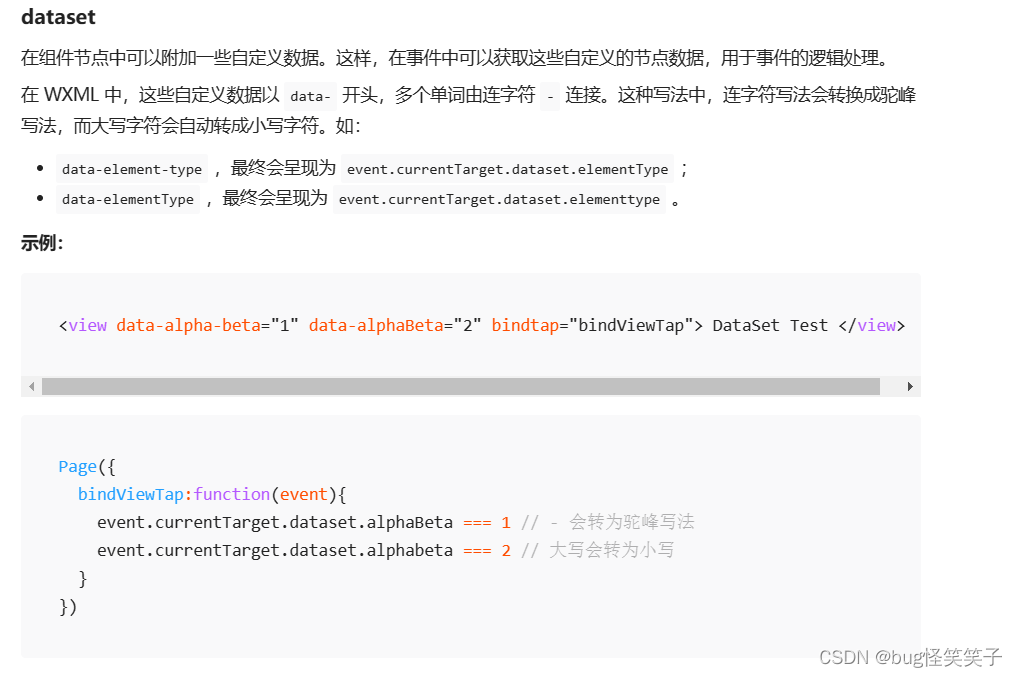
<3>参数传递
首先,在wxml里使用bindtap绑定的函数不能带(),但是如何传参数呢?
这里我们使用, data-属性名='属性值' 来传递参数
<!-- 事件传参 -->
<!-- 使用 data-属性名 -->
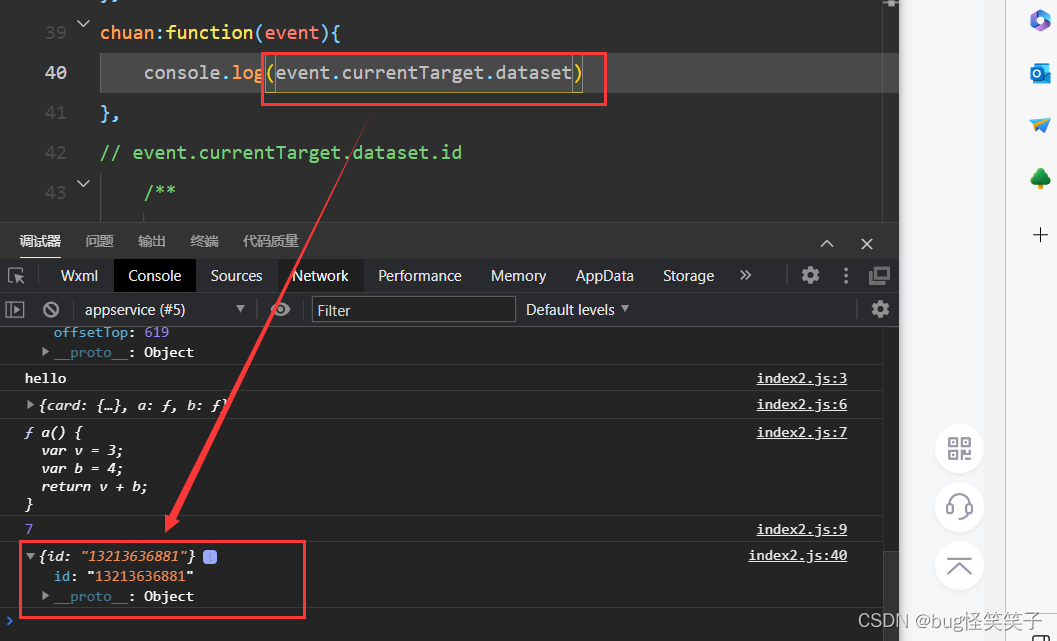
<view bindtap="chuan" data-id="13213636881">点我传参 </view>模拟器图示:

我们来测试获取参数的方法:
chuan:function(event){
    console.log(event.currentTarget.dataset.id)
}
//event.currentTarget.dataset.属性名
1.
2.

3.
4.

注意事项:
<4>data的获取和修改
获取:
data的获取很容易,this.data.属性名
修改:
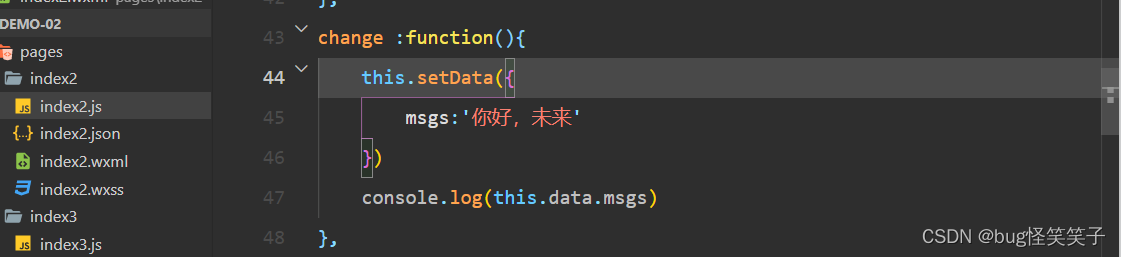
data里面数据的修改,要用到一个Api:this.setData({属性名:'属性值' ,属性名:'属性值,属性名:'属性值'...})
change :function(){
    this.setData({
        msgs:'你好,未来'
    })
    console.log(this.data.msgs)
}
示例:
此时data里面有 msgs 和page里有 方法chang()


当我们点击button:

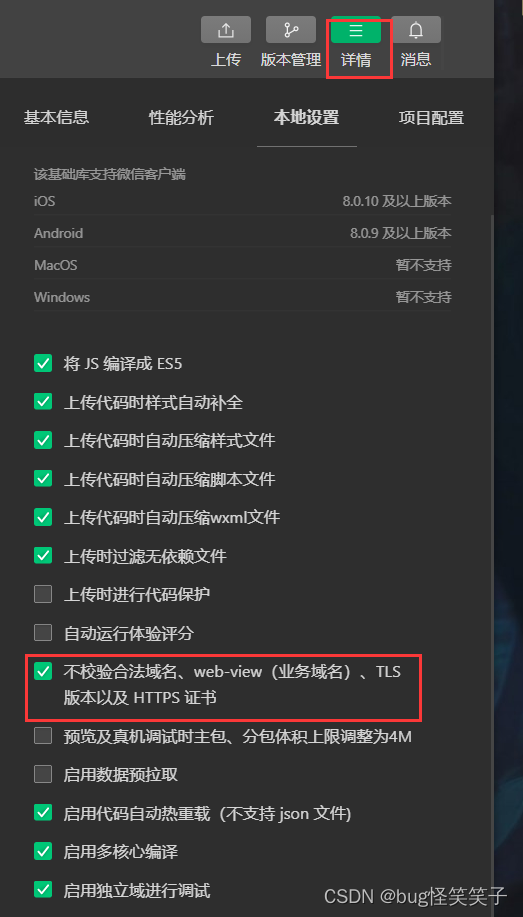
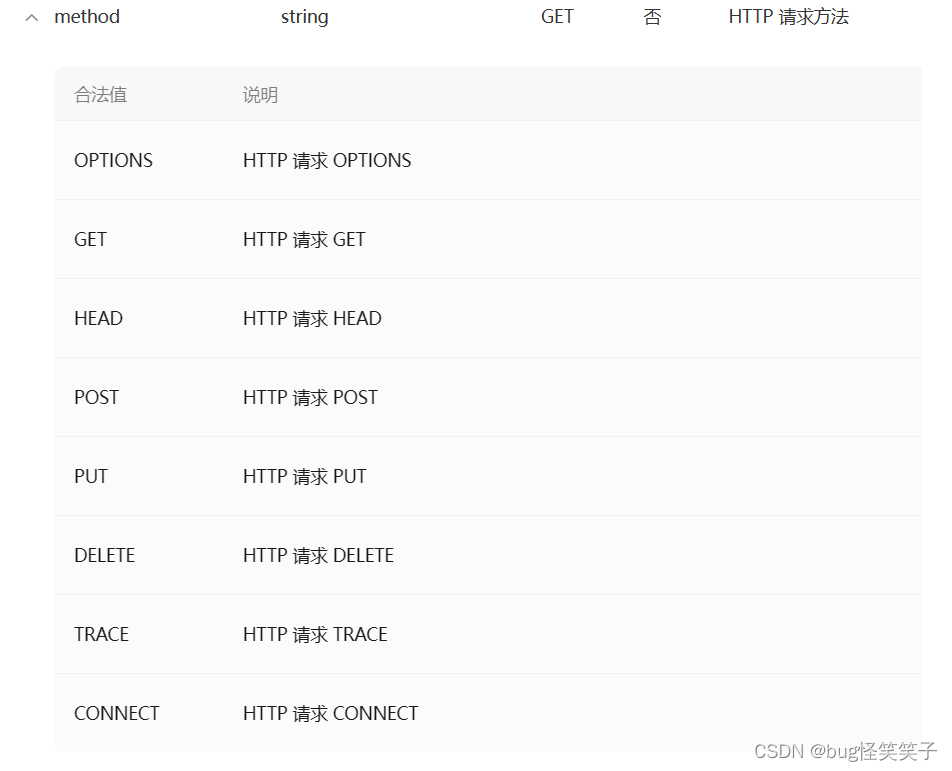
<5>网络请求
我们向java后端发送网络请求,需要以下几步。
1.开启,不校验合法域名
2.使用wx.request({})的api
wx.request({
  url: 'http://localhost:8083/category', //仅为示例,并非真实的接口地址
  data: {
    x: '',
    y: ''
  },
  header: {
    'content-type': 'application/json' // 默认值
  },
  success (res) {
    console.log(res.data)
  }
}) 


 466
466


 被折叠的 条评论
为什么被折叠?
被折叠的 条评论
为什么被折叠?
 到【灌水乐园】发言


