


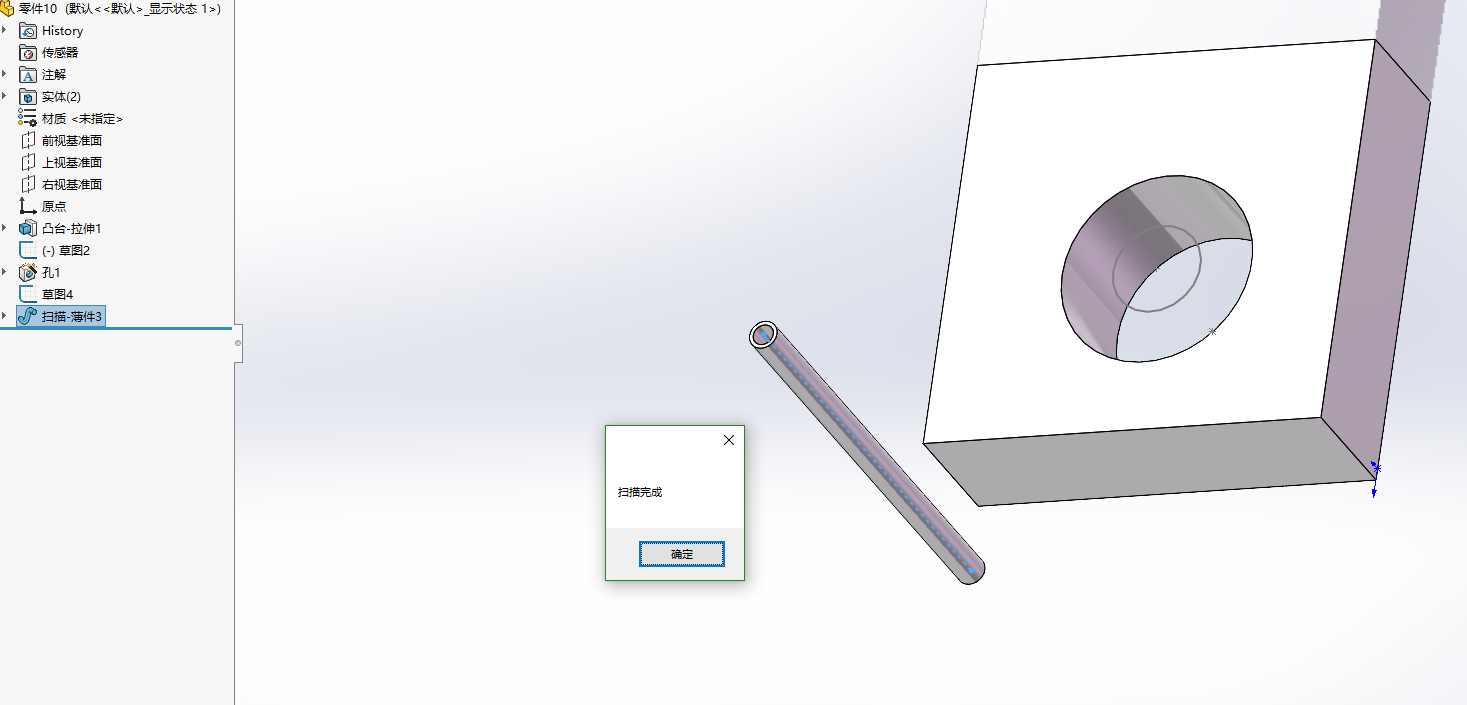
今天要讲的是SW中的扫描功能的使用,逻辑是先通过选中草图中的一条线段。然后根据这条线段进行扫描生成一个圆管。
代码如下所示:
SldWorks swApp;
swApp = Utility.ConnectToSolidWorks();
var swModel = (ModelDoc2)swApp.ActiveDoc;
var swSelMgr = (SelectionMgr)swModel.SelectionManager;
var swEnt1 = (Entity)swSelMgr.GetSelectedObject6(1, -1);
bool boolstatus = false;
boolstatus = swModel.Extension.SelectByID2("草图5@零件10-1", "SKETCH", 0, 0, 0, false, 4, null, 0);
Feature swFeat = null;
FeatureManager swFeatMgr = null;
swFeatMgr = ((FeatureManager)(swModel.FeatureManager));
SweepFeatureData swFeatData = null;
swFeatData = ((SweepFeatureData)(swFeatMgr.CreateDefinition(((int)(swFeatureNameID_e.swFmSweep)))));
swFeatData.AdvancedSmoothing = false;//获取或设置是否对此扫描功能应用高级平滑。
swFeatData.AutoSelect = true;
swFeatData.CircularProfile = true; //获取或设置是否为此扫描功能使用圆形配置文件。
swFeatData.D1ReverseTwistDir = false;//获取或设置是否反转此扫描功能的扭曲。
swFeatData.EndTangencyType = 0;
swFeatData.FeatureScope = true;
swFeatData.MaintainTangency = false;
swFeatData.Merge = true;
swFeatData.MergeSmoothFaces = true;//获取或设置是否合并使用引导曲线的此扫描特性的光滑面。 True表示平滑面合并,false表示不合并(见备注)
swFeatData.PathAlignmentType = 0;//获取或设置此扫描功能中扫描路径的对齐方式。0表示无
swFeatData.StartTangencyType = 0;//获取并设置此扫描特性的扫描路径开始处的切线,0表示无
swFeatData.ThinFeature = true;//判断是否有薄壁特征,true为是,false为否
swFeatData.ThinWallType = 0;//0表示单向
swFeatData.TwistControlType = 0;//获取或设置此扫描功能的扭曲控件的类型。
swFeatData.CircularProfileDiameter = 0.00462;//获取或设置此扫描特性的圆形轮廓的直径。
swFeatData.SetTwistAngle(0);//设置扭转此扫描功能的角度。
swFeatData.SetWallThickness(true, 0.000865);//设置薄壁特征的厚度
swFeat = ((Feature)(swFeatMgr.CreateFeature(swFeatData)));
其中有几点使用的时候需要注意:如果是创建圆管,而不是创建圆柱。需要将swFeatData.ThinFeature = true;这个属性设置为true,如果设置为false时是将薄壁特征给关闭。这样就没办法设置壁厚是多少,如果是设置壁厚用这个属性swFeatData.SetWallThickness(true, 0.000865);//设置薄壁特征的厚度
,第二个参数就是壁厚。
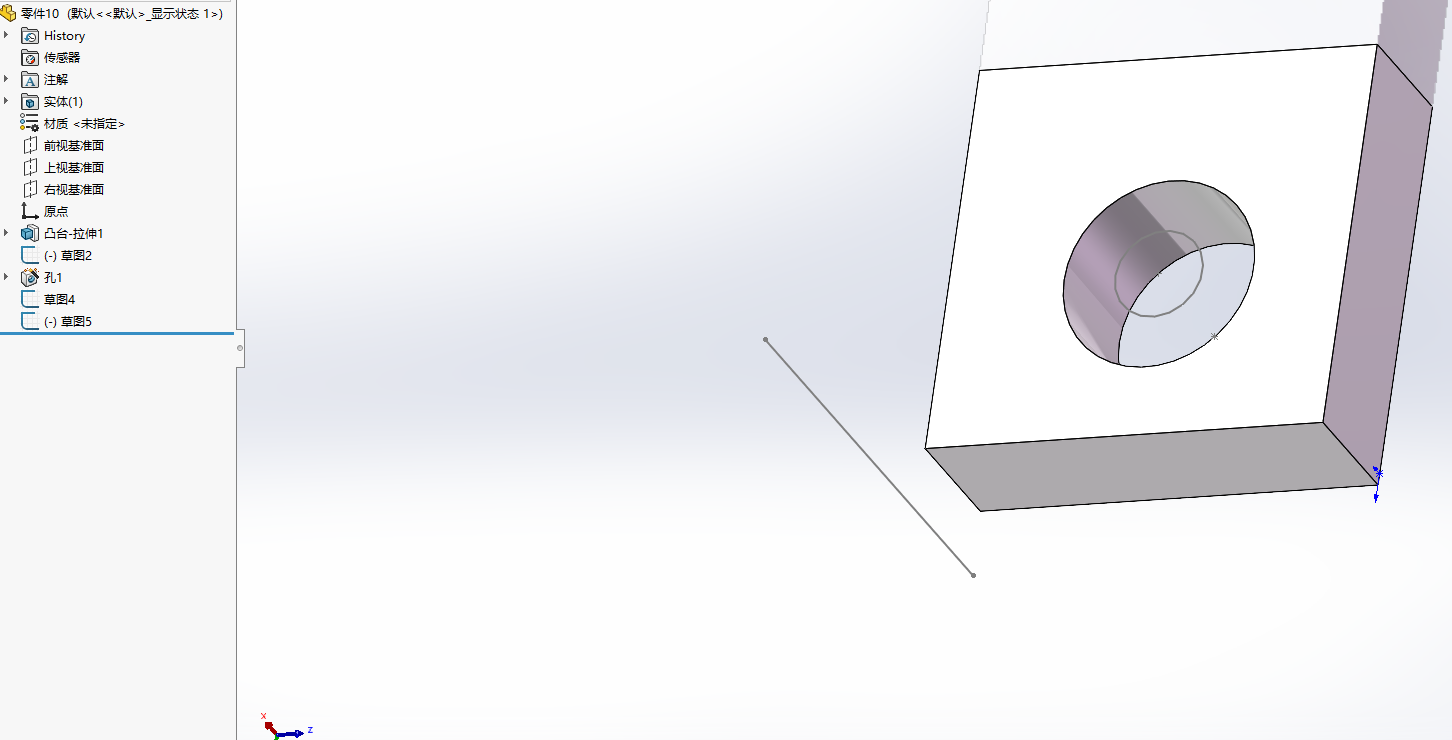
下面为程序的运行效果之前:
运行效果之后:


 953
953


 被折叠的 条评论
为什么被折叠?
被折叠的 条评论
为什么被折叠?
 到【灌水乐园】发言


