


版本控制系统
git和svn:公司内部的代码仓库,用于存放项目代码,方便整合开发过程
公共代码仓库:github全球 gitee国内
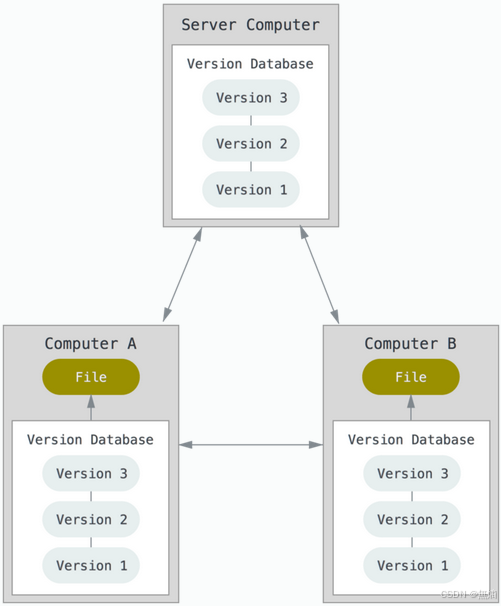
git 分布式 ---没有中心代码库,所有机器之间的地位同等(每台机器上都有相同的代码)
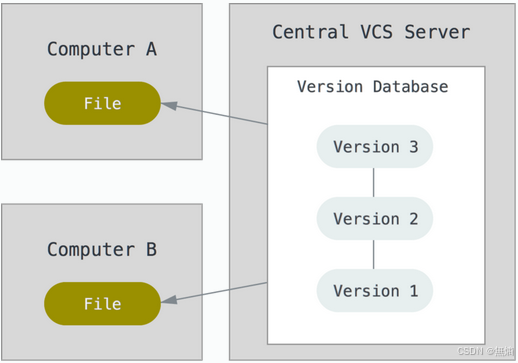
svn 集中管理的 ---有中心代码库,其他都是客户端
git与svn介绍
1. git 分布式版本控制系统
客户端并不只提取最新版本的文件,而是把原始的代码仓库完整地克隆下来。
优点:
a.离线操作:开发者可以在没有网络的情况下进行提交和查看历史记录等操作,只需要在网络恢复后再推送更改即可。
b.快速执行:几乎所有 Git 操作都在本地执行,因此速度非常快。
c.灵活的分支管理:Git 的分支管理非常轻量级且强大,可以轻松创建、合并和删除分支,这对团队协作非常有利。
d.数据完整性:Git 通过校验和机制保证数据的完整性和一致性,减少数据丢失的风险。
Git 的缺点
a.存储空间占用:由于每个开发者都需要克隆整个仓库,因此会占用更多的磁盘空间。
b.代码保密性:如果项目中有需要保密的核心代码,那么使用 Git 可能会导致这些代码容易被泄露给不应该知道这些代码的开发者。
2.svn 集中化的版本控制系统
Subversion (svn)是一个集中式的版本控制系统,它维护一个单一的中心仓库,所有的工作副本都从这个中心仓库获取最新的版本。SVN 的客户端行为主要围绕中心仓库进行,客户端通过网络连接到中心仓库进行文件的上传、更新和版本控制操作。
优点:
易于理解和使用:SVN 的工作方式较为直观,类似于传统的文件共享模型,使得新手更容易上手。
简单的同步过程:更新工作副本或提交更改到中心仓库的操作相对简单,通常只需要一步操作。
明确的版本控制:每个文件的版本号都是明确的,便于跟踪和管理。
良好的集成支持:许多集成开发环境 (IDEs) 和构建工具都内置了对 SVN 的支持,使得集成和使用更加方便。
缺点:
数据安全性风险:由于所有的版本历史都集中在一台服务器上,一旦服务器出现故障或遭受攻击,可能会导致数据丢失或损坏。
网络依赖性:所有的版本控制操作都需要网络连接,这可能会导致在没有网络的情况下无法进行版本控制操作。
性能问题:当项目变得非常大时,中心仓库可能会遇到性能瓶颈,尤其是在网络条件不佳的情况下。
分支管理复杂:相对于 Git,SVN 的分支管理和合并操作更加复杂和耗时。
3.git 相关概念---纯命令行
工作区;暂存区;版本库;HEAD;版本号.
1.工作区(Working Directory):
存放git版本仓库的目录就是工作区(放源代码的地方)
2.暂存区:
Git的版本库里存了很多东西,其中最重要的就是称为stage(或者叫index)的暂存区,(会将代码添加到暂存区,没有问题之后在提交到版本库)
3.版本库(Repository):
工作区有一个隐藏目录.git,而是Git的版本库。
4.HEAD:指向你最近一次提交后的结果。(现在是哪个版本,头就会指向这个版本)
1. 添加到暂存区
git add  文件名          # 添加文件到暂存区
git add  *               #将所有文件添加到暂存区

2. 从stage提交到当前master分支的HEAD:
git commit -m “版本描述信息”
查看版本号:git log
版本号:每个版本都会有一个id号,也就是commit id,
版本号可以通过版本日志查看,可以使用git log查看每次的commit记录
git部署
环境:
git-server 192.168.246.214 充当服务器
client 192.168.246.213
安装:所有机器都安装
[root@git-server ~]# yum install -y git
[root@git-server ~]# git --version
git version 1.8.3.1
准备:
因为Git是分布式版本控制系统,所以,每个客户端机器都必须自报家门:你的名字和Email地址。
注意git config命令的--global参数,用了这个参数,表示你这台机器上所有的Git仓库都会使用这个配置,
所有的机器都添加,只要邮箱和用户不一样就可以。 (作为身份标识,不需要真实邮箱)
# git config --global user.email "soho@163.com" ----设置邮箱
# git config --global user.name "soho" ----加添用户1、git使用
服务端
创建版本库
1.创建一个空目录:在中心服务器上创建
[root@git-server ~]# mkdir /git-test
[root@git-server ~]# useradd git   #创建一个git用户用来运行git
[root@git-server ~]# passwd git  #给用户设置密码
[root@git-server ~]# cd /git-test/
2.通过git init命令把这个目录变成Git可以管理的仓库:
创建裸库
适用远程中心仓库使用;创建裸库才可以从别处push(传)代码过来,使用--bare参数
语法:git init --bare 库名字[root@git-server git-test]# git init --bare testgit
Initialized empty Git repository in /git-test/testgit/
[root@git-server ~]# chown git.git /git-test -R #修改权限
2.仓库创建完成后查看库目录:
[root@git-server git-test]# cd testgit/
[root@git-server testgit]# ls
branches config description HEAD hooks info objects refs客户端操作
1.配置免密登录
[root@client ~]# ssh-keygen    #生成秘钥
[root@client ~]# ssh-copy-id -i git@192.168.246.214
#将秘钥传输到git服务器中的git用户
2.克隆git仓库
[root@client ~]# git clone git@192.168.246.214:/git-test/testgit/
Cloning into 'testgit'...
warning: You appear to have cloned an empty repository.
[root@client ~]# ls  #查看仓库已经克隆下来了
anaconda-ks.cfg    testgit
创建文件模拟代码提交到仓库
1.在testgit目录下创建一个测试文件test.txt
[root@client ~]# cd testgit/
[root@client testgit]# vi test.txt   #随便写点东西
2.把文件添加到暂存区:使用 "git add" 建立跟踪
[root@client testgit]# git add test.txt
注: 这里可以使用 git add * 或者 git add -A(提交当前目录下的所有文件)
3.提交文件到本地仓库分支:
[root@client testgit]# git commit -m "test1"
[master (root-commit) 2b51ff9] test1
 1 file changed, 2 insertions(+)
 create mode 100644 test.txt
 -m:描述
4.查看git状态:
 [root@client testgit]# git status
# On branch master   #分支位于master
5.修改文件后再此查看状态:
[root@client testgit]# echo '1122334' >> test.txt
[root@client testgit]# git status
# 位于分支 master
# 尚未暂存以备提交的变更:
#   (使用 "git add <file>..." 更新要提交的内容)
#   (使用 "git checkout -- <file>..." 丢弃工作区的改动)
#
#   修改:      readme.txt
#
修改尚未加入提交(使用 "git add" 和/或 "git commit "
6.先add
[root@client testgit]# git add -A
8.再次提交commit:
[root@client testgit]# git commit  -m "add2" test.txt
[master 73bf688] add2
 1 file changed, 1 insertion(+)
 [root@client testgit]# git status
# On branch master
nothing to commit, working directory clean
2、版本回退
已经提交了不合适的修改到版本库时,想要撤销本次提交,使用版本回退,不过前提是没有推送到远程库。
已经提交了不合适的修改到版本库时,想要撤销本次提交,使用版本回退,不过前提是没有推送到远程库。
查看现在的版本:
[root@client testgit]# git log
显示的哪个版本在第一个就是当前使用的版本。
版本回退(切换)
在Git中,上一个版本就HEAD^,上上一个版本就是HEAD^^,当然往上100个版本写100个^比较容易数不过来,所以写成HEAD~100(一般使用id号来恢复)
回到上一个版本
[root@client testgit]# git reset --hard HEAD^
HEAD is now at 0126755 test1
2.回到指定的版本(根据版本号):
[root@client testgit]# git reset --hard dd66ff
HEAD is now at dd66ff9 add2
==========================================================
注:消失的ID号:
回到早期的版本后再查看git log会发现最近的版本消失,可以使用reflog查看消失的版本ID,
用于回退到消失的版本
[root@vm20 gittest]# git reflog3、删除文件
从工作区删除test.txt,并且从版本库一起删除
从工作区删除
[root@client testgit]# rm -rf test.txt
从版本库删除:
[root@client testgit]# git rm test.txt
rm 'test.txt'
[root@client testgit]# git commit -m "删除文件test.txt"
[master cebc081] 删除文件test.txt
 1 file changed, 3 deletions(-)
 delete mode 100644 test.txt
4、将代码上传到仓库的master分支
[root@client testgit]# vi a.txt   #创建一个新文件
[root@client testgit]# git add a.txt
[root@client testgit]# git commit -m "add"
[root@client testgit]# git push origin master   #上传到远程仓库master分支
Counting objects: 11, done.
Compressing objects: 100% (4/4), done.
Writing objects: 100% (11/11), 828 bytes | 0 bytes/s, done.
Total 11 (delta 0), reused 0 (delta 0)
To git@192.168.246.214:/git-test/testgit/
 * [new branch]      master -> master
测试:测试:
在客户端将仓库删除掉然后在克隆下来查看仓库中是否有文件
[root@git-client ~]# rm -rf testgit/
[root@client ~]# git clone git@192.168.246.214:/git-test/testgit/
Cloning into 'testgit'...
remote: Counting objects: 11, done.
remote: Compressing objects: 100% (4/4), done.
remote: Total 11 (delta 0), reused 0 (delta 0)
Receiving objects: 100% (11/11), done.
[root@client ~]# cd testgit/
[root@client testgit]# ls
a.txt
[root@client testgit]# cat a.txt
hello world
三、创建、合并分支
每次提交,Git都把它们串成一条时间线,这条时间线就是一个分支。截止到目前,只有一条时间线,在Git里,这个分支叫主分支,即master分支。HEAD是指向master,所以,HEAD指向的就是当前分支。
客户端操作
[root@client ~]# git clone git@192.168.246.214:/git-test/testgit/
[root@client testgit]# git status
# On branch master #当前所在为master分支
#
# Initial commit
#
nothing to commit (create/copy files and use "git add" to track)
创建分支:
[root@client testgit]# git branch dev #创建分支。
[root@client testgit]# git branch #查看分支。*在哪里就表示当前是哪个分支
dev
* master
切换分支:
[root@client testgit]# git checkout dev
Switched to branch 'dev'
[root@client testgit]# git branch
* dev
master
在dev分支创建一个文件;
[root@client testgit]# vi test.txt
[root@client testgit]# git add test.txt
[root@client testgit]# git commit -m "add dev"
[dev f855bdf] add dev
1 file changed, 1 insertion(+)
create mode 100644 test.txt
现在,dev分支的工作完成,我们就可以切换回master分支:
[root@client testgit]# git checkout master
Switched to branch 'master'切换回 分支后,再查看一个test.txt文件,刚才添加的内容不见了!因为那个提交是在dev分支上,而master分支此刻的提交点并没有变:
[root@client testgit]# ls
a.txt现在,我们把dev分支的工作成果合并到master分支上:
[root@client testgit]# git merge dev
Updating 40833e0..f855bdf
Fast-forward
 test.txt | 1 +
 1 file changed, 1 insertion(+)
 create mode 100644 test.txt
[root@client testgit]# ls
a.txt  test.txt
现在已经将dev分支的内容合并到master上。确认没有问题上传到远程仓库:
[root@client testgit]# git push origin master
git merge命令用于合并指定分支到当前分支。合并后,再查看test.txt的内容,就可以看到,和dev分支的最新提交是完全一样的。
合并完成后,就可以放心地删除dev分支了。
[root@client testgit]# git branch -d dev
Deleted branch dev (was f855bdf).删除后,查看branch,就只剩下master分支了:
[root@client testgit]# git branch
* master
四、git标签
Git 标签(Tag)用于给仓库中的特定提交点加上标记,通常用于发布版本(如 v1.0, v2.0)。比如说,我们想为我们的 tmsc 项目发布一个 "1.0" 版本,可以用 git tag -a v1.0 命令给最新一次提交打上(HEAD) "v1.0" 的标签。
-a 选项意为"创建一个带注解的标签",不用 -a 选项也可以执行的,但不会记录这标签是啥时候打的,谁打的。推荐一直创建带注解的标签。
tag是git版本库的一个标记,指向某个commit的指针。
# 克隆远程仓库到本地
[root@client ~]# git clone git@192.168.229.168:/git-test/testgit
Cloning into 'testgit'...
# 成功克隆后,进入该仓库目录
[root@client ~]# cd testgit/
# 创建一个新的空文件 `a.txt`
[root@client testgit]# touch a.txt
# 将新创建的文件 `a.txt` 添加到暂存区
[root@client testgit]# git add a.txt
# 提交暂存区中的更改到仓库历史记录,并附带提交信息
[root@client testgit]# git commit -m "add 1"
[master 61a232c] add 1
1 file changed, 0 insertions(+), 0 deletions(-)
create mode 100644 a.txt
# 创建一个带有注释的标签 `v1.0`,指向当前的提交
[root@client testgit]# git tag -a v1.0
# 查看当前仓库中的所有标签
[root@client testgit]# git tag
v1.0
# 在文件 `a.txt` 中追加内容
[root@client testgit]# echo 12321323 >> a.txt
# 将修改后的文件 `a.txt` 添加到暂存区
[root@client testgit]# git add a.txt
# 提交暂存区中的更改到仓库历史记录,并附带提交信息
[root@client testgit]# git commit -m "add 2"
[master a5324a3] add 2
1 file changed, 1 insertion(+)
# 创建一个带有注释的标签 `v1.1`,并指定标签信息,该标签指向当前的提交
[root@client testgit]# git tag -a "v1.1" -m "指定commit id"
# 再次查看当前仓库中的所有标签
[root@client testgit]# git tag
v1.0
v1.1
# 查看标签 `v1.1` 的详细信息,包括标签创建者、时间戳及注释信息等
[root@client testgit]# git show v1.1
tag v1.1
Tagger: jack <jack@163.com>
Date: Sat Aug 31 17:01:41 2024 +0800
第二次修改
commit a5324a3a0da23ffc878f0a69b7dcca2a0dec6002 # 指定标签关联的提交的 SHA-1 哈希值
Author: jack <jack@163.com> # 提交的作者及其邮箱地址
Date: Sat Aug 31 17:01:24 2024 +0800 # 提交的时间(基于本地时区)
add 2 # 提交信息,这里描述了本次提交所做的更改
diff --git a/a.txt b/a.txt # 文件差异报告,展示从上一个提交到当前提交之间文件的变化
index e69de29..59be678 100644 # 文件 `a.txt` 的两个版本之间的索引对比信息
--- a/a.txt
+++ b/a.txt
@@ -0,0 +1 @@
+12321323 # 从旧版本到新版本的具体改动,这里是在文件末尾添加了一行[root@client testgit]# git push origin v1.0 #推送标签到远程仓库
Counting objects: 5, done.
Delta compression using up to 2 threads.
Compressing objects: 100% (2/2), done.
Writing objects: 100% (4/4), 358 bytes | 0 bytes/s, done.
Total 4 (delta 0), reused 2 (delta 0)
To git@192.168.209.168:/git-test/didipm
* [new tag] v1.0 -> v1.0
#git push origin --tags # 推送所有标签
[root@client testgit]# git tag -d v1.0 #删除本地标签
Deleted tag 'v1.0' (was 00265b7)
[root@localhost testgit]# git tag -d v1.1
Deleted tag 'v1.1' (was 4616fef)
测试
[root@client ~]# rm -rf testgit/
[root@client ~]# git clone git@192.168.229.168:/git-test/testgit
Cloning into 'didipm'...
remote: Counting objects: 18, done.
remote: Compressing objects: 100% (11/11), done.
remote: Total 18 (delta 0), reused 0 (delta 0)
Receiving objects: 100% (18/18), 24.41 KiB | 0 bytes/s, done.
[root@client ~]# cd testgit/
[root@client testgit]# ls
[root@client testgit]# git tag #查看现有标签
v1.0
v1.1
[root@client testgit]# git checkout v1.0 #切换标签
Note: checking out 'v1.0'.
You are in 'detached HEAD' state. You can look around, make experimental
changes and commit them, and you can discard any commits you make in this
state without impacting any branches by performing another checkout.
If you want to create a new branch to retain commits you create, you may
do so (now or later) by using -b with the checkout command again. Example:
git checkout -b new_branch_name
HEAD is now at 61a232c... add 1
[root@client testgit]# ls
a.txt
[root@client testgit]# cat a.txt
[root@client testgit]# git checkout v1.1
Previous HEAD position was 61a232c... add 1
HEAD is now at a5324a3... add 2
[root@client testgit]# cat a.txt
12321323
指定标签进行版本回退,做为一个新的branch继续增加功能
[root@client testgit]# git tag
v1.0
v1.1
v1.2
# 在 v1.0 基础上创建新标签 v1.0.1
bash
[root@client testgit]# git reset --hard v1.0
HEAD is now at 61a232c add 1
[root@client testgit]# cat a.txt
[root@client testgit]# echo hangzhou >> a.txt
[root@client testgit]# git add a.txt
[root@client testgit# git commit -m "hangzhou"
[detached HEAD b2fa719] hangzhou
1 file changed, 1 insertion(+)
[root@client testgit]# git tag -a "v1.0.1" -m "b2fa719"
[root@client testgit]# git tag
v1.0
v1.0.1
v1.1
v1.2
[root@client testgit]# git push origin v1.0.1 #推送到远程仓库
Counting objects: 6, done.
Delta compression using up to 2 threads.
Compressing objects: 100% (2/2), done.
Writing objects: 100% (4/4), 350 bytes | 0 bytes/s, done.
Total 4 (delta 0), reused 0 (delta 0)
To git@192.168.209.168:/git-test/didipm
* [new tag] v1.0.1 -> v1.0.1删除远程仓库上的标签
[root@client testgit]# git push --delete origin v1.0
To git@192.168.209.168:/git-test/didipm
 - [deleted]         v1.0
Tag 和 branch 都是 Git 中的重要概念,但它们有不同的用途。
Branch 是一个分支,指向 Git 仓库中某个提交(commit)。每个分支都相互独立,可以修改代码和提交新的提交,并在需要时合并两个分支。分支可以在 Git 中用于协作开发,并且可以允许多个用户同时修改同一个项目而不会影响其他用户的工作。
Tag 是一个标签,可以用来记录某个特定的提交。一般情况下,一个 Tag 被用来标记重要的历史节点,如版本发布或一些重大事件。Tag 通常是不会被修改或删除的,因为它们代表了项目在某个特定时刻的状态。
因此,Branch 用于在项目开发阶段进行代码版本控制,Tag 则用于标记项目的里程碑并提供版本发布历史记录。
五、部署gitlab服务
准备环境: 关闭防火墙和selinux
192.168.246.214 #gitlab服务器配置yum源
~]# yum install -y git
~]# cd /etc/yum.repos.d/
yum.repos.d]# vim gitlab-ce.repo
[gitlab-ce]
name=Gitlab CE Repository
baseurl=https://mirrors.tuna.tsinghua.edu.cn/gitlab-ce/yum/el$releasever
gpgcheck=0
enabled=1
安装相关依赖
yum.repos.d]# yum install -y curl policycoreutils-python openssh-server
yum.repos.d]# systemctl enable sshd
yum.repos.d]# systemctl start sshd
安装postfix
yum.repos.d]# yum install postfix #安装邮箱
yum.repos.d]# systemctl enable postfix
yum.repos.d]# systemctl start postfix
yum.repos.d]# yum install -y gitlab-ce-13.1.1-ce.0.el7.x86_64 #安装的版本
yum.repos.d]# yum install -y gitlab-ce #将会安装gitlab最新版本配置gitlab
[root@git-server ~]# vim /etc/gitlab/gitlab.rb
1.# 添加对外的域名(gitlab.papamk.com请添加A记录指向本服务器的公网IP):将原来的修改为
external_url 'http://192.168.246.214'
2.设置地区
gitlab_rails['time_zone'] = 'Asia/Shanghai'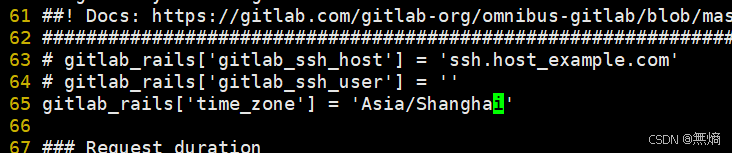
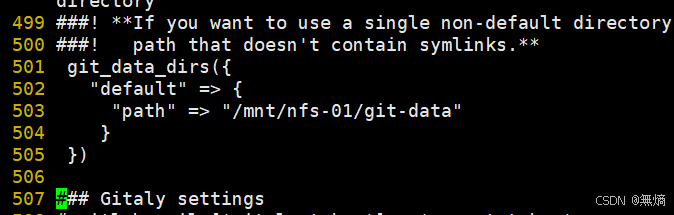
将数据路径的注释去掉,可以更改
开启ssh服务:

开启邮箱服务
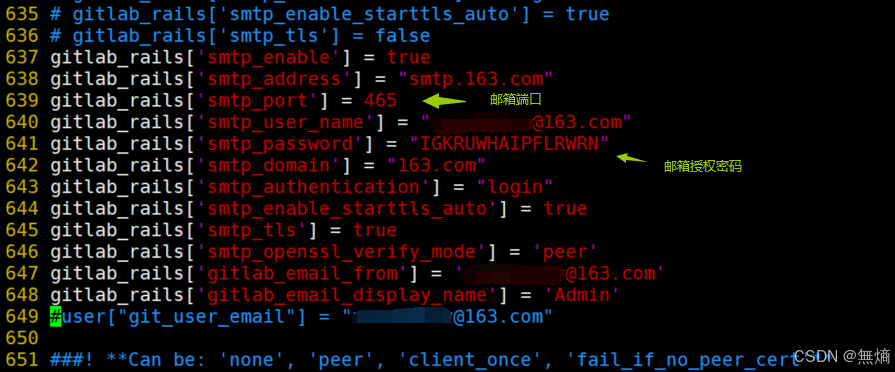
gitlab_rails['smtp_enable'] = true #开启smtp服务
gitlab_rails['smtp_address'] = "smtp.163.com" #指定smtp地址
gitlab_rails['smtp_port'] = 465
gitlab_rails['smtp_user_name'] = "xxxx@163.com" #指定邮箱
gitlab_rails['smtp_password'] = "邮箱授权密码"
gitlab_rails['smtp_domain'] = "163.com" #邮箱地址的域
gitlab_rails['smtp_authentication'] = "login"
gitlab_rails['smtp_enable_starttls_auto'] = true
gitlab_rails['smtp_tls'] = true
gitlab_rails['smtp_openssl_verify_mode'] = 'none'
gitlab_rails['gitlab_email_from'] = 'xxxx@163.com' #指定发件邮箱
gitlab_rails['gitlab_email_display_name'] = 'Admin' #指定发件人
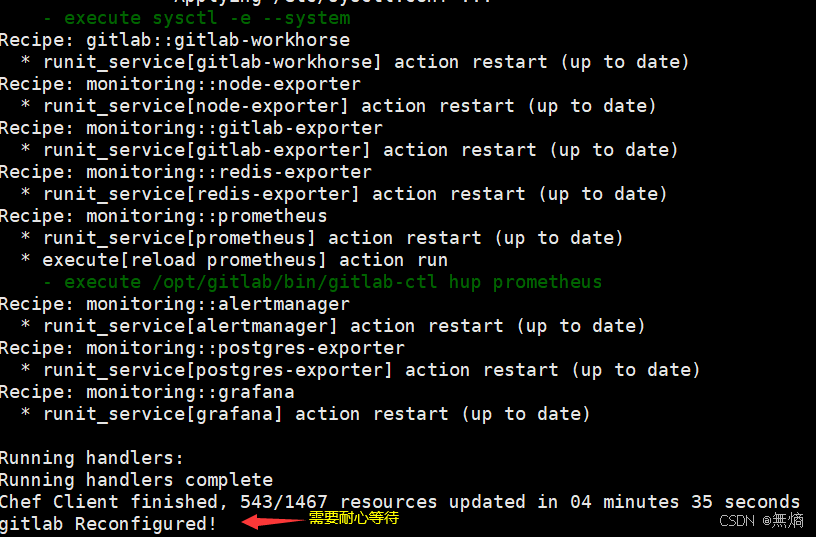
#user["git_user_email"] = "xxxx@163.com"重置加载GitLab
gitlab-ctl reconfigure #重新加载,需要等很长时间
启动
gitlab-ctl restart #启动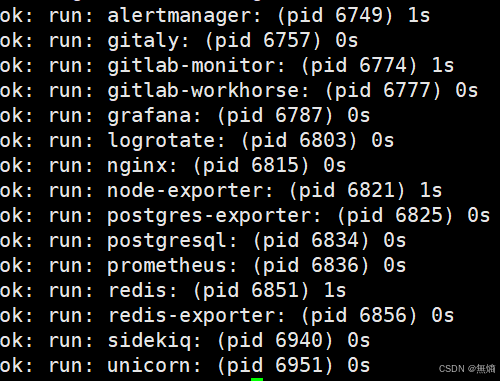
邮箱测试
[root@git-server ~] # gitlab-rails console
irb(main):001:0> Notify.test_email('xxxx@qq.com', 'Message Subject', 'Message Body').deliver_now #测试发送邮件是否成功
Notify#test_email: processed outbound mail in 1.4ms
Delivered mail 5ffa335015800_3de43fa76d4cf9b0686ba@localhost.localdomain.mail (956.6ms)
Date: Sun, 10 Jan 2021 06:50:56 +0800
From: Admin <xxxx@163.com>
Reply-To: Admin <noreply@192.168.246.214>
To: 503875980@qq.com
Message-ID: <5ffa335015800_3de43fa76d4cf9b0686ba@localhost.localdomain.mail>
Subject: Message Subject
Mime-Version: 1.0
Content-Type: text/html;
charset=UTF-8
Content-Transfer-Encoding: 7bit
Auto-Submitted: auto-generated
X-Auto-Response-Suppress: All
<!DOCTYPE html PUBLIC "-//W3C//DTD HTML 4.0 Transitional//EN" "http://www.w3.org/TR/REC-html40/loose.dtd">
<html><body><p>Message Body</p></body></html>
=> #<Mail::Message:69987905152360, Multipart: false, Headers: <Date: Sun, 10 Jan 2020 06:50:56 +0800>, <From: Admin <xxxx@163.com>>, <Reply-To: Admin <noreply@192.168.246.214>>, <To: xxxx@qq.com>, <Message-ID: <5ffa335015800_3de43fa76d4cf9b0686ba@localhost.localdomain.mail>>, <Subject: Message Subject>, <Mime-Version: 1.0>, <Content-Type: text/html; charset=UTF-8>, <Content-Transfer-Encoding: 7bit>, <Auto-Submitted: auto-generated>, <X-Auto-Response-Suppress: All>>
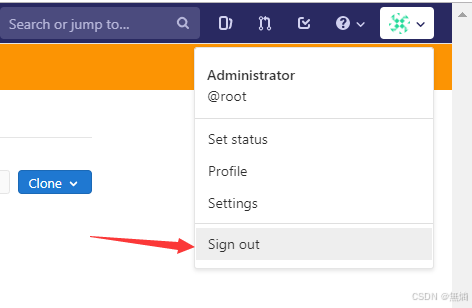
irb(main):002:0> quit #退出测试访问
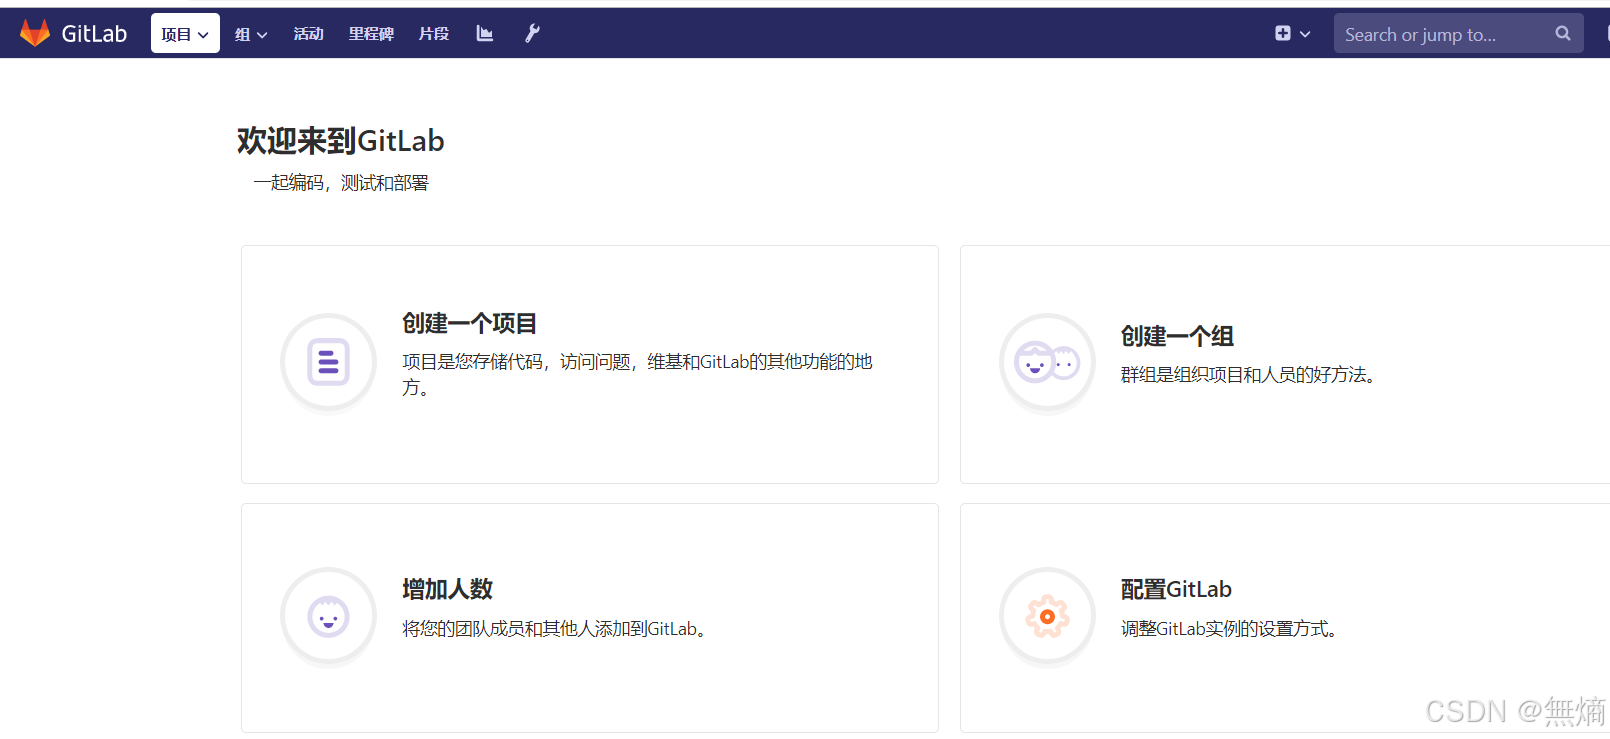
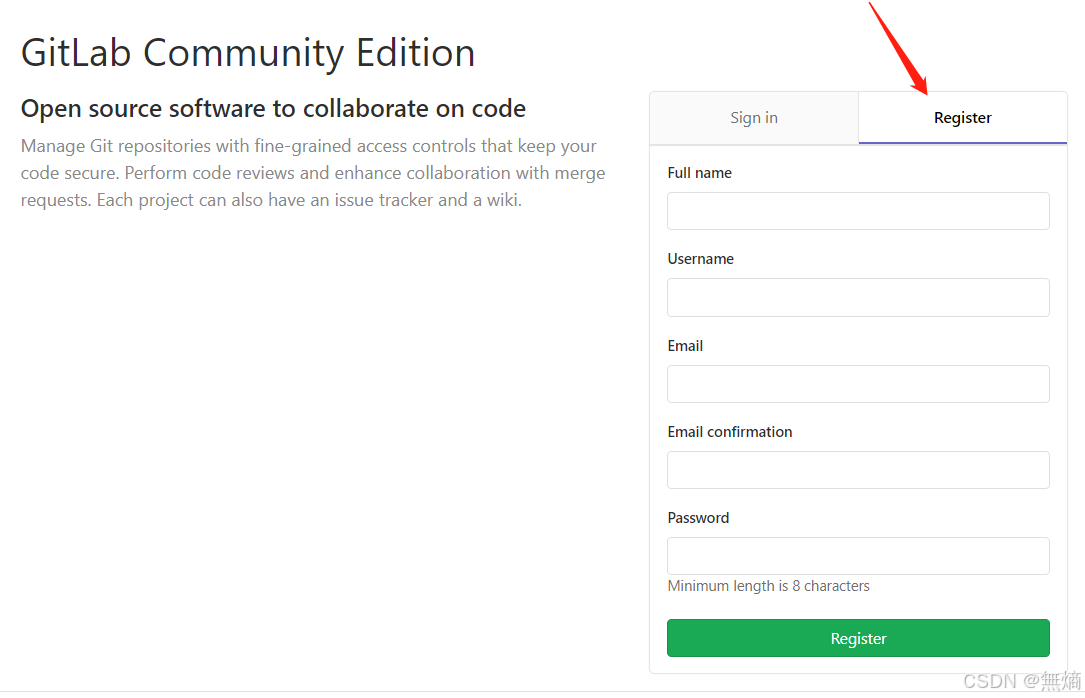
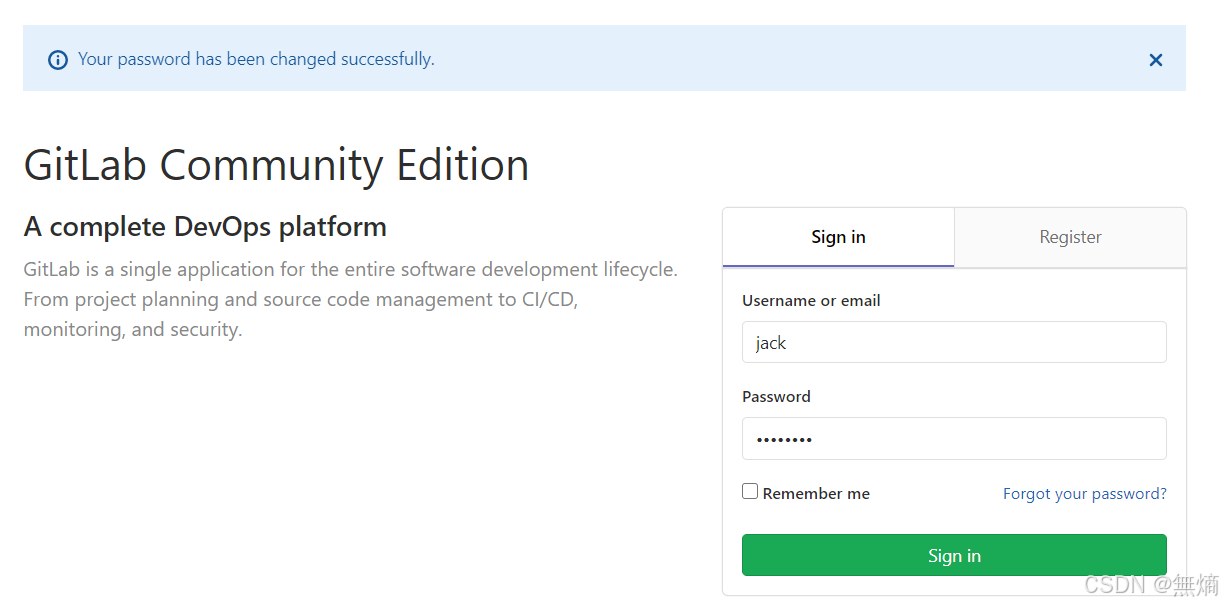
用户为:root
密码:为刚才设置的本人设置的密码是12345678

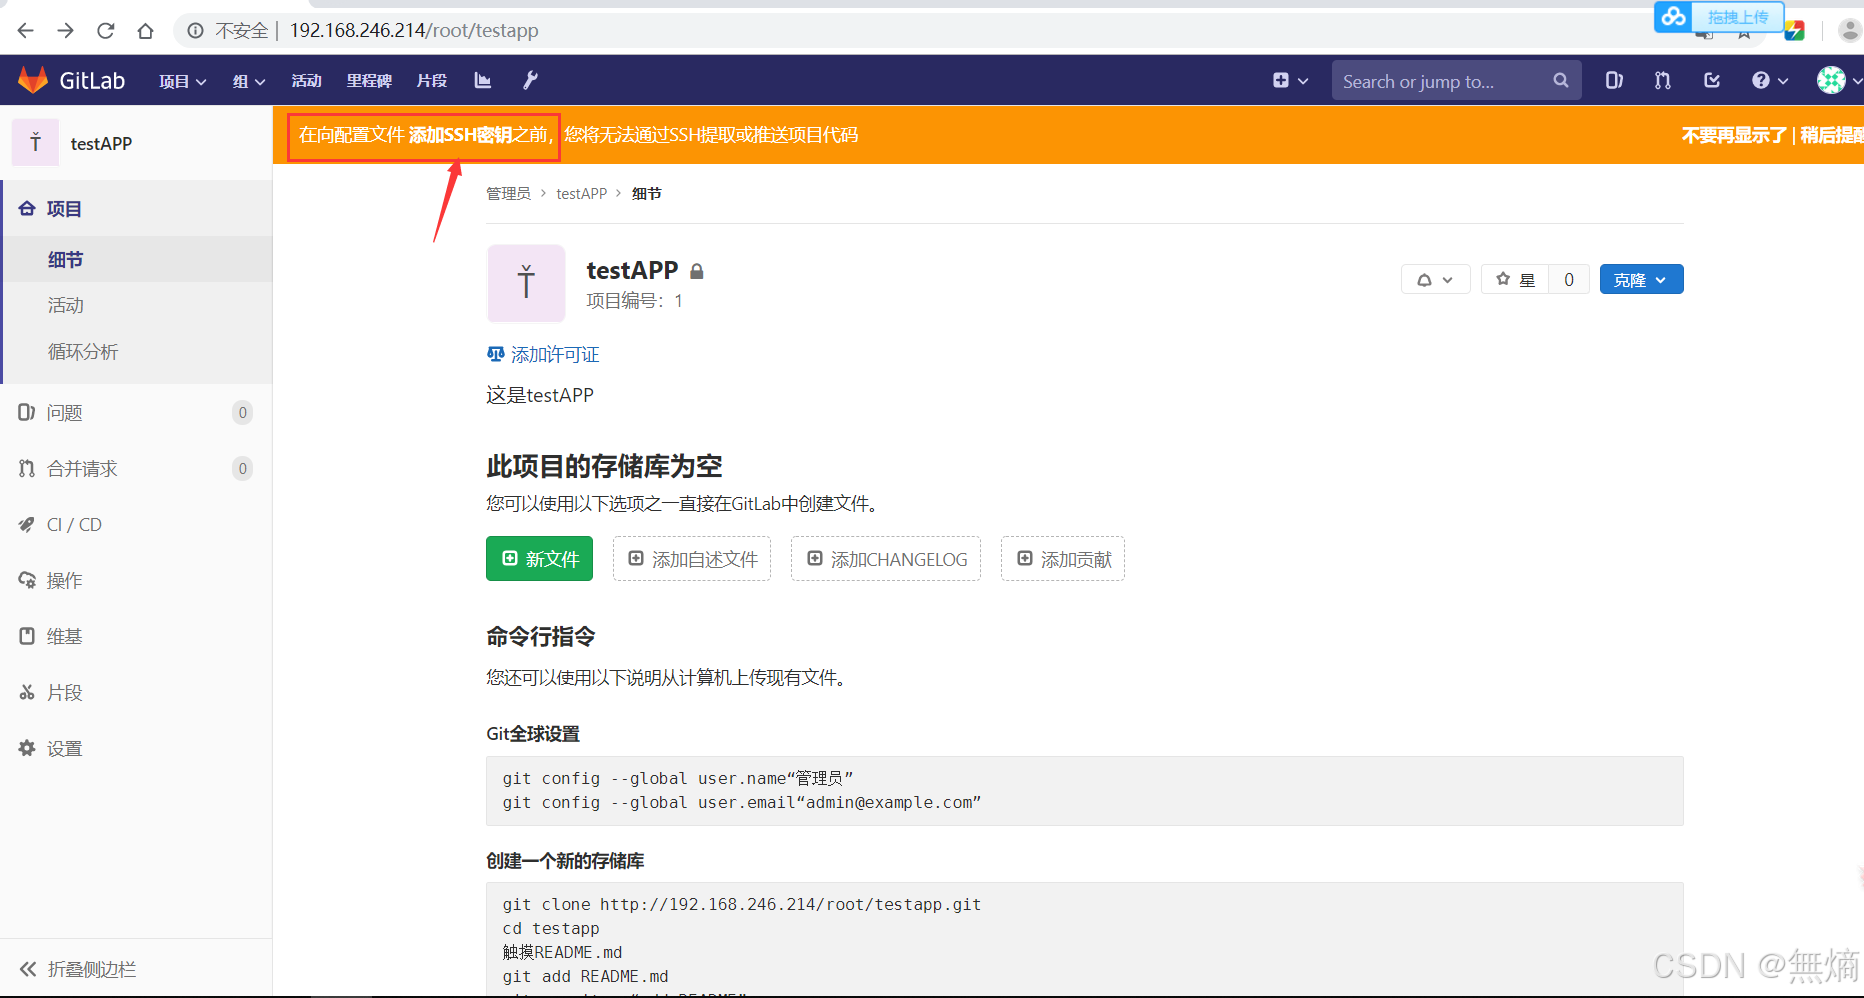
创建秘钥
[root@client ~]# ssh-keygen
[root@client ~]# cd .ssh/
[root@client .ssh]# ls
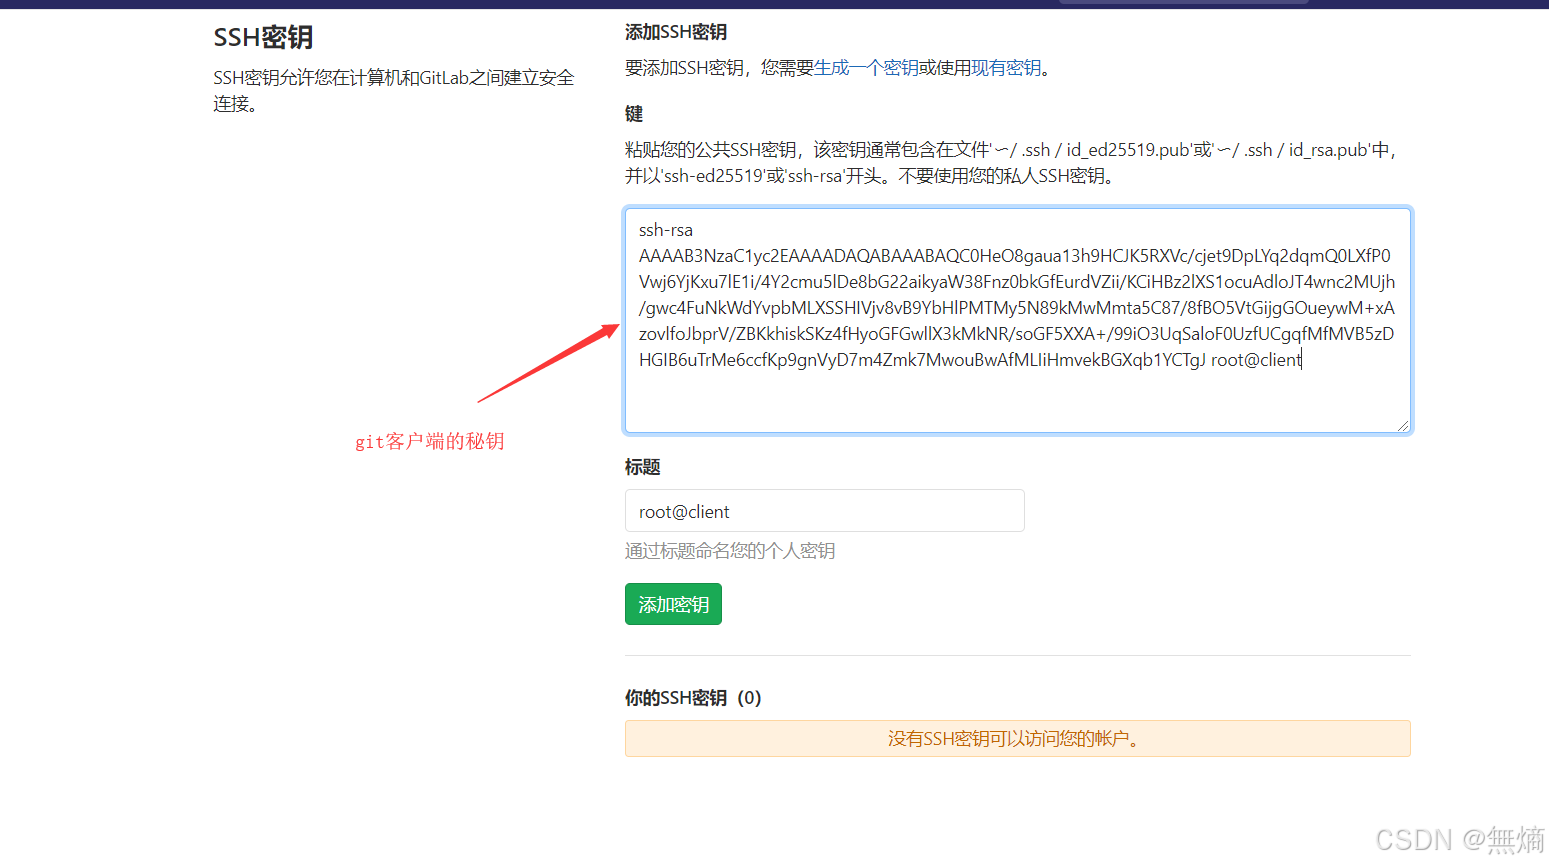
[root@client .ssh]# cat id_rsa.pub
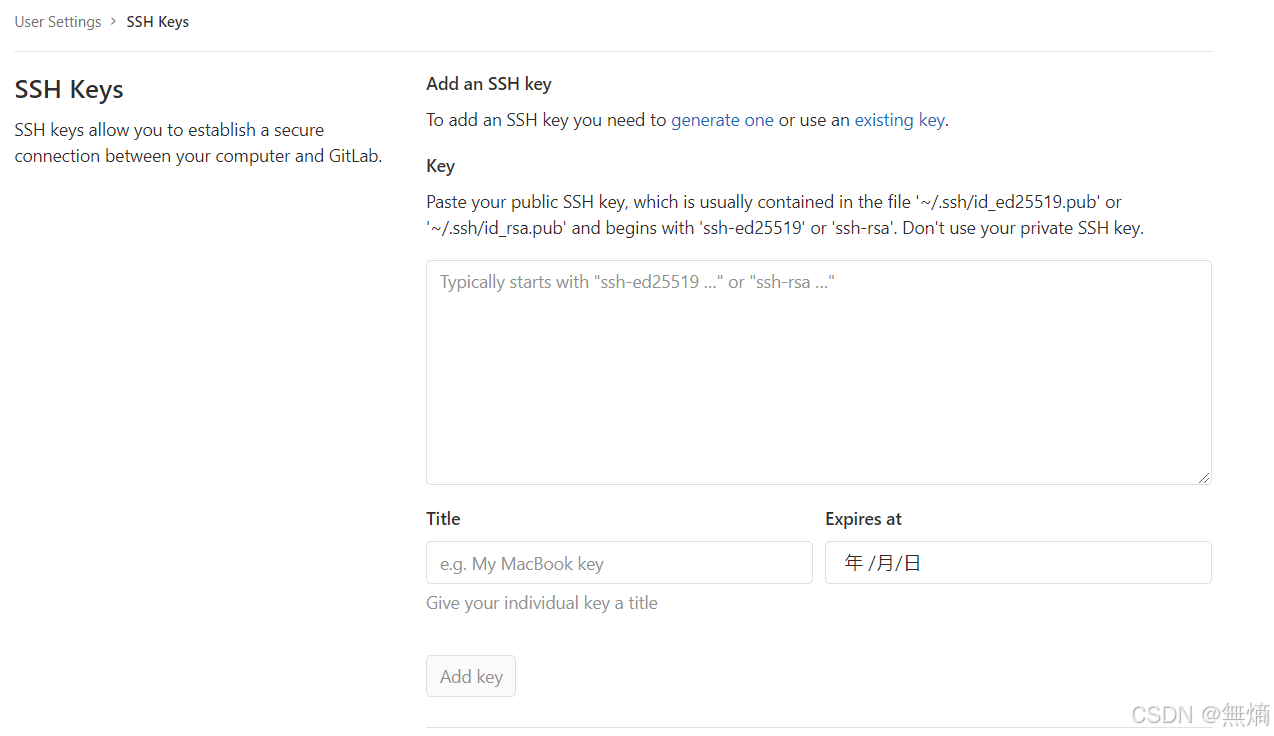
ssh-rsa AAAAB3NzaC1yc2EAAAADAQABAAABAQC0HeO8gaua13h9HCJK5RXVc/cjet9DpLYq2dqmQ0LXfP0Vwj6YjKxu7lE1i/4Y2cmu5lDe8bG22aikyaW38Fnz0bkGfEurdVZii/KCiHBz2lXS1ocuAdloJT4wnc2MUjh/gwc4FuNkWdYvpbMLXSSHIVjv8vB9YbHlPMTMy5N89kMwMmta5C87/8fBO5VtGijgGOueywM+xAzovlfoJbprV/ZBKkhiskSKz4fHyoGFGwllX3kMkNR/soGF5XXA+/99iO3UqSaloF0UzfUCgqfMfMVB5zDHGIB6uTrMe6ccfKp9gnVyD7m4Zmk7MwouBwAfMLIiHmvekBGXqb1YCTgJ root@client添加秘钥
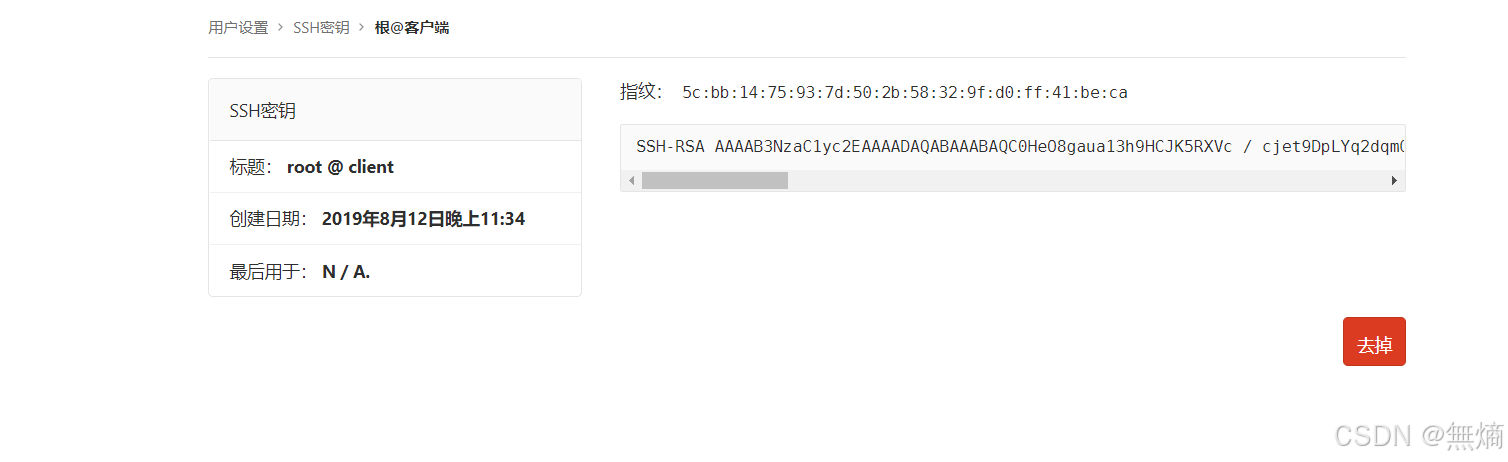
点击add key ,可以不设置时间
不设置时间,默认没有到期时间,永久
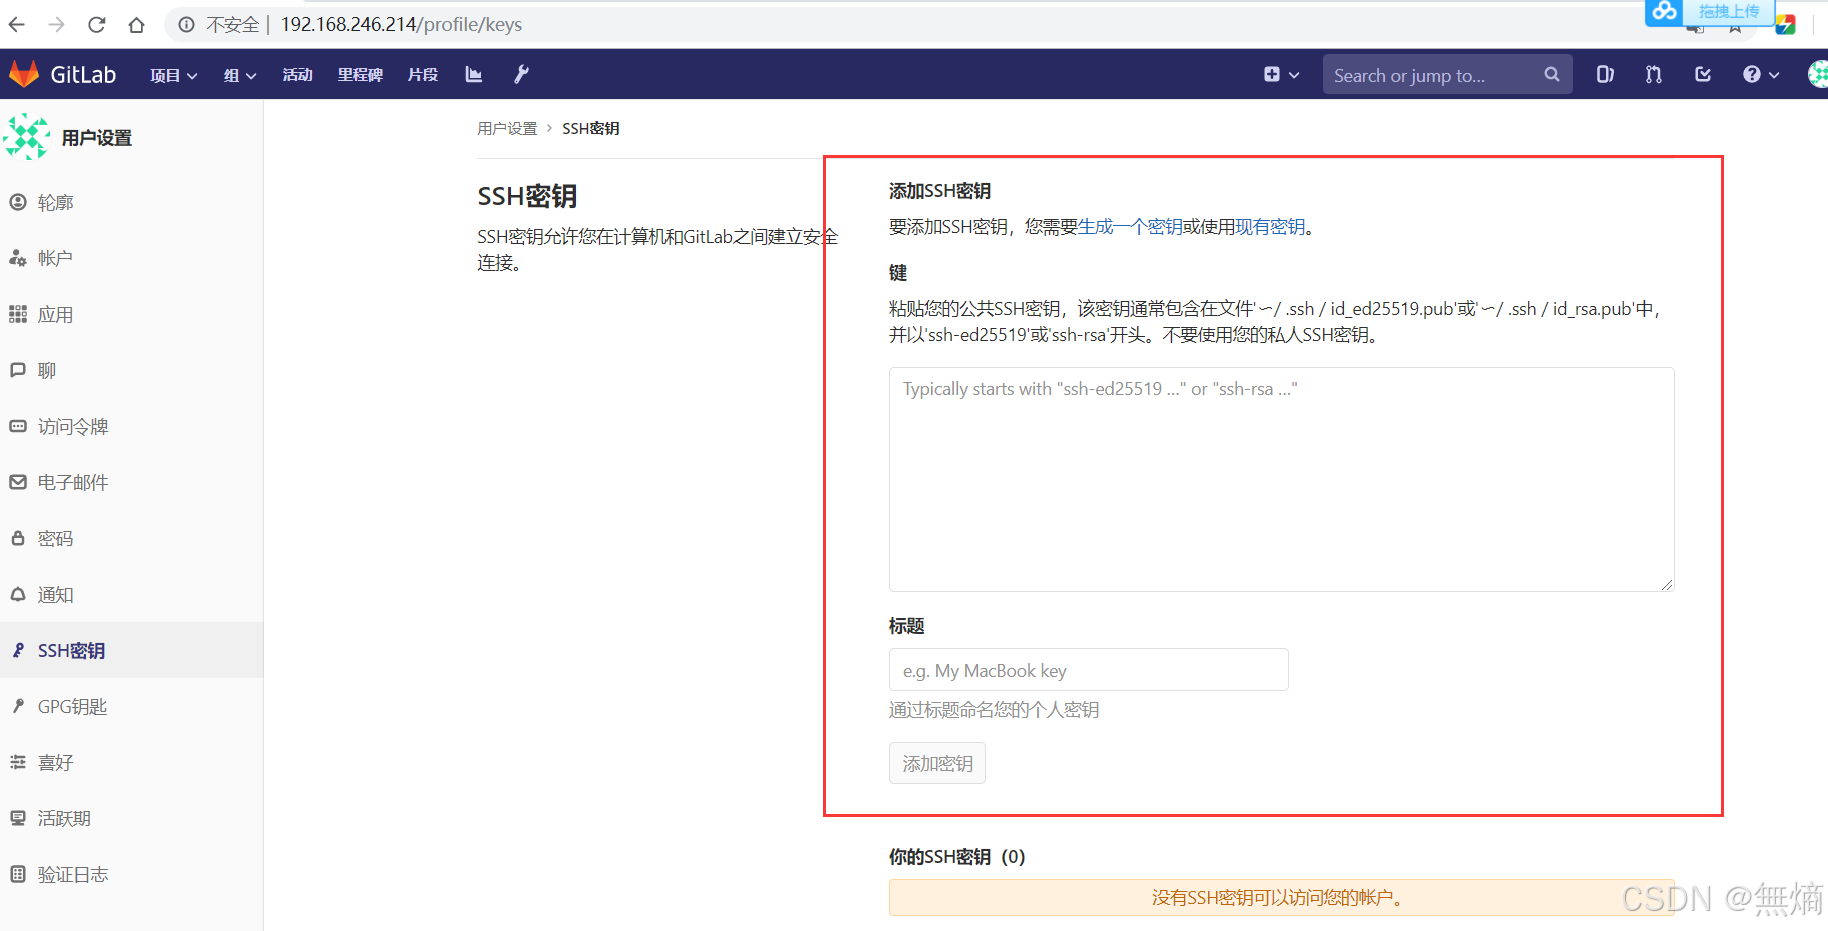
继续添加密钥
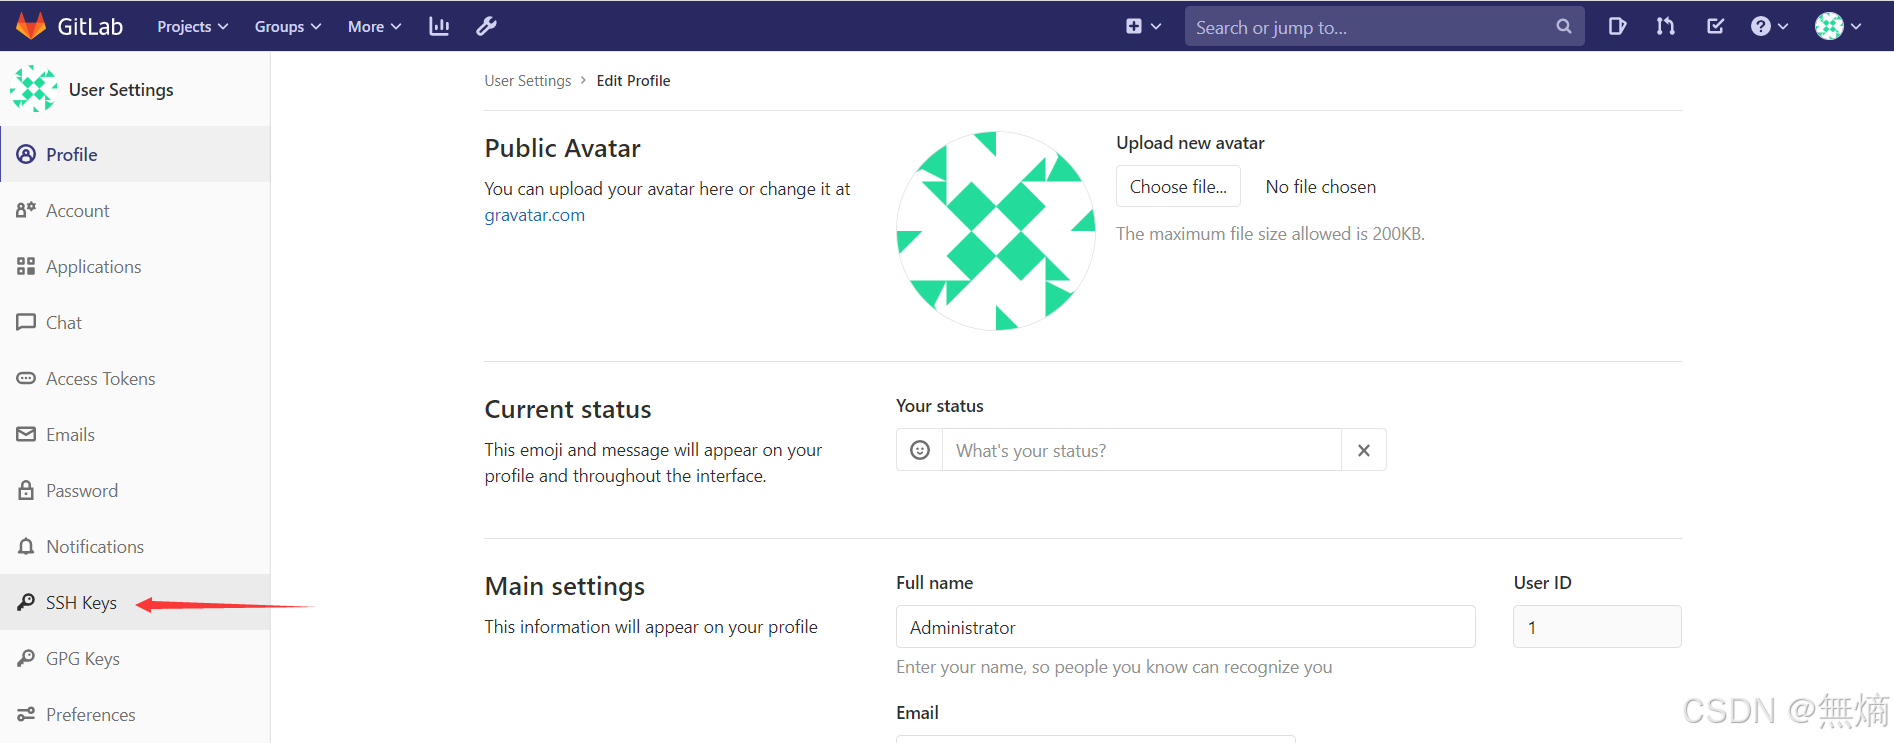
点击用户的settings -> SSH Keys

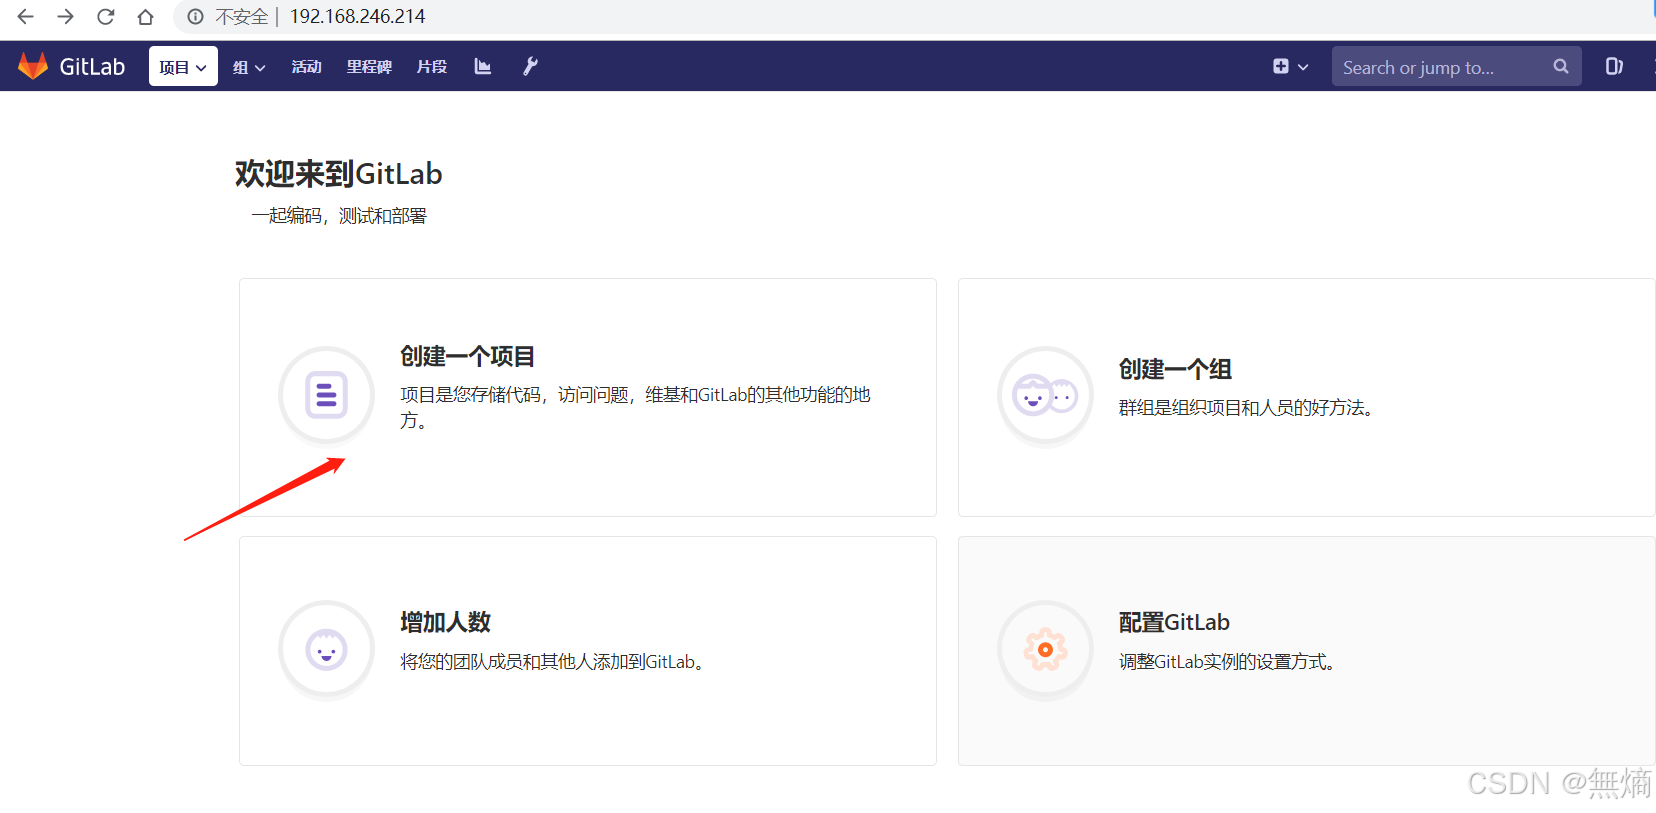
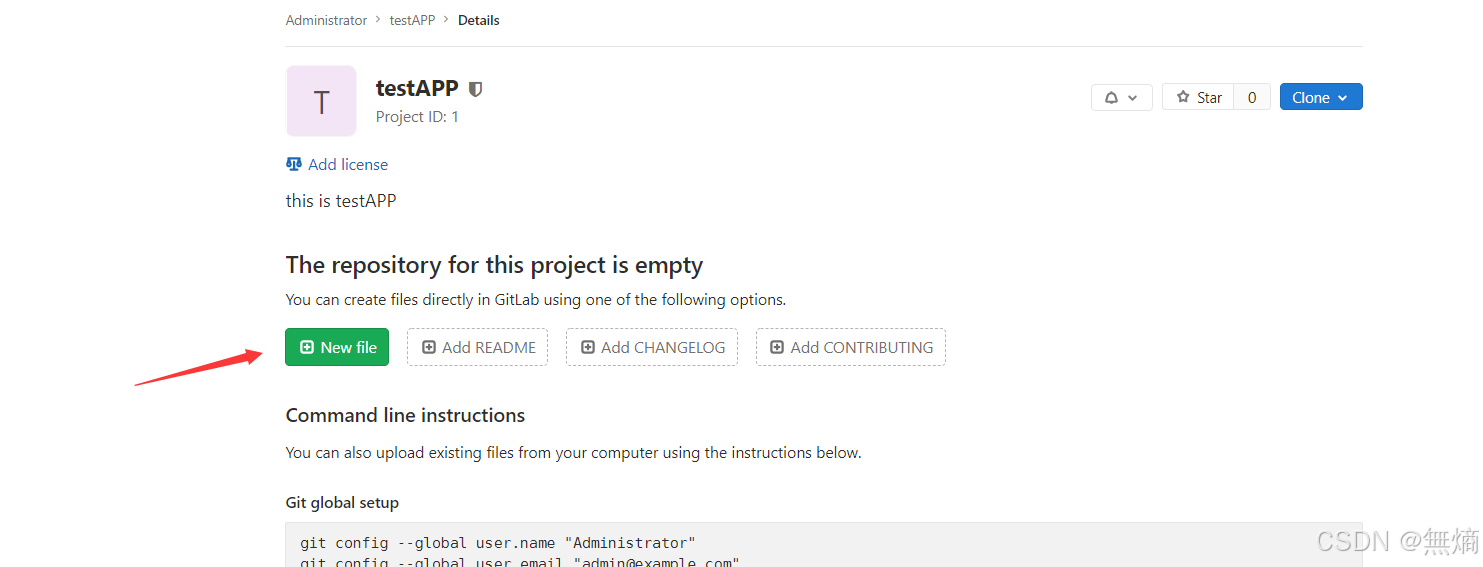
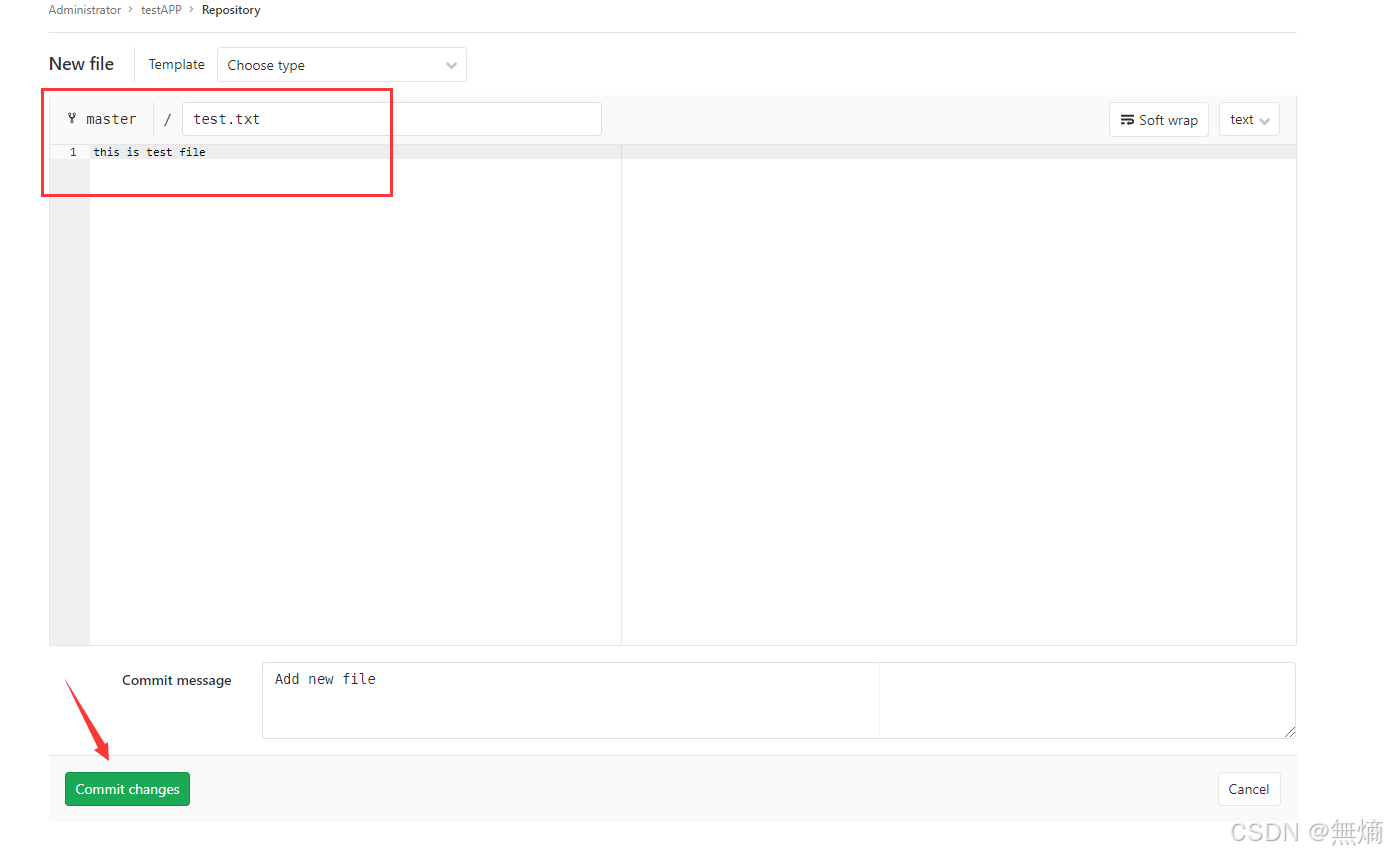
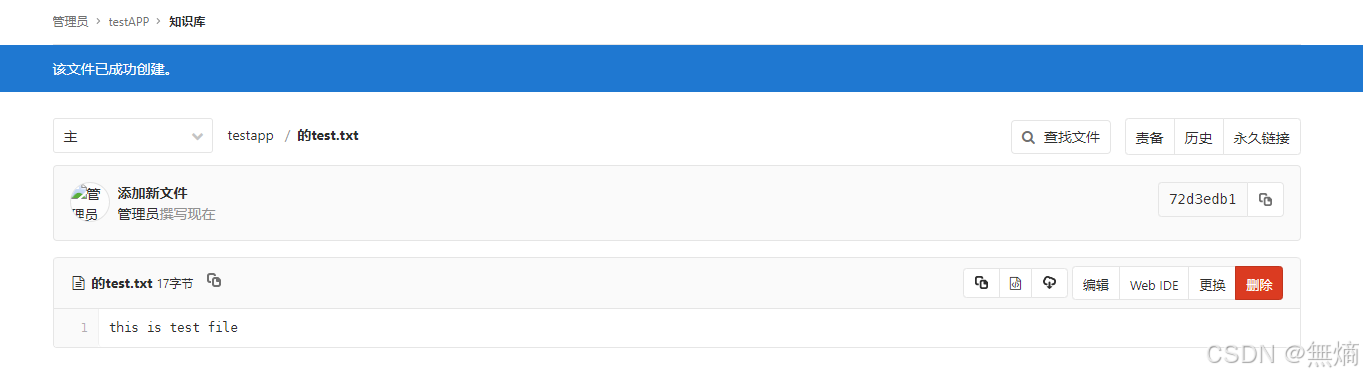
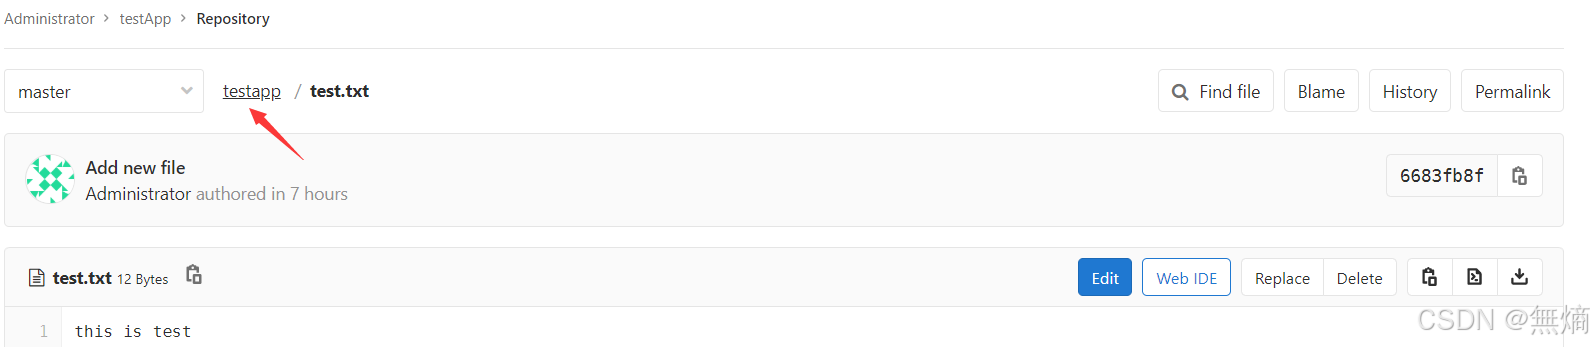
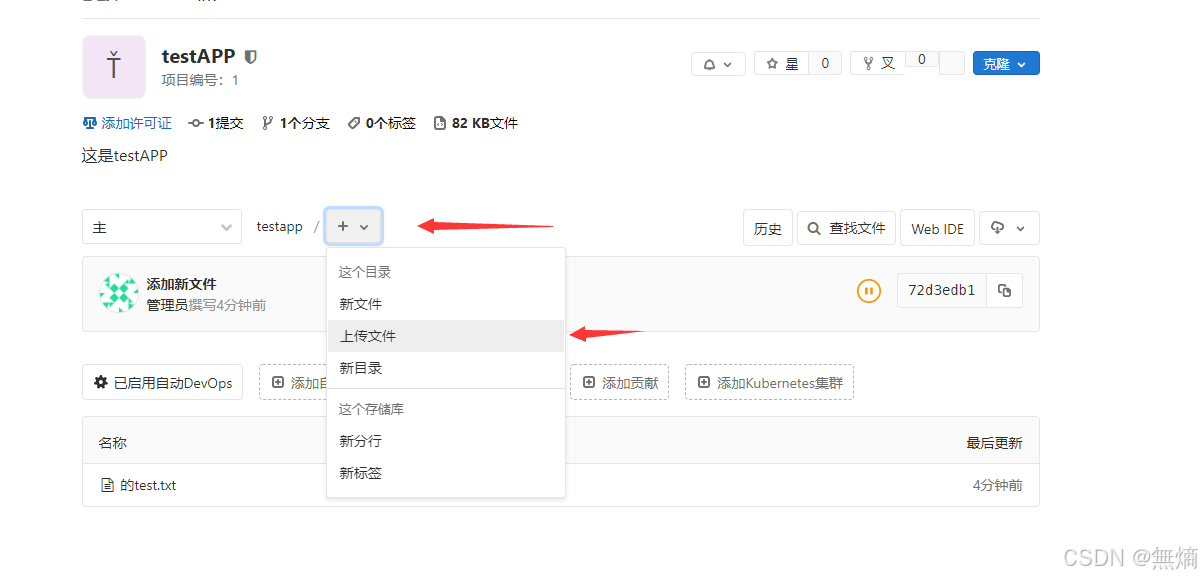
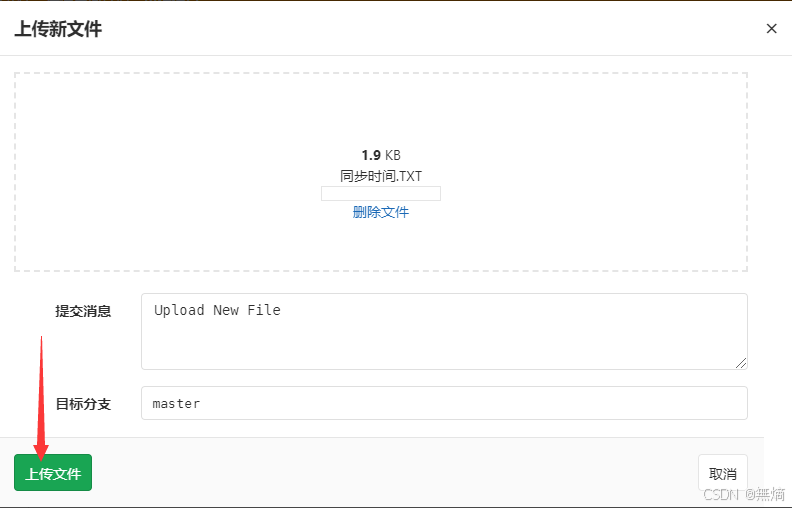
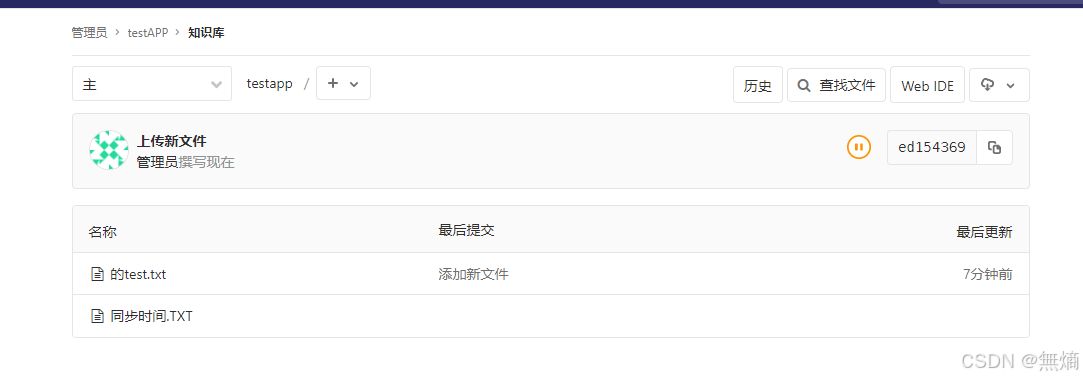
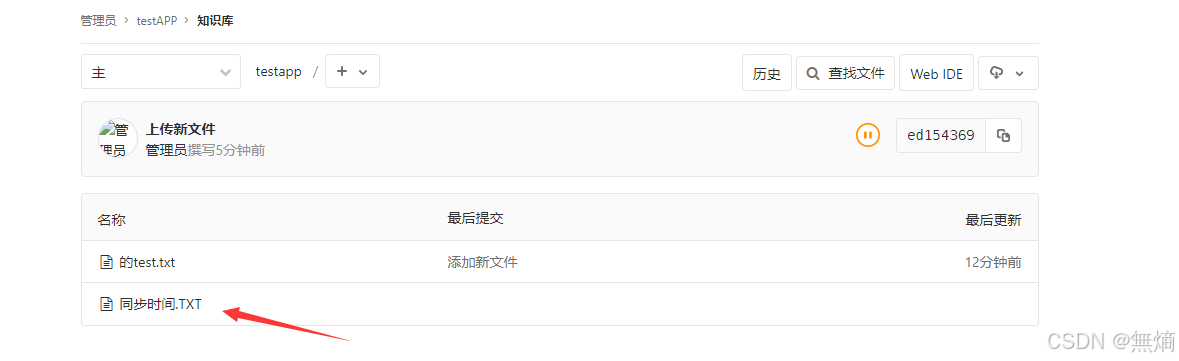
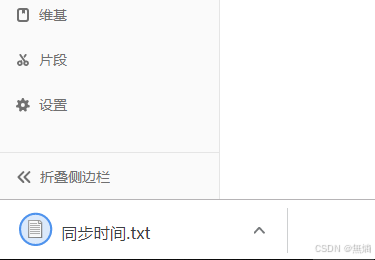
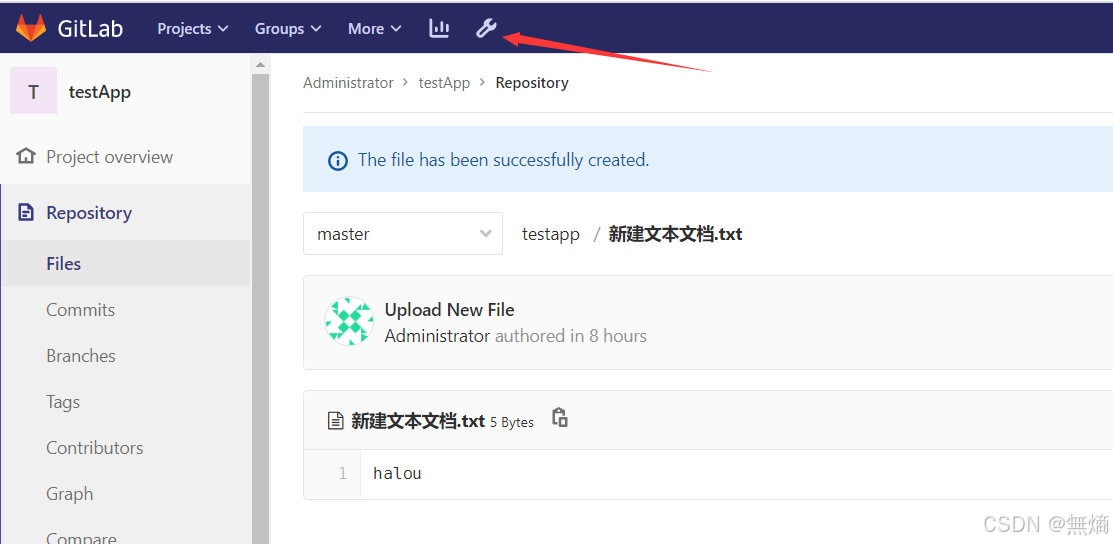
新建上传文件
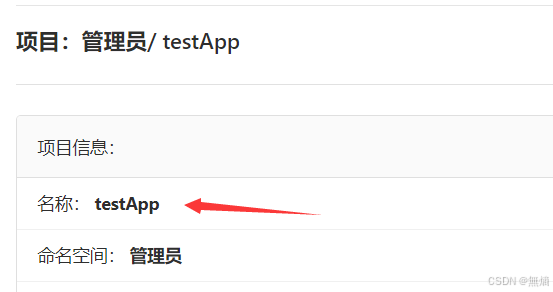
创建一个文件
1.newfile:先新建一个文件。2.uploadfile:再上传即可。
上传一个文件
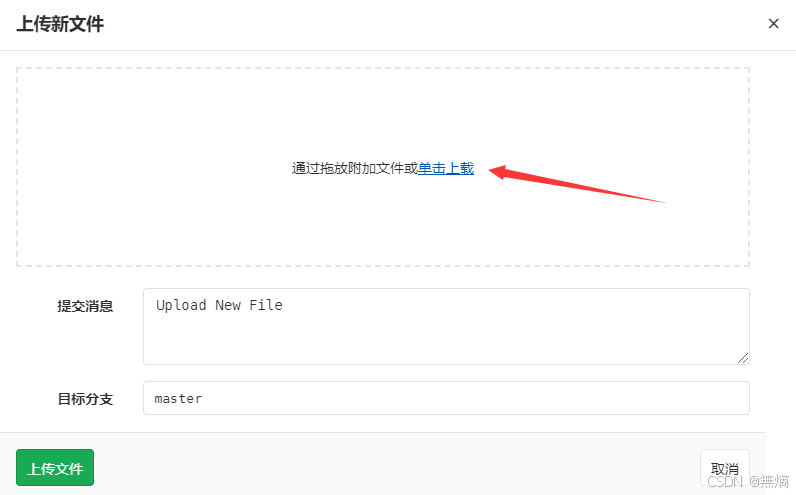
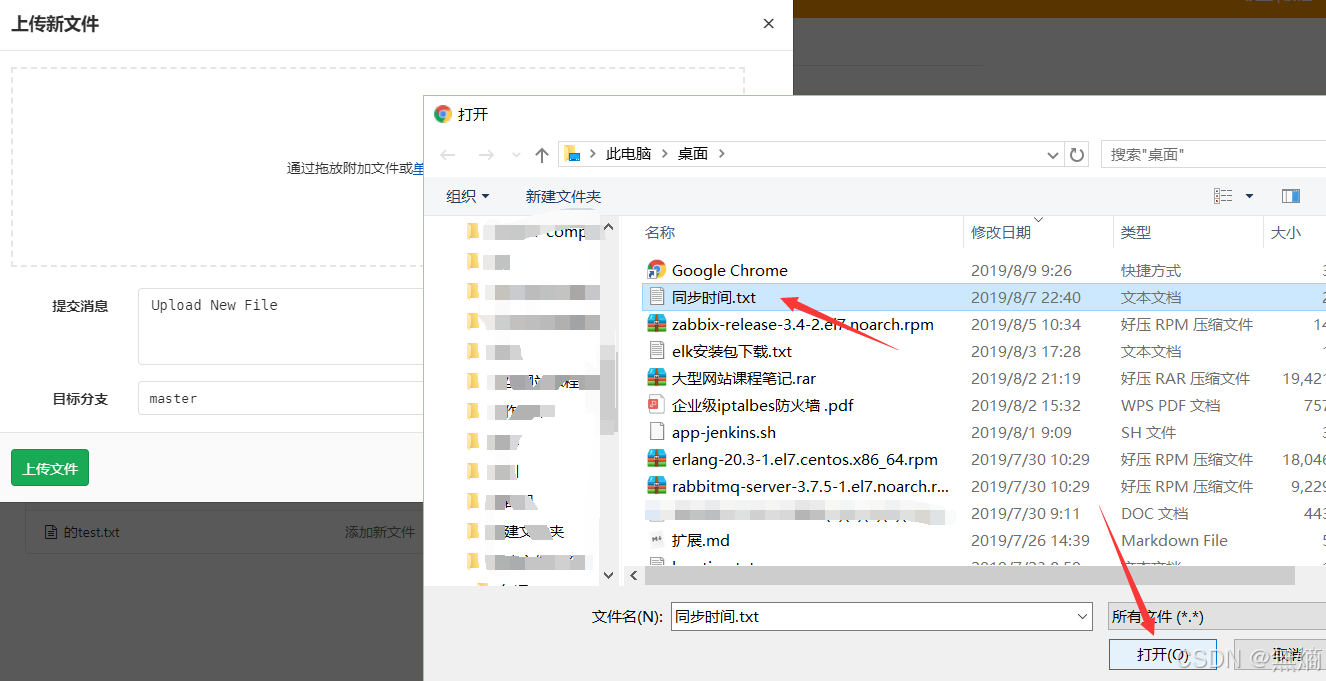

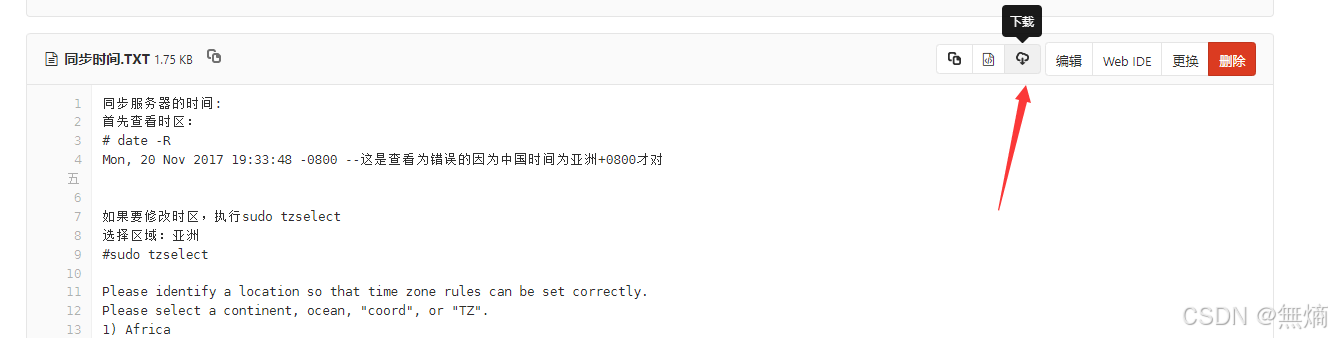
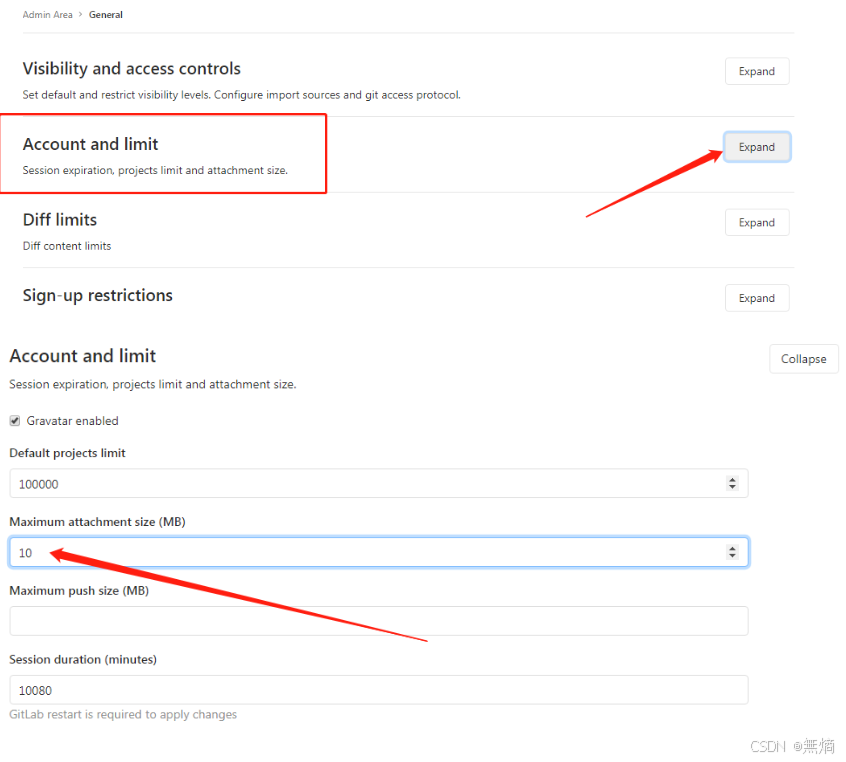
修改上传文件大小

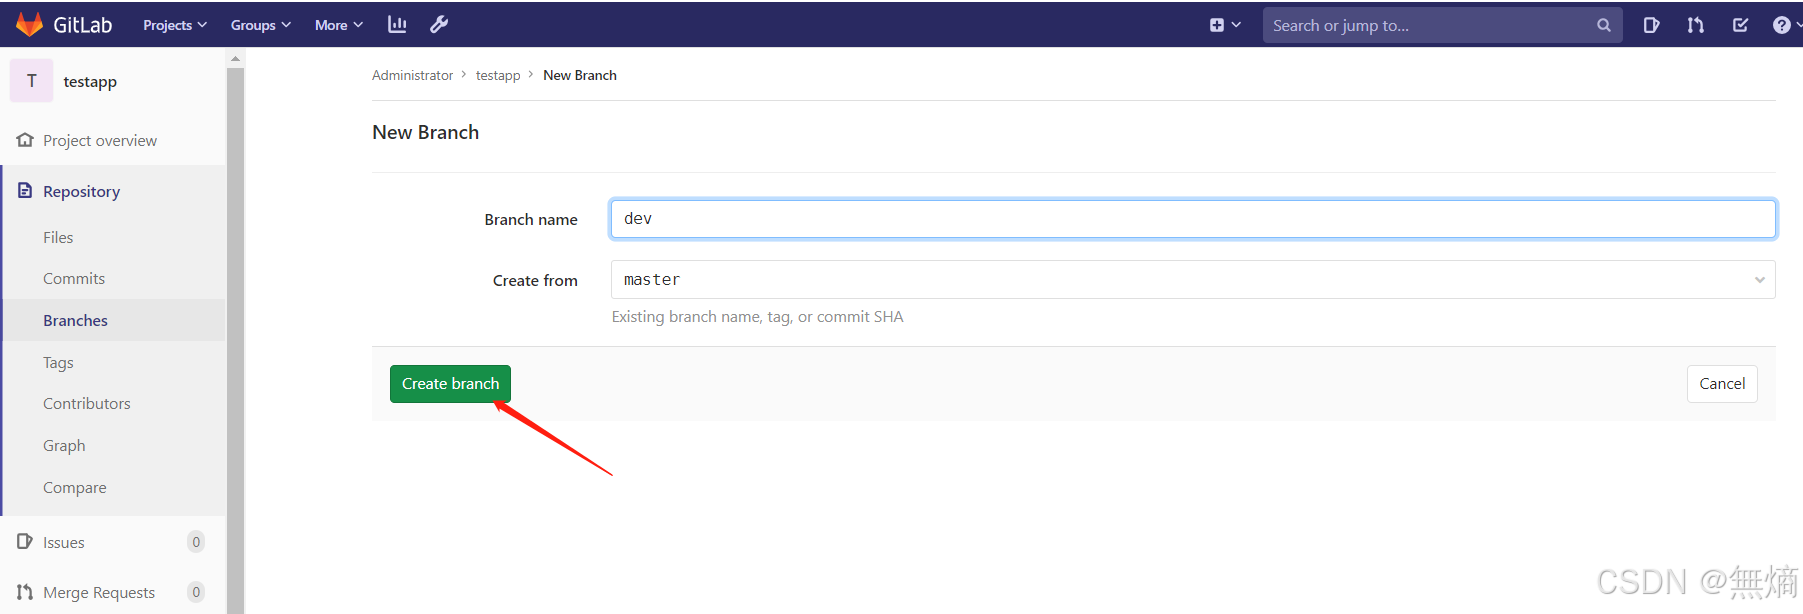
创建分支
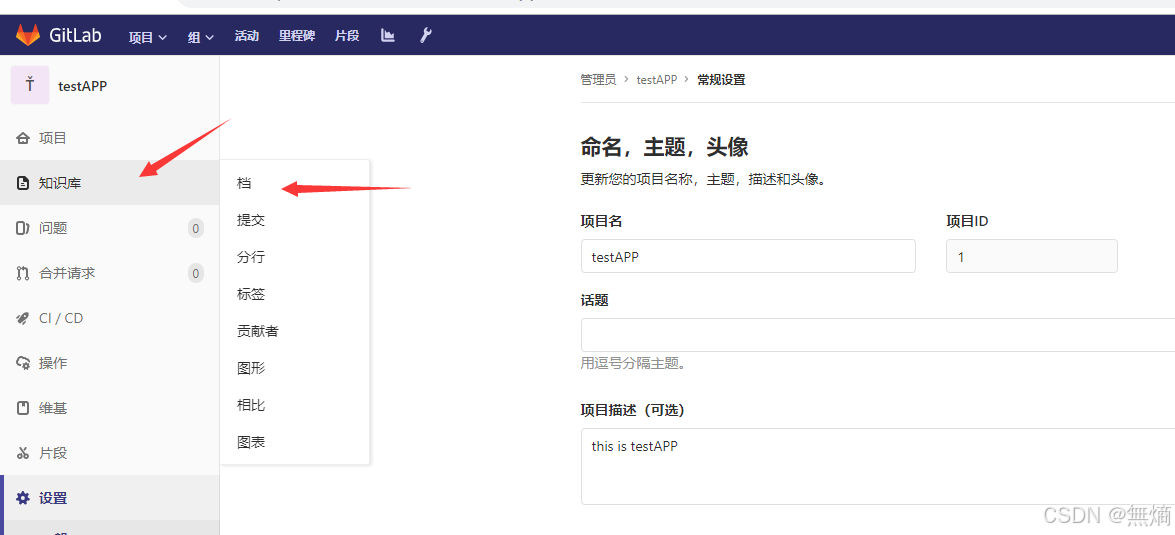
进入Project页面
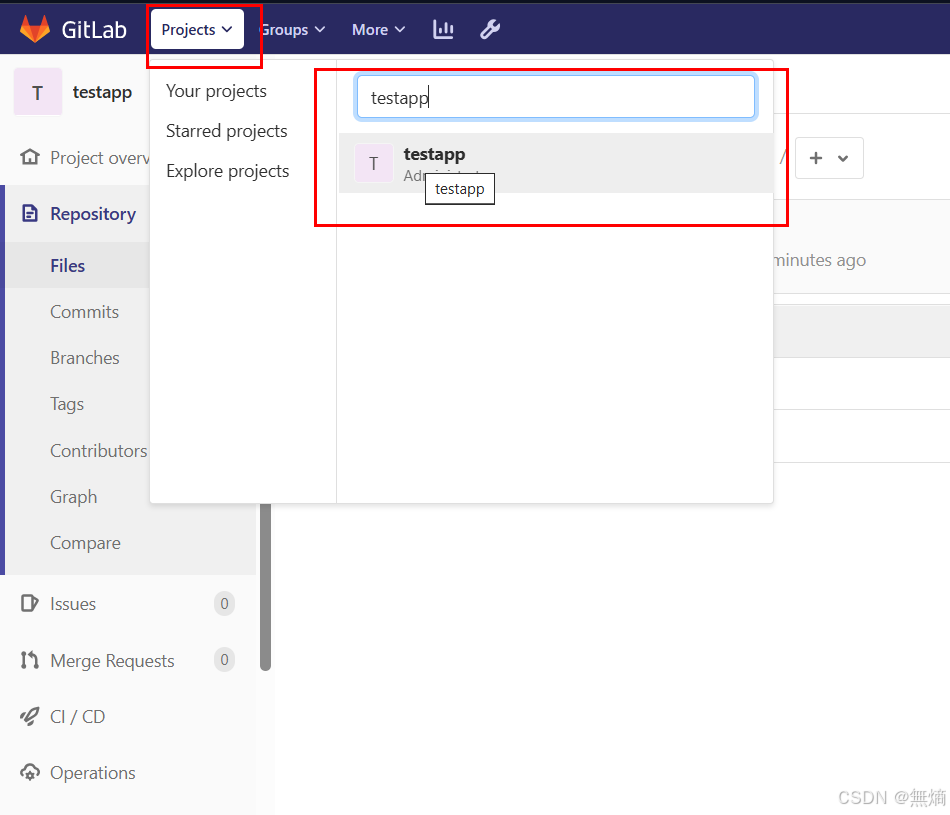
点击左侧的Repository
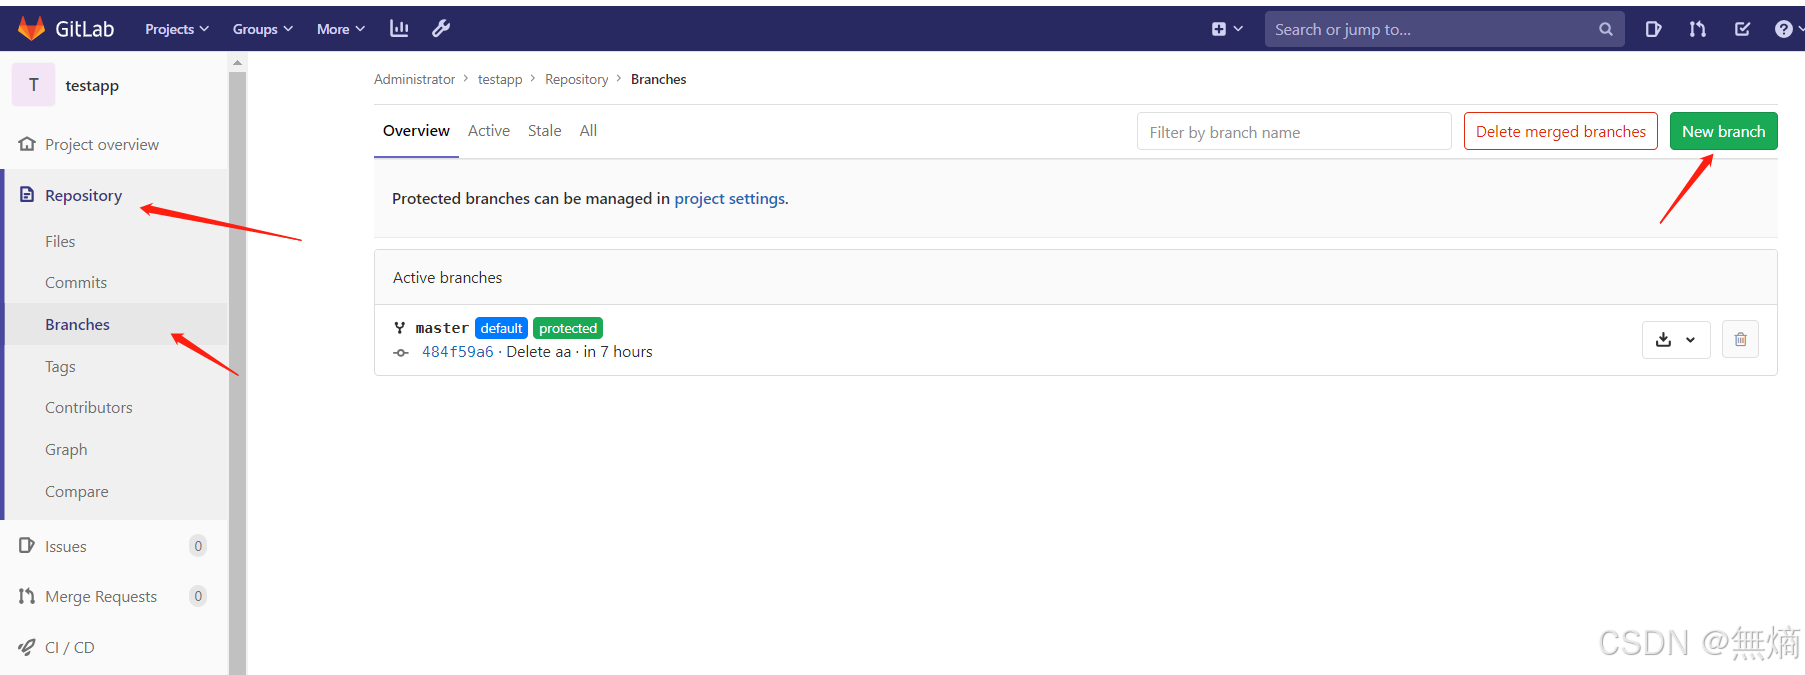
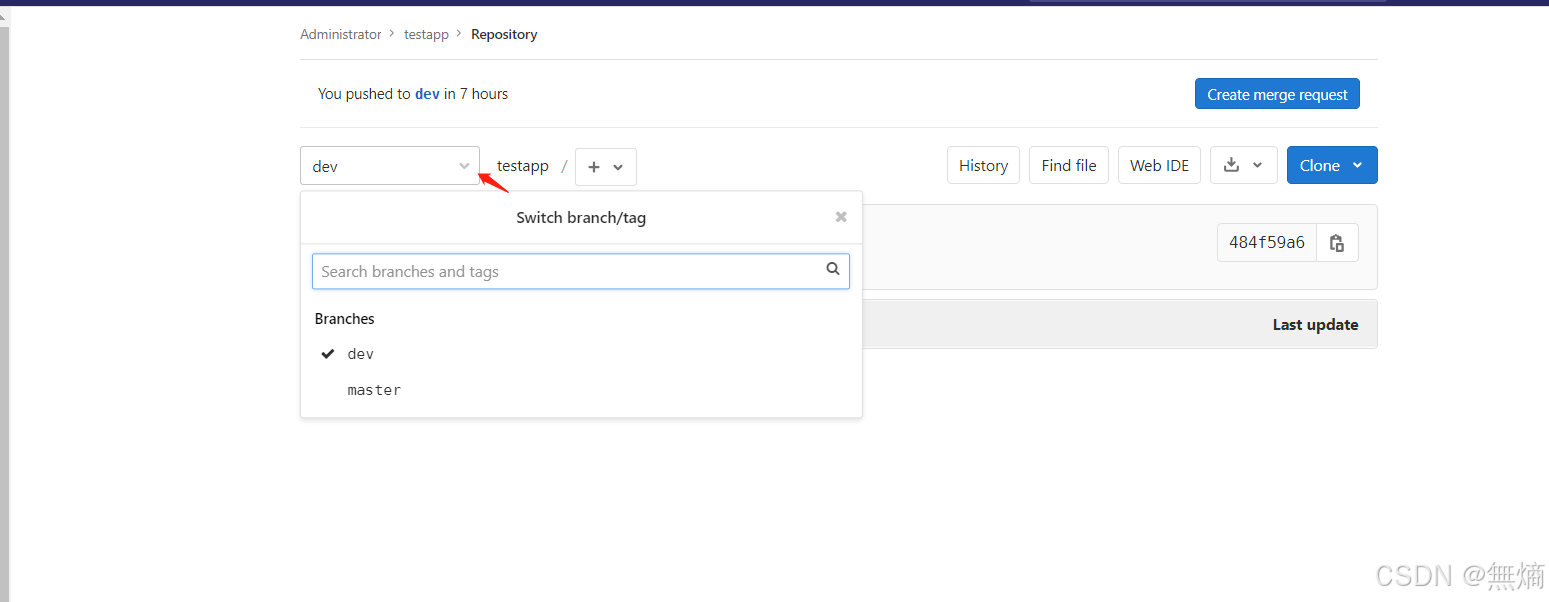
选择clone分支代码或者上传到代码到分支
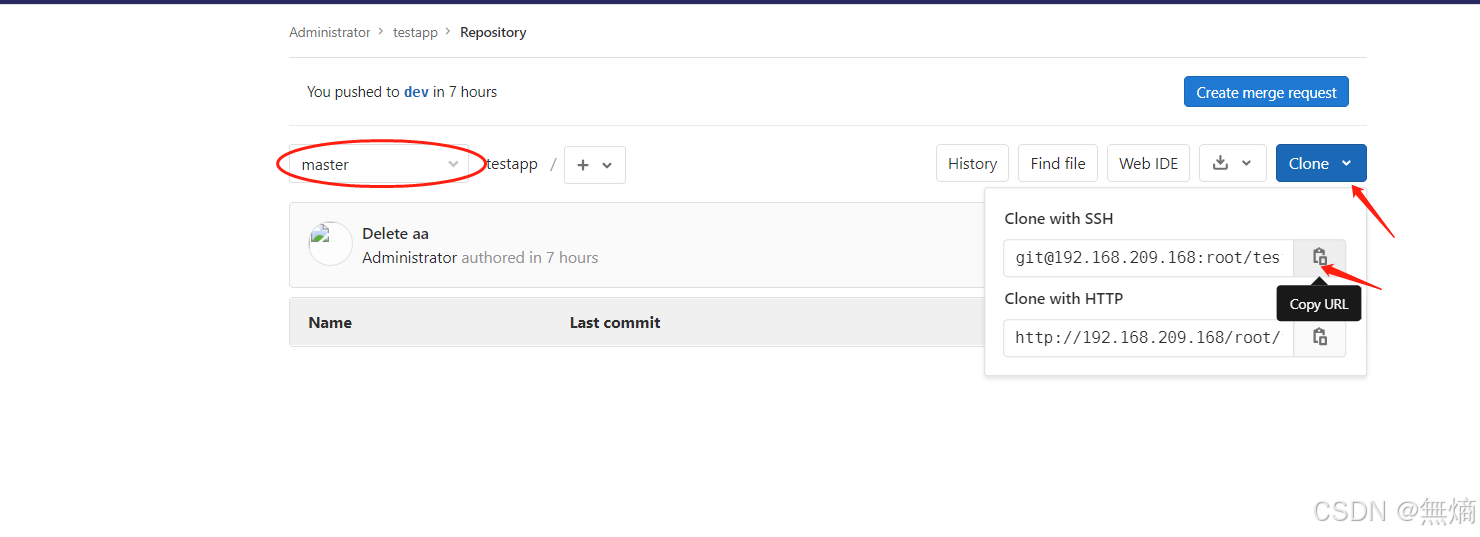
git客户端上传文件
[root@localhost ~]# git clone git@192.168.229.188:root/testapp.git
Cloning into 'testapp'...
remote: Enumerating objects: 5, done.
remote: Counting objects: 100% (5/5), done.
remote: Compressing objects: 100% (2/2), done.
remote: Total 5 (delta 0), reused 0 (delta 0), pack-reused 0
Receiving objects: 100% (5/5), done.
[root@localhost ~]# cd testapp/
[root@localhost testapp]# git branch
* master
[root@localhost testapp]# git checkout dev
Switched to a new branch 'dev'
[root@localhost testapp]# git branch
* dev
master
[root@localhost testapp]# touch aa.txt
[root@localhost testapp]# echo 123123 >> aa.txt
[root@localhost testapp]# git add *
[root@localhost testapp]# git commit -m "add 1"
[dev cf25148] add 1
1 file changed, 1 insertion(+)
create mode 100644 aa.txt
[root@localhost tmsc]# git push origin dev
Counting objects: 4, done.
Writing objects: 100% (3/3), 228 bytes | 0 bytes/s, done.
Total 3 (delta 0), reused 0 (delta 0)
remote:
remote: To create a merge request for dev, visit:
remote: http://192.168.229.188/root/testapp/-/merge_requests/new?merge_request%5Bsource_branch%5D=dev
remote:
To git@192.168.229.188:root/testapp.git
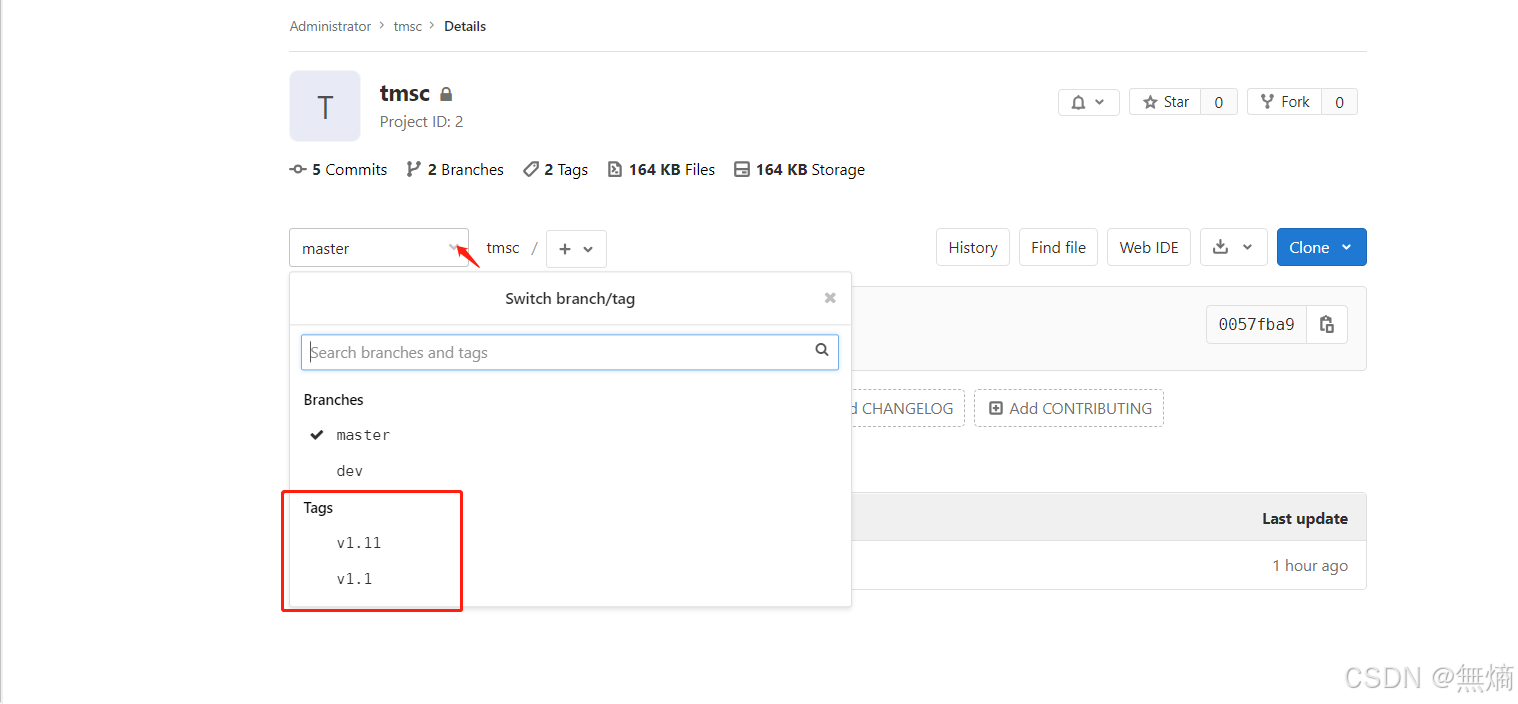
7d5a612..8aa27e0 dev -> dev打标签Tag
# 克隆远程仓库到本地
[root@localhost ~]# git clone git@192.168.229.188:root/testapp.git
Cloning into 'testapp'... # 开始克隆仓库
remote: Enumerating objects: 14, done. # 枚举对象
remote: Counting objects: 100% (14/14), done. # 计算对象
remote: Compressing objects: 100% (7/7), done. # 压缩对象
remote: Total 14 (delta 1), reused 0 (delta 0), pack-reused 0 # 总共的对象数
Receiving objects: 100% (14/14), done. # 接收对象
Resolving deltas: 100% (1/1), done. # 解析差异
[root@localhost ~]# cd testapp/ # 进入克隆下来的目录
[root@localhost testapp]# ls # 查看当前目录下的文件
aa.txt
[root@localhost testapp]# cat aa.txt # 显示文件内容
12323
[root@localhost testapp]# git tag # 列出所有标签
v1.1
[root@localhost testapp]# ls # 再次查看当前目录下的文件
aa.txt
[root@localhost testapp]# git checkout dev # 切换到dev分支
Branch dev set up to track remote branch dev from origin. # 设置dev分支跟踪远程origin的dev分支
Switched to a new branch 'dev' # 切换到了dev分支
[root@localhost testapp]# ls # 查看切换分支后的文件列表
aa.txt
[root@localhost testapp]# cat aa.txt # 查看文件内容
12323
[root@localhost testapp]# echo hello >> aa.txt # 向文件追加内容
[root@localhost testapp]# git add * # 将所有更改添加到暂存区
[root@localhost testapp]# git commit -m "add 5" # 提交更改,消息为"add 5"
[dev 0c989ff] add 5
 1 file changed, 1 insertion(+)
[root@localhost testapp]# git checkout master # 切换回master分支
Switched to branch 'master'
[root@localhost testapp]# git merge dev # 将dev分支合并到master分支
Merge made by the 'recursive' strategy.
 aa.txt | 1 +
 1 file changed, 1 insertion(+)
[root@localhost testapp]# git tag -a "v1.11" # 创建带注释的标签v1.11
[root@localhost testapp]# git tag # 列出所有标签
v1.1
v1.11
[root@localhost testapp]# git push origin v1.11 # 将标签推送到远程仓库
[root@localhost testapp]# git tag --delete v1.0 # 删除本地标签
[root@localhost testapp]# git push origin --delete v1.0 # 删除一个远程标签
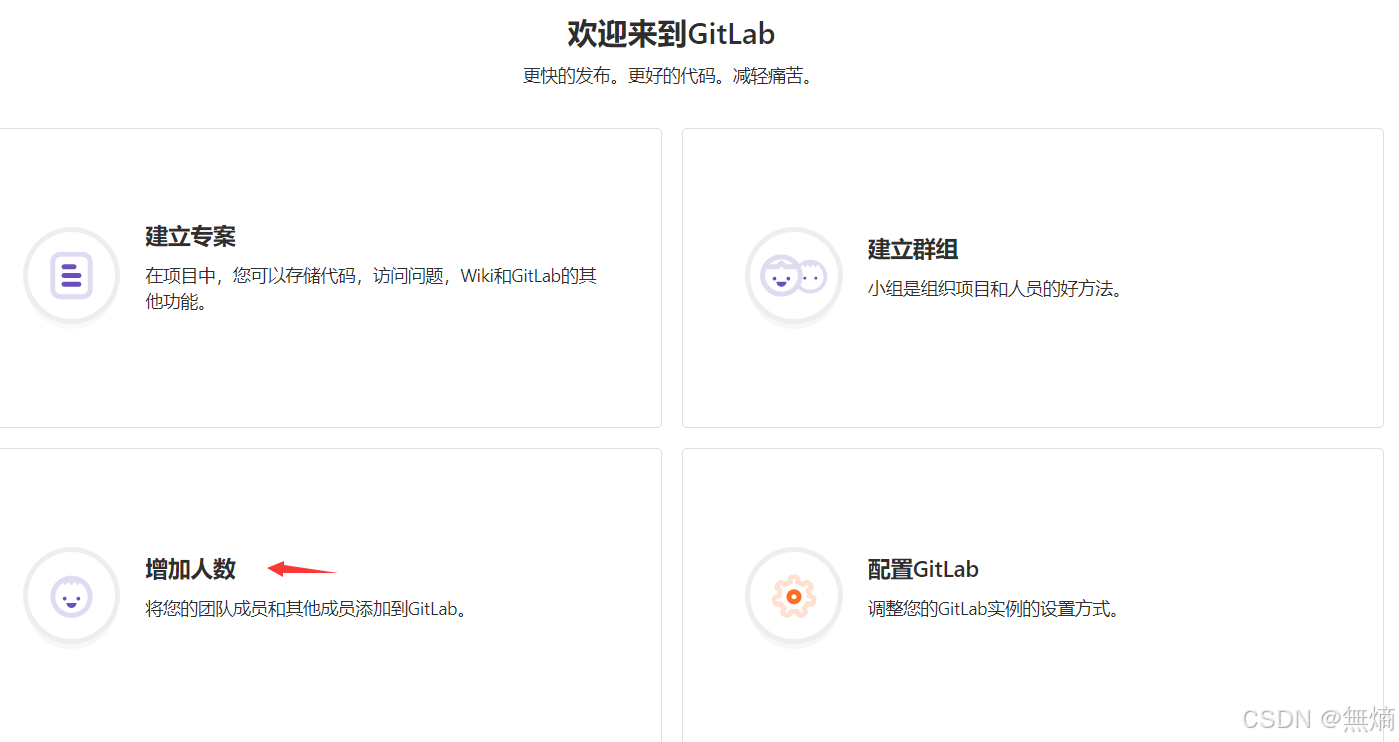
创建用户
1.自己创建一个用户
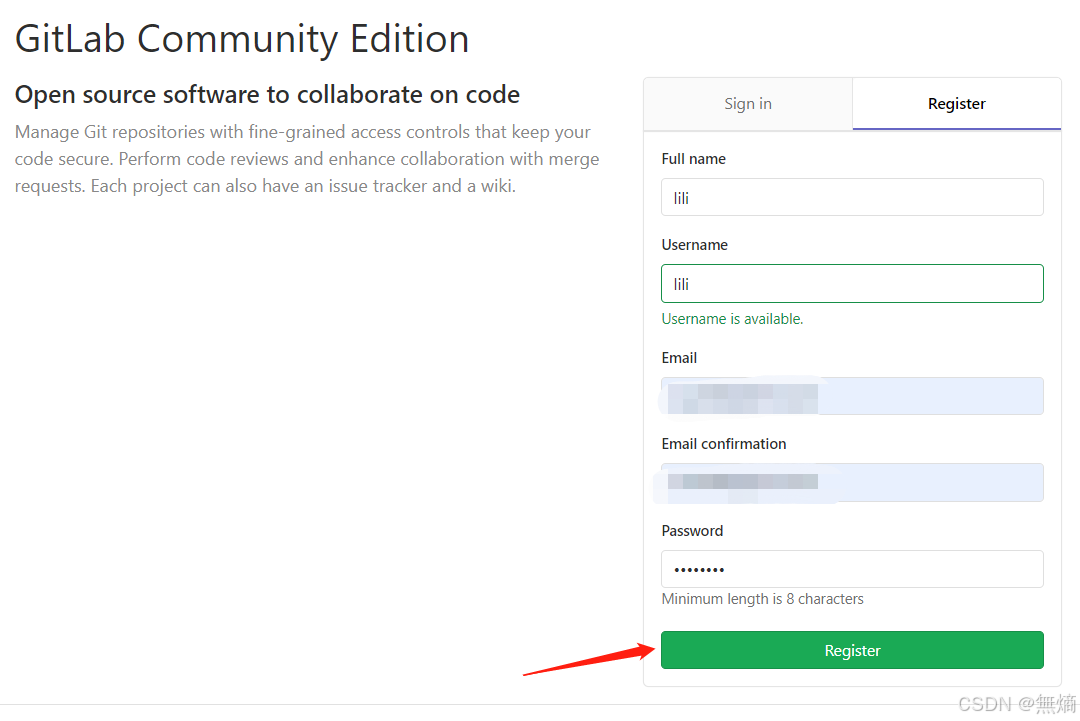
新添加的用户创建成功!
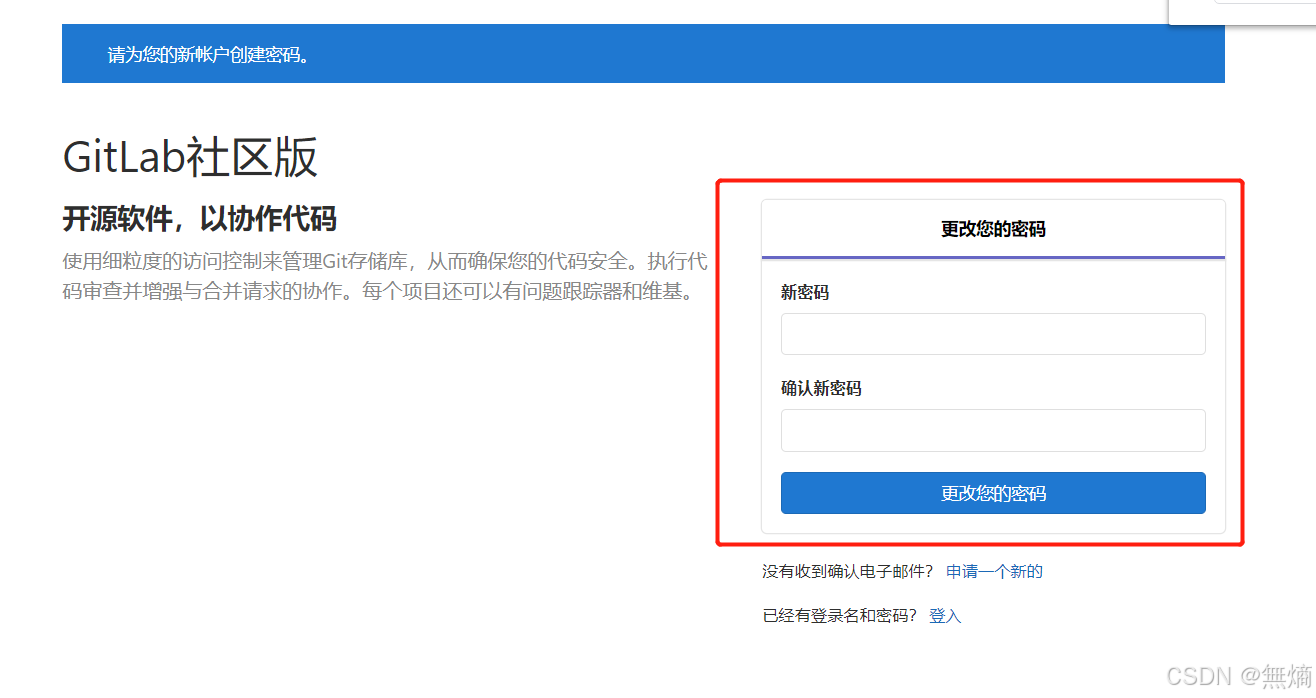
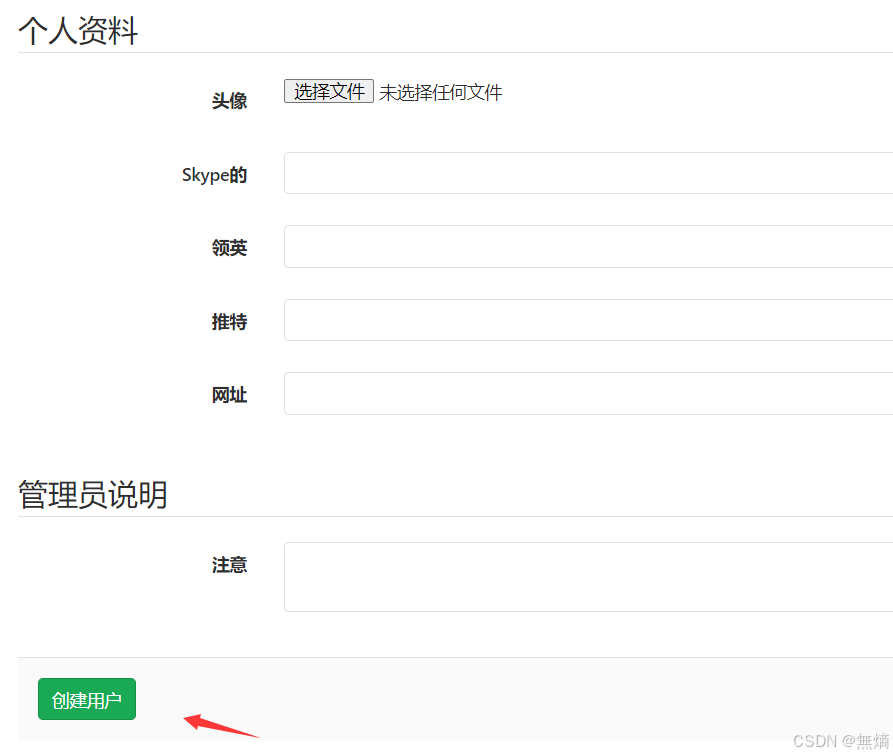
2.通过邮箱创建用户--公司常用
首先需要管理员用户登陆gitlab开始创建用户
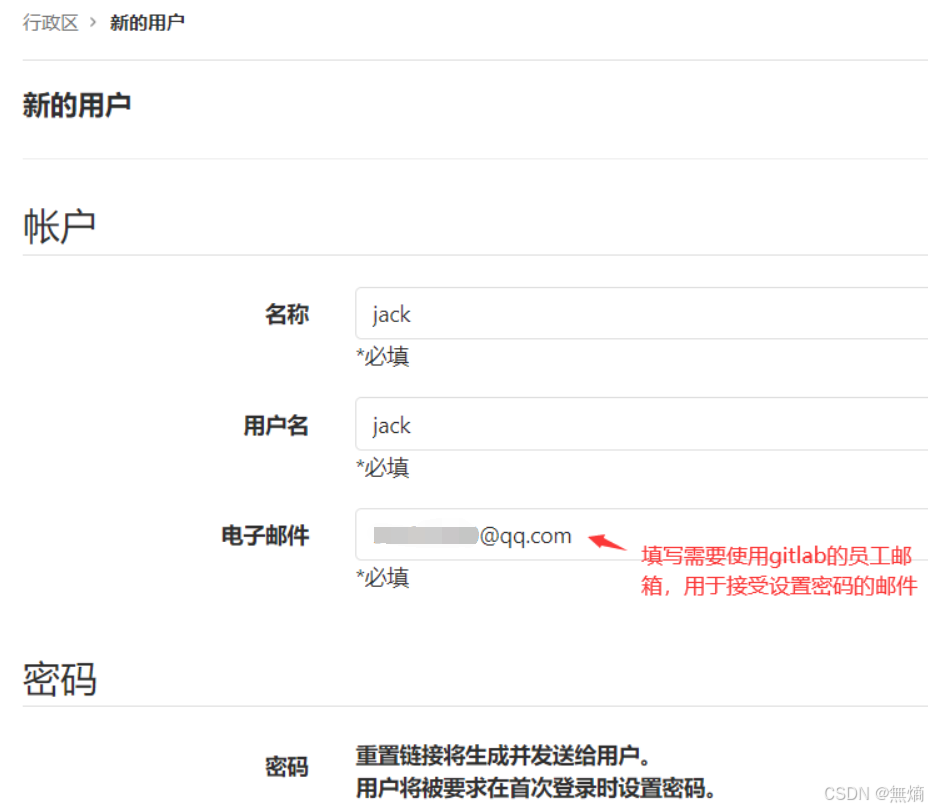

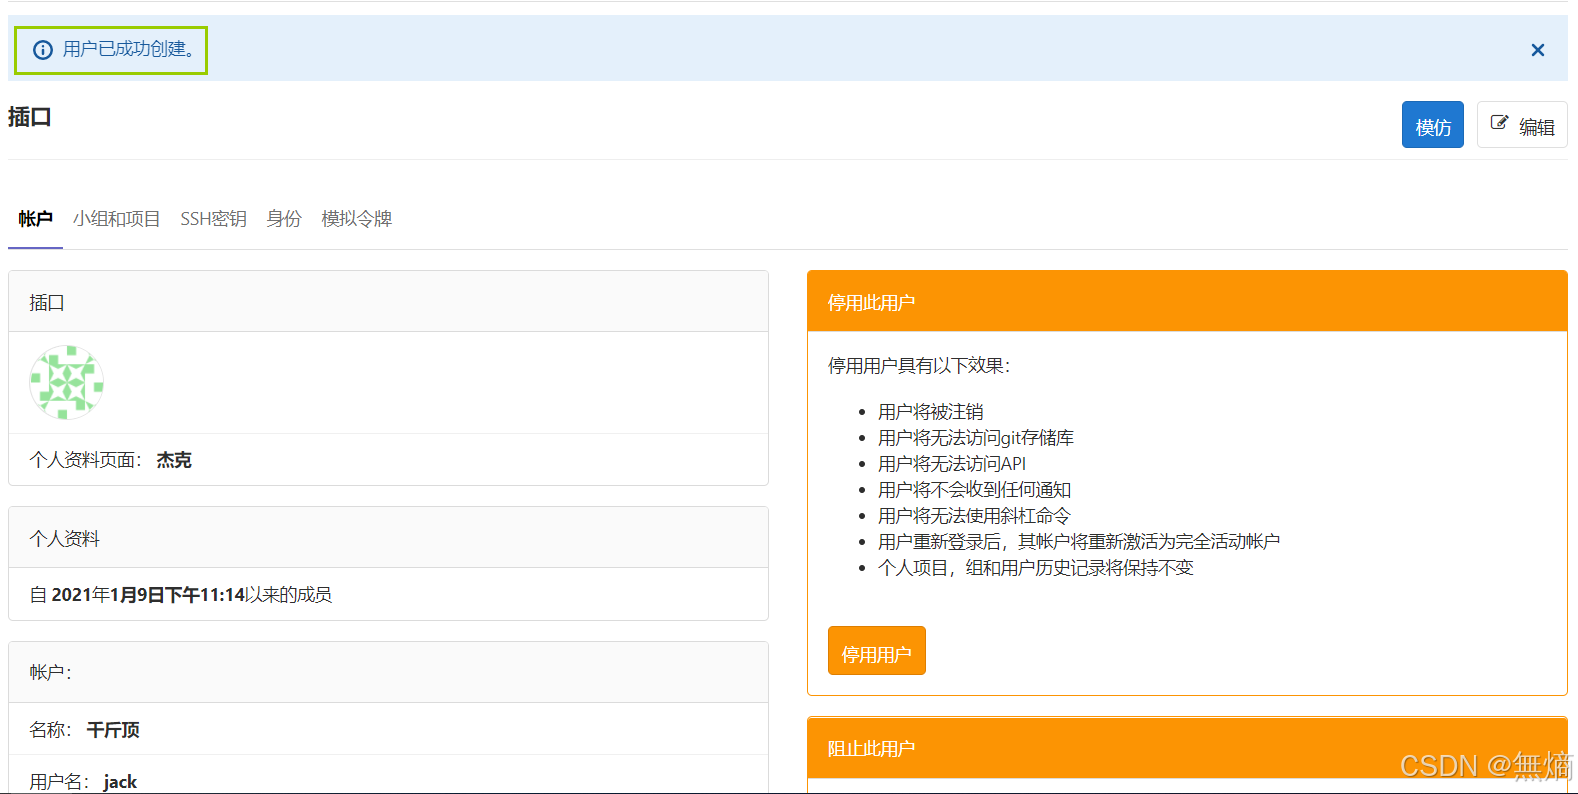
这时候创建成功,然后需要通过邮箱发送的地址链接自行进行设置密码。-登陆邮箱
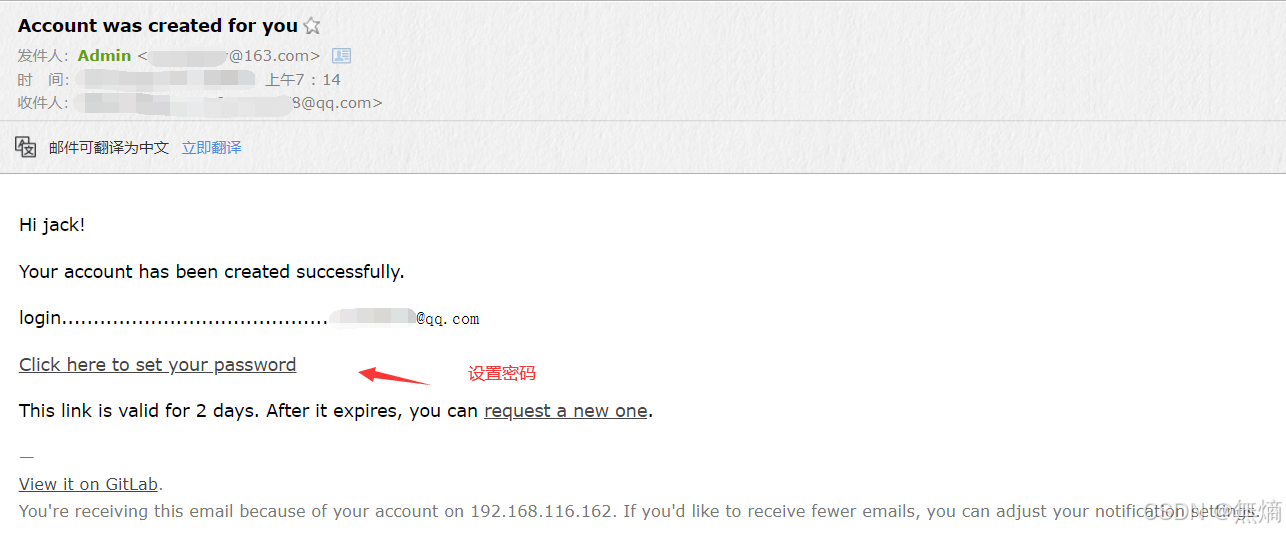
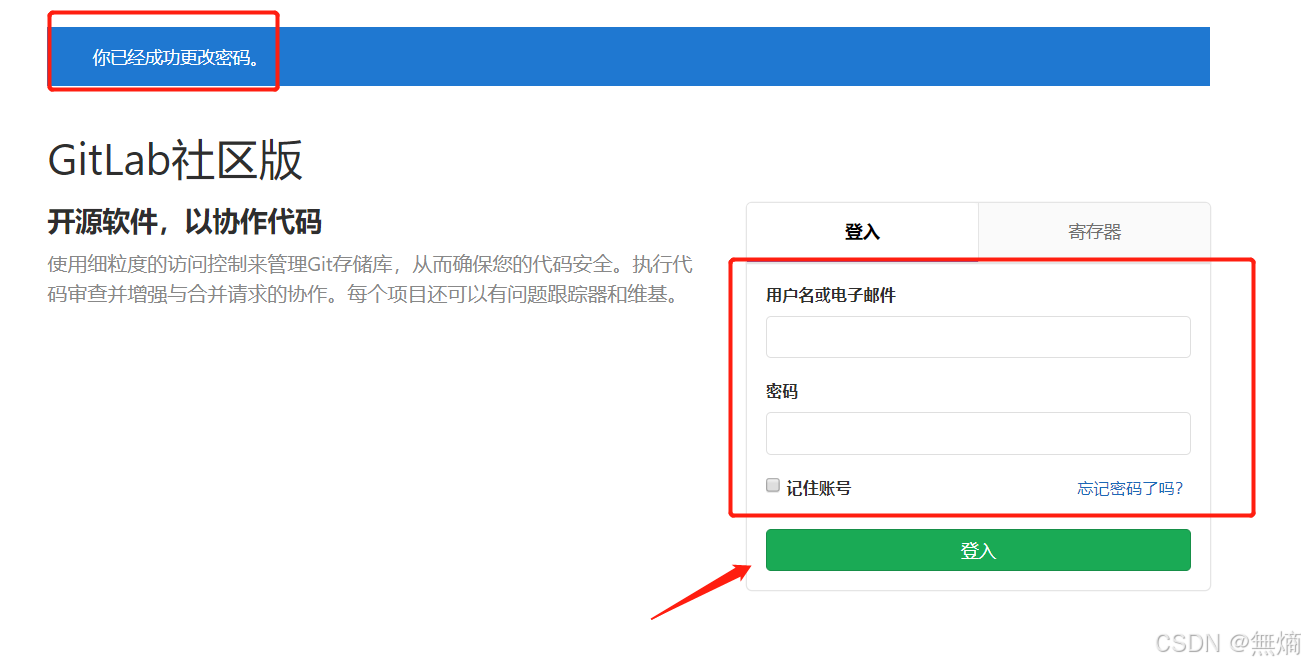
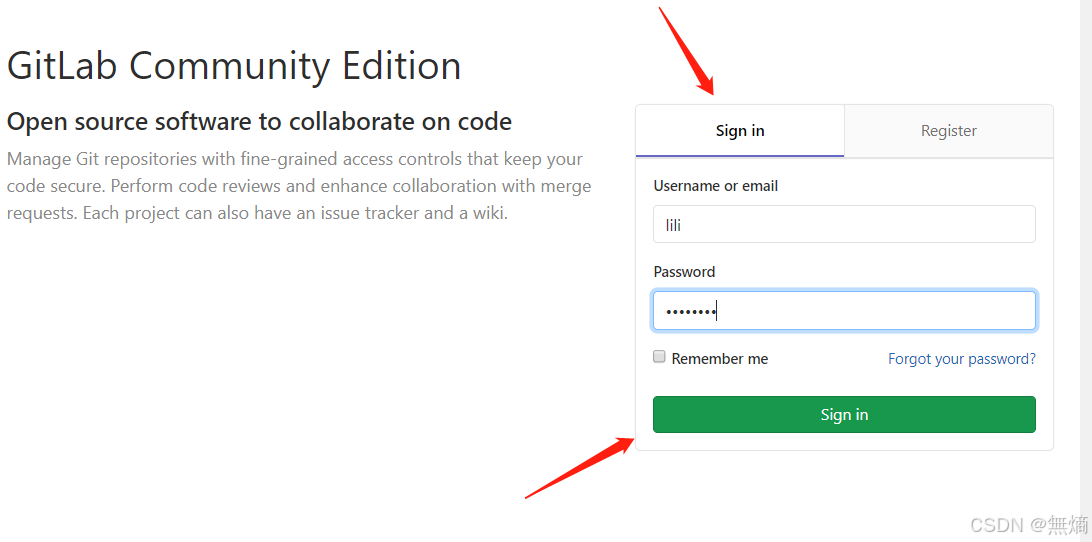
重置密码成功后登陆
使用gitlab
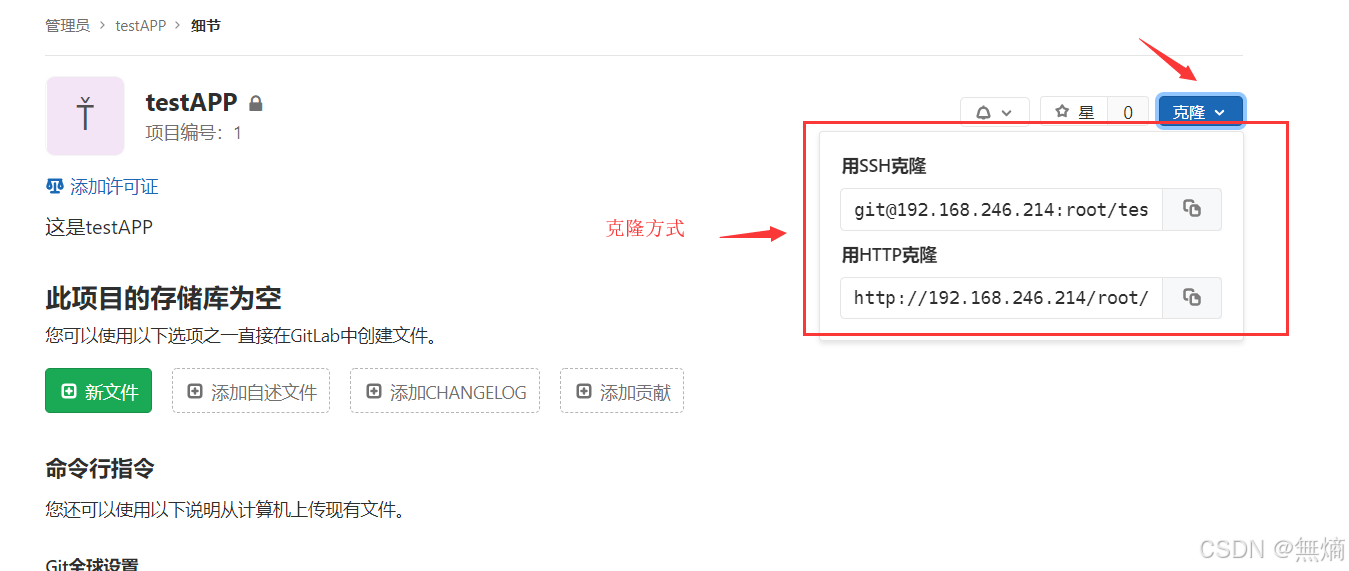
在服务器通过在git客户端
[root@client ~]# git clone git@192.168.246.214:root/testapp.git
Cloning into 'testapp'...
remote: Enumerating objects: 6, done.
remote: Counting objects: 100% (6/6), done.
remote: Compressing objects: 100% (4/4), done.
remote: Total 6 (delta 0), reused 0 (delta 0)
Receiving objects: 100% (6/6), done.
[root@client ~]# ls
testapp
[root@client ~]# cd testapp/
[root@client testapp]# ls
test.txt  同步时间.txt
[root@client testapp]#
注意:如果克隆不下来可以重新使用命令生成私钥
[root@client ~]# ssh-keygen -t rsa #然后将公钥添加到gitlab中。
使用http的
[root@client ~]# rm -rf testgit/
[root@client ~]# git clone http://192.168.246.214/root/testapp.git
Cloning into 'testapp'...
Username for 'http://192.168.246.214': root
Password for 'http://root@192.168.246.214':12345678 #为自己设置的密码
remote: Enumerating objects: 6, done.
remote: Counting objects: 100% (6/6), done.
remote: Compressing objects: 100% (4/4), done.
remote: Total 6 (delta 0), reused 0 (delta 0)
Unpacking objects: 100% (6/6), done.
[root@client ~]# ls
testapp提交到远程gitlab仓库
[root@client ~]# cd testapp/
[root@client testapp]# vi update.txt
1000phone
[root@client testapp]# git add .
[root@client testapp]# git commit -m 'updata-test'
[root@client testapp]# git push origin master
Counting objects: 4, done.
Compressing objects: 100% (2/2), done.
Writing objects: 100% (3/3), 266 bytes | 0 bytes/s, done.
Total 3 (delta 1), reused 0 (delta 0)
To git@192.168.153.156:root/testapp.git
4f35d4b..a0067ea master -> masterGitlab 备份与恢复
1、查看系统版本和软件版本
[root@git-server ~]# cat /etc/redhat-release
CentOS Linux release 7.4.1708 (Core)
# 查看gitlab的版本
[root@git-server ~]# cat /opt/gitlab/embedded/service/gitlab-rails/VERSION
13.1.12、数据备份
打开/etc/gitlab/gitlab.rb配置文件,查看一个和备份相关的配置项:
vim /etc/gitlab/gitlab.rb
gitlab_rails['backup_path'] = "/var/opt/gitlab/backups" #备份的路径
gitlab_rails['backup_archive_permissions'] = 0644       #备份文件的默认权限
gitlab_rails['backup_keep_time'] = 604800               #保留时长,秒为单位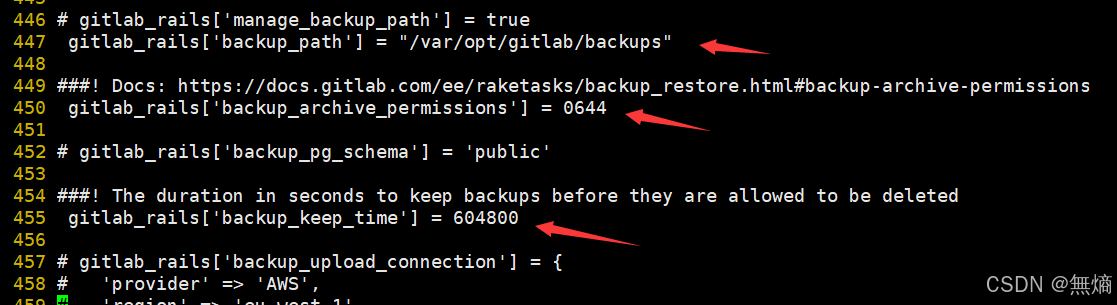
该项定义了默认备份出文件的路径,可以通过修改该配置,并执行 gitlab-ctl reconfigure 或者 gitlab-ctl restart 重启服务生效。
[root@git-server ~]# gitlab-ctl reconfigure
或者
[root@git-server ~]# gitlab-ctl  restart
执行备份命令进行备份
/opt/gitlab/bin/gitlab-rake gitlab:backup:create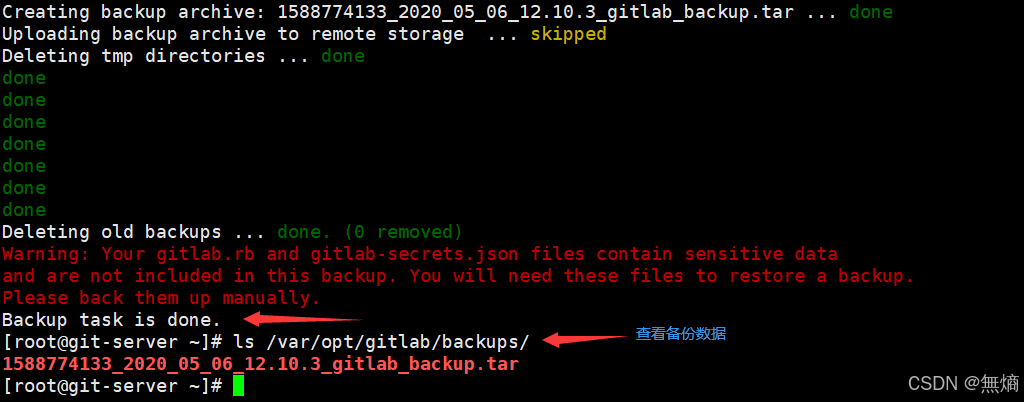
也可以添加到 crontab 中定时执行:
0 2 * * * /opt/gitlab/bin/gitlab-rake gitlab:backup:create 备份完成,会在备份目录中生成一个当天日期的tar包。
[root@git-server ~]# ls /var/opt/gitlab/backups/
1588774133_2020_05_06_12.10.3_gitlab_backup.tar
3、数据恢复
特别注意:
- 备份目录和gitlab.rb中定义的备份目录必须一致
- GitLab的版本和备份文件中的版本必须一致,否则还原时会报错。
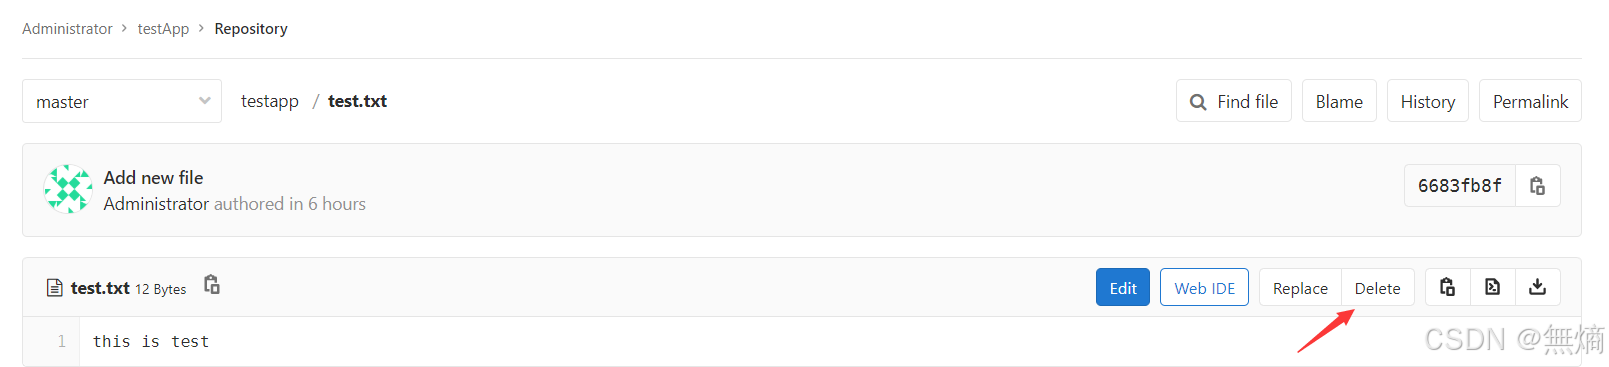
在恢复之前,可以删除一个文件,以便查看效果
执行恢复操作:
[root@git-server ~]# cd /var/opt/gitlab/backups/
[root@git-server backups]# gitlab-rake gitlab:backup:restore BACKUP=1588774133_2020_05_06_12.10.3
注意恢复文件的名称
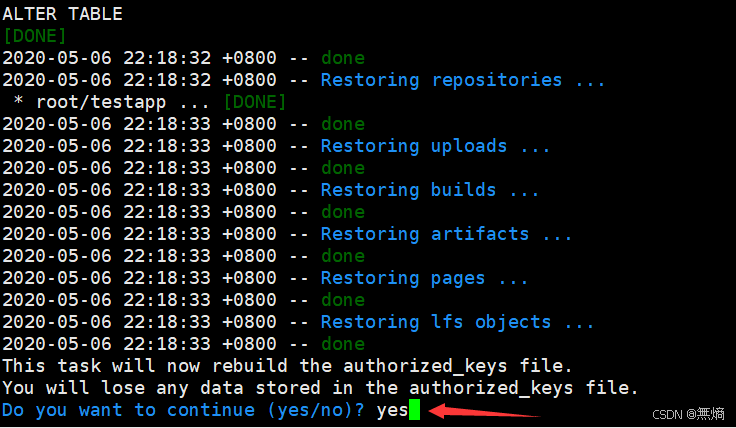

恢复完成后,或者重启服务,再打开浏览器进行访问,发现数据和之前的一致:
[root@git-server backups]# gitlab-ctl restart
注意:通过备份文件恢复gitlab必须保证两台主机的gitlab版本一致,否则会提示版本不匹配
Github 远程仓库
github是一个代码托管平台
1、github.com 注册账户---wxx0417
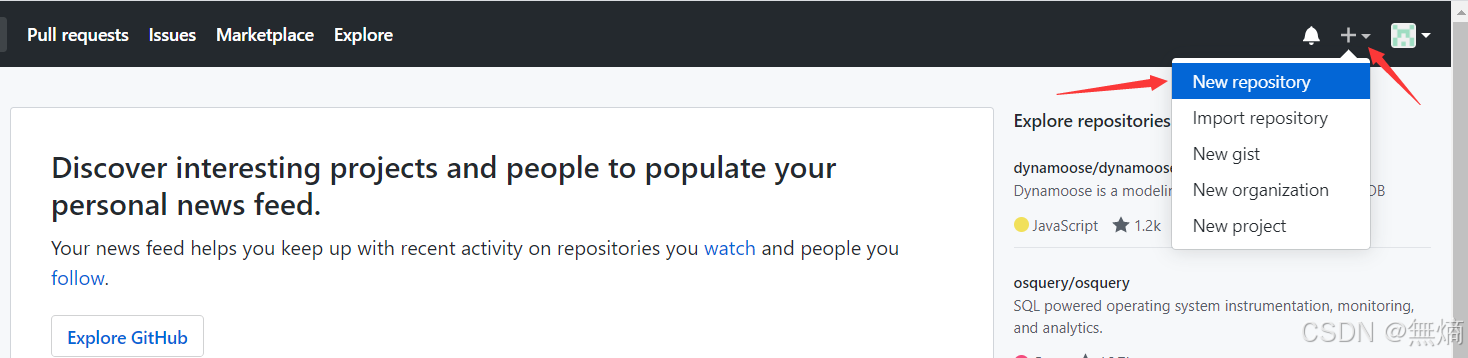
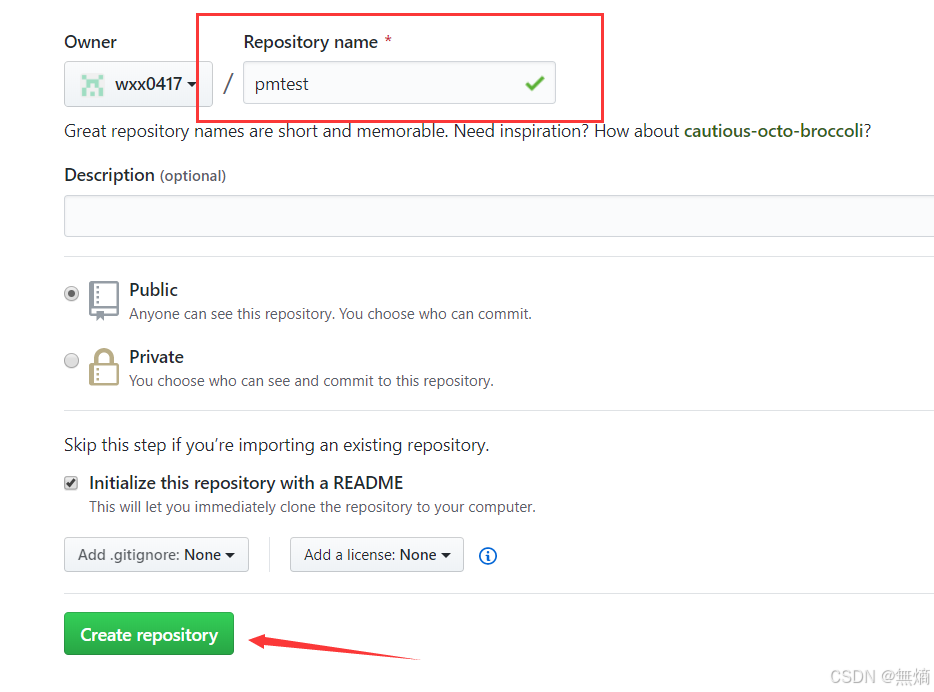
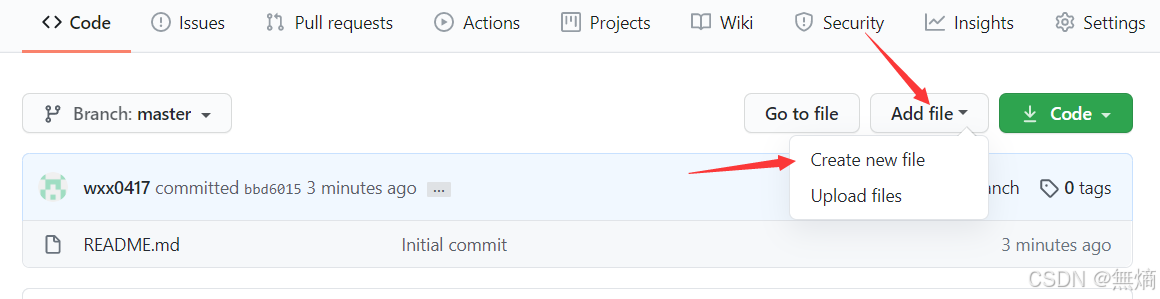
2、在github上创建仓库
3、生成本地ssh key
[root@localhost ~]# ssh-keygen -t rsa -C 'meteor@163.com'
# 邮箱要与github上注册的相同
Generating public/private rsa key pair.
Enter file in which to save the key (/root/.ssh/id_rsa):
Enter passphrase (empty for no passphrase):
Enter same passphrase again:
Your identification has been saved in /root/.ssh/id_rsa.
Your public key has been saved in /root/.ssh/id_rsa.pub.
The key fingerprint is:
SHA256:RiE6UR1BtzV5avyE2uz6TNPsVHa2D2eHprghrJEkd/g meteor@163.com
The key's randomart image is:
+---[RSA 2048]----+
| ..oo=o. o. |
| o ..o o... |
| o . .. + |
| . o = . |
| . + S = o =|
| + * . oo.=o|
| o E ..o B.+|
| o . =.* +o|
| . +++ . .|
+----[SHA256]-----+
[root@localhost ~]# cat .ssh/id_rsa.pub
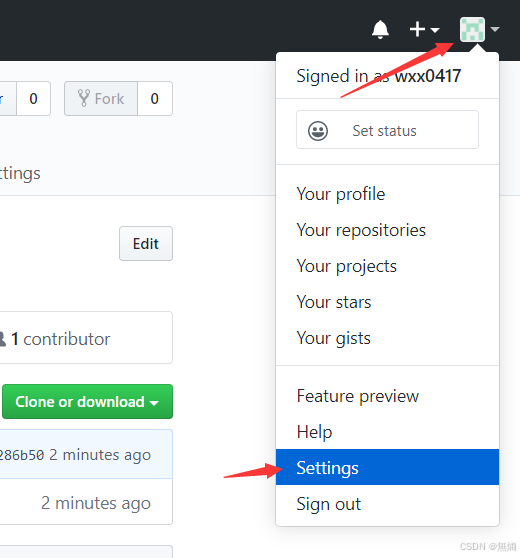
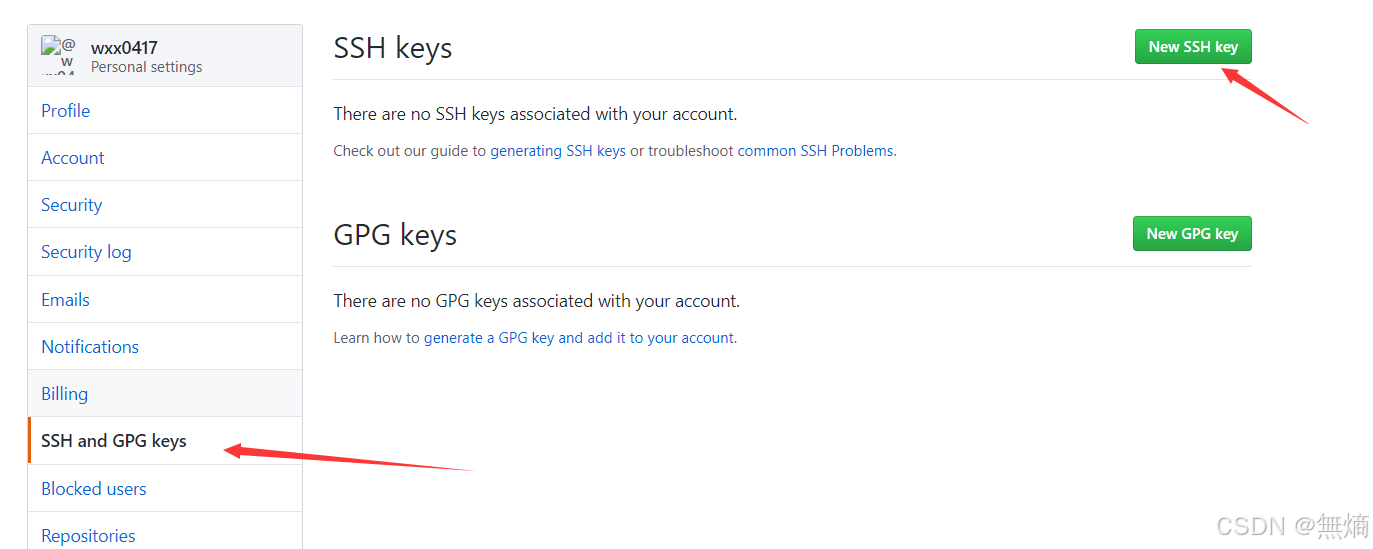
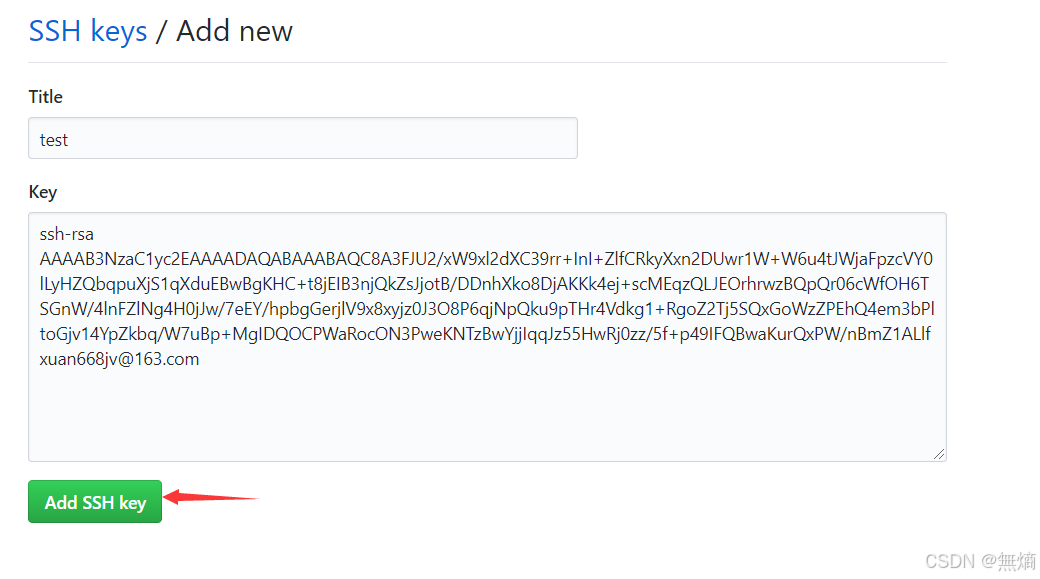
ssh-rsa AAAAB3NzaC1yc2EAAAADAQABAAABAQDVThfq4brrlsPGtAknVB0TLPx+7Dd3qlxTbSIrUOsGC5Y8JuNqVTlIntZB4oNj8cSQrWvec9CKm0a8o7WwaJIiqpxurz+YpQHP2KbapftKIxsX4hPf/z+p0El1U6arQa35/xmNsq+cJLH/bDdRG+EMDhuCBmjVZOlLj/hEdeIT6s56AnnCkaWoF+sq58KCF7Tk54jRbs/YiyE4SN7FuA70r+07sA/uj0+lmuk4E190KtQUELhjX/E9stivlqiRhxnKvVUqXDywsjfM8Rtvbi4Fg9R8Wt9fpd4QwnWksYUoR5qZJFYXO4hSZrUnSMruPK14xXjDJcFDcP2eHIzKgLD1 meteor@163.com4、复制以上的公钥,在github 中添加ssh key
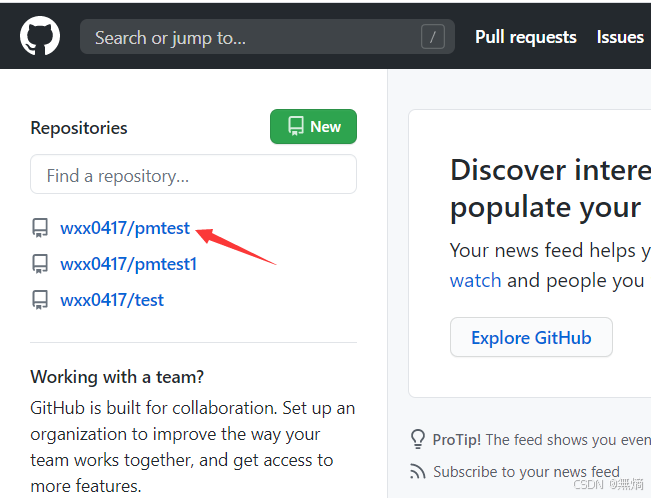
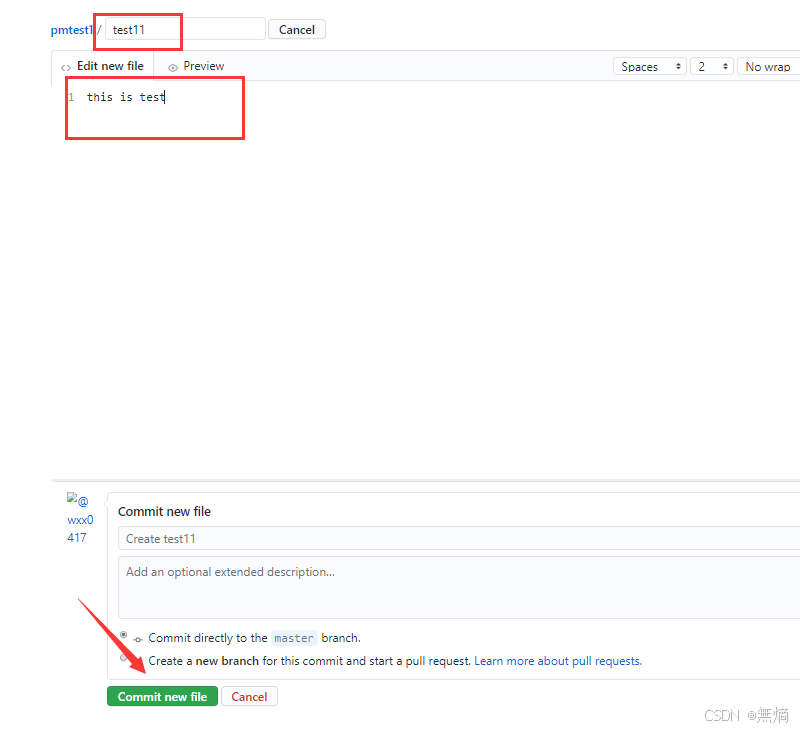
创建好库之后,在库里创建几个文件,方便测试
5、测试:拉取github仓库
[root@client ~]# git clone git@github.com:wxx0417/pmtest.git
Cloning into 'pmtest'...
The authenticity of host 'github.com (52.74.223.119)' can't be established.
RSA key fingerprint is SHA256:nThbg6kXUpJWGl7E1IGOCspRomTxdCARLviKw6E5SY8.
RSA key fingerprint is MD5:16:27:ac:a5:76:28:2d:36:63:1b:56:4d:eb:df:a6:48.
Are you sure you want to continue connecting (yes/no)? yes
Warning: Permanently added 'github.com,52.74.223.119' (RSA) to the list of known hosts.
remote: Enumerating objects: 6, done.
remote: Counting objects: 100% (6/6), done.
remote: Compressing objects: 100% (3/3), done.
Receiving objects: 100% (6/6), done.
remote: Total 6 (delta 0), reused 0 (delta 0), pack-reused 0
[root@client ~]# ls
anaconda-ks.cfg  pmtest
6、并推送至github仓库
[root@client ~]# cd pmtest/
[root@client pmtest]# ls
README.md testapp
[root@client pmtest]# cat testapp
this is
[root@client pmtest]# vi qf.txt
1000phone
[root@client pmtest]# git add .
[root@client pmtest]# git commit -m 'test2'
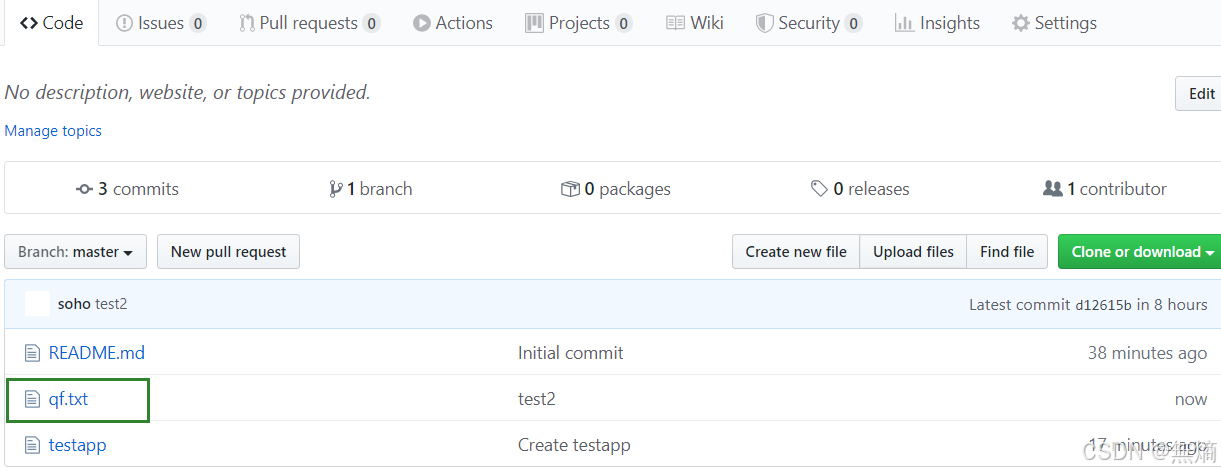
[master d12615b] test2
1 file changed, 1 insertion(+)
create mode 100644 qf.txt
[root@client pmtest]# git push origin HEAD:master
Counting objects: 4, done.
Compressing objects: 100% (2/2), done.
Writing objects: 100% (3/3), 297 bytes | 0 bytes/s, done.
Total 3 (delta 0), reused 0 (delta 0)
To git@github.com:wxx0417/pmtest.git
d3dcc6f..d12615b master -> master去github界面查看


 451
451

 被折叠的 条评论
为什么被折叠?
被折叠的 条评论
为什么被折叠?
 到【灌水乐园】发言


