


部署过程
部署2个实例的集群,1主1从
准备主节点 k8s部署yml文件
PVC声明,这里我是用的是local-path-provisioner本地存储,可以根据自己的环境替换
---

#声明存储使用
#local存储 storage\_class:local-path-provisioner(rancher)
apiVersion: v1
kind: PersistentVolumeClaim
metadata:
  name: es-010-pvc
  namespace:  es
spec:
  accessModes:
    - ReadWriteOnce #本地存储只支持ReadWriteOnce
  storageClassName: local-path #local-path: 容器删除,存储local-path动态删除,local-path-retain: 容器删除,存储local-path保留,local-path|local-path-retain为手动安装的storageclass
  resources:
    requests:
      storage: 50Gi #声明最少要使用存储空间,不足则无法创建 Gi=G Mi=M
  #persistentVolumeReclaimPolicy: Delete # PVC 回收策略 Retain 保留| Delete 清除 | PV: local-path-provisioner(rancher) 不支持设置该属性
暴露ES集群service, service 我一般是采用固定ip,方便给nginx做upsream
---

# api service

apiVersion: v1
kind: Service
metadata:
  name: es-01-svc
  namespace:  es
  annotations:
    desc : elastic 01 集群 name-server的服务访问入口
spec:
  selector:
    es-cluster: es-01
  type: ClusterIP   #type: ClusterIP【默认】 | NodePort | LoadBalancer(外部负载均衡) | ExternalName (外部DNS解析)
  clusterIP: 10.106.220.1
  ports:
    - port: 9200
      targetPort: 9200
      name: httpport
    - port: 9300
      targetPort: 9300
      name: transport
      #nodePort: 32000

---
StatefulSet配置(ES肯定是有状态的)
要点说明
- 只能单副本 replicas: 1
- 需要指定以root来启动pod并开启特权(因为需要优化内核参数)
- 挂载data跟logs目录,使用的PVC
- 挂载证书目录es-010-cert-file,使用的hostPath,配置文件中可以用绝对目录也可以用相对目录,相对目录的话当前位置是在 ${ES_HOME}/config/ 下,所以我才会把证书目录挂载到config子目录中;
- 通过command来同步配置文件,并重设目录用户,添加hosts(可选),再以elasticsearch用户启动服务
- elasticsearch.yml配置要点说明
command中增加 “sleep 3600;” 生成完证书删除掉,不要注释,要删除。
discovery.seed_hosts: [“10.244.220.10:9300”,“10.244.220.11:9300”]
这行配置是用于发现集群中的节点,首次启动时注释掉,等后面需要初始化集群的时候再打开
首次启动单点使用
cluster.initial_master_nodes: [“10.244.220.10”],启动成功后,进行证书初始化
后续集群启动开启 discovery.seed_hosts 进行集群启动,由于之前单点启动成功已经有master了,故此是可以成功启动集群的
cluster.name: "es-01"同一个集群的节点要保持一致
- 这里我还初始化了一下pod的hosts,可以让本地通过域名来执行脚本或访问api而不用写死ip
apiVersion: apps/v1
kind: StatefulSet # Deployment | StatefulSet | DaemonSet | JobSet
metadata:
  name:   es-010
  namespace:  es
spec:
  replicas: 1  #运行副本数
  selector:
    matchLabels:
      k8s-app:  es-010 #与下方template节点中的 labels 保持一致
  revisionHistoryLimit: 10 #设定保留最近的几个revision 用于回滚,默认10
  #serviceName: "nginx-headless" #设置绑定的service,以支持内部dns访问 <pod-name>.<svc-name>.<namespace>.svc.cluster.local
  updateStrategy: #更新策略 [Statefulset]
  #strategy: #更新策略 [Deployment]
    type: RollingUpdate # RollingUpdate (滚动更新) | OnDelete (删除时更新)
    rollingUpdate:
      #maxSurge: 1 #[Deployment]支持-升级过程中可以启动超过原先设置的POD数量的上限:数量 或 百分比 1 | 20%
      #maxUnavailable: 1 #[Deployment]支持-升级过程中无法提供服务的POD数量的上限:数量 或 百分比 1 | 20%,最好与maxSurge保持一致,这样能确保更新过程中的服务能力不会下降
      partition: 0 #[Statefulset] 灰度发布控制器,每次只更新部署的pod序号 >= partition的pod,如果有5个pod[0-4],0=更新所有,4=更新1pod,3=更新2pod
  template:
    metadata:
      labels:
         k8s-app: es-010
         es-cluster: es-01
      annotations:
        #elasticearch 安全证书要求,需要固定节点ip
        "cni.projectcalico.org/ipAddrs": "[\"10.244.220.10\"]"  #pod绑定固定ip,依赖于calico ipam插件,必须使用calico 3.24.1以上的版本才可以
    spec:
      restartPolicy: Always
      #使用指定用户运行,当前pod下所有容器都生效
      securityContext:
        runAsUser: 0  #以root运行
      containers:
        - name: es-010
          image: docker.elastic.co/elasticsearch/elasticsearch:8.12.0
          imagePullPolicy: IfNotPresent # IfNotPresent | Always | Never
          securityContext: ##开启特权,因为要调整系统内核
            privileged: true
          resources:
            requests:
              memory: "4Gi" #Gi=G Mi=M 只支持整数
              cpu: "2000m" #1000m=1cpu (cpu物理线程)
            limits:
              memory: "6Gi" #Gi=G Mi=M 只支持整数
              cpu: "3000m"  #1000m=1cpu (cpu物理线程)
          #securityContext: ###添加参数启用容器root权限
          # privileged: true
          ports:
          - containerPort: 9200
            protocol: TCP
          - containerPort: 9300
            protocol: TCP
          command: ["/bin/sh","-c"]
          args: #可以设置多行命令,不过启动后初始化还是推荐使用postStart钩子函数来执行,不能有#注释符
           #将挂载的配置文件同步到默认的ES配置文件中,因为elastic的安全机制,软连接无法生效
           #将${POD\_NAME}'.es.ndcto.com添加到本机hosts中,以便于与http.p12中的授信主机名适配
          - |
            cat /config/elasticsearch.yml > /usr/share/elasticsearch/config/elasticsearch.yml;
            cat /config/jvm.options > /usr/share/elasticsearch/config/jvm.options;
            chown -R elasticsearch:elasticsearch /usr/share/elasticsearch;
            chown -R elasticsearch:elasticsearch /elasticsearch;

            swapoff -a
            echo 'elasticsearch - nproc 4096' >> /etc/security/limits.conf;
            echo 'elasticsearch - nofile 65535' >> /etc/security/limits.conf;
            echo 'elasticsearch soft memlock unlimited' >> /etc/security/limits.conf;
            echo 'elasticsearch hard memlock unlimited' >> /etc/security/limits.conf;

            echo 'vm.max\_map\_count=262144'  >> /tmp/sysctl.conf;
            echo 'vm.swappiness=0'          >> /tmp/sysctl.conf;
            echo 'vm.overcommit\_memory=1'   >> /tmp/sysctl.conf;
            echo 'vm.zone\_reclaim\_mode=0'   >> /tmp/sysctl.conf;
            echo 'net.ipv4.tcp\_retries2=5'  >> /tmp/sysctl.conf;

            sysctl -p;

            echo ''${POD\_IP}' es01.es.ndcto.com' >> /etc/hosts;
            echo ''${POD\_IP}' es-01-svc' >> /etc/hosts;

            su - elasticsearch -c "/usr/share/elasticsearch/bin/elasticsearch -p /elasticsearch/elasticsearch.pid";
            sleep 3600;

          env:   #环境变量配置
          - name: POD_NAME
            valueFrom:
              fieldRef:
                apiVersion: v1
                fieldPath: metadata.name
          - name: POD_IP
            valueFrom:
              fieldRef:
                fieldPath: status.podIP
          volumeMounts:
          - name: es-volume    #挂载部署目录
            mountPath: /elasticsearch/data
            subPathExpr: $(POD\_NAME)/elasticsearch/data
          - name: es-volume  #挂载部署目录
            mountPath: /elasticsearch/logs
            subPathExpr: $(POD\_NAME)/elasticsearch/logs
          - name: es-volume  #挂载部署目录
            mountPath: /usr/share/elasticsearch/.cache
            subPathExpr: $(POD\_NAME)/elasticsearch/cache
          - name: es-volume  #挂载部署目录
            mountPath: /usr/share/elasticsearch/plugins
            subPathExpr: $(POD\_NAME)/elasticsearch/plugins
          - name: es-010-cert-file  #挂载存储目录
            mountPath: /usr/share/elasticsearch/config/local-certs
          - name: es-010-config  #挂载配置文件
            mountPath: /config
          - name: host-time  #挂载本地时区
            mountPath: /etc/localtime
            readOnly: true
      volumes:
      - name: es-volume  #使用pvc
        persistentVolumeClaim:
          claimName: es-010-pvc
      - name: es-010-config  #使用pvc
        configMap:    #使用configMap
          name:  es-010-config
          defaultMode: 420 #420-644 493-755
      - name: es-010-cert-file
        hostPath: #挂载主机的目录
          path: /data/deploy/k8s/elasticsearch/certs
          type: ""
      - name: host-time
        hostPath: #挂载本地时区
          path: /etc/localtime
          type: ""

---
configmap配置
要点
---

apiVersion: v1
kind: ConfigMap #配置信息
metadata:
  name: es-010-config #es-010配置
  namespace:  es
data:
  elasticsearch.yml: |
    #首次启动会失败,需要重新生成证书并复制到所有节点上(xpack.security配置中的证书位置)
    cluster.name: "es-01"
    node:
      name: "es-010"
      #指定节点角色
      #roles: [ data, master]

    # 为HTTP 和传输流量设置此节点的地址。 elastic将监听该地址的所有请求,0.0.0.0 代表监听本机所有网络地址的请求,指定地址则仅监听该地址的请求(接受IP、主机名或特殊值)。
    network.host: 10.244.220.10

    # 默认不开启
    # 开启是为了能够在内网与其他节点通讯,使得新节点可以加入集群,0.0.0.0 代表监听本机所有网络地址的请求,指定地址则仅监听该地址的请求(接受IP、主机名或特殊值)。
    transport.host: 10.244.220.10

    # 用于节点发现
    # 首次启动时不开启
    #discovery.seed\_hosts: ["10.244.220.10:9300","10.244.220.11:9300"]

    # 初始主节点配置,集群形成后,从每个节点的配置中删除此设置。
    # 单点首次启动
    cluster.initial_master_nodes: ["10.244.220.10"]

    # 初始集群配置至少3台,集群形成后,从每个节点的配置中删除此设置,需要按顺序启动
    #cluster.initial\_master\_nodes: ["10.244.220.10","10.244.220.11","10.244.220.12"]

    #配置存储路径
    path.data:  /elasticsearch/data
    path.logs:  /elasticsearch/logs

    # 开启es跨域与head插件
    http.cors.allow-origin: "\*"
    http.cors.enabled: true
    http.cors.allow-headers: Authorization
    http.max_content_length: 200mb

    #linux在使用内存锁时仍会交换堆外内存。要防止堆外内存交换,请禁用所有交换文件。
    bootstrap.memory_lock: true

    #限制高成本查询
    search.default_search_timeout: "50s"
    #必须set为true,否则kibana报错
    search.allow_expensive_queries: true

    #禁用通配符模糊匹配删除索引
    action.destructive_requires_name: true

    # 设置自动创建索引(可选)
    # 一些商业功能会自动在 Elasticsearch 中创建索引。 默认情况下,Elasticsearch 配置为允许自动创建索引,不需要额外的步骤
    #action.auto\_create\_index: .monitoring\*,.watches,.triggered\_watches,.watcher-history\*,.ml\*

    #----------------------- BEGIN SECURITY AUTO CONFIGURATION -----------------------
    #
    # The following settings, TLS certificates, and keys have been automatically
    # generated to configure Elasticsearch security features on 07-02-2024 12:57:00
    #
    # --------------------------------------------------------------------------------

    # Enable security features


    xpack.security:
      enabled: true
      autoconfiguration:
        enabled: true

    xpack.security.enrollment.enabled: true

    # Enable encryption for HTTP API client connections, such as Kibana, Logstash, and Agents
    xpack.security.http.ssl:
      enabled: true
      # pem证书配置方式
      #key: local-certs/elastic-http.key
      #certificate: local-certs/elastic-http.crt
      #certificate\_authorities: [ "local-certs/elastic-http.crt" ]
      keystore.path: local-certs/http.p12

    # Enable encryption and mutual authentication between cluster nodes
    xpack.security.transport.ssl:
      enabled: true
      verification_mode: certificate
      # pem证书配置方式
      #key: local-certs/ca.key
      #certificate: local-certs/ca.crt
      #certificate\_authorities: [ "local-certs/ca.crt" ]

      # pks12证书配置方式
      keystore.path: local-certs/elastic-certificates.p12
      truststore.path: local-certs/elastic-certificates.p12


    #----------------------- END SECURITY AUTO CONFIGURATION -------------------------

  jvm.options: |
    -Xms4g
    -Xmx4g
    -XX:+UseG1GC

    ## JVM temporary directory
    -Djava.io.tmpdir=${ES\_TMPDIR}

    # Leverages accelerated vector hardware instructions; removing this may
    # result in less optimal vector performance
    20-:--add-modules=jdk.incubator.vector

    # REMOVE once bumped to a JDK greater than 21.0.1, https://github.com/elastic/elasticsearch/issues/103004
    19-21:-XX:CompileCommand=exclude,org.apache.lucene.util.MSBRadixSorter::computeCommonPrefixLengthAndBuildHistogram
    19-21:-XX:CompileCommand=exclude,org.apache.lucene.util.RadixSelector::computeCommonPrefixLengthAndBuildHistogram

    ## heap dumps

    # generate a heap dump when an allocation from the Java heap fails; heap dumps
    # are created in the working directory of the JVM unless an alternative path is
    # specified
    -XX:+HeapDumpOnOutOfMemoryError

    # exit right after heap dump on out of memory error
    -XX:+ExitOnOutOfMemoryError

    # specify an alternative path for heap dumps; ensure the directory exists and
    # has sufficient space
    -XX:HeapDumpPath=/elasticsearch/data

    # specify an alternative path for JVM fatal error logs
    -XX:ErrorFile=/elasticsearch/logs/hs_err_pid%p.log

    ## GC logging
    -Xlog:gc*,gc+age=trace,safepoint:file=/elasticsearch/logs/gc.log:utctime,level,pid,tags:filecount=32,filesize=64m
证书生成
通过 kubectl apply -f 部署文件,可以部署ES-010 主节点以及 集群的service访问入口,ES服务会启动失败,不过由于slepp 3600; 容器会保持在running 状态,我们可以通过kubecl exec 进去容器内去生成证书。
ES使用的证书一共有4套
1.CA证书,用于生成其他证书
2.transport证书,用于ES节点之间通讯
3.http证书,用于client访问,包括ES自带的/bin下的脚本文件也会依赖这个证书调用当前ES的API(跟K8S kubedctl kubeadm 类似)
4.kibana访问ES集群的证书
当前可以简单粗暴的在配置中把所有ssl校验都设置为false来忽略这些安全校验,不过这不是我的初衷
生成CA证书
${ES\_HOME}/bin/elasticsearch-certutil ca
这里可以选择添加证书密码,如果添加密码的话,后续使用CA证书去生成其他证书都需要先校验密码
默认会在${ES_HOME}目录下生成 elastic-stack-ca.p12 这个证书文件,在实际操作中根据自己的实际情况进行调整
使用CA证书生成 transport证书
${ES\_HOME}/bin/elasticsearch-certutil cert --ca ${ES\_HOME}/elastic-stack-ca.p12
最终会生成1个elastic-certificates.p12的证书文件
使用CA证书生成http证书
/usr/share/elasticsearch/bin/elasticsearch-certutil http
执行后需要按提示输入一些选项
# 需要设置一些选项
 创建CSR: 否 {选是的话,需要使用自己的CA根证书}
 使用已创建CA:是
 输入CA文件路径:/elastic-stack-ca.p12   ${ES\_HOME}/elastic-stack-ca.p12
 CA文件密码:创建CA证书时没有设置就回车,设置了就填写
 设置证书过期时间:可以按年月日计算,例如10y为10年,10d为10天,10m为10个月。
 是否为每个节点创建独立的证书:是  (使用同一个证书。)
 录入需要使用证书的主机名   即可以通过https访问的主机名或域名,域名可以设置通配符如:*.es.example.com |  这里我用的是 es-01-svc.es 也就是{ES集群serviceapi的name}.{service所在的命名空间},同个集群内都可以使用,k8s集群内部访问都是通过service的域名来做请求的,可以多个,每个换行。
 录入需要使用证书的IP       需要设置证书适用集群节点的ip,否则后期增加节点会不可用,还得重新生成证书 : 输入ES集群节点将要绑定的ip地址,可以多个,每个换行
 设置证书密码:建议为空,省点麻烦,这么多证书认证已经够够的了
以上完成后将在${elasticsearch_home}下生成一个zip压缩文件。 解压文件,生成一个文件夹,里面包含两个文件夹:
elasticsearch文件夹包含http.p12及elasticsearch.yml的配置参考;
kibana文件夹包含elasticsearch-ca.pem及kibana.yml的配置参考;(注意:kibana仅有这个证书是不够的)
用java/bin/keytool http.p12证书中注入CA证书
这步很重要,否则生成的http.p12根本用不了,会提示异常,也是最让我想吐槽的地方,官方文档的安装步骤里根本没提,只是因为问题反馈有人说,才找到解答说这步是在哪哪哪,这也是我觉得ES官方文档很碎片化的原因,要说没有的吧,在某个地方也说了,但是从安装说明那开始走,找不到!!
ERROR: Unable to create an enrollment token. Elasticsearch node HTTP layer SSL configuration Keystore doesn't contain any PrivateKey entries where the associated certificate is a CA certificate, with exit code 73
# 这里需要使用java/bin/keytool 给http.p12证书中注入CA证书
# 如果http.p12证书没有设置密码,只需要在命令中添加 -storepass "" 参数

keytool -importkeystore -destkeystore <filename-http-PKCS12> -srckeystore <filename-PKCS12-contains-CA-Cert.p12> -srcstoretype PKCS12
$ES\_HOME/jdk/bin/keytool -importkeystore -destkeystore ./http.p12 -srckeystore ./elastic-stack-ca.p12  -srcstoretype PKCS12 -storepass ""
到这里ES需要的3个证书(配置里只配2个)就齐了
CA:elastic-stack-ca.p12
trasport: elastic-certificates.p12 (需要在配置文件中指定位置)
http: http.p12 (需要在配置文件中指定位置)
这时候需要配置好证书把集群启动起来,在我这里的配置中,我把 elastic-stack-ca.p12、http.p12、elastic-certificates.p12 都通过hostpath 挂载到了所有pod的${ES_HOME}/config/local-certs/中(要确保pod调度到的所有Node的该存储目录中都有这3个文件),实际配置中只需要 http.p12、elastic-certificates.p12 为了以后便于维护我还是都放进去了。
这时候需要调整一下部署文件,以我的集群1主1从举例
- 所有节点的配置中开启节点发现,并把主从节点的ip端口都填进去,transport端口默认就是9300,也可以不指明
discovery.seed_hosts: ["10.244.220.10:9300","10.244.220.11:9300"]
- 注释单节点初始化
 # 首次启动单点
#cluster.initial\_master\_nodes: ["10.244.220.10"]
- 删除 commond中的 sleep 3600;
其他节点配置
从节点1的k8s部署配置如下,有更多节点2,3,4,5 可以参考复制该配置,并调整name,ip属性值
声明单独的存储PVC
---

#声明存储使用
#local存储 storage\_class:local-path-provisioner(rancher)
apiVersion: v1
kind: PersistentVolumeClaim
metadata:
  name: es-011-pvc
  namespace:  es
spec:
  accessModes:
    - ReadWriteOnce #本地存储只支持ReadWriteOnce
  storageClassName: local-path #local-path: 容器删除,存储local-path动态删除,local-path-retain: 容器删除,存储local-path保留,local-path|local-path-retain为手动安装的storageclass
  resources:
    requests:
      storage: 50Gi #声明最少要使用存储空间,不足则无法创建 Gi=G Mi=M
  #persistentVolumeReclaimPolicy: Delete # PVC 回收策略 Retain 保留| Delete 清除 | PV: local-path-provisioner(rancher) 不支持设置该属性
pod部署说明
- es-cluster: es-01 不要动这是为了让集群service能匹配到集群内的所有pod,集群内节点需要保持一致
---


apiVersion: apps/v1
kind: StatefulSet # Deployment | StatefulSet | DaemonSet | JobSet
metadata:
  name:   es-011
  namespace:  es
spec:
  replicas: 1  #运行副本数
  selector:
    matchLabels:
      k8s-app:  es-011 #与下方template节点中的 labels 保持一致
  revisionHistoryLimit: 10 #设定保留最近的几个revision 用于回滚,默认10
  #serviceName: "nginx-headless" #设置绑定的service,以支持内部dns访问 <pod-name>.<svc-name>.<namespace>.svc.cluster.local
  updateStrategy: #更新策略 [Statefulset]
  #strategy: #更新策略 [Deployment]
    type: RollingUpdate # RollingUpdate (滚动更新) | OnDelete (删除时更新)
    rollingUpdate:
      #maxSurge: 1 #[Deployment]支持-升级过程中可以启动超过原先设置的POD数量的上限:数量 或 百分比 1 | 20%
      #maxUnavailable: 1 #[Deployment]支持-升级过程中无法提供服务的POD数量的上限:数量 或 百分比 1 | 20%,最好与maxSurge保持一致,这样能确保更新过程中的服务能力不会下降
      partition: 0 #[Statefulset] 灰度发布控制器,每次只更新部署的pod序号 >= partition的pod,如果有5个pod[0-4],0=更新所有,4=更新1pod,3=更新2pod
  template:
    metadata:
      labels:
         k8s-app: es-011
         es-cluster: es-01
      annotations:
        #elasticearch 安全证书要求,需要固定节点ip
        "cni.projectcalico.org/ipAddrs": "[\"10.244.220.11\"]"  #pod绑定固定ip,依赖于calico ipam插件,必须使用calico 3.24.1以上的版本才可以
    spec:
      restartPolicy: Always
      #使用指定用户运行,当前pod下所有容器都生效
      securityContext:
        runAsUser: 0  #以root运行
        #fsGroup: 1000 #指定存储卷挂载归属用户组
        #runAsUser: 1000 #以指定用户运行容器
      containers:
        - name: es-011
          image: docker.elastic.co/elasticsearch/elasticsearch:8.12.0
          imagePullPolicy: IfNotPresent # IfNotPresent | Always | Never
          securityContext: ##开启特权,因为要调整系统内核
            privileged: true
          resources:
            requests:
              memory: "4Gi" #Gi=G Mi=M 只支持整数
              cpu: "2000m" #1000m=1cpu (cpu物理线程)
            limits:
              memory: "6Gi" #Gi=G Mi=M 只支持整数
              cpu: "4000m"  #1000m=1cpu (cpu物理线程)
          #securityContext: ###添加参数启用容器root权限
          # privileged: true
          ports:
          - containerPort: 9200
            protocol: TCP
          - containerPort: 9300
            protocol: TCP
          command: ["/bin/sh","-c"]
          args: #可以设置多行命令,不过启动后初始化还是推荐使用postStart钩子函数来执行,不能有#注释符
           #将挂载的配置文件同步到默认的ES配置文件中,因为elastic的安全机制,软连接无法生效
           #将${POD\_NAME}'.es.ndcto.com添加到本机hosts中,以便于与http.p12中的授信主机名适配
          - |
            cat /config/elasticsearch.yml > /usr/share/elasticsearch/config/elasticsearch.yml;
            cat /config/jvm.options > /usr/share/elasticsearch/config/jvm.options;
            chown -R elasticsearch:elasticsearch /usr/share/elasticsearch;
            chown -R elasticsearch:elasticsearch /elasticsearch;

            swapoff -a
            echo 'elasticsearch - nproc 4096' >> /etc/security/limits.conf;
            echo 'elasticsearch - nofile 65535' >> /etc/security/limits.conf;
            echo 'elasticsearch soft memlock unlimited' >> /etc/security/limits.conf;
            echo 'elasticsearch hard memlock unlimited' >> /etc/security/limits.conf;

            echo 'vm.max\_map\_count=262144'  >> /tmp/sysctl.conf;
            echo 'vm.swappiness=0'          >> /tmp/sysctl.conf;
            echo 'vm.overcommit\_memory=1'   >> /tmp/sysctl.conf;
            echo 'vm.zone\_reclaim\_mode=0'   >> /tmp/sysctl.conf;
            echo 'net.ipv4.tcp\_retries2=5'  >> /tmp/sysctl.conf;

            sysctl -p;

            echo ''${POD\_IP}' es01.es.ndcto.com' >> /etc/hosts;
            echo ''${POD\_IP}' es-01-svc' >> /etc/hosts;
            su - elasticsearch -c "/usr/share/elasticsearch/bin/elasticsearch -p /elasticsearch/elasticsearch.pid";

          env:   #环境变量配置
          - name: POD_NAME
            valueFrom:
              fieldRef:
                apiVersion: v1
                fieldPath: metadata.name
          - name: POD_IP
            valueFrom:
              fieldRef:
                fieldPath: status.podIP
          volumeMounts:
          - name: es-volume    #挂载部署目录
            mountPath: /elasticsearch/data
            subPathExpr: $(POD\_NAME)/elasticsearch/data
          - name: es-volume  #挂载部署目录
            mountPath: /elasticsearch/logs
            subPathExpr: $(POD\_NAME)/elasticsearch/logs
          - name: es-volume  #挂载部署目录
            mountPath: /usr/share/elasticsearch/.cache
            subPathExpr: $(POD\_NAME)/elasticsearch/cache
          - name: es-volume  #挂载部署目录
            mountPath: /usr/share/elasticsearch/plugins
            subPathExpr: $(POD\_NAME)/elasticsearch/plugins
          - name: es-011-cert-file  #挂载存储目录
            mountPath: /usr/share/elasticsearch/config/local-certs
          - name: es-011-config  #挂载配置文件
            mountPath: /config
            #readOnly: true
          - name: host-time  #挂载本地时区
            mountPath: /etc/localtime
            readOnly: true
      volumes:
      - name: es-volume  #使用pvc
        persistentVolumeClaim:
          claimName:  es-011-pvc
      - name: es-011-config  #使用pvc
        configMap:    #使用configMap
          name:  es-011-config
          defaultMode: 420 #420-644 493-755
      - name: es-011-cert-file
        hostPath: #挂载主机的目录
          path: /data/deploy/k8s/elasticsearch/certs
          type: ""
      - name: host-time
        hostPath: #挂载本地时区
          path: /etc/localtime
          type: ""

---
挂载配置文件,各节点除了node.name跟network.host 都相同,当然也可以指定不同的node.role
apiVersion: v1
kind: ConfigMap #配置信息
metadata:
  name: es-011-config #es-010配置
  namespace:  es
data:
  elasticsearch.yml: |
    cluster.name: "es-01"
    node:
      name: "es-011"
      #指定节点角色
      #roles: [ data, master]
    # 为HTTP 和传输流量设置此节点的地址。 elastic将监听该地址的所有请求,0.0.0.0 代表监听本机所有网络地址的请求,指定地址则仅监听该地址的请求(接受IP、主机名或特殊值)。
    network.host: 10.244.220.11

    # 默认不开启
    # 开启是为了能够在内网与其他节点通讯,使得新节点可以加入集群,0.0.0.0 代表监听本机所有网络地址的请求,指定地址则仅监听该地址的请求(接受IP、主机名或特殊值)。
    transport.host: 10.244.220.11

    # 用于节点发现
    discovery.seed_hosts: ["10.244.220.10:9300","10.244.220.11:9300"]

    # 初始主节点配置,集群形成后,从每个节点的配置中删除此设置。
    # 单点首次启动
    #cluster.initial\_master\_nodes: ["10.244.220.11"]

    # 初始集群配置至少3台,集群形成后,从每个节点的配置中删除此设置,需要按顺序启动
    #cluster.initial\_master\_nodes: ["10.244.220.10","10.244.220.11","10.244.220.12"]

    #配置存储路径
    path.data:  /elasticsearch/data
    path.logs:  /elasticsearch/logs

    # 开启es跨域与head插件
    http.cors.allow-origin: "\*"
    http.cors.enabled: true
    http.cors.allow-headers: Authorization
    http.max_content_length: 200mb

    #linux在使用内存锁时仍会交换堆外内存。要防止堆外内存交换,请禁用所有交换文件。
    #k8s容器无法执行
    bootstrap.memory_lock: true

    #限制高成本查询
    search.default_search_timeout: "50s"
    #必须set为true,否则kibana报错
    search.allow_expensive_queries: true

    #禁用通配符模糊匹配删除索引
    action.destructive_requires_name: true

    # 设置自动创建索引(可选)
    # 一些商业功能会自动在 Elasticsearch 中创建索引。 默认情况下,Elasticsearch 配置为允许自动创建索引,不需要额外的步骤
    #action.auto\_create\_index: .monitoring\*,.watches,.triggered\_watches,.watcher-history\*,.ml\*

    #----------------------- BEGIN SECURITY AUTO CONFIGURATION -----------------------
    #
    # The following settings, TLS certificates, and keys have been automatically
    # generated to configure Elasticsearch security features on 07-02-2024 12:57:00
    #
    # --------------------------------------------------------------------------------

    # Enable security features


    xpack.security:
      enabled: true
      autoconfiguration:
        enabled: true

    xpack.security.enrollment.enabled: true

    # Enable encryption for HTTP API client connections, such as Kibana, Logstash, and Agents
    xpack.security.http.ssl:
      enabled: true
      # pem证书配置方式
      #key: local-certs/elastic-http.key
      #certificate: local-certs/elastic-http.crt
      #certificate\_authorities: [ "local-certs/elastic-http.crt" ]
      keystore.path: local-certs/http.p12

    # Enable encryption and mutual authentication between cluster nodes
    xpack.security.transport.ssl:
      enabled: true
      verification_mode: certificate
      # pem证书配置方式
      #key: local-certs/ca.key
      #certificate: local-certs/ca.crt
      #certificate\_authorities: [ "local-certs/ca.crt" ]

      # pks12证书配置方式
      keystore.path: local-certs/elastic-certificates.p12
      truststore.path: local-certs/elastic-certificates.p12


    #----------------------- END SECURITY AUTO CONFIGURATION -------------------------

  jvm.options: |
    -Xms4g
    -Xmx4g
    -XX:+UseG1GC

    ## JVM temporary directory
    -Djava.io.tmpdir=${ES\_TMPDIR}

    # Leverages accelerated vector hardware instructions; removing this may
    # result in less optimal vector performance
    20-:--add-modules=jdk.incubator.vector

    # REMOVE once bumped to a JDK greater than 21.0.1, https://github.com/elastic/elasticsearch/issues/103004
    19-21:-XX:CompileCommand=exclude,org.apache.lucene.util.MSBRadixSorter::computeCommonPrefixLengthAndBuildHistogram
    19-21:-XX:CompileCommand=exclude,org.apache.lucene.util.RadixSelector::computeCommonPrefixLengthAndBuildHistogram

    ## heap dumps

    # generate a heap dump when an allocation from the Java heap fails; heap dumps
    # are created in the working directory of the JVM unless an alternative path is
    # specified
    -XX:+HeapDumpOnOutOfMemoryError

    # exit right after heap dump on out of memory error
    -XX:+ExitOnOutOfMemoryError

    # specify an alternative path for heap dumps; ensure the directory exists and
    # has sufficient space
    -XX:HeapDumpPath=/elasticsearch/data

    # specify an alternative path for JVM fatal error logs
    -XX:ErrorFile=/elasticsearch/logs/hs_err_pid%p.log

    ## GC logging
    -Xlog:gc*,gc+age=trace,safepoint:file=/elasticsearch/logs/gc.log:utctime,level,pid,tags:filecount=32,filesize=64m
然后通过kubectl apply -f …yaml 顺序部署主从节点,正常的话,会出现一大段的info初始化日志,没有error。
启动成功后,用kubectl exec -it 进去到任一容器中,重置elastic账号 与 kibana-system(kibana专用)账号
${ES\_HOME}/bin/elasticsearch-reset-password -u elastic -i
${ES\_HOME}/bin/elasticsearch-reset-password -u kibana_system -i
通过service 的 cluster ip 查看一下集群状态,需要输出刚才重置的elastic账号的密码
https://${svc\_cluster\_ip}:9200/_cat/nodes?v
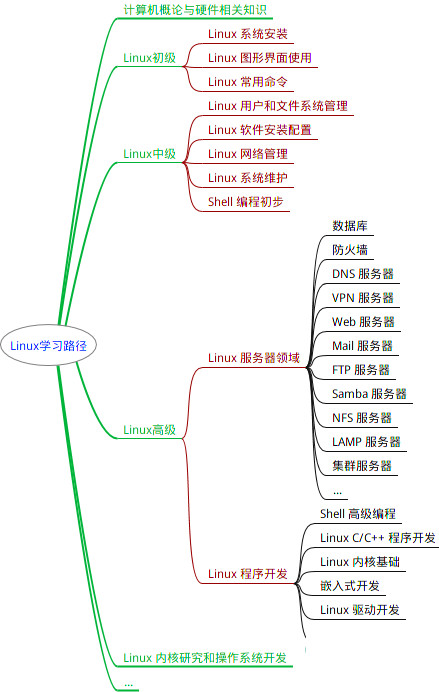
最全的Linux教程,Linux从入门到精通
======================
1. **linux从入门到精通(第2版)**
2. **Linux系统移植**
3. **Linux驱动开发入门与实战**
4. **LINUX 系统移植 第2版**
5. **Linux开源网络全栈详解 从DPDK到OpenFlow**
第一份《Linux从入门到精通》466页
====================
内容简介
====
本书是获得了很多读者好评的Linux经典畅销书**《Linux从入门到精通》的第2版**。本书第1版出版后曾经多次印刷,并被51CTO读书频道评为“最受读者喜爱的原创IT技术图书奖”。本书第﹖版以最新的Ubuntu 12.04为版本,循序渐进地向读者介绍了Linux 的基础应用、系统管理、网络应用、娱乐和办公、程序开发、服务器配置、系统安全等。本书附带1张光盘,内容为本书配套多媒体教学视频。另外,本书还为读者提供了大量的Linux学习资料和Ubuntu安装镜像文件,供读者免费下载。

**本书适合广大Linux初中级用户、开源软件爱好者和大专院校的学生阅读,同时也非常适合准备从事Linux平台开发的各类人员。**
> 需要《Linux入门到精通》、《linux系统移植》、《Linux驱动开发入门实战》、《Linux开源网络全栈》电子书籍及教程的工程师朋友们劳烦您转发+评论


 1万+
1万+


 被折叠的 条评论
为什么被折叠?
被折叠的 条评论
为什么被折叠?
 到【灌水乐园】发言


