


 前期回顾
前期回顾 
element-plus 自动按需引入
-
1.安装
cnpm i unplugin-vue-components unplugin-auto-import -D
-
2.配置:vue.config.js
const AutoImport = require('unplugin-auto-import/webpack')
const Components = require('unplugin-vue-components/webpack')
const { ElementPlusResolver } = require('unplugin-vue-components/resolvers')


//修改默认配置,配置跨域
//加载path模块
const path = require("path");
//定义resolve方法,把相对路径转换成绝对路径
const resolve = (dir) => path.join(__dirname, dir);

module.exports = {
    publicPath: "./", //解决打包白屏
    devServer: {
        // proxy: {
        //     "/api": {
        //         // http://www.sirfang.com/build/ajax_get_list这是完整路径,将com/后的路径重写路径为api
        //         // 1 目标路径 这里相当于公共的地址
        //         target: "http://m.sirfang.com/",
        //         // port: 9090, // 1.1端口号 默认的可以不配
        //         open: true, // 1.2运行项目自启
        //         //2 允许跨域
        //         changOrigin: true,
        //         hotOnly: true, //热更新
        //         //3 重写路径
        //         pathRewrite: {
        //             "^/api": "",
        //         },
        //     },
        // },
    },
    // 添加别名和跨域在项目开始就要先配好
    chainWebpack: (config) => {
        config.resolve.alias
            .set("@", resolve("src"))
            .set("assets", resolve("src/assets"))
            .set("views", resolve("src/views"))
            .set("components", resolve("src/components"));
    },
    //引入element-plus自动按需导入 插件都在这里引入!!!配合上面可实现打包体积优化,这里现在只是单独写了v3的自动引入
    configureWebpack: {
        plugins: [
            AutoImport({
                resolvers: [ElementPlusResolver()],
            }),
            Components({
                resolvers: [ElementPlusResolver()],
            }),
        ],
    }
};
页面使用:
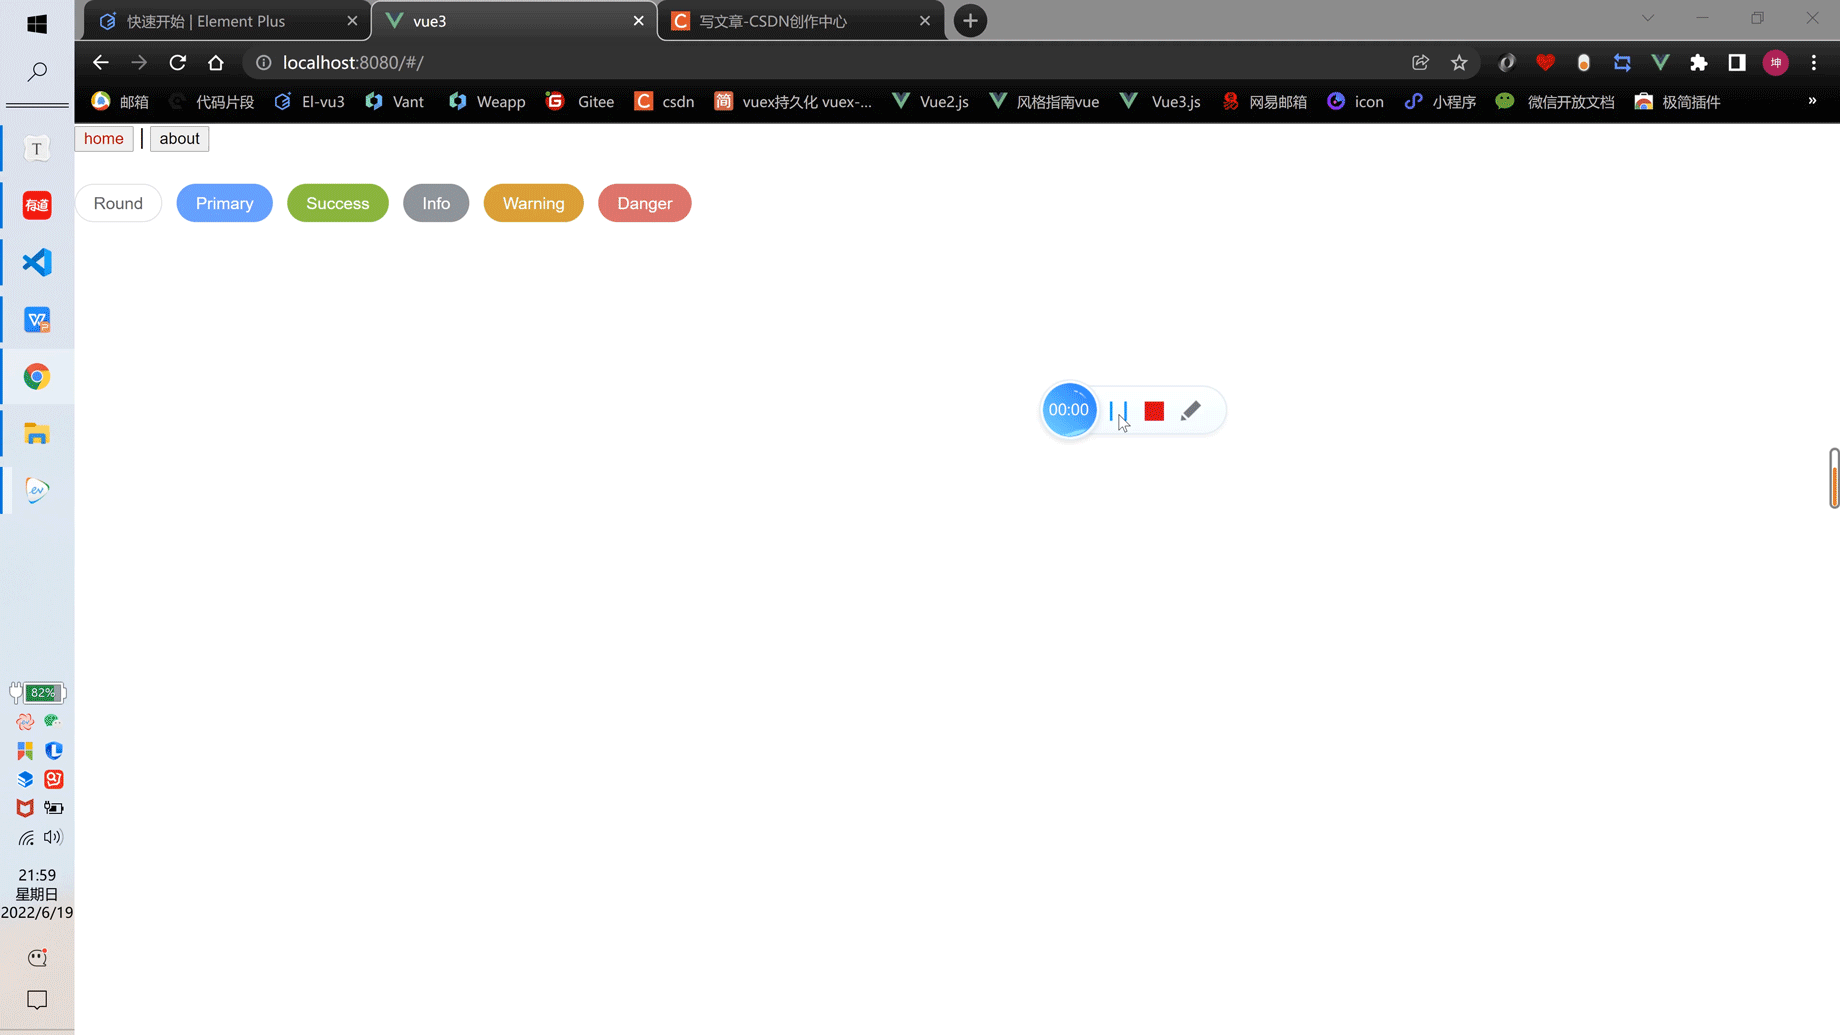
<template>
  <div class="home">
    <el-row class="mb-4">
      <el-button round>Round</el-button>
      <el-button type="primary" round>Primary</el-button>
      <el-button type="success" round>Success</el-button>
      <el-button type="info" round>Info</el-button>
      <el-button type="warning" round>Warning</el-button>
      <el-button type="danger" round>Danger</el-button>
    </el-row>
  </div>
</template>

<script setup></script>
效果:
动画代码:
-
位置app.vue
<template>
  <!--
      vue3中移除了tag属性 新增了custom属性  custom可以用来自定义router-link的内容
      但是使用了之后会导致路由无法跳转 这时候需要v-slot="{navigate}" 通过事件触发navigate方法就能跳转页面
      假如有两个路由地址 第一个 /home 第二个是 /home/index
      exact-acitve-class 精确匹配后才会添加的class类名
      active-class 包含有就会添加的class类名
      vue2中的写法
      <router-link to="/" tag="button" exact-active-class="active">home</router-link>
    -->

  <router-link to="/" custom v-slot="{ navigate, isExactActive }">
    <!-- a 标签变成button -->
    <button @click="navigate" :class="isExactActive ? 'active' : ''">
      home
    </button>
  </router-link>
  |
  <router-link to="/about" custom v-slot="{ navigate, isExactActive }">
    <button @click="navigate" :class="isExactActive ? 'active' : ''">
      about
    </button>
  </router-link>
  <!-- 动画 -->
  <router-view v-slot="{ Component }">
    <div>
      <transition name="ani">
        <component :is="Component" class="pages"></component>
      </transition>
    </div>
  </router-view>
</template>

<style lang='scss'>
* {
  box-sizing: border-box;
}
html,
body {
  width: 100%;
  height: 100%;
  margin: 0;
}

.pages {
  width: 100%;
  position: absolute;
  top: 50px;
  left: 0;
}
// 进入时
.ani-enter-from {
  left: 100%;
  transform: scale(0) rotate(-360deg);
  opacity: 0;
  background: blue;
}
//进入过程
.ani-enter-active {
  transition: all 1s linear;
}
//离开过程
.ani-leave-active {
  transition: all 1s linear;
  transform-origin: center;
}
//离开时
.ani-leave-to {
  left: -100%;
  transform: scale(0) rotate(360deg);
  opacity: 0;
  background: red;
}
.active {
  color: #d00;
}

</style>
完结:
祝大家越来越好,bug越来越少!


 775
775


 被折叠的 条评论
为什么被折叠?
被折叠的 条评论
为什么被折叠?
 到【灌水乐园】发言


