


1.引入vue.js
2.建立vue对象
3.创建视图层展示
插值表达式 {{ 表达式,一般是变量}}
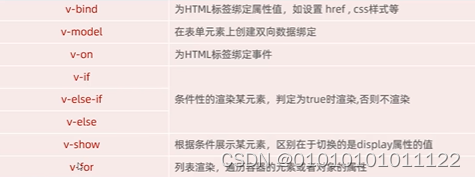
常用指令
<div id="a">
<a v-bind:href="url"> 百度</a>
<input type="text" v-model="url">
</div>
<script>
new Vue({
el:"#a",
data:{
url:"https://www.baidu.com"
}
})
</script>
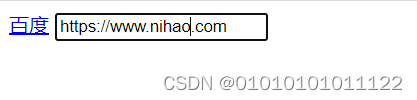
通过v-bind或者是v-model绑定模型,必须在vue对象中声明
对v-on的介绍
<div id="a">
<input type="button" value="点击按钮" v-on:click="handle()">
<input type="button" value="简写点击按钮" @click="handle()">
</div>
<script>
new Vue({
el:"#a",
data:{
},
methods: {
handle:function()
{
alert("你好,论文写了吗");
}
},
})
</script>
</body>
</h
v-if和v-show质检的区别在于前者只渲染符合条件的,而后者全部渲染,通过css中的display决定是否展示
<div id="a">
年龄<input type="text" v-model="age">
<span v-if="age<35"> 35以下</span>
<span v-else-if="age>=30 && age<=45"> 35到45</span>
<span v-else> 45以上</span>
</div>
<script>
new Vue({
el:"#a",
data:{
age:"50"
},
})
v-for遍历元素
<div id="a">
<div v-for="(p,index) in ages">{{p}}</div>
<div v-for="(p,index) in ages">{{index+1}}:{{p}}</div>
</div>
<script>
new Vue({
el:"#a",
data:{
ages:["50","60","70"]//shuzu
},

})
生命周期
mounted(){
console.log(“ 挂载完毕,发送请求获取数据”)


 202
202


 被折叠的 条评论
为什么被折叠?
被折叠的 条评论
为什么被折叠?
 到【灌水乐园】发言


