


 本文详细介绍了如何使用SpringBoot创建一个简单的项目,包括创建启动类、配置application.yml文件中的服务器端口和数据库连接,以及在pom.xml中添加必要的依赖。
创建一个springboot工程的内容,项目自己建。
1.创建一个springboot项目
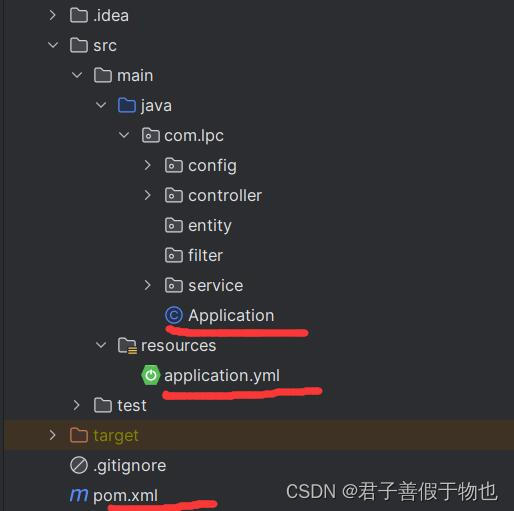
2.Application
package com.lpc;

import lombok.extern.slf4j.Slf4j;
import org.springframework.boot.SpringApplication;
import org.springframework.boot.autoconfigure.SpringBootApplication;

/**
 * @Author lpc
 * @Date 2024 01 05 10 13
 * <p>
 * springboot项目启动类
 * <p>
 *
 * @SpringBootApplication 它的作用是将当前类标识为 Spring Boot 应用的入口点,并启用自动配置和组件扫描。
 *
 * @Slf4j 在这里就是这个作用 log.info("项目启动成功。。。。。");
 * @Slf4j 用于自动为类生成一个名为 “log” 的日志对象。它是 Lombok 项目中提供的一个注解,通过在类上添加 @Slf4j 注解,
 * 可以方便地在代码中使用日志记录功能。
 *
 **/


@SpringBootApplication
@Slf4j
public class Application {
    public static void main(String[] args) {
        SpringApplication.run(Application.class,args);
        log.info("项目启动成功。。。。。");
    }
}
3.application.yml
server:
  port: 8001
spring:
  #连接数据库
  datasource:
      driver-class-name: com.mysql.cj.jdbc.Driver
      url: jdbc:mysql://localhost:3306/数据库名?serverTimezone=Asia/Shanghai&useUnicode=true&characterEncoding=utf-8&zeroDateTimeBehavior=convertToNull&useSSL=false&allowPublicKeyRetrieval=true
      username: root
      password: 密码
4.pom.xml
 <!--它是 Spring Boot 应用程序的父项目,可以继承 Spring Boot 的默认参数、
    默认配置和依赖管理,简化了项目的构建和配置工作。-->
    <parent>
        <groupId>org.springframework.boot</groupId>
        <artifactId>spring-boot-starter-parent</artifactId>
        <version>2.3.5.RELEASE</version>
    </parent>


 <properties>
        <!--依赖版本控制-->
        <lombok.version>1.18.16</lombok.version>
    </properties>


<dependencies>

        <!--spring boot相关依赖-->

        <!--这个依赖项是 Spring Boot 的核心依赖,它包含了一系列常用的 Spring Boot 模块和库。
        这个依赖项主要用于构建 Spring Boot 应用程序,它封装了许多常用的配置和依赖项,使得开发者
        可以更快速地搭建和启动一个基于 Spring Boot 的项目。-->
        <dependency>
            <groupId>org.springframework.boot</groupId>
            <artifactId>spring-boot-starter</artifactId>
        </dependency>

        <!--是用于编写测试代码的 Spring Boot 依赖项,它包含了一些常用的测试框架和工具。
        这个依赖项的 scope 被设为 test,表示这些依赖项仅在测试阶段需要使用,不会被包含到最终的构建结果中。-->
        <dependency>
            <groupId>org.springframework.boot</groupId>
            <artifactId>spring-boot-starter-test</artifactId>
            <scope>test</scope>
        </dependency>

        <!--这个依赖项是用于开发基于 Spring Boot 的 Web 应用程序的。它提供了一些基本的依赖项和配置,
                以帮助你快速搭建一个 Web 应用程序。-->
        <dependency>
            <groupId>org.springframework.boot</groupId>
            <artifactId>spring-boot-starter-web</artifactId>
            <scope>compile</scope>
        </dependency>

        <!--Lombok 是一个开发工具,可以通过注解自动化生成 Java 代码中的一些样板代码,
        如 getter、setter、构造函数等,减少了编写冗余代码的工作量。-->
        <dependency>
            <groupId>org.projectlombok</groupId>
            <artifactId>lombok</artifactId>
            <version>${lombok.version}</version>
        </dependency>


    </dependencies>


    <build>
        <plugins>
            <plugin>
                <groupId>org.springframework.boot</groupId>
                <artifactId>spring-boot-maven-plugin</artifactId>
                <configuration>
                    <!-- 指定该Main Class为全局的唯一入口 这里是启动类的地址 -->
                    <mainClass>com.lpc.Application</mainClass>
                    <layout>ZIP</layout>
                    <includeSystemScope>true</includeSystemScope>
                </configuration>
                <executions>
                    <execution>
                        <goals>
                            <goal>repackage</goal><!--可以把依赖的包都打包到生成的Jar包中-->
                        </goals>
                    </execution>
                </executions>
            </plugin>
        </plugins>
    </build>


 被折叠的 条评论
为什么被折叠?
被折叠的 条评论
为什么被折叠?
 到【灌水乐园】发言


