


<LinearLayout xmlns:android=“http://schemas.android.com/apk/res/android”
android:layout_width=“match_parent”
android:layout_height=“match_parent”
android:orientation=“vertical”>
<Button
android:id=“@+id/btn_next”
android:layout_gravity=“center_horizontal”
android:layout_width=“wrap_content”
android:layout_marginTop=“@dimen/dimen_20”
android:layout_height=“wrap_content”
android:text=“下一张” />
<ImageView
android:id=“@+id/iv_show”
android:layout_width=“250dp”
android:layout_height=“250dp”
android:layout_marginTop=“@dimen/dimen_10”
android:layout_gravity=“center”
android:scaleType=“fitXY”
android:src=“@mipmap/sc1”/>
<LinearLayout
android:layout_width=“match_parent”
android:orientation=“horizontal”
android:layout_marginTop=“10dp”
android:gravity=“center_horizontal”
android:layout_height=“wrap_content”>
<Button
android:id=“@+id/btn_uri”
android:layout_width=“wrap_content”
android:layout_height=“wrap_content”
android:text=“网络图片” />
<Button
android:id=“@+id/btn_open_photo_album”
android:layout_width=“wrap_content”
android:layout_height=“wrap_content”
android:text=“加载本地图片” />
<LinearLayout
android:layout_width=“match_parent”
android:orientation=“horizontal”
android:layout_marginTop=“@dimen/dimen_10”
android:gravity=“center_horizontal”
android:layout_height=“wrap_content”>
<ImageView
android:id=“@+id/iv_http_uri”
android:layout_width=“150dp”
android:layout_height=“150dp”
android:layout_gravity=“center”
android:layout_marginRight=“@dimen/dimen_10”
android:scaleType=“fitXY”
/>
<ImageView
android:id=“@+id/iv_content_uri”
android:layout_width=“150dp”
android:layout_height=“150dp”
android:layout_gravity=“center”
android:layout_marginLeft=“@dimen/dimen_10”
android:scaleType=“fitXY”
/>
2、用代码使ImageView显示图片
public class ImageLoadActivity extends ActivityBase implements View.OnClickListener {
private Button btnUri, btnNext,btnOpenPhotoAlbum;
private ImageView ivShow,ivHttpUri,ivContentUri;
int[] images = new int[]{R.mipmap.sc1, R.mipmap.sc2, R.mipmap.sc3};
private int currentImage = 0;
@Override
protected void onCreate(Bundle savedInstanceState) {
super.onCreate(savedInstanceState);
setContentView(R.layout.activity_imageview_load);
initData();
}
private void initData() {
ivShow = findViewById(R.id.iv_show);
ivHttpUri = findViewById(R.id.iv_http_uri);
ivContentUri = findViewById(R.id.iv_content_uri);
btnUri = findViewById(R.id.btn_uri);
btnNext = findViewById(R.id.btn_next);
btnOpenPhotoAlbum = findViewById(R.id.btn_open_photo_album);
btnUri.setOnClickListener(this);
btnNext.setOnClickListener(this);
btnOpenPhotoAlbum.setOnClickListener(this);
}
@Override
public void onClick(View v) {
switch (v.getId()) {
case R.id.btn_uri:
//添加权限
Uri uri = Uri.parse(“https://img-blog.csdnimg.cn/20210702150442684.png”);
//使用图片加载框架(Universal、ImageLoader、Picasso、Fresco、Glide)加载图片
//以Picasso为例,这里用到加载网络图片load(Uri),
//但是他还可以load(File)、load(String)、load(int)
//感兴趣的可以看看源码它是怎么实现的,这里就不说了。毕竟,本文重点是ImageView
Picasso.with(this).load(uri).into(ivHttpUri);
break;
case R.id.btn_next:
ivShow.setImageBitmap(BitmapFactory.decodeResource(getResources(),
images[++currentImage % images.length]));
break;
case R.id.btn_open_photo_album:
Intent intent = new Intent(Intent.ACTION_PICK, null);
intent.setDataAndType(MediaStore.Images.Media.EXTERNAL_CONTENT_URI, “image/*”);
startActivityForResult(intent, 2);
break;
default:
break;
}
}
@Override
protected void onActivityResult(int requestCode, int resultCode, Intent data) {
super.onActivityResult(requestCode, resultCode, data);
if (requestCode == 2) {
// 从相册返回的数据
Log.e(this.getClass().getName(), “Result:” + data.toString());
if (data != null) {
// 得到图片的全路径
Uri uri = data.getData();
Log.e(this.getClass().getName(), “Uri:” + uri);
ivContentUri.setImageURI(uri);
}
}
}
}
3、运行效果

ImageView设置图片
示例:
<ImageView
android:id=“@+id/iv_round”
android:layout_width=“300dp”
android:layout_height=“300dp”
android:layout_gravity=“center”
android:background=“@color/color_ff0000”
android:src=“@mipmap/sc1”/>

ImageView有两个可以设置图片的属性(src和background)
-
src:是图像**「内容」(前景,如上蓝色猪图)。当使用src填入图片时,是按照图片大小直接填充,并不会进行拉伸;需要配合android:scaleType使用。「src仅ImageView可使用。」**
-
background:background是填充**「背景」的属性(如上图红色)。background就等于src+scaleType(fitXY)。「background所有View都可用。」**
设置圆角、圆形
1、通过RoundedBitmapDrawable设置圆角、圆形
//设置圆形
private void roundBitmap(ImageView iv){
Bitmap image = BitmapFactory.decodeResource(getResources(), R.mipmap.sc1);
int cornerRadius = 0;
//取最长边为圆角值,值越大越是圆。
if (image.getWidth()<image.getHeight()) {
cornerRadius = image.getHeight();
} else {
cornerRadius = image.getWidth();
}
RoundedBitmapDrawable roundedBitmapDrawable = RoundedBitmapDrawableFactory.create(getResources(), image);
//抗锯齿
roundedBitmapDrawable.setAntiAlias(true);
//设置圆角半径(值小为圆角,值大为圆形)
//如:roundImg.setCornerRadius(30)为圆角
roundedBitmapDrawable.setCornerRadius(cornerRadius);
iv.setImageDrawable(roundedBitmapDrawable);
}
2、使用图片加载框架进行设置,以Picasso为例
- 2.1重写Transformation接口
public class CircleCornerForm implements Transformation {
@Override
public Bitmap transform(Bitmap source) {
int widthLight = source.getWidth();
int heightLight = source.getHeight();
Bitmap output = Bitmap.createBitmap(source.getWidth(), source.getHeight(), Bitmap.Config.ARGB_8888);
Canvas canvas = new Canvas(output);
Paint paintColor = new Paint();
paintColor.setFlags(Paint.ANTI_ALIAS_FLAG);
RectF rectF = new RectF(new Rect(0, 0, widthLight, heightLight));
canvas.drawRoundRect(rectF, widthLight / 8, heightLight / 8, paintColor);//这里除的数越大角度越小
Paint paintImage = new Paint();
paintImage.setXfermode(new PorterDuffXfermode(PorterDuff.Mode.SRC_ATOP));
canvas.drawBitmap(source, 0, 0, paintImage);
source.recycle();
return output;
}
//返回转换的唯一键,用于缓存目的。
@Override
public String key() {
return “CircleCornerForm”;
}
}
- 2.2使用CircleCornerForm
Uri uri = Uri.parse(“https://img-blog.csdnimg.cn/20210702150442684.png”);
自我介绍一下,小编13年上海交大毕业,曾经在小公司待过,也去过华为、OPPO等大厂,18年进入阿里一直到现在。
深知大多数初中级安卓工程师,想要提升技能,往往是自己摸索成长,但自己不成体系的自学效果低效又漫长,而且极易碰到天花板技术停滞不前!
因此收集整理了一份《2024年最新Android移动开发全套学习资料》送给大家,初衷也很简单,就是希望能够帮助到想自学提升又不知道该从何学起的朋友,同时减轻大家的负担。


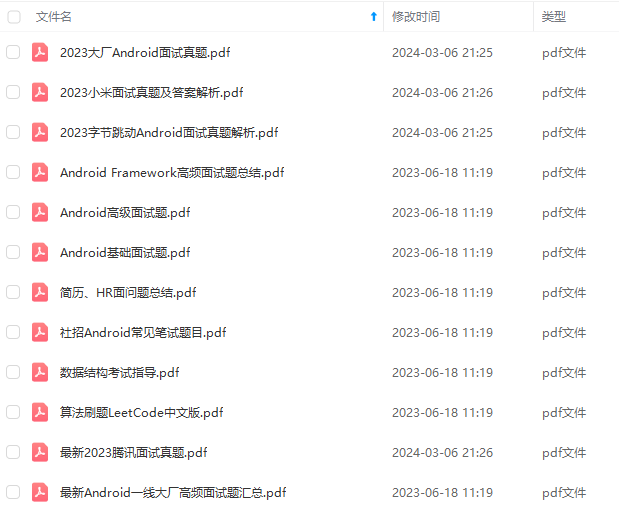
由于文件比较大,这里只是将部分目录截图出来,每个节点里面都包含大厂面经、学习笔记、源码讲义、实战项目、讲解视频
如果你觉得这些内容对你有帮助,可以添加下面V无偿领取!(备注Android)

作者2013年从java开发,转做Android开发,在小厂待过,也去过华为,OPPO等大厂待过,18年四月份进了阿里一直到现在。
参与过不少面试,也当面试官 面试过很多人。深知大多数初中级Android工程师,想要提升技能,往往是自己摸索成长,不成体系的学习效果低效漫长,而且极易碰到天花板技术停滞不前!
我整理了一份阿里P7级别的最系统的Android开发主流技术,特别适合有3-5年以上经验的小伙伴深入学习提升。
主要包括阿里,以及字节跳动,腾讯,华为,小米,等一线互联网公司主流架构技术。如果你想深入系统学习Android开发,成为一名合格的高级工程师,可以收藏一下这些Android进阶技术选型
我搜集整理过这几年阿里,以及腾讯,字节跳动,华为,小米等公司的面试题,把面试的要求和技术点梳理成一份大而全的“ Android架构师”面试 Xmind(实际上比预期多花了不少精力),包含知识脉络 + 分支细节。

Java语言与原理;
大厂,小厂。Android面试先看你熟不熟悉Java语言

高级UI与自定义view;
自定义view,Android开发的基本功。

性能调优;
数据结构算法,设计模式。都是这里面的关键基础和重点需要熟练的。

NDK开发;
未来的方向,高薪必会。

前沿技术;
组件化,热升级,热修复,框架设计

网上学习 Android的资料一大堆,但如果学到的知识不成体系,遇到问题时只是浅尝辄止,不再深入研究,那么很难做到真正的技术提升。希望这份系统化的技术体系对大家有一个方向参考。
我在搭建这些技术框架的时候,还整理了系统的高级进阶教程,会比自己碎片化学习效果强太多,GitHub可见;《Android架构视频+学习笔记》
当然,想要深入学习并掌握这些能力,并不简单。关于如何学习,做程序员这一行什么工作强度大家都懂,但是不管工作多忙,每周也要雷打不动的抽出 2 小时用来学习。
法,设计模式。都是这里面的关键基础和重点需要熟练的。
[外链图片转存中…(img-SOKPyjsa-1711289754657)]
NDK开发;
未来的方向,高薪必会。
[外链图片转存中…(img-hNICAVbi-1711289754658)]
前沿技术;
组件化,热升级,热修复,框架设计
[外链图片转存中…(img-vKE7yvJB-1711289754658)]
网上学习 Android的资料一大堆,但如果学到的知识不成体系,遇到问题时只是浅尝辄止,不再深入研究,那么很难做到真正的技术提升。希望这份系统化的技术体系对大家有一个方向参考。
我在搭建这些技术框架的时候,还整理了系统的高级进阶教程,会比自己碎片化学习效果强太多,GitHub可见;《Android架构视频+学习笔记》
当然,想要深入学习并掌握这些能力,并不简单。关于如何学习,做程序员这一行什么工作强度大家都懂,但是不管工作多忙,每周也要雷打不动的抽出 2 小时用来学习。
不出半年,你就能看出变化!


 185
185


 被折叠的 条评论
为什么被折叠?
被折叠的 条评论
为什么被折叠?
 到【灌水乐园】发言


