


[1] Shen X, Tao X, Gao H, et al. Deep Automatic Portrait Matting[M]// ComputerVision – ECCV 2016. Springer International Publishing, 2016:92-107.
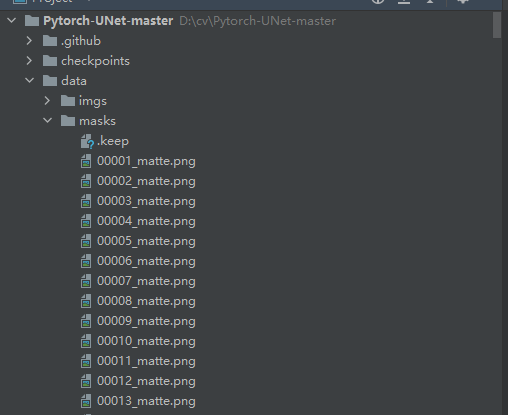
将数据集下载后放到将训练集放到data文件夹中,其中图片放到imgs文件夹中,mask放到masks文件夹中,测试集放到test文件夹下面:
由于原程序是用于Carvana Image Masking Challenge,所以我们需要修改加载数据集的逻辑,打开utils/data_loading.py文件:
class CarvanaDataset(BasicDataset):
def init(self, images_dir, masks_dir, scale=1):
super().init(images_dir, masks_dir, scale, mask_suffix=‘_matte’)
将mask_suffix改为“_matte”
=============================================================
打开train.py,先查看全局参数:
def get_args():
parser = argparse.ArgumentParser(description=‘Train the UNet on images and target masks’)
parser.add_argument(‘–epochs’, ‘-e’, metavar=‘E’, type=int, default=300, help=‘Number of epochs’)
parser.add_argument(‘–batch-size’, ‘-b’, dest=‘batch_size’, metavar=‘B’, type=int, default=16, help=‘Batch size’)
parser.add_argument(‘–learning-rate’, ‘-l’, metavar=‘LR’, type=float, default=0.001,
help=‘Learning rate’, dest=‘lr’)
parser.add_argument(‘–load’, ‘-f’, type=str, default=False, help=‘Load model from a .pth file’)
parser.add_argument(‘–scale’, ‘-s’, type=float, default=0.5, help=‘Downscaling factor of the images’)
parser.add_argument(‘–validation’, ‘-v’, dest=‘val’, type=float, default=10.0,
help=‘Percent of the data that is used as validation (0-100)’)
parser.add_argument(‘–amp’, action=‘store_true’, default=False, help=‘Use mixed precision’)
return parser.parse_args()
epochs:epoch的个数,一般设置为300。
batch-size:批处理的大小,根据显存的大小设置。
learning-rate:学习率,一般设置为0.001,如果优化器不同,初始的学习率也要做相应的调整。
load:加载模型的路径,如果接着上次的训练,就需要设置上次训练的权重文件路径,如果有预训练权重,则设置预训练权重的路径。
scale:放大的倍数,这里设置为0.5,把图片大小变为原来的一半。
validation:验证验证集的百分比。
amp:是否使用混合精度?
比较重要的参数是epochs、batch-size和learning-rate,可以反复调整做实验,达到最好的精度。
接下来是设置模型:
net = deeplabv3_resnet50(pretrained=False,num_classes=2)
print(net)
if args.load:
net.load_state_dict(torch.load(args.load, map_location=device))
logging.info(f’Model loaded from {args.load}')
设置deeplabv3_resnet50参数:
导入方式:
from torchvision.models.segmentation import deeplabv3_resnet50
pretrained:是否使用预训练权重,我们选用false。如果选用false则默认加载resnet50的预训练权重,是true则会加载deeplabv3_resnet50_coco的预训练权重。如果你想用预训练权重可以这样做:
net = deeplabv3_resnet50(pretrained=True)
print(net)
net.classifier[4] = torch.nn.Conv2d(256, 2, kernel_size=(1, 1), stride=(1, 1))
net.aux_classifier[4] = torch.nn.Conv2d(256, 2, kernel_size=(1, 1), stride=(1, 1))
print(net)
但是要注意,选择预训练选中后,aux_classifier也会包含在内,也要修改aux_classifier的类别个数,2代表num_classes。
num_classes:类别,我们这里把背景当作一类,所以设置为2。
try:
dataset = CarvanaDataset(dir_img, dir_mask, img_scale)
except (AssertionError, RuntimeError):
dataset = BasicDataset(dir_img, dir_mask, img_scale)
2. Split into train / validation partitions
n_val = int(len(dataset) * val_percent)
n_train = len(dataset) - n_val
train_set, val_set = random_split(dataset, [n_train, n_val], generator=torch.Generator().manual_seed(0))
3. Create data loaders
loader_args = dict(batch_size=batch_size, num_workers=4, pin_memory=True)
train_loader = DataLoader(train_set, shuffle=True, **loader_args)
val_loader = DataLoader(val_set, shuffle=False, drop_last=True, **loader_args)
1、加载数据集。
2、按照比例切分训练集和验证集。
3、将训练集和验证集放入DataLoader中。
(Initialize logging)
experiment = wandb.init(project=‘deeplabv3’, resume=‘allow’, anonymous=‘must’)
experiment.config.update(dict(epochs=epochs, batch_size=batch_size, learning_rate=learning_rate,
val_percent=val_percent, save_checkpoint=save_checkpoint, img_scale=img_scale,
amp=amp))
设置wandb,wandb是一款非常好用的可视化工具。安装和使用方法见:https://blog.csdn.net/hhhhhhhhhhwwwwwwwwww/article/details/116124285。
4. Set up the optimizer, the loss, the learning rate scheduler and the loss scaling for AMP
optimizer = optim.RMSprop(net.parameters(), lr=learning_rate, weight_decay=1e-8, momentum=0.9)
scheduler = optim.lr_scheduler.ReduceLROnPlateau(optimizer, ‘max’, patience=2) # goal: maximize Dice score
grad_scaler = torch.cuda.amp.GradScaler(enabled=amp)
criterion = nn.CrossEntropyLoss()
global_step = 0
1、设置优化器optimizer为RMSprop,我也尝试了改为SGD,通常情况下SGD的表现好一些。但是在训练时发现,二者最终的结果都差不多。
2、ReduceLROnPlateau学习率调整策略,和keras的类似。本次选择用的是Dice score,所以将mode设置为max,当得分不再上升时,则降低学习率。
3、设置loss为 nn.CrossEntropyLoss()。交叉熵,多分类常用的loss。
接下来是train部分的逻辑,这里需要修改的如下:
masks_pred = net(images)[‘out’]
print(masks_pred.shape)
for name,x in masks_pred.items():
true_masks = F.one_hot(true_masks.squeeze_(1), 2).permute(0, 3, 1, 2).float()
masks_pred = net(images)计算出来的结果是:collections.OrderedDict类型的。如果不理解可以看这里:
class _SimpleSegmentationModel(nn.Module):
constants = [“aux_classifier”]
def init(self, backbone: nn.Module, classifier: nn.Module, aux_classifier: Optional[nn.Module] = None) -> None:
super().init()
_log_api_usage_once(self)
self.backbone = backbone
self.classifier = classifier
self.aux_classifier = aux_classifier
def forward(self, x: Tensor) -> Dict[str, Tensor]:
input_shape = x.shape[-2:]
contract: features is a dict of tensors
features = self.backbone(x)
result = OrderedDict()
x = features[“out”]
x = self.classifier(x)
x = F.interpolate(x, size=input_shape, mode=“bilinear”, align_corners=False)
result[“out”] = x
if self.aux_classifier is not None:
x = features[“aux”]
x = self.aux_classifier(x)
x = F.interpolate(x, size=input_shape, mode=“bilinear”, align_corners=False)
result[“aux”] = x
return result
这个类是DeepLabV3的父类,返回值是result[“out”],如果有aux_classifier,再返回 result[“aux”]。
所以我们需要的结果放在result[“out”]中。masks_pred的shape是[batch, 2, 400, 300],2对应的是类别。true_masks.shape是[batch, 1, 400, 300],所以要对true_masks做onehot处理。如果直接对true_masks做onehot处理,你会发现处理后的shape是[batch, 1, 400, 300,2],这样就和masks_pred 对不上了,所以在做onehot之前,先将第二维(也就是1这一维度)去掉,这样onehot后的shape是[batch, 400, 300,2],然后调整顺序,和masks_pred 的维度对上。
接下来就要计算loss,loss分为两部分,一部分时交叉熵,另一部分是dice_loss,这两个loss各有优势,组合使用效果更优。dice_loss在utils/dice_sorce.py文件中,代码如下:
import torch
from torch import Tensor
def dice_coeff(input: Tensor, target: Tensor, reduce_batch_first: bool = False, epsilon=1e-6):
Average of Dice coefficient for all batches, or for a single mask
assert input.size() == target.size()
if input.dim() == 2 and reduce_batch_first:
raise ValueError(f’Dice: asked to reduce batch but got tensor without batch dimension (shape {input.shape})')
if input.dim() == 2 or reduce_batch_first:
inter = torch.dot(input.reshape(-1), target.reshape(-1))
sets_sum = torch.sum(input) + torch.sum(target)
if sets_sum.item() == 0:
sets_sum = 2 * inter
return (2 * inter + epsilon) / (sets_sum + epsilon)
else:
compute and average metric for each batch element
dice = 0
for i in range(input.shape[0]):
dice += dice_coeff(input[i, …], target[i, …])
return dice / input.shape[0]
def dice_coeff_1(pred, target):
smooth = 1.
num = pred.size(0)
m1 = pred.view(num, -1) # Flatten
m2 = target.view(num, -1) # Flatten
intersection = (m1 * m2).sum()
return 1 - (2. * intersection + smooth) / (m1.sum() + m2.sum() + smooth)
def multiclass_dice_coeff(input: Tensor, target: Tensor, reduce_batch_first: bool = False, epsilon=1e-6):
Average of Dice coefficient for all classes
assert input.size() == target.size()
dice = 0
for channel in range(input.shape[1]):
dice += dice_coeff(input[:, channel, …], target[:, channel, …], reduce_batch_first, epsilon)
return dice / input.shape[1]
def dice_loss(input: Tensor, target: Tensor, multiclass: bool = False):
Dice loss (objective to minimize) between 0 and 1
assert input.size() == target.size()
fn = multiclass_dice_coeff if multiclass else dice_coeff
return 1 - fn(input, target, reduce_batch_first=True)
导入到train.py中,然后和交叉熵组合作为本项目的loss。
loss = criterion(masks_pred, true_masks) \
- dice_loss(F.softmax(masks_pred, dim=1).float(),
true_masks,
multiclass=True)
接下来是对evaluate函数的逻辑做修改。
mask_true = mask_true.to(device=device, dtype=torch.long)
mask_true = F.one_hot(mask_true.squeeze_(1), net.n_classes).permute(0, 3, 1, 2).float()
with torch.no_grad():
predict the mask
mask_pred = net(image)[‘out’]
num_classes=2
convert to one-hot format
if num_classes == 1:
mask_pred = (F.sigmoid(mask_pred) > 0.5).float()
compute the Dice score
dice_score += dice_coeff(mask_pred, mask_true, reduce_batch_first=False)
else:
mask_pred = F.one_hot(mask_pred.argmax(dim=1), 2).permute(0, 3, 1, 2).float()
compute the Dice score, ignoring background
dice_score += multiclass_dice_coeff(mask_pred[:, 1:, …], mask_true[:, 1:, …],
reduce_batch_first=False)
增加对mask_trued的onehot逻辑。
定义num_classes为2,由于官方的模型没有类别数量的定义,所以只能自己定义类别数。
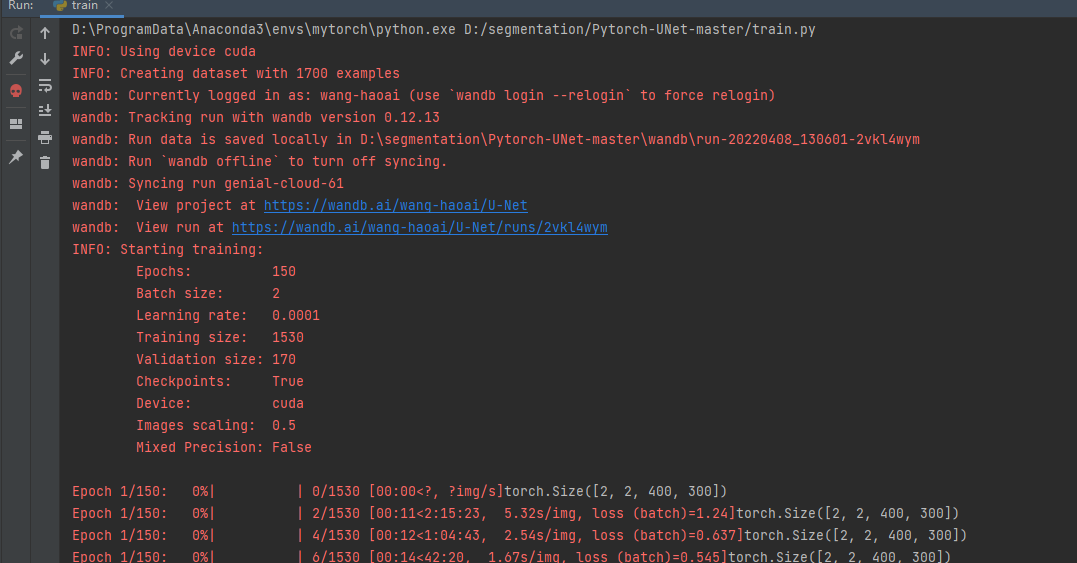
修改完上面的逻辑就可以开始训练了。
=============================================================
完成训练后就可以测试了。打开predict.py,修改全局参数:
def get_args():
parser = argparse.ArgumentParser(description=‘Predict masks from input images’)
parser.add_argument(‘–model’, ‘-m’, default=‘checkpoints/checkpoint_epoch150.pth’, metavar=‘FILE’,
help=‘Specify the file in which the model is stored’)
parser.add_argument(‘–input’, ‘-i’, metavar=‘INPUT’,default=‘test/00002.png’, nargs=‘+’, help=‘Filenames of input images’)
parser.add_argument(‘–output’, ‘-o’, metavar=‘INPUT’,default=‘00001.png’, nargs=‘+’, help=‘Filenames of output images’)
parser.add_argument(‘–viz’, ‘-v’, action=‘store_true’,
help=‘Visualize the images as they are processed’)
parser.add_argument(‘–no-save’, ‘-n’, action=‘store_true’,default=False, help=‘Do not save the output masks’)
parser.add_argument(‘–mask-threshold’, ‘-t’, type=float, default=0.5,
help=‘Minimum probability value to consider a mask pixel white’)
parser.add_argument(‘–scale’, ‘-s’, type=float, default=0.5,
help=‘Scale factor for the input images’)
model:设置权重文件路径。这里要改为自己训练的路径。
scale:0.5,和训练的参数对应上。
其他的参数,通过命令输入。
net = deeplabv3_resnet50(pretrained=False,num_classes=2)
device = torch.device(‘cuda’ if torch.cuda.is_available() else ‘cpu’)
logging.info(f’Loading model {args.model}')
学好 Python 不论是就业还是做副业赚钱都不错,但要学会 Python 还是要有一个学习规划。最后大家分享一份全套的 Python 学习资料,给那些想学习 Python 的小伙伴们一点帮助!
一、Python所有方向的学习路线
Python所有方向路线就是把Python常用的技术点做整理,形成各个领域的知识点汇总,它的用处就在于,你可以按照上面的知识点去找对应的学习资源,保证自己学得较为全面。

二、学习软件
工欲善其事必先利其器。学习Python常用的开发软件都在这里了,给大家节省了很多时间。

三、全套PDF电子书
书籍的好处就在于权威和体系健全,刚开始学习的时候你可以只看视频或者听某个人讲课,但等你学完之后,你觉得你掌握了,这时候建议还是得去看一下书籍,看权威技术书籍也是每个程序员必经之路。

四、入门学习视频
我们在看视频学习的时候,不能光动眼动脑不动手,比较科学的学习方法是在理解之后运用它们,这时候练手项目就很适合了。
五、实战案例
光学理论是没用的,要学会跟着一起敲,要动手实操,才能将自己的所学运用到实际当中去,这时候可以搞点实战案例来学习。
六、面试资料
我们学习Python必然是为了找到高薪的工作,下面这些面试题是来自阿里、腾讯、字节等一线互联网大厂最新的面试资料,并且有阿里大佬给出了权威的解答,刷完这一套面试资料相信大家都能找到满意的工作。

网上学习资料一大堆,但如果学到的知识不成体系,遇到问题时只是浅尝辄止,不再深入研究,那么很难做到真正的技术提升。
一个人可以走的很快,但一群人才能走的更远!不论你是正从事IT行业的老鸟或是对IT行业感兴趣的新人,都欢迎加入我们的的圈子(技术交流、学习资源、职场吐槽、大厂内推、面试辅导),让我们一起学习成长!


 1004
1004


 被折叠的 条评论
为什么被折叠?
被折叠的 条评论
为什么被折叠?
 到【灌水乐园】发言


