


一、标签语言特点
1.1 形式
<c:if test=“true”> 开始标签
true 标签体
</c:if> 结束标签
1.2 分类
标签有四种:空标签、控制标签 、UI标签、数据标签
下面展示 代码。
<%@ page language="java" contentType="text/html; charset=UTF-8"
    pageEncoding="UTF-8"%>
    <%@ taglib uri="http://java.sun.com/jsp/jstl/core" prefix="c" %>
<!DOCTYPE html PUBLIC "-//W3C//DTD HTML 4.01 Transitional//EN" "http://www.w3.org/TR/html4/loose.dtd">
<html>
<head>
<meta http-equiv="Content-Type" content="text/html; charset=UTF-8">
<title>Insert title here</title>
</head>
<body>
<!--
		了解标签结构
		<c:if test="true"> 开始标签
		true 标签体
		</c:if>  结束标签


		标签分类:控制标签、数据标签、UI标签
		   没有标签体也能在网页中输出内容的标签,称为UI标签
		通过点击c:if标签,可以链接调到c:tld文件中,而.tld文件就是c标签库的定义配置文件
  -->
<c:if test="true">true</c:if>
<c:if test="false">false</c:if>
<c:set var="name" value="猪崽"></c:set>
<c:out value="${name }"></c:out>
</body>
</html>
二、自定义标签的开发以及使用步骤
2.1 步骤
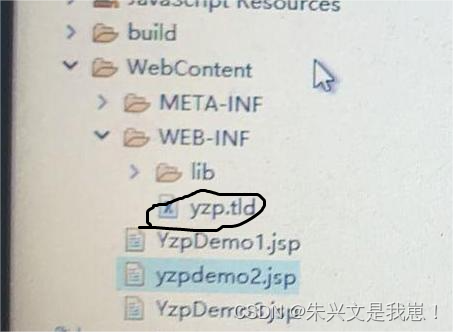
先弄一个助手类继承BodyTagSupport类,标签库描述文件(tld)
tld文件必须保存到WEB-INF目录或其子目录
JSP通过taglib导入标签库
代码片复制
下面展示tld。
<?xml version="1.0" encoding="UTF-8" ?>

<taglib xmlns="http://java.sun.com/xml/ns/j2ee"
    xmlns:xsi="http://www.w3.org/2001/XMLSchema-instance"
    xsi:schemaLocation="http://java.sun.com/xml/ns/j2ee http://java.sun.com/xml/ns/j2ee/web-jsptaglibrary_2_0.xsd"
    version="2.0">

  <description>JSTL 1.1 core library</description>
  <display-name>JSTL core</display-name>
  <tlib-version>1.1</tlib-version>
  <short-name>y</short-name>
  <uri>http://com.yizepeng.886</uri>

  <validator>
    <description>
        Provides core validation features for JSTL tags.
    </description>
    <validator-class>
        org.apache.taglibs.standard.tlv.JstlCoreTLV
    </validator-class>
  </validator>

  <tag>
  <!-- 代表标签库标签的名字 -->
     <name>yzpdemo1</name>
    <!-- 该标签对应的助手类 -->
     <tag-class>com.yzp.jsp.DemoTag1</tag-class>
    <!-- 代表一个JSP标签 -->
   <body-content>JSP</body-content>
    <!-- <attribute> -->
    	<!-- 该自定义JSP标签的属性名称 -->
       <!--  <name>var</name> -->
       <!--  该属性是否必填 -->
       <!--  <required>false</required> -->
        <!-- 该属性值是否支持表达式 -->
       <!--  <rtexprvalue>false</rtexprvalue> -->
    <!-- </attribute> -->
  </tag>

  <tag>
     <name>if</name>
     <tag-class>com.yzp.jsp.IfTag</tag-class>
   <body-content>JSP</body-content>
    <attribute>
        <name>test</name>
       <required>true</required>
       <rtexprvalue>true</rtexprvalue>
    </attribute>
  </tag>
   <tag>
     <name>set</name>
     <tag-class>com.yzp.jsp.SetTag</tag-class>
   <body-content>JSP</body-content>
    <attribute>
        <name>var</name>
       <required>true</required>
       <rtexprvalue>false</rtexprvalue>
    </attribute>
    <attribute>
        <name>value</name>
       <required>true</required>
       <rtexprvalue>false</rtexprvalue>
    </attribute>
  </tag>

  <tag>
     <name>out</name>
     <tag-class>com.yzp.jsp.OutTag</tag-class>
   <body-content>JSP</body-content>
    <attribute>
        <name>value</name>
       <required>true</required>
       <rtexprvalue>true</rtexprvalue>
    </attribute>
  </tag>

</taglib>
下面展示代码。
<%@ page language="java" contentType="text/html; charset=UTF-8"
    pageEncoding="UTF-8"%>
    <%@ taglib uri="http://com.yizepeng.886" prefix="y" %>
<!DOCTYPE html PUBLIC "-//W3C//DTD HTML 4.01 Transitional//EN" "http://www.w3.org/TR/html4/loose.dtd">
<html>
<head>
<meta http-equiv="Content-Type" content="text/html; charset=UTF-8">
<title>Insert title here</title>
</head>
<body>
<!-- 1.自定义标签库是与tld文件相关的 -->
<!-- 2.标签库中的标签与tld中的tag元素有关,也就是跟tag元素对应的助手类有关 -->
<y:if test="true">true</y:if>
<y:if test="false">false</y:if>
<y:set var="name" value="猪崽"></y:set>
<y:out value="${name }"></y:out>
</body>
</html>
三、标签生命周期
3.1 返回值
SKIP_BODY:跳过主题
EVAL_BODY_INCLUDE:计算标签主题内容并【输出】
EVAL_BODY_AGAIN:再计算主题一次
EVAL_PAGE:计算页面的后续部分
SKIP_PAGE:跳过页面的后续部分
3.2标签开发场景
有标签的情况下,会默认调用助手类的dostarttag,doafterbody,doendtag方法
三种路线
线路一
如果将dostarttag的返回值改为skip_body,那么doafterbody就不会调用执行
doStarttag()---->doEndTag()
线路二
如果将dostarttag的返回值改为eval——body——include,那么doafterbody就会执行调用
doStartTag()---->doAfterBody-------->doEndTag()
线路三
如果将doafterbody的返回值改为eval_body_again,那么就会一直调用doafterbody,进入循环
doStartTag()------>doAfterBody(循环)-------->doEngTag()
下面展示 java代码。
package com.yzp.jsp;

import javax.servlet.jsp.JspException;
import javax.servlet.jsp.tagext.BodyTagSupport;

/**
 * 助手类 必须继承bodyTagSupport
 * @author 易泽鹏
 *
 * 2022年6月18日上午8:33:09
 */
public class DemoTag1 extends BodyTagSupport{
	//开始
	@Override
	public int doStartTag() throws JspException {
		System.out.println("~~~~~~doStartTag~~~~~~~~~");
		return EVAL_BODY_INCLUDE;//计算标签主体内容并【输出】
//		return SKIP_BODY;  跳过主体
	}

	@Override
	public int doAfterBody() throws JspException {
		System.out.println("~~~~~~~doAfterBody~~~~~~~~");
//		return EVAL_BODY_AGAIN; 再计算主体一次
		return super.doAfterBody();
//		return SKIP_PAGE;
	}

	@Override
	public int doEndTag() throws JspException {
		System.out.println("~~~~~~doEndTag~~~~~~~~~");
		return SKIP_PAGE;//跳过页面的后续部分
//		return doEndTag();
	}


}
下面展示jsp代码。
<%@ page language="java" contentType="text/html; charset=UTF-8"
    pageEncoding="UTF-8"%>
    <%@ taglib uri="http://com.yizepeng.886" prefix="y" %>
<!DOCTYPE html PUBLIC "-//W3C//DTD HTML 4.01 Transitional//EN" "http://www.w3.org/TR/html4/loose.dtd">
<html>
<head>
<meta http-equiv="Content-Type" content="text/html; charset=UTF-8">
<title>Insert title here</title>
</head>
<body>
<!--
1.有标签的情况下,会默认调用助手类的dostarttag,doafterbody,doendtag方法
2.如果将dostarttag的返回值改为skip_body,那么doafterbody就不会调用执行(路线1)
3.如果将dostarttag的返回值改为eval——body——include,那么doafterbody就会执行调用(路线2)
4.如果将doafterbody的返回值改为eval_body_again,那么就会一直调用doafterbody,进入循环(线路3)
 -->
<y:yzpdemo1>123</y:yzpdemo1>
打打看大框架
<%-- <y:if test="true">true</y:if>
<y:if test="false">false</y:if>
<y:set var="name" value="猪崽"></y:set>
<y:out value="${name }"></y:out> --%>
</body>
</html>
四、y:if标签
下面展示 tag标签介绍。
<tag>
  <!-- 代表标签库标签的名字 -->
     <name>yzpdemo1</name>
    <!-- 该标签对应的助手类 -->
     <tag-class>com.yzp.jsp.DemoTag1</tag-class>
    <!-- 代表一个JSP标签 -->
   <body-content>JSP</body-content>
    <!-- <attribute> -->
    	<!-- 该自定义JSP标签的属性名称 -->
       <!--  <name>var</name> -->
       <!--  该属性是否必填 -->
       <!--  <required>false</required> -->
        <!-- 该属性值是否支持表达式 -->
       <!--  <rtexprvalue>false</rtexprvalue> -->
    <!-- </attribute> -->
  </tag>
下面展示 yif的创建和使用。
  <tag>
     <name>if</name>
     <tag-class>com.yzp.jsp.IfTag</tag-class>
   <body-content>JSP</body-content>
    <attribute>
        <name>test</name>
       <required>true</required>
       <rtexprvalue>true</rtexprvalue>
    </attribute>
  </tag>
<y:if test="true">true</y:if>
<y:if test="false">false</y:if>
五、set和out
下面展示 set和out的创建。
<tag>
     <name>set</name>
     <tag-class>com.yzp.jsp.SetTag</tag-class>
   <body-content>JSP</body-content>
    <attribute>
        <name>var</name>
       <required>true</required>
       <rtexprvalue>false</rtexprvalue>
    </attribute>
    <attribute>
        <name>value</name>
       <required>true</required>
       <rtexprvalue>false</rtexprvalue>
    </attribute>
  </tag>

  <tag>
     <name>out</name>
     <tag-class>com.yzp.jsp.OutTag</tag-class>
   <body-content>JSP</body-content>
    <attribute>
        <name>value</name>
       <required>true</required>
       <rtexprvalue>true</rtexprvalue>
    </attribute>
  </tag>
下面展示 set和out的使用。
<y:set var="name" value="猪崽"></y:set>
<y:out value="${name }"></y:out>
输出结果


 923
923


 被折叠的 条评论
为什么被折叠?
被折叠的 条评论
为什么被折叠?
 到【灌水乐园】发言


