


官方文档
说实话,uniapp 的官方文档有点小乱
找不到,可以参考一下下图
请在阅读此教程前,一定一定一定要大概看看官方文档
然后结合进行使用
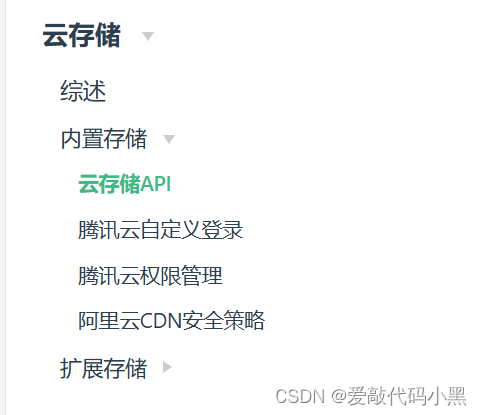
内置云存储概述:
- web界面:即在https://unicloud.dcloud.net.cn/ web控制台,点击云存储,通过web界面进行文件上传。该管理界面同时提供了资源浏览、删除等操作界面。
- 客户端API或组件上传:在前端js中编写uniCloud.uploadFile,或者使用uni ui的FilePicker组件,文件选择+上传均封装完毕。
- 云函数上传文件到云存储:即在云函数js中编写uniCloud.uploadFile
详细实现过程
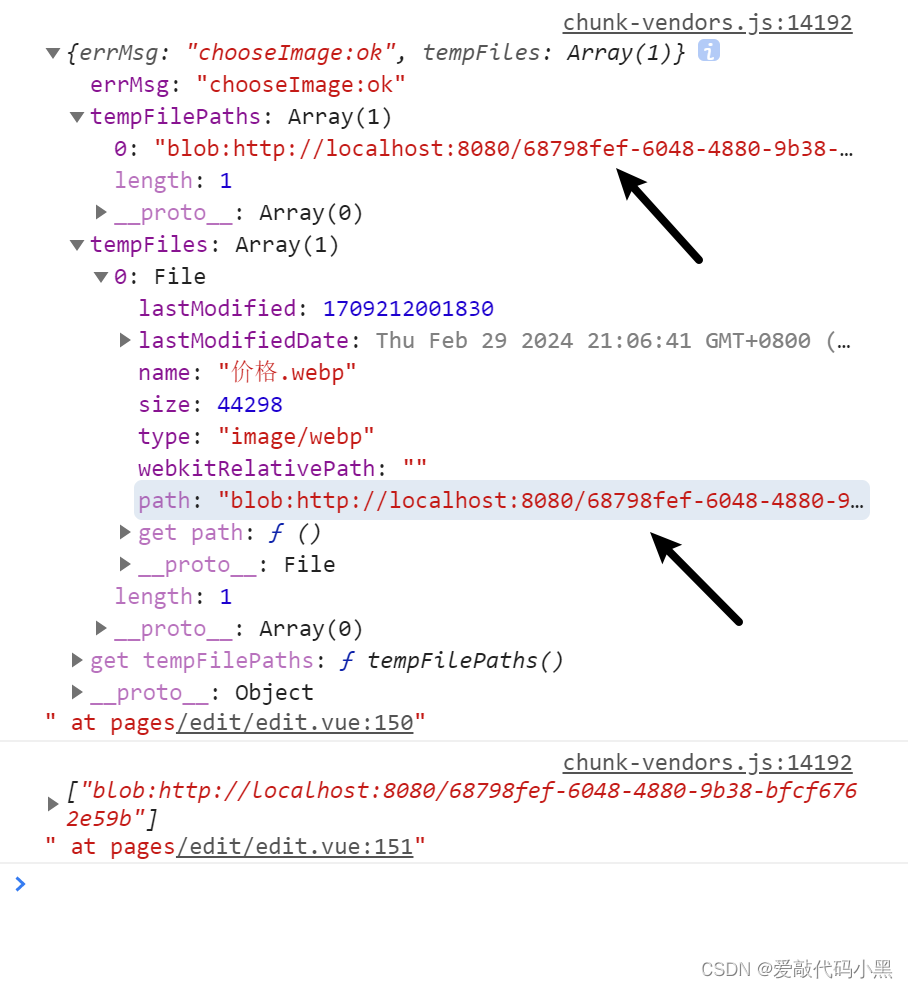
通过 chooseImage 选择图片并且success返回的参数中tempFiles为图片的本地文件列表,每一项都是一个File对象
chooseImage官方文档
						uni.chooseImage({
						success:async res=>{
						uni.showLoading({
							title:"上传中请稍后",
							mask:true
						})
						// 打印  这里关注一下 tempFiles 中
						console.log(res)
						console.log(res.tempFilePaths)
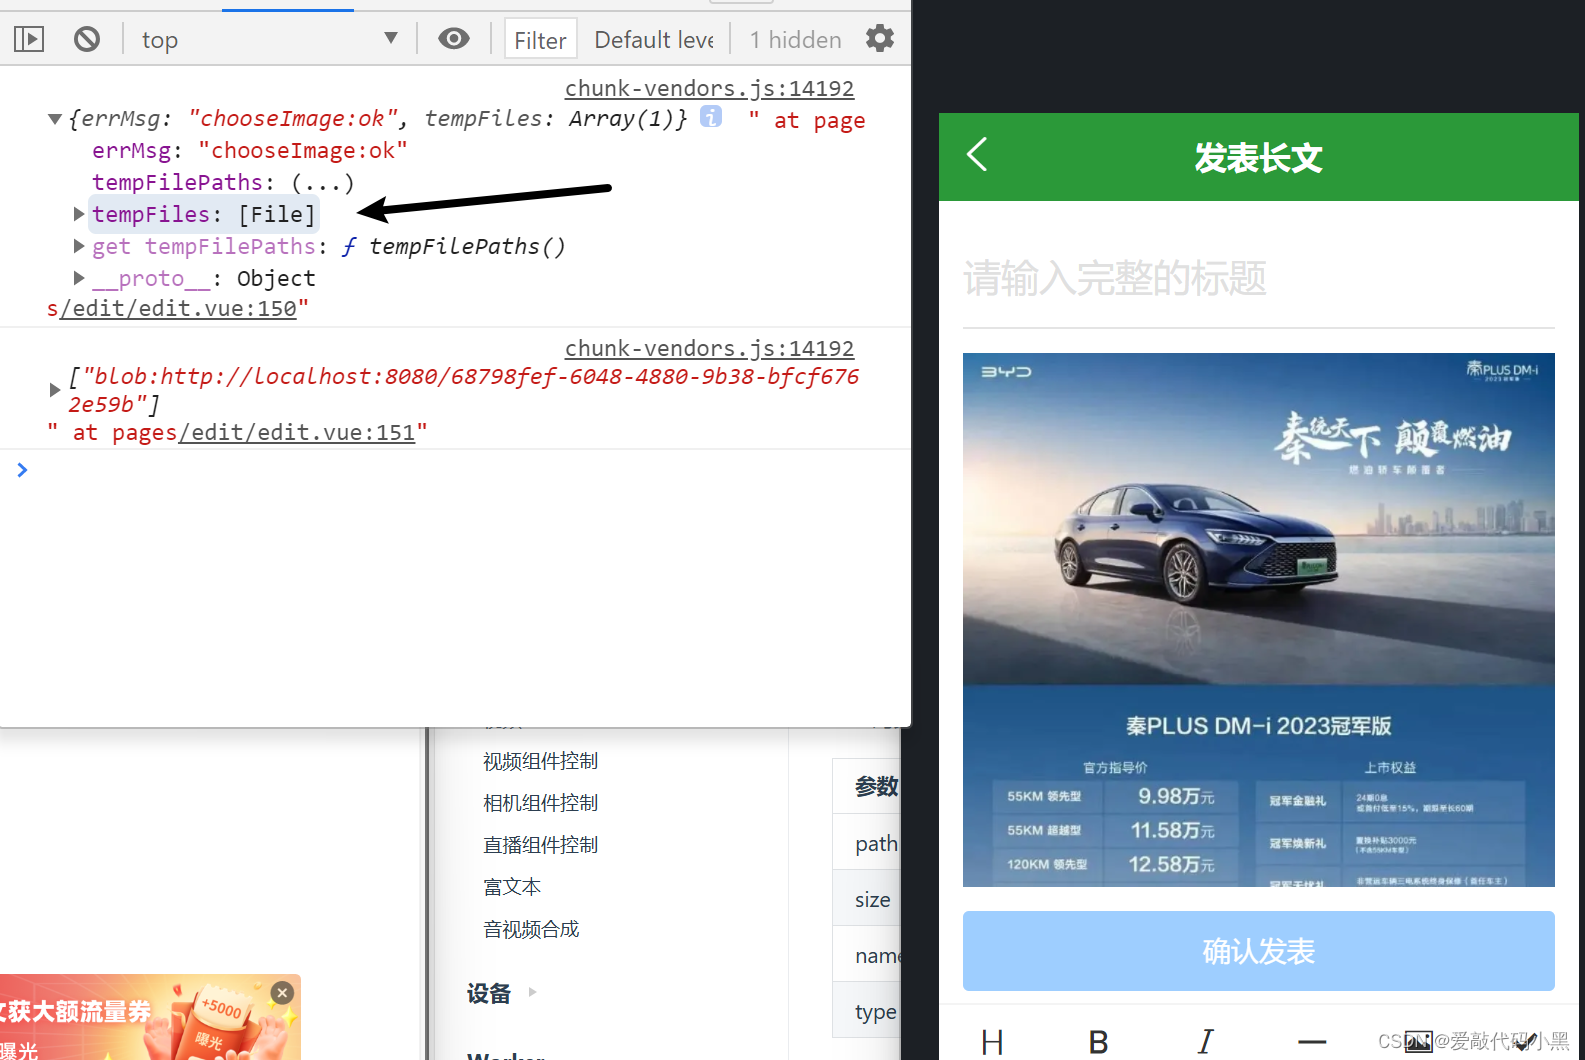
tempFilePaths: 路径数组
tempFiles: File 数组对象, 里面包含有 各种属性
下面重点讲一下云存储客户端 API
函数名: uploadFile(Object object)
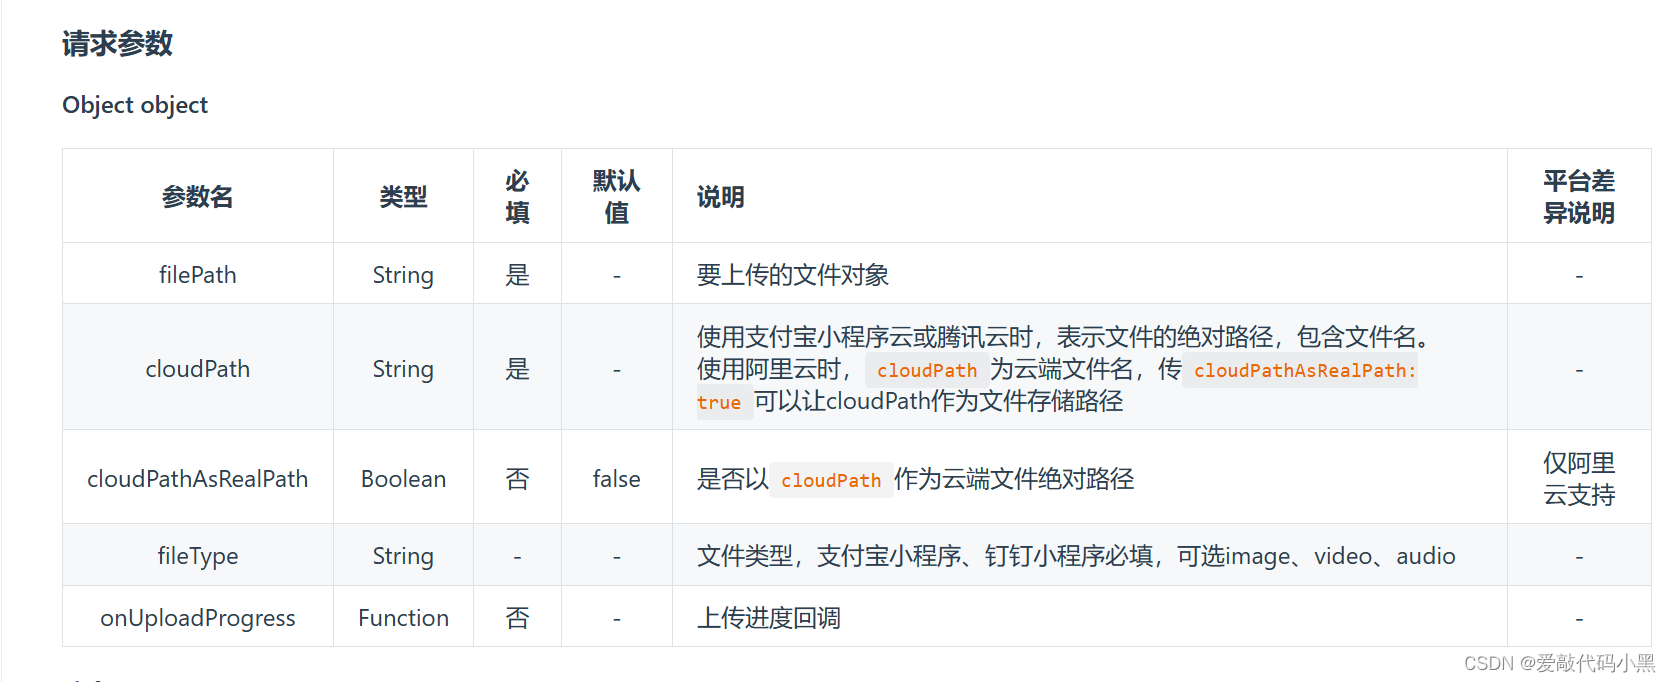
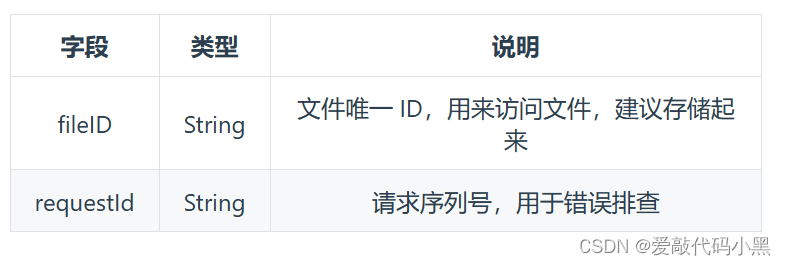
响应参数
简单来说: fileID就是上传图片后,云服务器返回的链接
requestId 就是用来排查错误的 成功 or 失败
  					let res= await uniCloud.uploadFile({
  						filePath:item.path,       //  本地临时路径
  						cloudPath:item.name || randomName   // 名字
  					})
通过循环实现多张图片上传
						for (let item of res.tempFiles) {
							// 获取文件后缀名
							let suffix = item.path.substring(item.path.lastIndexOf("."));
							let randomName=Date.now() + "" + String( Math.random() ).substr(3,6)+suffix
							// 异步同步化
							let res= await uniCloud.uploadFile({
								filePath:item.path,
								cloudPath:item.name || randomName
							})
							// 这里使用 云存储函数 uploadFile
							// res 返回值: fileID: 文件唯一 , 用来访问文件, 建议存储起来
							//requestId: 请求序列号, 用于错误排查
							// 富文本插入图片 如果没有富文本的话,下面这部分需要删除
							this.editorCtx.insertImage({
								src:res.fileID
							})
						}
						uni.hideLoading()
						}
完整code
clickInsertImage(){
				uni.chooseImage({
					success:async res=>{
						uni.showLoading({
							title:"上传中请稍后",
							mask:true
						})
						// 打印  这里关注一下 tempFiles 中
						console.log(res)
						console.log(res.tempFilePaths)

						for (let item of res.tempFiles) {
							// 获取文件后缀名
							let suffix = item.path.substring(item.path.lastIndexOf("."));
							let randomName=Date.now() + "" + String( Math.random() ).substr(3,6)+suffix
							// 异步同步化
							let res= await uniCloud.uploadFile({
								filePath:item.path,
								cloudPath:item.name || randomName
							})
							// 这里使用 云存储函数 uploadFile
							// res 返回值: fileID: 文件唯一 , 用来访问文件, 建议存储起来
							//requestId: 请求序列号, 用于错误排查
							// this.editorCtx.insertImage({
							//	src:res.fileID
							// })
						}
						uni.hideLoading()
					}
				})
			},


 1481
1481


 被折叠的 条评论
为什么被折叠?
被折叠的 条评论
为什么被折叠?
 到【灌水乐园】发言


