


这里我们分一下步邹进行构建
目录结构如下所示
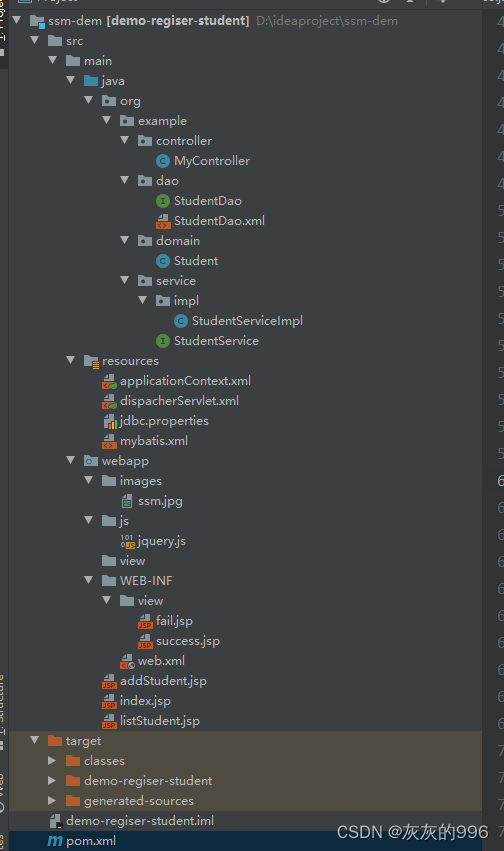
首先创建项目,并加入pom.xml依赖
<?xml version="1.0" encoding="UTF-8"?>

<project xmlns="http://maven.apache.org/POM/4.0.0" xmlns:xsi="http://www.w3.org/2001/XMLSchema-instance"
  xsi:schemaLocation="http://maven.apache.org/POM/4.0.0 http://maven.apache.org/xsd/maven-4.0.0.xsd">
  <modelVersion>4.0.0</modelVersion>

  <groupId>org.example</groupId>
  <artifactId>demo-regiser-student</artifactId>
  <version>1.0-SNAPSHOT</version>
  <packaging>war</packaging>

  <name>demo-regiser-student Maven Webapp</name>
  <!-- FIXME change it to the project's website -->
  <url>http://www.example.com</url>

  <properties>
    <project.build.sourceEncoding>UTF-8</project.build.sourceEncoding>
    <maven.compiler.source>1.7</maven.compiler.source>
    <maven.compiler.target>1.7</maven.compiler.target>
  </properties>

  <dependencies>
    <dependency>
      <groupId>junit</groupId>
      <artifactId>junit</artifactId>
      <version>4.11</version>
      <scope>test</scope>
    </dependency>
    <!--servlet-->
    <dependency>
      <groupId>javax.servlet</groupId>
      <artifactId>javax.servlet-api</artifactId>
      <version>3.1.0</version>
      <scope>provided</scope>
    </dependency>
    <!-- jsp 依赖 -->
    <dependency>
      <groupId>javax.servlet.jsp</groupId>
      <artifactId>jsp-api</artifactId>
      <version>2.2.1-b03</version>
      <scope>provided</scope>
    </dependency>
    <!--springmvc-->
    <dependency>
      <groupId>org.springframework</groupId>
      <artifactId>spring-webmvc</artifactId>
      <version>5.2.5.RELEASE</version>
    </dependency>
    <!--事务的-->
    <dependency>
      <groupId>org.springframework</groupId>
      <artifactId>spring-tx</artifactId>
      <version>5.2.5.RELEASE</version>
    </dependency>
    <dependency>
      <groupId>org.springframework</groupId>
      <artifactId>spring-jdbc</artifactId>
      <version>5.2.5.RELEASE</version>
    </dependency>
    <!--aspectj 依赖-->
    <dependency>
      <groupId>org.springframework</groupId>
      <artifactId>spring-aspects</artifactId>
      <version>5.2.5.RELEASE</version>
    </dependency>
    <!--jackson-->
    <dependency>
      <groupId>com.fasterxml.jackson.core</groupId>
      <artifactId>jackson-core</artifactId>
      <version>2.9.0</version>
    </dependency>
    <dependency>
      <groupId>com.fasterxml.jackson.core</groupId>
      <artifactId>jackson-databind</artifactId>
      <version>2.9.0</version>
    </dependency>
    <!--mybatis 和 spring 整合的-->
    <dependency>
      <groupId>org.mybatis</groupId>
      <artifactId>mybatis-spring</artifactId>
      <version>1.3.1</version>
    </dependency>
    <!--mybatis-->
    <dependency>
      <groupId>org.mybatis</groupId>
      <artifactId>mybatis</artifactId>
      <version>3.5.1</version>
    </dependency>
    <!--mysql 驱动-->
    <dependency>
      <groupId>mysql</groupId>
      <artifactId>mysql-connector-java</artifactId>
      <version>5.1.9</version>
    </dependency>
    <!--druid-->
    <dependency>
    <groupId>com.alibaba</groupId>
    <artifactId>druid</artifactId>
      <version>1.1.12</version>
    </dependency>
    <!-- Javax Annotation -->
    <dependency>
      <groupId>javax.annotation</groupId>
      <artifactId>javax.annotation-api</artifactId>
      <version>1.3.1</version>
    </dependency>
    <dependency>
      <groupId>commons-fileupload</groupId>
      <artifactId>commons-fileupload</artifactId>
      <version>1.3.1</version>
    </dependency>

  </dependencies>


  <build>
    <finalName>demo-regiser-student</finalName>
    <pluginManagement><!-- lock down plugins versions to avoid using Maven defaults (may be moved to parent pom) -->
      <plugins>
        <plugin>
          <artifactId>maven-clean-plugin</artifactId>
          <version>3.1.0</version>
        </plugin>
        <!-- see http://maven.apache.org/ref/current/maven-core/default-bindings.html#Plugin_bindings_for_war_packaging -->
        <plugin>
          <artifactId>maven-resources-plugin</artifactId>
          <version>3.0.2</version>
        </plugin>
        <plugin>
          <artifactId>maven-compiler-plugin</artifactId>
          <version>3.8.0</version>
        </plugin>
        <plugin>
          <artifactId>maven-surefire-plugin</artifactId>
          <version>2.22.1</version>
        </plugin>
        <plugin>
          <artifactId>maven-war-plugin</artifactId>
          <version>3.2.2</version>
        </plugin>
        <plugin>
          <artifactId>maven-install-plugin</artifactId>
          <version>2.5.2</version>
        </plugin>
        <plugin>
          <artifactId>maven-deploy-plugin</artifactId>
          <version>2.8.2</version>
        </plugin>
      </plugins>
    </pluginManagement>
    <resources>
      <resource>
        <directory>src/main/java</directory><!--所在的目录-->
        <includes><!--包括目录下的.properties,.xml 文件都会扫描到-->
          <include>**/*.properties</include>
          <include>**/*.xml</include>
        </includes>
        <filtering>false</filtering>
      </resource>
    </resources>
    <plugins>
      <plugin>
        <artifactId>maven-compiler-plugin</artifactId>
        <version>3.1</version>
        <configuration>
          <source>1.8</source>
          <target>1.8</target>
        </configuration>
      </plugin>
    </plugins>
  </build>
</project>
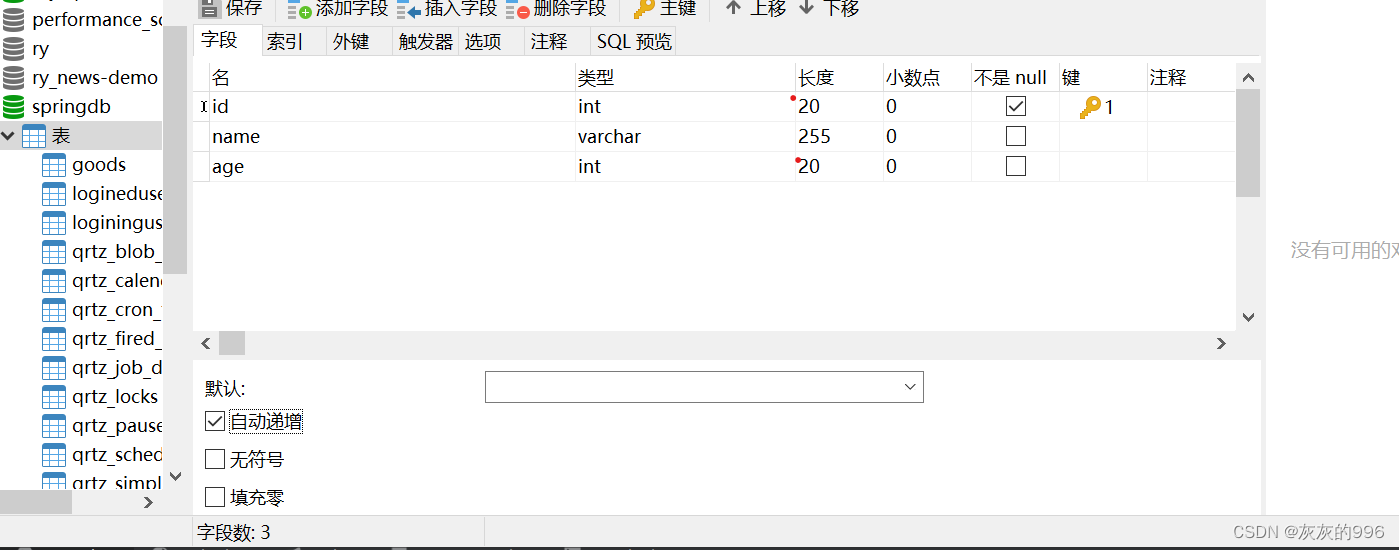
引入依赖之后我们就可以使用,接下来在数据库user表 表中的字段为id ,name,age这里我把id设置为主键,并且设置为自动增长。
接下来就是将我们的配置文件进行配置一一下,resources目录下:
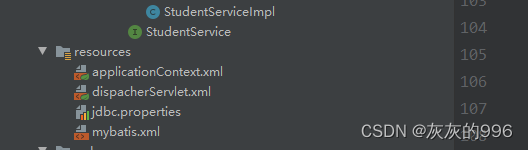
因为配置文件很多,具体的配置信息大家可以看博主的上一边文章
连接如下:(4条消息) org.springframework.beans.factory.BeanCreationException_灰灰的996的博客-CSDN博客
完成配置文件之后就是我们的domain层,dao层,service层的代码填写
domain层
package org.example.domain;

public class Student {
    private  String name;

    private  int age;
    private  Integer id;

    public String getName() {
        return name;
    }

    public void setName(String name) {
        this.name = name;
    }


    public int getAge() {
        return age;
    }

    public void setAge(int age) {
        this.age = age;
    }

    public Integer getId() {
        return id;
    }

    public void setId(Integer id) {
        this.id = id;
    }

    @Override
    public String toString() {
        return "Student{" +
                "name='" + name + '\'' +

                ", age=" + age +
                ", id=" + id +
                '}';
    }
}
dao层代码
package org.example.dao;

import org.example.domain.Student;

import java.util.List;

public interface StudentDao {
    int insertStudent(Student student);
    List<Student> selectAllStudent();
}
mapper文件 StudentDao.xml
<?xml version="1.0" encoding="UTF-8" ?>
<!DOCTYPE mapper
        PUBLIC "-//mybatis.org//DTD Mapper 3.0//EN"
        "http://mybatis.org/dtd/mybatis-3-mapper.dtd">
<mapper namespace="org.example.dao.StudentDao">

    <select id="selectAllStudent" resultType="org.example.domain.Student">

select id,name,age from student
    </select>
<insert id="insertStudent">
    insert into student(name,age) values (#{name},#{age})
</insert>
</mapper>
service层:
package org.example.service;

import org.example.domain.Student;
import org.springframework.stereotype.Service;

import java.util.List;

public interface StudentService {
    int addStudent(Student student);
    List<Student> queryStudent();

}
实现类;
package org.example.service.impl;

import org.example.dao.StudentDao;
import org.example.domain.Student;
import org.example.service.StudentService;
import org.springframework.beans.factory.annotation.Autowired;
import org.springframework.stereotype.Service;

import javax.annotation.Resource;
import java.util.List;
@Service
public class StudentServiceImpl implements StudentService {

  @Resource
    private StudentDao studentDao;


    @Override
    public int addStudent(Student student) {

        return studentDao.insertStudent(student);
    }

    @Override
    public List<Student> queryStudent() {

        return studentDao.selectAllStudent();
    }

    public StudentDao getStudentDao() {
        return studentDao;
    }

    public void setStudentDao(StudentDao studentDao) {
        this.studentDao = studentDao;
    }

    @Override
    public String toString() {
        return "StudentServiceImpl{" +
                "studentDao=" + studentDao +
                '}';
    }
}
controller层;
package org.example.controller;

import org.example.domain.Student;
import org.example.service.StudentService;
import org.springframework.beans.factory.annotation.Autowired;
import org.springframework.context.annotation.ImportResource;
import org.springframework.stereotype.Controller;
import org.springframework.web.bind.annotation.PostMapping;
import org.springframework.web.bind.annotation.RequestMapping;
import org.springframework.web.bind.annotation.ResponseBody;
import org.springframework.web.servlet.ModelAndView;

import javax.annotation.Resource;
import java.util.List;

@Controller

public class MyController {
@Resource
    private StudentService studentService;
@RequestMapping("/addStudent.do")
    public ModelAndView addStudent(Student student){
        ModelAndView mv=new ModelAndView();
        int rows=studentService.addStudent(student);
    System.out.println(rows);
       if (rows>0){
           mv.addObject("myname",student.getName());
          mv.addObject("myage",student.getAge());
           mv.addObject("msg","注册成功");
          mv.setViewName("success");
        }else {
           mv.addObject("myname",student.getName());
           mv.addObject("myage",student.getAge());
           mv.addObject("msg","注册失败");
            mv.setViewName("fail");


      }

        return  mv;

        /*相应ajax输出数据*/

    }
    @RequestMapping("/queryStudent.do")
    @ResponseBody
    public List<Student> queryStudent(){
    List<Student> students=studentService.queryStudent();
    return students;
    }

    public StudentService getStudentService() {
        return studentService;
    }

    public void setStudentService(StudentService studentService) {
        this.studentService = studentService;
    }

    @Override
    public String toString() {
        return "MyController{" +
                "studentService=" + studentService +
                '}';
    }

}
到此位置就是后端部署,接下来就是前端jsp文件的编写
代码目录如下· :
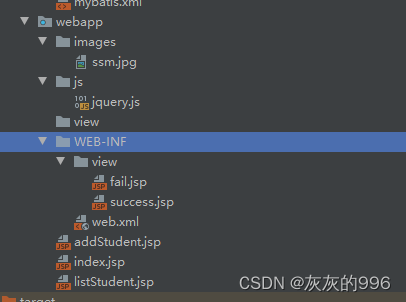
images包下大家只需要去保存一个.jpg结尾的图片就可以,这个是为了前端页面的装饰效果。美化页面:
js包跟listStudent.jsp大家可以不用去配置,这个是为了相应ajax使用的;
index.jsp 加载页面
<%
    String basePath = request.getScheme() + "://" +
            request.getServerName() + ":" + request.getServerPort() +
            request.getContextPath() + "/";
%>
指定 base 标签
<%@ page contentType="text/html;charset=UTF-8" language="java" %>

<head>
    <base href="<%=basePath%>">
    <title>Title</title>
</head>
<div align="center">
    <p> SSM整合开发--实现student表的操作</p>
    <img src="images/ssm.jpg">
    <table cellpadding="0" cellspacing="0">
        <tr>
            <td><a href="addStudent.jsp">注册学生</a>

            </td>
        </tr>
        <tr>
            <td>
                <a href="listStudent.jsp">查询学生</a>
            </td>
        </tr>
    </table>
</div>
<body>

</body>
addStudent.jsp 用来注册学生的页面
<%@ page contentType="text/html;charset=UTF-8" language="java" %>
<html>
<head>
<title>Title</title>
</head>
<body>
<div align="center">
<p>注册学生页面</p>
<form action="addStudent.do" method="post">
<table>
<tr>
<td>
姓名:
</td>
<td><input type="text" name="name">
</td>
</tr>
<tr>
<td>
年龄:
</td>
<td><input type="text" name="age">
</td>
</tr>
<tr>
<td>
</td>
<td>
<input type="submit" value="注册">
</td>
</tr>
</table>
</form>
</div>
</body>
</html>
fail.jsp 用来显示注册失败的页面;
<%@ page contentType="text/html;charset=UTF-8" language="java" %>
<html>
<head>
    <title>Title</title>
</head>
<body>
name:${myname}
age:${myage}
注册结果为==${msg}
</body>
</html>
success.jsp 用来显示加载成功的页面
<%@ page contentType="text/html;charset=UTF-8" language="java" %>
<html>
<head>
    <title>Title</title>
</head>
<body>
name:${myname}
age:${myage}
注册结果为==${msg}
</body>
</html>


 1458
1458


 被折叠的 条评论
为什么被折叠?
被折叠的 条评论
为什么被折叠?
 到【灌水乐园】发言


