


 本文介绍在UI界面中设置分割线的三种方法:使用ImageView、View控件及divider样式。适用于垂直和水平分割线的创建。
UI界面中设置分割线通常有三种方式,分别是ImageView View divider
方法一:ImageView方式

该方法在xml布局文件中添加ImageView控件
设置竖直分割线时,设置宽度为0.5dp,高度为match_parent(与父控件等高),颜色设置为black(黑色),此处数值可根据需求自行更改
        <ImageView
            android:layout_width="0.5dp"
            android:layout_height="match_parent"
            android:background="@android:color/black"/>
设置水平分割线时,设置宽度为match_parent(与父控件等高),高度为0.5dp,颜色设置为black(黑色),此处数值可根据需求自行更改
    <ImageView
        android:layout_width="match_parent"
        android:layout_height="0.5dp"
        android:background="@android:color/black" />
设置为如图所示的界面,两个线性布局嵌套在一起,第一层中控件竖直放置,第二层中控件水平放置,代码如下
<?xml version="1.0" encoding="utf-8"?>
<LinearLayout xmlns:android="http://schemas.android.com/apk/res/android"
    android:layout_width="match_parent"
    android:layout_height="match_parent"
    android:orientation="vertical"
    android:weightSum="1">
    <LinearLayout
        android:layout_width="match_parent"
        android:layout_height="wrap_content"
        android:orientation="horizontal">
        <Button
            android:layout_width="47dp"
            android:layout_height="wrap_content"
            android:id="@+id/back_ccloth"
            android:text="⬅"
            android:background="#00000000"
            android:layout_marginTop="10dp"
            android:layout_marginBottom="10dp"
            android:textSize="40dp"/>
        <ImageView
            android:layout_width="0.5dp"
            android:layout_height="match_parent"
            android:background="@android:color/black"/>
        <TextView
            android:layout_width="wrap_content"
            android:layout_height="wrap_content"
            android:layout_marginLeft="110dp"
            android:text="标题"
            android:layout_marginTop="10dp"
            android:layout_marginBottom="10dp"
            android:textSize="20dp"
            android:textColor="@android:color/black" />
    </LinearLayout>
    <ImageView
        android:layout_width="match_parent"
        android:layout_height="0.5dp"
        android:background="@android:color/black" />
        </LinearLayout>
方法二:View方式
该方法与方法一类似,在xml布局文件中添加View控件,其他代码不变,如下所示
<?xml version="1.0" encoding="utf-8"?>
<LinearLayout xmlns:android="http://schemas.android.com/apk/res/android"
    android:layout_width="match_parent"
    android:layout_height="match_parent"
    android:orientation="vertical"
    android:weightSum="1">
    <LinearLayout
        android:layout_width="match_parent"
        android:layout_height="56dp"
        android:orientation="horizontal"
        android:layout_weight="0.05">
        <Button
            android:layout_width="47dp"
            android:layout_height="wrap_content"
            android:id="@+id/back_ccloth"
            android:text="⬅"
            android:background="#00000000"
            android:layout_marginTop="10dp"
            android:layout_marginBottom="10dp"
            android:textSize="40dp"/>
        <View
            android:layout_width="0.5dp"
            android:layout_height="match_parent"
            android:background="@android:color/black"/>
        <TextView
            android:layout_width="wrap_content"
            android:layout_height="wrap_content"
            android:layout_marginLeft="110dp"
            android:text="标题"
            android:layout_marginTop="10dp"
            android:layout_marginBottom="10dp"
            android:textSize="20dp"
            android:textColor="@android:color/black" />
    </LinearLayout>
    <View
        android:layout_width="match_parent"
        android:layout_height="0.5dp"
        android:background="#000000" />
</LinearLayout>
方法三:divider
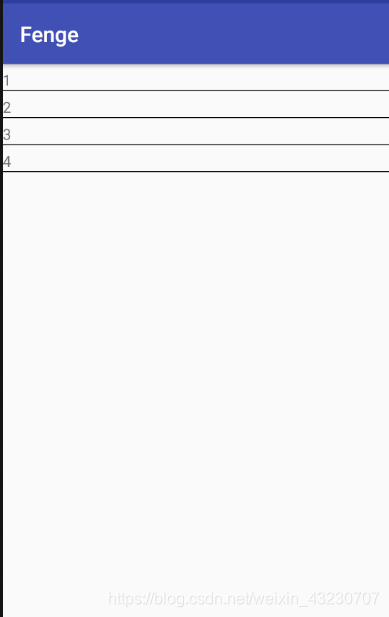
这个方法相对于前两种就比较复杂,需先创建先调格式,然后在布局中调用该格式,divider设置分割线多用作水平分割线,此处效果图以水平分割线为例
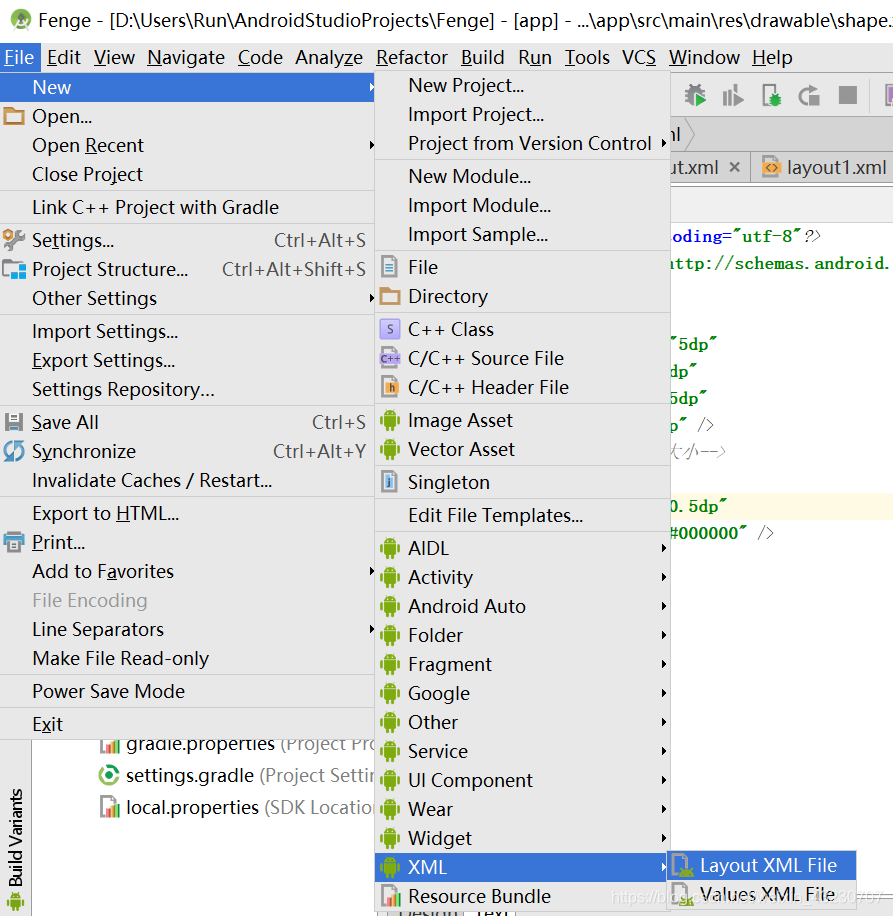
step1:新建xml文件,File-New-XML-Layout XML File
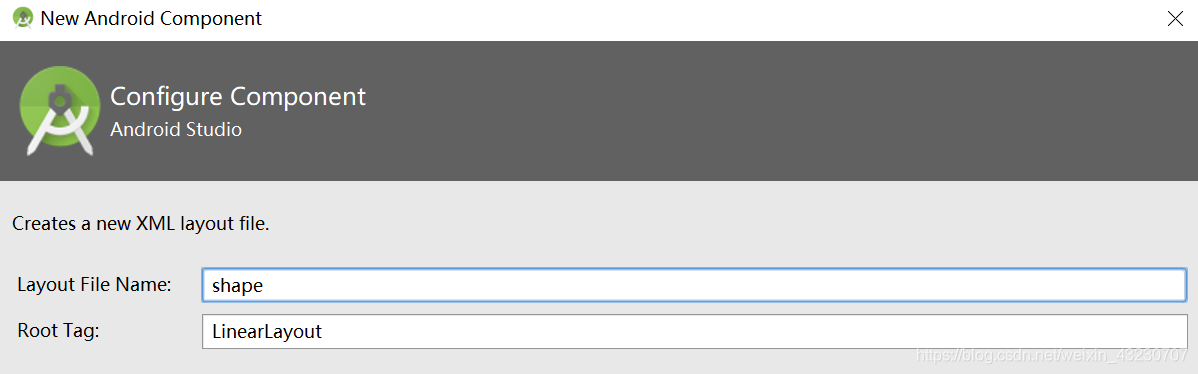
step2:命名为shape
step3:编写代码,如下所示
<?xml version="1.0" encoding="utf-8"?>
<shape xmlns:android="http://schemas.android.com/apk/res/android" >
    <!--颜色-->
    <solid android:color="#000000" />
    <!--大小-->
    <size android:height="1dp"/>
</shape>
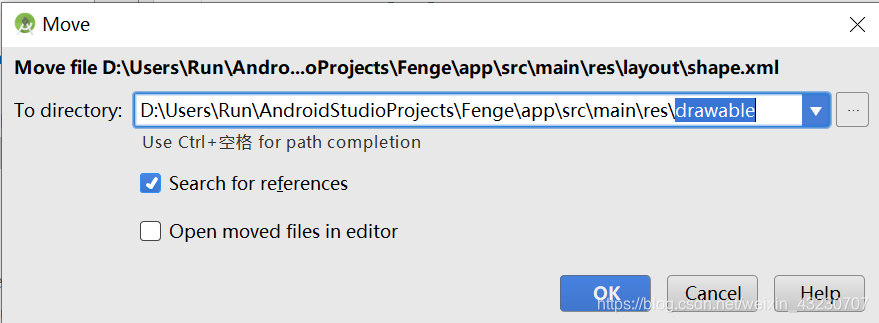
step4:将shape.xml从layout文件夹中移动到drawable文件夹中
①选中shape-单击鼠标右键-Refactor-Move
②将layout改为drawable
step5:调用divider样式
Android:showDividers可以设置为middle(每一项中间添加),end(整体最后一项),beginning(整体最前方),none(无),本例中设置为middle|end
    android:divider="@drawable/shape"
    android:showDividers = "middle|end"
整体代码如下所示
<?xml version="1.0" encoding="utf-8"?>
<LinearLayout xmlns:android="http://schemas.android.com/apk/res/android"
    android:layout_width="match_parent"
    android:layout_height="match_parent"
    android:orientation="vertical"
    android:divider="@drawable/shape"
    android:showDividers = "middle|end">
    <TextView
        android:layout_width="match_parent"
        android:layout_height="wrap_content"
        android:text="1"
        android:layout_marginTop="5dp"/>
    <TextView
        android:layout_width="match_parent"
        android:layout_height="wrap_content"
        android:text="2"
        android:layout_marginTop="5dp"/>
    <TextView
        android:layout_width="match_parent"
        android:layout_height="wrap_content"
        android:text="3"
        android:layout_marginTop="5dp"/>
    <TextView
        android:layout_width="match_parent"
        android:layout_height="wrap_content"
        android:text="4"
        android:layout_marginTop="5dp"/>
</LinearLayout>


 44
44

 被折叠的 条评论
为什么被折叠?
被折叠的 条评论
为什么被折叠?
 到【灌水乐园】发言


