


1.逻辑
在com.example下面把每个层的包创建好,用于后续我们在不同的包里创建Java文件,后端我们都是分层的。
controller:后端接口的入口,主要编写各种 xxxController,提供接口给前端调用。
service:后端业务层,主要编写一些后端业务逻辑。controller --> service
dao(mapper):后端持久层,主要映射数据库,操作数据库表数据。service --> dao (mapper)
entity:实体类,对应数据库表,实体类的属性对应表的字段信息。
1.1controller(类class)
@Restcontroller
标注为controller层
@RequestMapping
大门钥匙
@RestController
@RequestMapping("/user")
public class UserController {
    /**
     * controller里的一个方法,它其实就是我们平常说的web项目的一个接口的入口
     * 可以在这个方法上再加上一个url
     * 也可以指定请求方式:GET POST PUT DELETE
     * @return
     */
    @GetMapping("/start")
    public String start() {
        return "欢迎";      //访问默认端口localhost:8080/user/start就可以显示“欢迎”
    }
}
@GetMapping
小门钥匙 (包含路径和请求方式 get/post/put/delete 可以不指定不指定小门钥匙)
{钥匙路径: 双括号+双引号}
引入Service
@Resource
private+ service层类名+ 对象名( private UserService userService)

public + 返回值类型 + 函数名(){ ... 函数体...}
返回值类型为字符串时为String
返回值类型为表单数据时 可以定义一个实体类 返回值类型就为实体类名
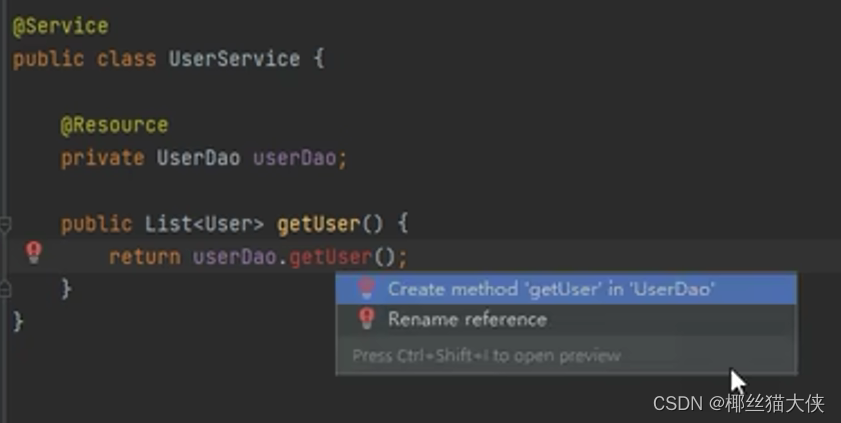
public User getUser( ) { ... }
数据有多条时,封装为list : public User List(User) getUser( ) { ... }
1.2entity实体类(类class)
创建实体类(对象)
private + 参数类型 + 参数名;
右键-生成-getter和setter方法-全选
右键-生成-构造方法Constructor-全选(可以不写)
映射数据库!!!
@Table(name = "user") //name对应数据库表名 Table为Mybatis自带
public class User {

    @Id       //主键注释
    @GeneratedValue(strategy = GenerationType.IDENTITY)    //自增策略
    private Integer id;        //声明id

    @Column(name = "name")   //Column:形成一一对应 数据库name(可以不写)
    private String name;     //对应实体name
    @Column(name = "password")
    private String password;
    @Column(name = "sex")
    private String sex;
    @Column(name = "age")
    private Integer age;
    @Column(name = "phone")
    private String phone;
}
1.3service业务层(类class)
引入Dao
@Resource
private+Dao层类名+ 对象名( private UserDao userDao)
@Service
标注为service层
1.4dao持久层(接口interface)
写法
1.基于注解:直接在dao中写函数
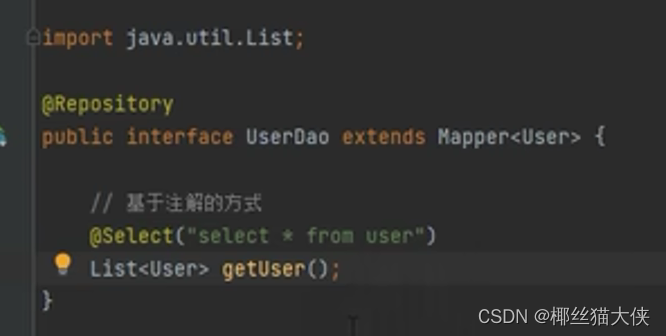
select:查询数据库语句
2.基于xml:在绑定的mapper.xml中写函数
@Repository
标注为持久层
MyBatis
持久层框架,用于操作数据库,需要整合MyBatis
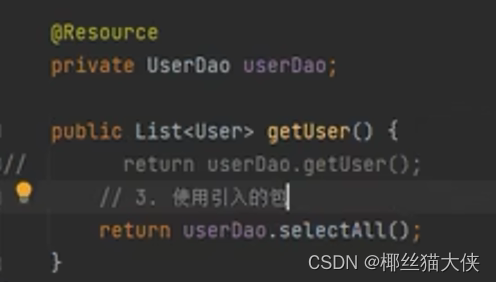
图中dao层使用的selectAll就是Mybatis自带的查询数据库所有数据的函数
extends继承
@Repository
public interface UserDao{                //自动生成的

}

@Repository
public interface UserDao extends Mapper<User> {

                                        //用extends继承Mapper里的User实体对象
}
表示此持久层是操作User实体对象 而User实体对象又和数据库user表映射 即此持久层用于操作数据库的user表
Mapper映射
在application.yml中配置的MyBatis中,标记了Mapper的位置:
# 配置mybatis实体和xml映射
mybatis:
  mapper-locations: classpath:mapper/*.xml
  type-aliases-package: com.example.entity

#即mapper位置为:src/main/resouces/mapper(自己创建文件夹)/userMapper.xml(自己创建的文件)
要是持久层逻辑功能比较复杂,就在创建的对应Mapper.xml文件中写函数,而不直接在dao层中写
mapper.xml绑定dao层:
//userMapper中写入

<?xml version="1.0" encoding="UTF-8"?>
<!DOCTYPE mapper PUBLIC "-//mybatis.org//DTD Mapper 3.0//EN" "http://mybatis.org/dtd/mybatis-3-mapper.dtd">
<mapper namespace="com.example.dao.UserDao"> //!!!此处绑定的是UserDao


</mapper>
1.5application.yml
配置连接数据库
server:
  port: 8080  //端口设置

# 数据库配置
spring:
  datasource:
    driver-class-name: com.mysql.cj.jdbc.Driver
    username: root   #你本地的数据库用户名
    password: ??? #你本地的数据库密码
    url: jdbc:mysql://localhost:3306/springboot?useUnicode=true&characterEncoding=utf-8&allowMultiQueries=true&useSSL=false&serverTimezone=GMT%2b8&allowPublicKeyRetrieval=true
  main:
    allow-circular-references: true


# 配置mybatis实体和xml映射
mybatis:
  mapper-locations: classpath:mapper/*.xml
  type-aliases-package: com.example.entity

# 分页查询
pagehelper:
  helper-dialect: mysql
  reasonable: true
  support-methods-arguments: true
  params: count=countSql
1.6总结
既然让我说两句呢 那我就简单说两句吧 至于说哪两句呢 不如就这两句吧
整个逻辑
前端vue用request封装的axios发送post/get 请求将请求体发送到url中
然后后端controller层写一个与url相对应的接口来接收前端发送的请求体,并引用service服务层
后端创建一个实体类接收前端的数据,并生成getter和setter方法 ,实体类用@Table与数据库名关联
后端service服务层中引用dao层
后端dao层处理数据库:用extends Mapper<实体类名>与实体类关联
前提:已经整合Mybatis
其他
springbootApplication:启动类
1.右键选中run可以启动项目
2.@MapperScan("com.example.dao")
添加扫描,否则dao层报错
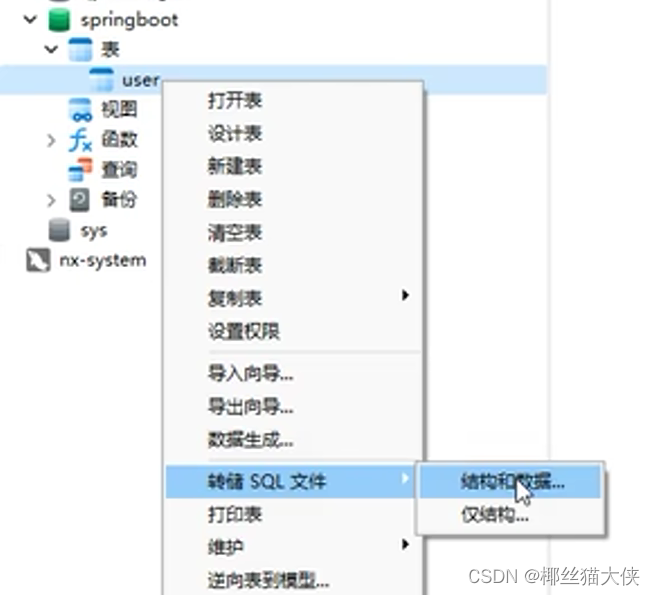
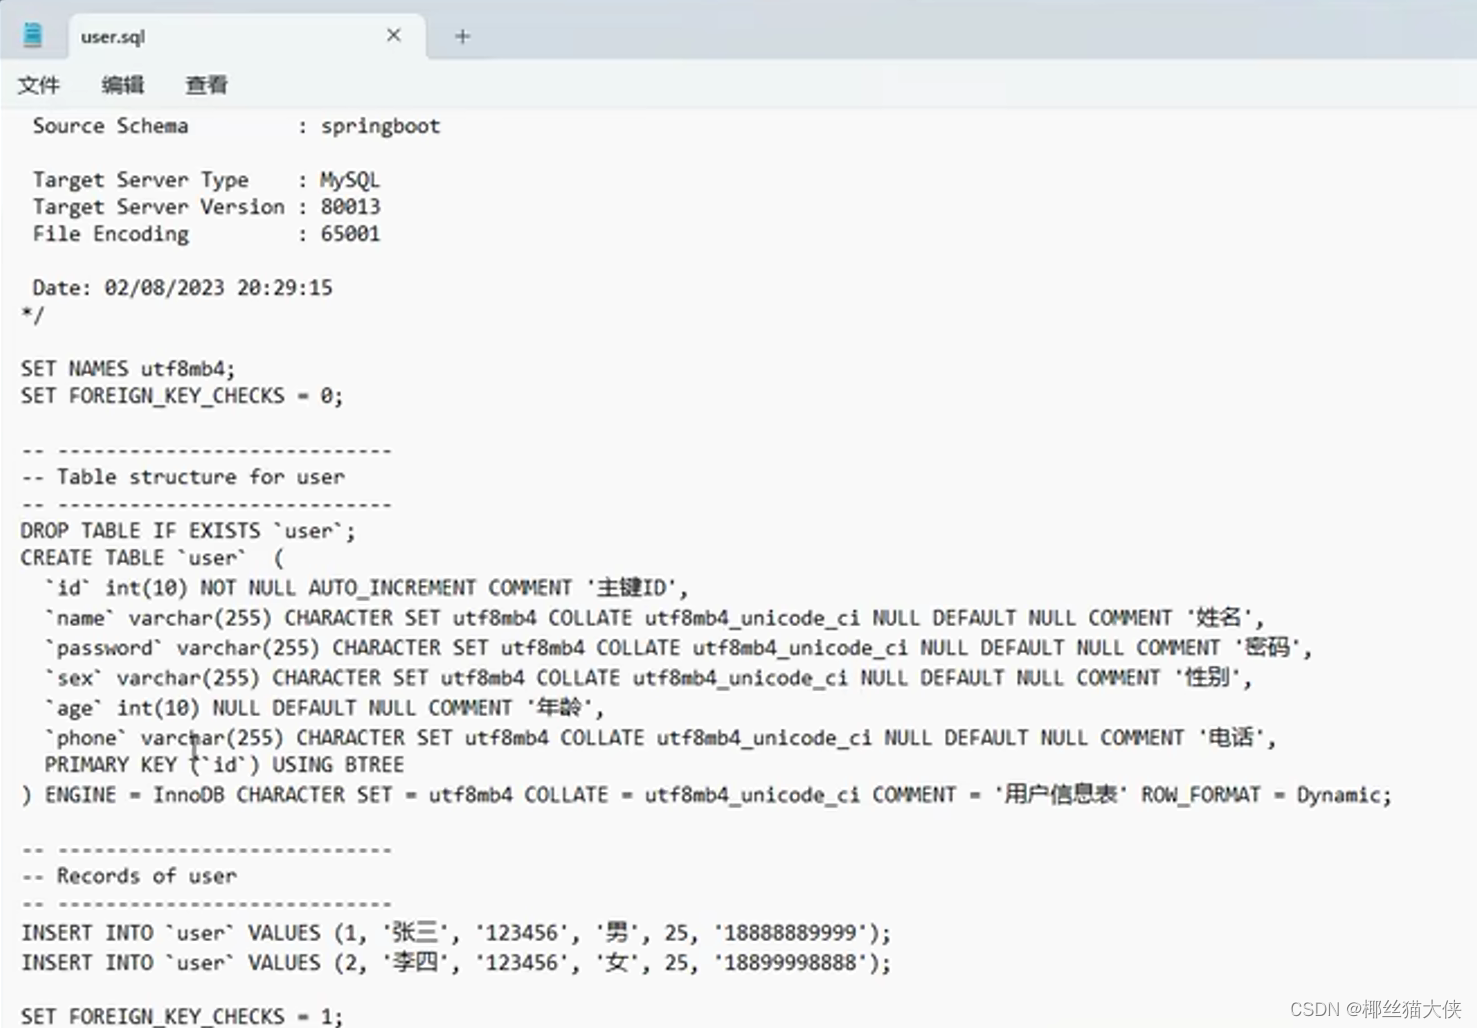
数据库创建脚本
用脚本在数据库新增查询中运行可以无痛创建数据库


 8411
8411


 被折叠的 条评论
为什么被折叠?
被折叠的 条评论
为什么被折叠?
 到【灌水乐园】发言


