


这一步中,我们要实现的效果是:获得一个可以访问个人主页的地址“你的用户名.github.io”(免费,随时随地,任何人),并在本地上创建可以修改个人主页的工程文件,随时修改,随时同步。
Step1 创建github账号
过程请参考:
GitHub账号注册教程_许秀军的博客-CSDN博客_github账号
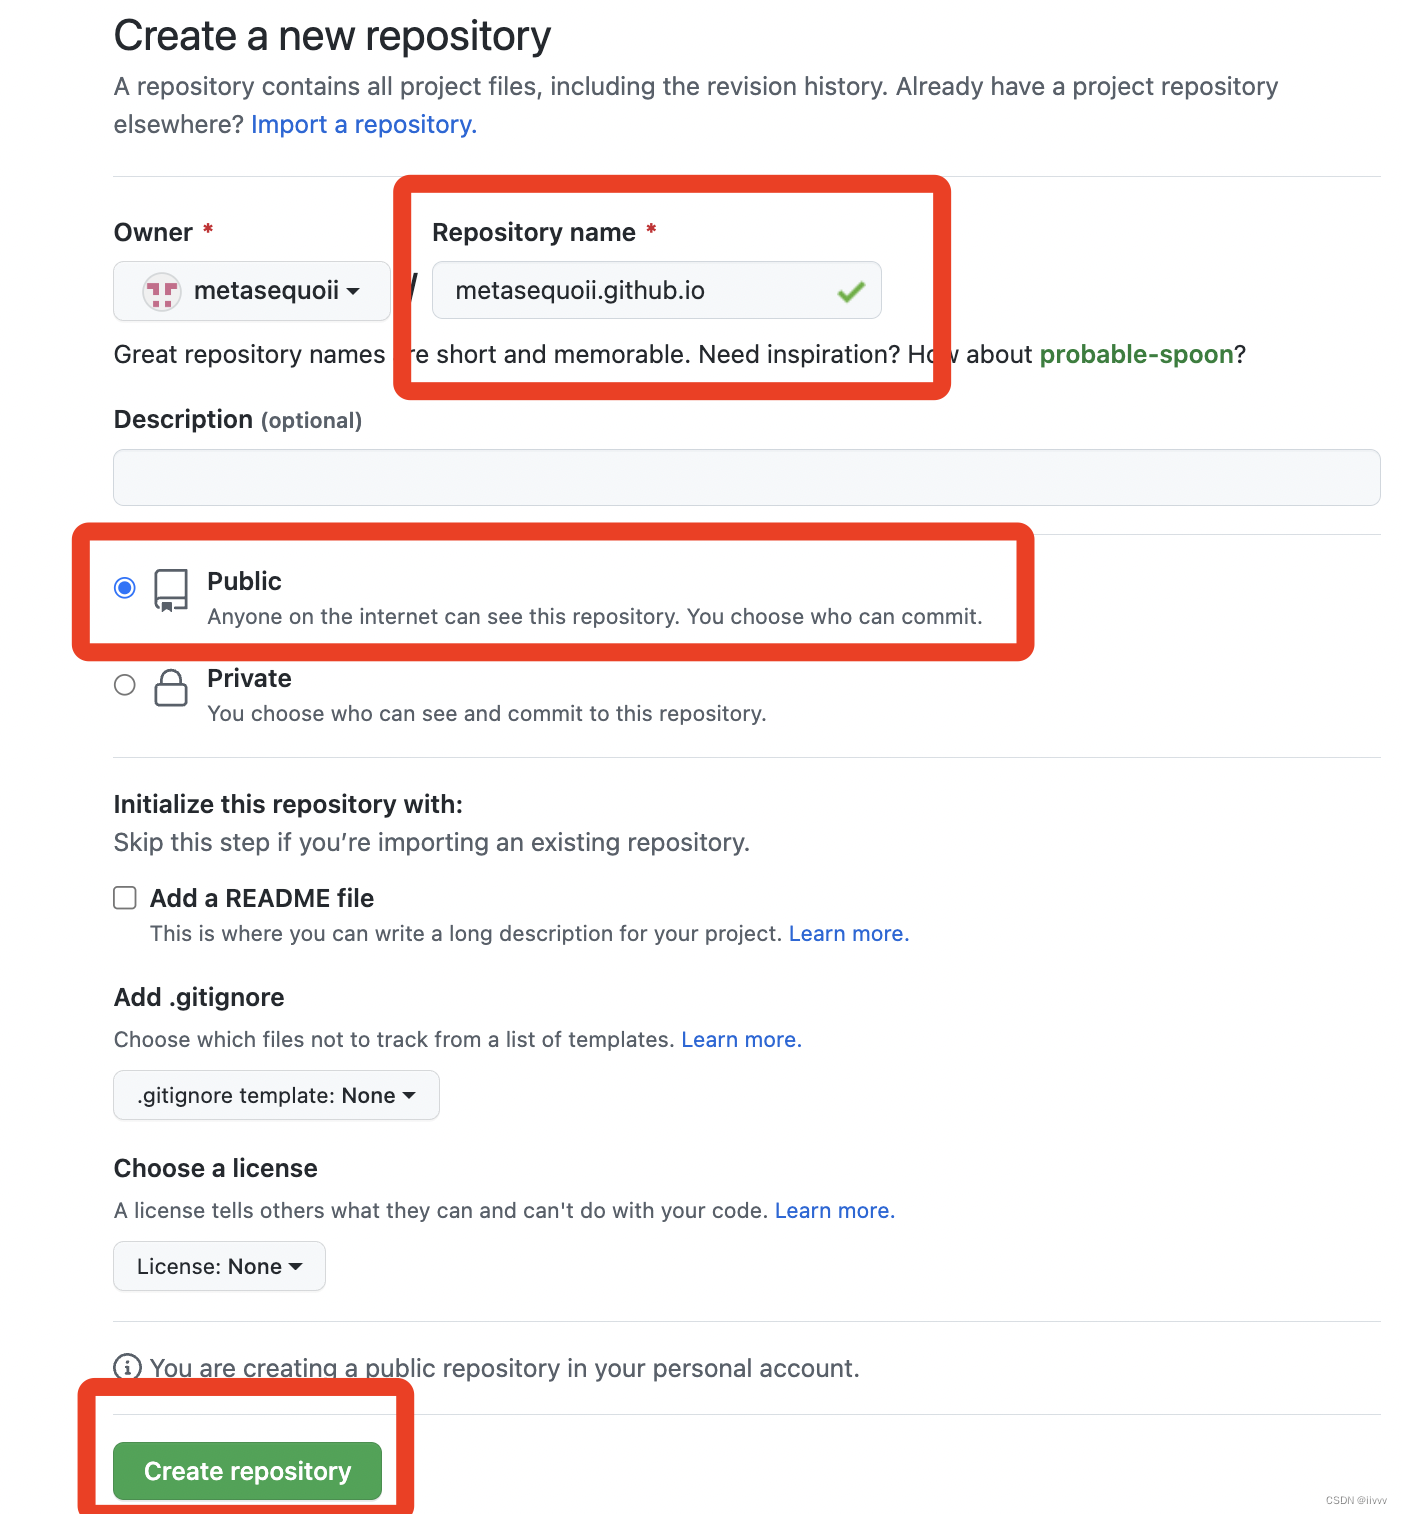
Step2 在github中创建个人主页仓库
1.在Repository name一项中,格式必须为:你的用户名.github.io
2.勾选public
3.点击绿色按钮Create repository

Step3 创建本地仓库并连接到Github远程仓库
1.检查是否已安装git
打开命令行输入
git --version
如果有版本信息,即是已安装git;
如果没有,则需要自行安装git,这一步请参考:安装Git - 廖雪峰的官方网站
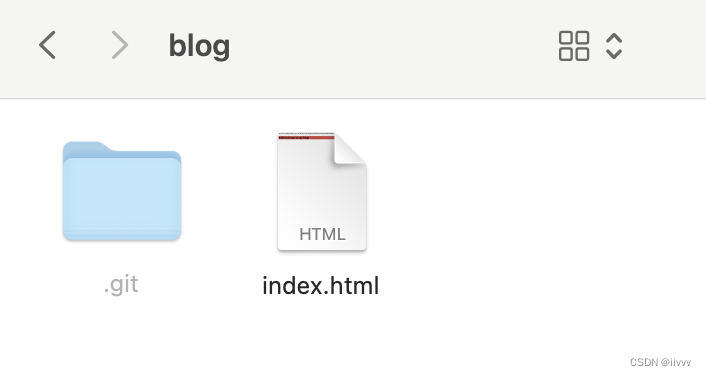
2.创建本地仓库
创建一个文件夹(eg:命名为blog)
在这个文件夹路径下(eg:/Users/puluotagela/webfront/blog)右键调用命令行输入pwd检查当前所在路径
pwd如果路径有误,则输入cd /Users/puluotagela/webfront/blog
cd /Users/puluotagela/webfront/blog如果路径无误,则输入git init初始化当前的文件夹为本地仓库
git init成功后,blog文件夹会多出一个名为 .git 的隐藏文件夹(若没出现需要手动打开显示隐藏文件)

3.创建个人主页文件
命名为index.html
文件内容需使用vscode修改,可直接复制以下测试内容:
<!DOCTYPE html>
<html lang="">
<head>
    <meta charset="utf-8">
    <meta http-equiv="X-UA-Compatible" content="IE=edge">
    <meta name="viewport" content="width=device-width,initial-scale=1">
    <title>yourname's blog</title>
</head>
<body>
   <h1>hello!welcome to my blog!</h1>
   <style>
    h1{
        background-color: rgb(215, 77, 72);
    }
   </style>
</body>
</html>
4.连接远程仓库
获取ssh公钥,添加至github账户中,请参考:这篇博客中的“一、Git的配置”部分Git- 连接远程仓库_编程大西瓜的博客-CSDN博客_git链接远程仓库
复制github远程仓库的ssh地址
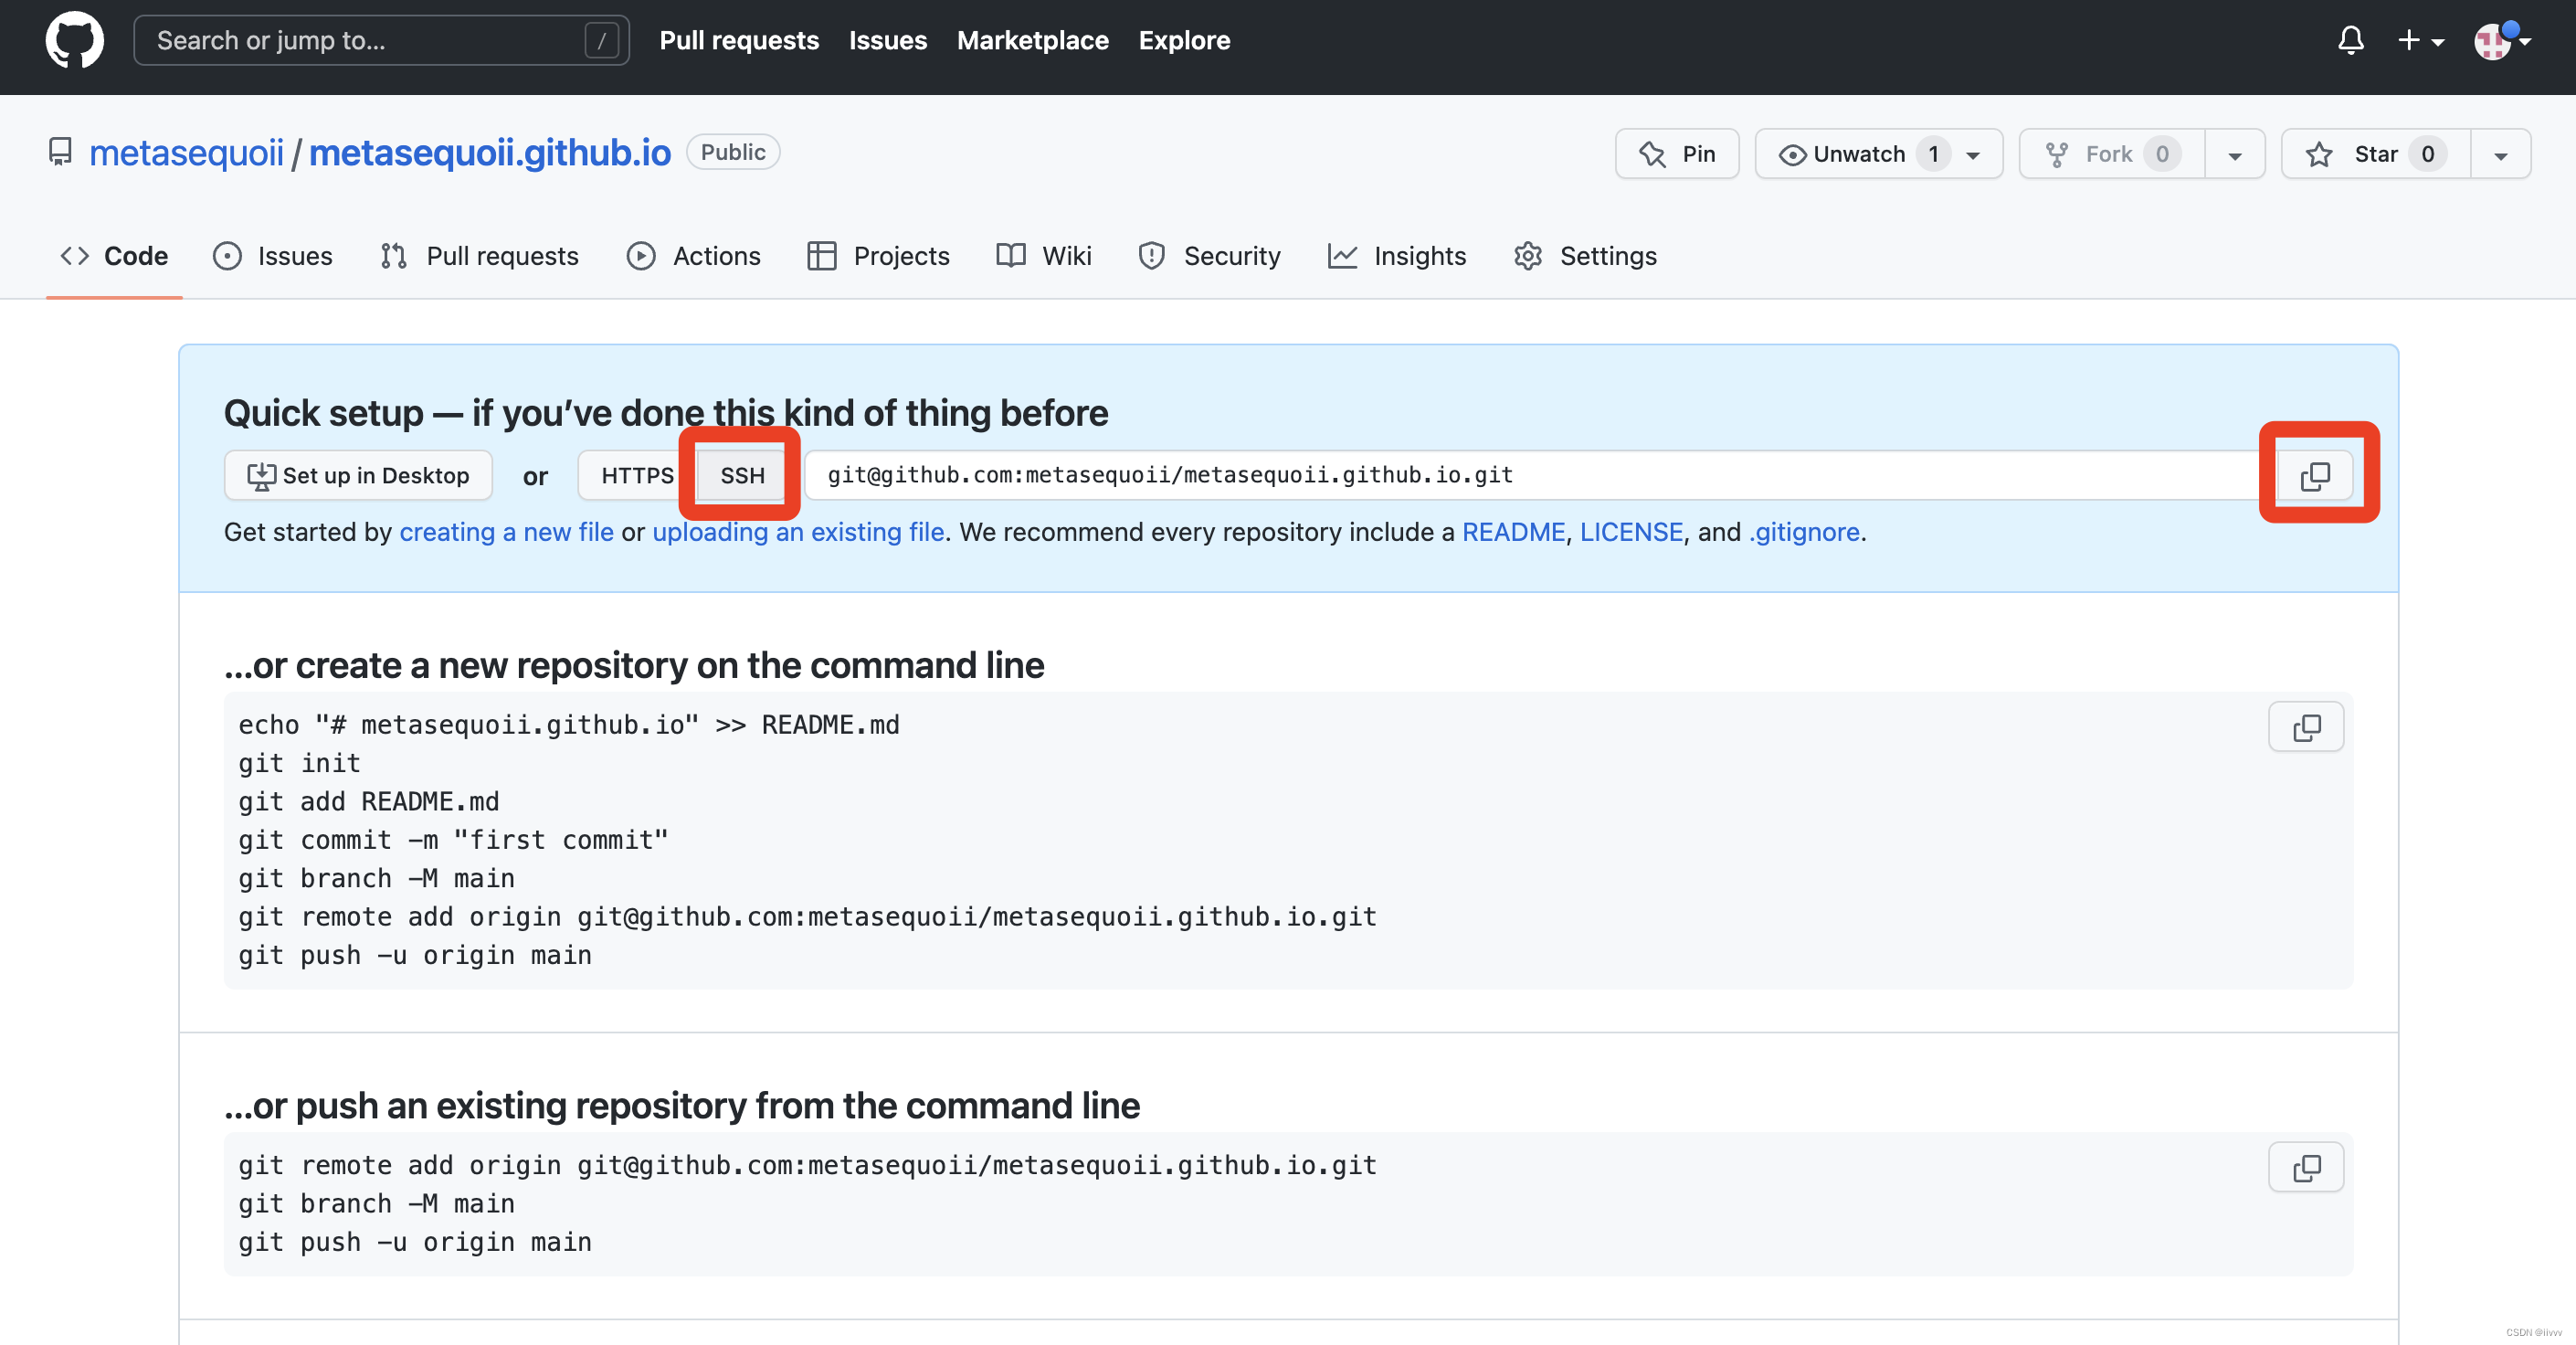
在本地仓库路径下(/Users/puluotagela/webfront/blog)调用命令行输入git remote add origin git@github.com:metasequoii/metasequoii.github.io.git
git remote add origin git@github.com:metasequoii/metasequoii.github.io.git5.将个人主页文件传至本地仓库,同步至远程仓库
在本地仓库路径下(/Users/puluotagela/webfront/blog)调用命令行依次输入
Git add .
Git commit -m"备注信息"
Git push -u origin main
若出现error: src refspec main does not match any,请参考:关于git的问题:error: src refspec main does not match any_TripleGold.的博客-CSDN博客
Step4 访问你的主页
主页地址为:你的用户名.github.io
后续可以深化修改个人主页文件,每次修改完后需要重新执行step3-5


 4940
4940


 被折叠的 条评论
为什么被折叠?
被折叠的 条评论
为什么被折叠?
 到【灌水乐园】发言


