


前言:
本篇文章主要是前一篇文章Android自定义UI开发之——Measure原理介绍的具体应用。
尽管目前android support包已经提供了PercentRelativeLativeLayout和PercentLinearLayout,但是我们不但要知其然而且要知其所以然。
一、例子效果如下:

二、实现原理:
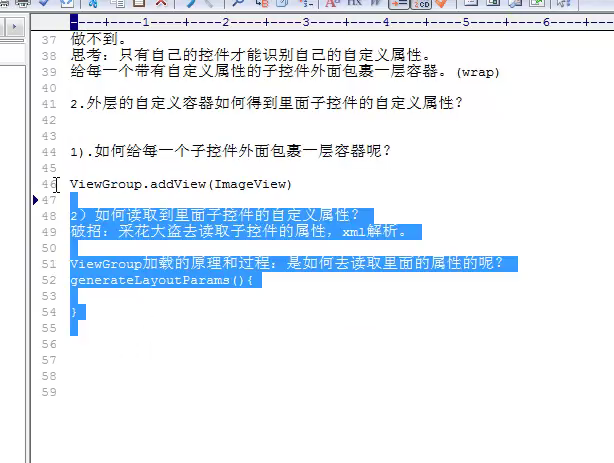
要实现PercentRelativeLayout问题的关键是父容器必须要得到子控件的自定义属性。
三、实现步骤:
1、在attrs.xml中定义子控件的自定义属性:
<declare-styleable name="PercentRelativeLayout">
        <attr name="percent_width" format="float"/>
        <attr name="percent_height" format="float"/>
    </declare-styleable>
2、自定义PercentRelativeLayout的LayoutParams:
public class LayoutParams extends RelativeLayout.LayoutParamsprivate void initParams(Context context, AttributeSet attrs) {
TypedArray a = context.obtainStyledAttributes(attrs, R.styleable.PercentRelativeLayout);
percentWidth = a.getFloat(R.styleable.PercentRelativeLayout_percent_width, 1.0f);
percentHeight = a.getFloat(R.styleable.PercentRelativeLayout_percent_height, 1.0f);
a.recycle();
}这里有两个注意点:
1)、为什么我们要自定义一个LayoutParams?
其实我们从原理就可以知道PercentRelativeLayout的具体实现就是我们通过定义的percent再结合父控件的宽高就可以得到子控件的宽高。所以问题的关键点就是,我们如何把依据percent计算出的子控件的宽高丢给子控件。在这里我们就用到了一个定义控件宽高等属性的LayoutParams。所以,LayoutParams是Layout的属性,而我们要的width和height则又是LayoutParams的属性。
2)、如何从布局文件中获取自定义的属性:
在这里我们主要利用TypedArray来获取我们自定义的属性。我们自定义的属性集合一定是通过R.styleable.XXX来获取的,就是前文中在attrs.xml中定义的declare-styleable的name.而具体属性则一定是R.styleable.XXX_YYY这种形式来获取。YYY即是前文中在attrs.xml中定义的attr的name.
在这里,我们又有问题了TypedArray是什么?android.content.res.TypedArray
 包含函数 obtainStyledAttributes(AttributeSet, int[], int, int) 或者 obtainAttributes(AttributeSet, int[])检索的数组值。
 说明:返回一个由AttributeSet获得的一系列的基本的属性值,不需要用用一个主题或者/和样式资源执行样式。
参数:
set:现在检索的属性值;
attrs:制定的检索的属性值
在执行完之后,一定要确保调用 recycle()函数 。用于检索从这个结构对应于给定的属性位置到obtainStyledAttributes中的值。
3、获取子控件的percent属性:
@Override
    public LayoutParams generateLayoutParams(AttributeSet attrs) {
        return new PercentRelativeLayout.LayoutParams(context, attrs);
    }
4、具体利用percent计算子控件的宽高:
@Override
    protected void onMeasure(int widthMeasureSpec, int heightMeasureSpec) {
        int childCount = getChildCount();
        if(childCount <= 0) {
            super.onMeasure(widthMeasureSpec, heightMeasureSpec);
        } else {
            float widthPercent = 1.0f, heightPercent = 1.0f;
            int widthSpecSize = MeasureSpec.getSize(widthMeasureSpec);
            int heightSpecSize = MeasureSpec.getSize(heightMeasureSpec);
            for(int i = 0; i < getChildCount(); i++) {
                View childView = getChildAt(i);
                ViewGroup.LayoutParams params = childView.getLayoutParams();
                if(params instanceof PercentRelativeLayout.LayoutParams) {
                    widthPercent = ((PercentRelativeLayout.LayoutParams) params).percentWidth;
                    heightPercent = ((LayoutParams) params).percentHeight;
                }

                if(widthPercent > 0) {
                    params.width = (int)(widthPercent * widthSpecSize);
                    params.height = (int)(heightPercent * heightSpecSize);
                }
            }
            super.onMeasure(widthMeasureSpec, heightMeasureSpec);
        }

    }
注意点:在这里我们只要将计算得出的子控件的宽高重新赋值给layoutparams就行了。曾经有一个同学问过我为什么不需要再调用一遍setLayoutParams()。原因是Layoutparams是一个对象,子控件的宽高是它的公共属性。对象是引用传递。
5、最后,在布局中定义属性值。具体见效果图。
这里,使用自定义属性,必须要定义一个自身包的命名空间。其实android本身就是一个命名空间。
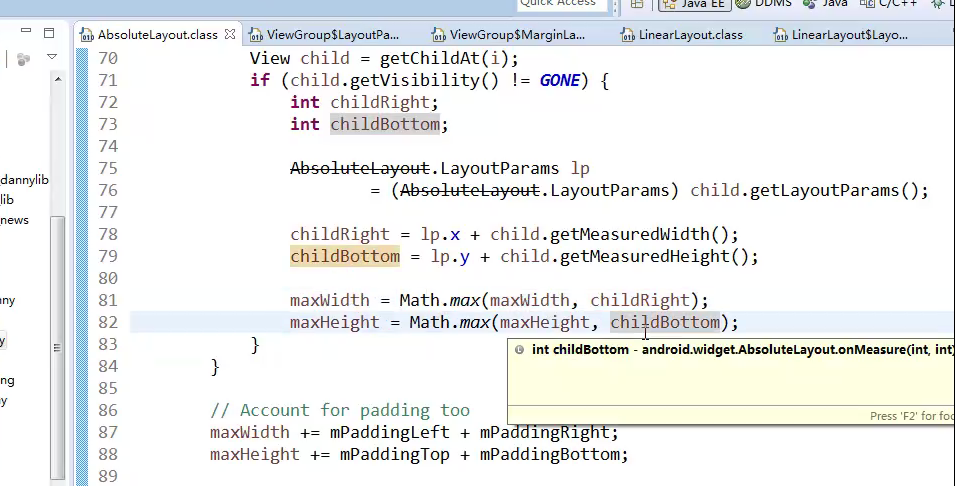
末了,送给大家一段layout的源码。即父布局如何决定子布局的具体位置(left,top,right,bottom)。为下文layout做准备。
参考:
http://blog.csdn.net/zhangphil/article/details/49532493
http://blog.csdn.net/lmj623565791/article/details/46695347
附送代码稍后。


 2164
2164

 被折叠的 条评论
为什么被折叠?
被折叠的 条评论
为什么被折叠?
 到【灌水乐园】发言


