


表视图 UITableView,iOS中最重要的视图,随处可⻅。
表视图通常⽤来管理⼀组具有相同数据结构的数据。
UITableView继承⾃UIScrollView,所以可以滚动
表视图的每⼀条数据都是显⽰在UITableViewCell对象中
表视图可以分区显⽰数据,每个分区称为⼀个section,每⼀⾏称为row,编号都是从0开始
=================================
先遵守协议
@interface RootViewController ()< UITableViewDelegate,UITableViewDataSource>
=================================
为了方便管理创建方法创建表示图
-(void)addTableView
{
初始化
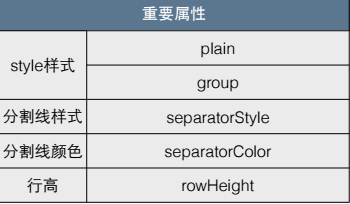
UITableView *tableView = [[UITableView alloc] initWithFrame:[UIScreen mainScreen].bounds style:(UITableViewStylePlain)];
设置代理 和 数据源代理
tableView.delegate = self;
tableView.dataSource = self;
1. 设置整个tableView的表头和表尾
步骤1:创建两个View
UIView *headerView = [[UIView alloc] initWithFrame:CGRectMake(0,0,0, 50)];
headerView.backgroundColor = [UIColor colorWithRed:arc4random()%256/255.0 green:arc4random()%256/255.0 blue:arc4random()%256/255.0 alpha:1];
UIView *footerView = [[UIView alloc] initWithFrame:CGRectMake(0, 0, 0, 100)];
footerView.backgroundColor = [UIColor colorWithRed:arc4random()%256/255.0 green:arc4random()%256/255.0 blue:arc4random()%256/255.0 alpha:1];
步骤2:设置表头和标尾
// 设置表头
tableView.tableHeaderView = headerView;
[headerView release];
// 设置表尾
tableView.tableFooterView = footerView;
[footerView release];
// 显示视图
[self.view addSubview:tableView];
// 释放
[tableView release];
}
============================
协议中(必须实现)设置每个分区有多少行
-(NSInteger)tableView:(UITableView *)tableView numberOfRowsInSection:(NSInteger)section
{
return 5;
}
=================================
协议中(必须实现)的方法。这个方法是用来设置你的TableView中每一行显示的内容和格式的。indexPath 用来指示当前单元格,它的row方法可以获得这个单元格的行号,section方法可以获得这个单元格所处的区域号
-(UITableViewCell )tableView:(UITableView )tableView cellForRowAtIndexPath:(NSIndexPath *)indexPath
{
/*
UITableViewCell重用机制
需要重用集合 作用:把滑出屏幕的cell(完全消失在屏幕上时)放入这个重用集合(备用)
当屏幕下方 需要新的cell进行展示的时候 开始重用方式
首先 系统会先去重用集合中找 看有没有cell 可以重新使用 如果有 就直接使用 如果没有 就创建一个出来进行使用
*/
去重用集合中 按标识符 寻找对应的cell
static NSString *identifier = @”Mycell”;
UITableViewCell *cell = [tableView dequeueReusableCellWithIdentifier:identifier];
if (cell == nil) {
去创建新的cell
释放cell的时候 只有创建出来才需要去释放 从集合中取出来 不用释放
cell = [[[UITableViewCell alloc] initWithStyle:(UITableViewCellStyleSubtitle) reuseIdentifier:identifier]autorelease];
}
赋值cell上的控件(从集合中取出来的 也需要赋值)
就一个分区 分区 indexpath.section 始终是0
row 是每一个分区的第几行
设置属性
cell.textLabel.text = @”哈哈”;

return cell;
}
=================================
设置分区数
-(NSInteger)numberOfSectionsInTableView:(UITableView *)tableView
{
return 3;
}
==================================
设置每个分区的表头 和 表尾
1.设置表头
-(UIView )tableView:(UITableView )tableView viewForHeaderInSection:(NSInteger)section
{
UIView *headerView = [[UIView alloc] initWithFrame:CGRectMake(0, 0, 100, 20)];
headerView.backgroundColor = [UIColor colorWithRed:arc4random()%256/255.0 green:arc4random()%256/255.0 blue:arc4random()%256/255.0 alpha:1];
return [headerView autorelease];
}
2.设置表尾
-(UIView )tableView:(UITableView )tableView viewForFooterInSection:(NSInteger)section
{
UIView *footerView = [[UIView alloc] initWithFrame:CGRectMake(0, 0, 100, 150)];
footerView.backgroundColor = [UIColor colorWithRed:arc4random()%256/255.0 green:arc4random()%256/255.0 blue:arc4random()%256/255.0 alpha:1];
return [footerView autorelease];
}
设置分区表头 和 表尾 的高度
3. 设置分区表头 的高度
-(CGFloat)tableView:(UITableView *)tableView heightForHeaderInSection:(NSInteger)section
{
return 50;
}
4.设置分区表尾 的高度
-(CGFloat)tableView:(UITableView *)tableView heightForFooterInSection:(NSInteger)section
{
return 150;
}
==================================
设置的是 每一个分区的每一行的高度
-(CGFloat)tableView:(UITableView )tableView heightForRowAtIndexPath:(NSIndexPath )indexPath
{
return 80;
}
================================
设置分区表头 和表尾 的 标题
设置分区表头 的 标题
- (NSString )tableView:(UITableView )tableView titleForHeaderInSection:(NSInteger)section
{
if (section == 0) {
return @”a”;
}else if (section == 1){
return @”b”;
}else{
return @”c”;
}
}
================================
设置tableView右边 标题小按钮
- (NSArray )sectionIndexTitlesForTableView:(UITableView )tableView
{
return @[@”a”,@”b”,@”c”];
}
=================================


 1095
1095

 被折叠的 条评论
为什么被折叠?
被折叠的 条评论
为什么被折叠?
 到【灌水乐园】发言


