


一、UITableView
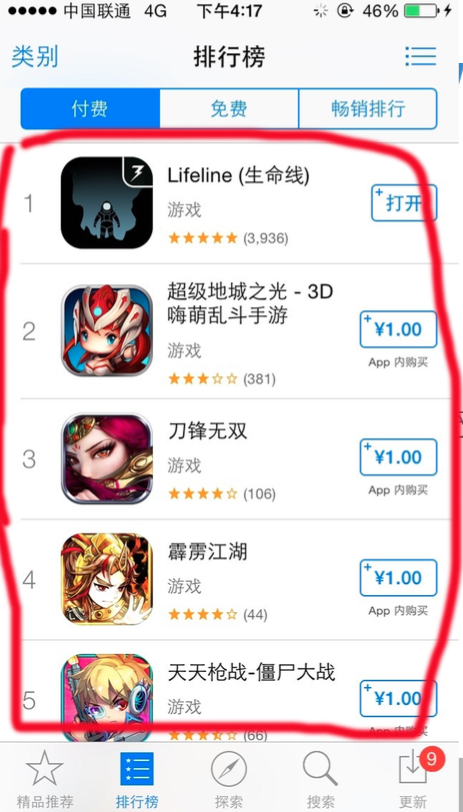
UITableView,也就是表视图,可以算是app中最重要的视图了,随处可见,中间这一圈就是,有一种列表的形势,但应用比较丰富,可以加图片,每行的高度也可自定

UITableView继承于UIScrollView,备其的滚动属性
UITableView通过分区和行来划分,每个分区为section,每行为row,编号都从0开始,系统专门提供了一个类NSIndexPath来整合section和row
从最基本最必要的说起吧
表视图的初始化
    //Grouped属性,在滚动时分区头部一起移动
    UITableView *myTableView = [[UITableView alloc]initWithFrame:self.view.bounds style:UITableViewStyleGrouped];
    //添加到父视图
<pre name="code" class="objc">    [self.view addSubview: myTableView];
    myTableView.delegate = self;//负责外观
    myTableView.dataSource = self;//负责数据
导入代理需要的两个协议
@interface RootViewController ()<UITableViewDelegate,UITableViewDataSource>实现必须实现的两个协议方法:
第一个,返回表视图每个分区的行数
//返回每个分区下的单元格个数,必须实现
-(NSInteger)tableView:(UITableView *)tableView numberOfRowsInSection:(NSInteger)section
{
    return 10;
}
第二个,单元格的内容填充,这里有两种方法,注册的方法和直接创建的方法
这里有一个单元格重用机制的概念,大概的意思就是,屏幕显示多少cell,系统就提供多少内存,滚动出屏幕的cell就让自己的cell,给新滚动到屏幕上的cell使用
//定制每个单元格,indexPath:当前定位的单元格位置,它有两个属性:indexPath.section,indexPath.row
-(UITableViewCell *)tableView:(UITableView *)tableView cellForRowAtIndexPath:(NSIndexPath *)indexPath
{
    //cell重用机制

    //定义重用标示符
    static NSString* cellId = @"CELL";
    //每次需要使用单元格的是,先根据重用标识符从重用队列中获取单元格,如果队列中没有,再进行初始化新的单元格
    //每次都会先创建一屏幕的cell,当有cell出屏幕,就会根据重用标识符添加到对应的重用队列中,当屏幕外的cell要进入屏幕,先从队列中获取,如果没有,则初始化cell
    //当重用cell时,需要对上面的控件程序赋值
    UITableViewCell *cell = [tableView dequeueReusableCellWithIdentifier:cellId];

    //如果从重用队列中未获取cell,也就是Cell为空
    if (!cell) {
        cell = [[UITableViewCell alloc]initWithStyle:UITableViewCellStyleSubtitle reuseIdentifier:cellId];
        //系统提供的控件要配合不同的样式来使用
        cell.detailTextLabel.text = @"detail详细内容";
    }
   //选中效果
     cell.selectionStyle = UITableViewCellSelectionStyleNone;
    //辅助视图的样式,右侧会有一个小图标
    cell.accessoryType = UITableViewCellAccessoryCheckmark;
    //设置左侧图片
    cell.imageView.image = [UIImage imageNamed:@"b33"];
    cell.textLabel.text = @"文字内容显示";

    //为相应位置返回定制好的单元格
    return cell;

}

//注册单元格之后的写法,不用判断cell是否存在,不用初始化,直接使用

//需要在viewdidLoad中写下面这行注册代码

//注册单元格,
    //第一个参数为所使用的单元格类型
    //第二个参数为单元格的重用标示符
    [myTableView registerClass:[UITableViewCell class] forCellReuseIdentifier:@"CELL"];
//但是无法修改cell的样式,只能使用default样式
//-(UITableViewCell *)tableView:(UITableView *)tableView cellForRowAtIndexPath:(NSIndexPath *)indexPath
//{
// UITableViewCell *cell = [tableView dequeueReusableCellWithIdentifier:@"CELL" forIndexPath:indexPath];
// cell.detailTextLabel.text = @"asdas"; cell.textLabel.text = @"1111";// return cell;//
//}
cell自带的imageVIew会随图片大小进行变化,下面的代码会修改图片的大小
  CGSize size = CGSizeMake(30, 40);
  UIImage *image = [UIImage imageNamed:@"mv_book_icon"];

  //调整image的大小
  UIGraphicsBeginImageContextWithOptions(size, NO,0.0);
  CGRect imageRect=CGRectMake(0.0, 0.0, size.width, size.height);
  [image drawInRect:imageRect];

 //设置图片
  cell.imageView.image=UIGraphicsGetImageFromCurrentImageContext();
  UIGraphicsEndImageContext();
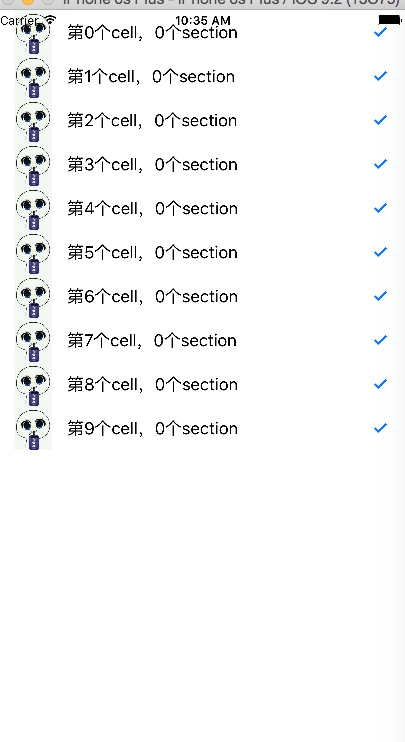
写了上面这些必须内容,就可以在界面上显示出表视图,能运行就不会有什么错误
大概是下面的样子,内容的图片和text可以自己改
因为模拟器的分辨率不够,cell之间的分割线可能看不清
表视图的问题很多的,还有很多属性还是先上代码,慢慢理解
下面的完整代码添加了一些新内容:
TableView显示相关的属性:
    //行高
    myTableView.rowHeight = 70;
    //分割线
    myTableView.separatorColor = [UIColor blueColor];
    myTableView.separatorStyle = UITableViewCellSeparatorStyleSingleLine;
    //置顶视图
    myTableView.tableHeaderView = [[UIView alloc]init];
    //置底视图
    myTableView.tableFooterView = [[UIView alloc]init];
    //section标题的颜色
    myTableView.sectionIndexColor = [UIColor redColor];
UITableViewCell的属性
<span style="font-size:12px;">    //选中效果
    cell.selectionStyle = UITableViewCellSelectionStyleBlue;
    //辅助视图的样式
    cell.accessoryType = UITableViewCellAccessoryCheckmark;
    //设置左侧图片
    cell.imageView.image = [UIImage imageNamed:@"ck.jpg"];
    //标题视图
    cell.textLabel.text = [NSString stringWithFormat:@"第%ld个cell,%ld个section",indexPath.row,indexPath.section];
    //副标题视图
    cell.detailTextLabel.text = @"副标题";</span>
对row和section进行操作
    //插入一行row
    [self.myViewTable insertRowsAtIndexPaths:@[indexPath] withRowAnimation:UITableViewRowAnimationLeft];
    //删除一行row
//    [self.myViewTable deleteRowsAtIndexPaths:@[indexPath] withRowAnimation:UITableViewRowAnimationTop];

      //删除一行row
//    [self.myViewTable deleteRowsAtIndexPaths:@[indexPath] withRowAnimation:UITableViewRowAnimationTop];
    //插入和删除section
    NSIndexSet *section = [NSIndexSet indexSetWithIndex:1];
    [self.myViewTable insertSections:section withRowAnimation:UITableViewRowAnimationFade];
    [self.myViewTable deleteSections:section withRowAnimation:UITableViewRowAnimationTop];


    //滚动到最后一行
    [self.myViewTable scrollToRowAtIndexPath:indexPath atScrollPosition:UITableViewScrollPositionBottom animated:YES];


    //滚动table到最底部
    //当前内容已经超过一屏
    if (_myTableView.contentSize.height >= _myTableView.bounds.size.height)
    {
        [self.myTableView setContentOffset:
         CGPointMake(0, self.myTableView.contentSize.height -self.myTableView.bounds.size.height)animated:YES];
    }
通过相关的代理方法来实现的:
设置指定位置cell的高度
-(CGFloat)tableView:(UITableView *)tableView heightForRowAtIndexPath:(NSIndexPath *)indexPath添加右侧边栏的索引条
-(NSArray<NSString *> *)sectionIndexTitlesForTableView:(UITableView *)tableView设置页眉的高度
-(CGFloat)tableView:(UITableView *)tableView heightForHeaderInSection:(NSInteger)section设置分区标题
-(NSString *)tableView:(UITableView *)tableView titleForHeaderInSection:(NSInteger)section添加点击cell的方法
点击cell会触发方法
-(void)tableView:(UITableView *)tableView didDeselectRowAtIndexPath:(NSIndexPath *)indexPath这里有点重要东西,我们可以根据cell得到IndexPath,也可以根据IndexPath得到cell
同时也可以根据点击的cell得到cell的IndexPath,有时我们需要在点击cell的代理方法外得知这个点击的是哪个cell
    //根据IndexPath得到cell
    CustomTableViewCell *cell = [_myTableView cellForRowAtIndexPath:indexPath];

    //根据cell得到IndexPath
    NSIndexPath *indexPath2 = [_myTableView indexPathForCell:cell];

    //根据点击得到cell的IndexPath
    NSIndexPath *indexPath3 = [_myTableView indexPathForSelectedRow];
完整的代码以及效果
#import "RootViewController.h"

@interface RootViewController ()<UITableViewDelegate,UITableViewDataSource>

@property (nonatomic,assign)int index;//标记创建单元格的个数

@end

@implementation RootViewController

- (void)viewDidLoad {
    [super viewDidLoad];

    //初始化
    self.index = 0;

    self.navigationItem.title = @"表视图学习";
    self.navigationController.navigationBar.barTintColor =  [UIColor colorWithRed:200/255.0 green:233/255.0 blue:160/255.0 alpha:1];

    //表视图的初始化
    //Grouped,分区头部一起移动
    UITableView *myTableView = [[UITableView alloc]initWithFrame:self.view.bounds style:UITableViewStyleGrouped];

    [self.view addSubview: myTableView];

    //tabView属性
    //分割线
    myTableView.separatorColor =  [UIColor colorWithRed:200/255.0 green:233/255.0 blue:160/255.0 alpha:1];
    myTableView.separatorStyle = UITableViewCellSeparatorStyleSingleLine;
    myTableView.rowHeight = 100;

    //置顶视图
//    myTableView.tableFooterView = (一个石头)


    //表视图所有的方法都需要代理方法
    //表视图的代理方法有两个
    //一个偏重于外观
    //一个偏重于数据

    myTableView.delegate = self;
    myTableView.dataSource = self;

    //注册单元格,
    //第一个参数为所使用的单元格类型
    //第二个参数为单元格的重用标示符
    [myTableView registerClass:[UITableViewCell class] forCellReuseIdentifier:@"CELL"];

}

#pragma mark -- 表视图的代理方法

//定制每个单元格,indexPath:当前定位的单元格位置,它有两个属性:indexPath.section,indexPath.row
-(UITableViewCell *)tableView:(UITableView *)tableView cellForRowAtIndexPath:(NSIndexPath *)indexPath
{
    //cell重用机制

    //定义重用标示符
    static NSString* cellId = @"CELL";
    //每次需要使用单元格的是,先根据重用标识符从重用队列中获取单元格,如果队列中没有,再进行初始化新的单元格
    //每次都会先创建一屏幕的cell,当有cell出屏幕,就会根据重用标识符添加到对应的重用队列中,当屏幕外的cell要进入屏幕,先从队列中获取,如果没有,则初始化cell
    //当重用cell时,需要对上面的控件程序赋值
    UITableViewCell *cell = [tableView dequeueReusableCellWithIdentifier:cellId];

    //如果从重用队列中未获取cell,也就是Cell为空
    if (!cell) {
        cell = [[UITableViewCell alloc]initWithStyle:UITableViewCellStyleSubtitle reuseIdentifier:cellId];
        //系统提供的控件要配合不同的样式来使用
        cell.detailTextLabel.text = [NSString stringWithFormat:@"创建的第%d个单元格",self.index++];


    }
   //选中效果
     cell.selectionStyle = UITableViewCellSelectionStyleBlue;
    //辅助视图的样式
    cell.accessoryType = UITableViewCellAccessoryCheckmark;
    //设置左侧图片
    cell.imageView.image = [UIImage imageNamed:@"b33"];
    cell.textLabel.text = [NSString stringWithFormat:@"第%ld个cell,%ld个section",indexPath.row,indexPath.section];
    //为相应位置返回定制好的单元格
    return cell;

}

//注册单元格之后的写法,不用判断cell是否存在,不用初始化,直接使用
//但是无法修改cell的样式,只能使用default样式
//-(UITableViewCell *)tableView:(UITableView *)tableView cellForRowAtIndexPath:(NSIndexPath *)indexPath
//{
//    UITableViewCell *cell = [tableView dequeueReusableCellWithIdentifier:@"CELL" forIndexPath:indexPath];
//    cell.detailTextLabel.text = @"asdas";
//
//    cell.textLabel.text = @"1111";
//    return cell;
//
//}

//设置对应位置的cell的高度
-(CGFloat)tableView:(UITableView *)tableView heightForRowAtIndexPath:(NSIndexPath *)indexPath
{
    //不同分区的宽度不同
    //使得奇数cell的高度为50,偶数为100
    if (indexPath.row%2 == 0 && indexPath.section %2 == 0) {
        return 100;
    }
    else{
        return 50;
    }
}

//设置页眉的高度
-(CGFloat)tableView:(UITableView *)tableView heightForHeaderInSection:(NSInteger)section
{
    return 22;
}

//索引条
-(NSArray<NSString *> *)sectionIndexTitlesForTableView:(UITableView *)tableView
{
    return [NSArray arrayWithObjects:@"A",@"B",@"C", nil];
}

//点击cell之后执行的代理方法
//delect
-(void)tableView:(UITableView *)tableView didDeselectRowAtIndexPath:(NSIndexPath *)indexPath
{
    NSLog(@"点击了%ld分区下的%ld行的cell",indexPath.section,indexPath.row);
}

//添加分区标题

-(NSString *)tableView:(UITableView *)tableView titleForHeaderInSection:(NSInteger)section
{
    return @"分区标题";
}

//返回每个分区下的单元格个数,必须实现
-(NSInteger)tableView:(UITableView *)tableView numberOfRowsInSection:(NSInteger)section
{
    return 2;
}

//返回分区的个数,可选实现,不实现则默认只有一个分区
-(NSInteger)numberOfSectionsInTableView:(UITableView *)tableView
{

    return 10;
}


@end
效果如下


 4684
4684

 被折叠的 条评论
为什么被折叠?
被折叠的 条评论
为什么被折叠?
 到【灌水乐园】发言


