


安装protobuf
- 下个安装包:有坑,记得下all的
protobuf v3.19.4地址:github 下载地址
ncnn环境安装
sudo apt-get install build-essential
sudo apt-get install cmake
sudo apt-get install autoconf automake libtool curl make g++ unzip
编译
./autogen.sh
sudo ./configure --prefix=$INSTALL_DIR #--prefix指定安装目录
sudo make
sudo make check
sudo make install
将模型转成ncnn 的格式
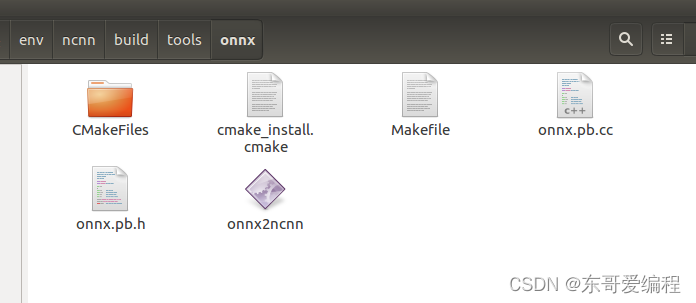
方式1:直接用ncnn 自带的工具转
- 在编译后的build tools有个onnx文件可以把模型转成ncnn格式
./onnx2ncnn lw50.onnx lw50.param lw50.bin
不过基本都会报错
Unsupported slice axes !
Unsupported slice axes !
Unsupported slice axes !
Unsupported slice axes !
Unsupported slice axes !
Unsupported slice axes !
或者

如果成功会生成两个文件
yolov5s.param
yolov5s.bin
这个可以参考修改,原因是有的层实现不兼容https://zhuanlan.zhihu.com/p/275989233
方式二
用pnnx 进行转换
这个有编译好的版本
https://github.com/pnnx/pnnx/releases
直接下载运行就可以了
pnnx resnet18.pt inputshape=[1,3,224,224]
如果不支持的话, 只能自己编译
pnnx 源码:
https://github.com/pnnx/pnnx
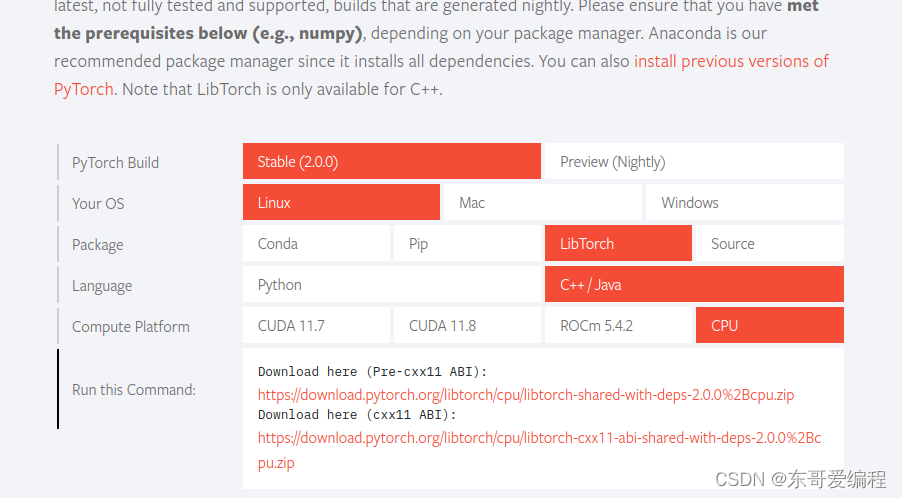
直接去pytorch 下c++ 源码
https://pytorch.org/
旧版本参考
https://blog.csdn.net/qq_41375318/article/details/126800667
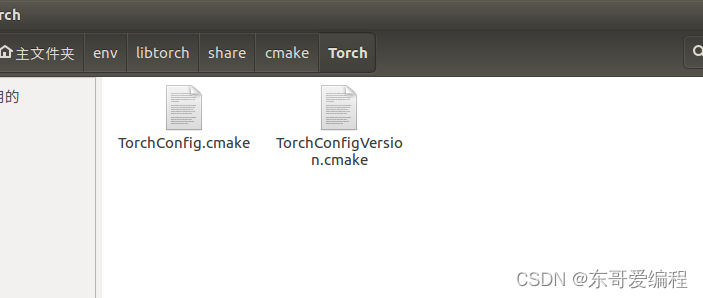
这里需要修改 编译路径,找到LibTorch 的make路径,相当于是软链接路径文件
同时需要一个python 的软链接路径
找个地方新建python3 文件夹
- 新建一个CMakeLists.txt,
cmake_minimum_required(VERSION 3.5)
project(Python3Config)

message(STATUS "Python3_EXECUTABLE: ${Python3_EXECUTABLE}")
message(STATUS "Python3_INCLUDE_DIRS: ${Python3_INCLUDE_DIRS}")
message(STATUS "Python3_LIBRARIES: ${Python3_LIBRARIES}")
message(STATUS "Python3_VERSION: ${Python3_VERSION}")
message(STATUS "NumPy_INCLUDE_DIRS: ${NumPy_INCLUDE_DIRS}")

configure_file(Python3Config.cmake.in Python3Config.cmake @ONLY)
另外新建一个变量文件Python3Config.cmake.in
set(Python3_EXECUTABLE "/home/cdm/anaconda3/bin/python")
set(Python3_INCLUDE_DIRS "/home/cdm/anaconda3/lib/python3.9/Python3_INCLUDE_DIRS")
set(Python3_LIBRARIES "/home/cdm/anaconda3/lib/python3.9/Python3_LIBRARIES")
set(Python3_VERSION "3.9.13")
set(NumPy_INCLUDE_DIRS "/home/cdm/anaconda3/lib/python3.9/site-packages/numpy")
查看命令
import os
import numpy

numpy_path = os.path.dirname(numpy.__file__)
print(numpy_path)
print(os.path.join(os.path.dirname(os.__file__), "Python3_LIBRARIES"))
print(os.environ.get('Python3_INCLUDE_DIRS'))
dir_path = os.environ.get('Python3_INCLUDE_DIRS')
if dir_path:
    for file_name in os.listdir(dir_path):
        print(file_name)
else:
    print('Python3_INCLUDE_DIRS环境变量未设置')
python_executable = os.popen('which python3').read().strip()
print(python_executable)
然后执行 cmake .
编译生成
Python3Config.cmake
set(Python3_EXECUTABLE "/home/cdm/anaconda3/bin/python")
set(Python3_INCLUDE_DIRS "/home/cdm/anaconda3/lib/python3.9/Python3_INCLUDE_DIRS")
set(Python3_LIBRARIES "/home/cdm/anaconda3/lib/python3.9/Python3_LIBRARIES")
set(Python3_VERSION "3.9.13")
set(NumPy_INCLUDE_DIRS "/home/cdm/anaconda3/lib/python3.9/site-packages/numpy")
其实直接输入也行
然后修改pnnx 的CMakeLists.txt
find_package(Python3 COMPONENTS Interpreter Development)
find_package(Torch REQUIRED)
加上路径
就是修改查找编译的路径地址
set(Python3_DIR "/home/cdm/env/ncnn/tools/pnnx")
set(Torch_DIR "/home/cdm/env/libtorch/share/cmake/Torch")
接下来根据这个官方来就行
mkdir ncnn/tools/pnnx/build
cd ncnn/tools/pnnx/build
cmake -DCMAKE_INSTALL_PREFIX=install -DTorch_INSTALL_DIR=<your libtorch dir> ..
cmake --build . --config Release -j 2
cmake --build . --config Release --target install


 4317
4317


 被折叠的 条评论
为什么被折叠?
被折叠的 条评论
为什么被折叠?
 到【灌水乐园】发言


