


串口助手添加参数选项
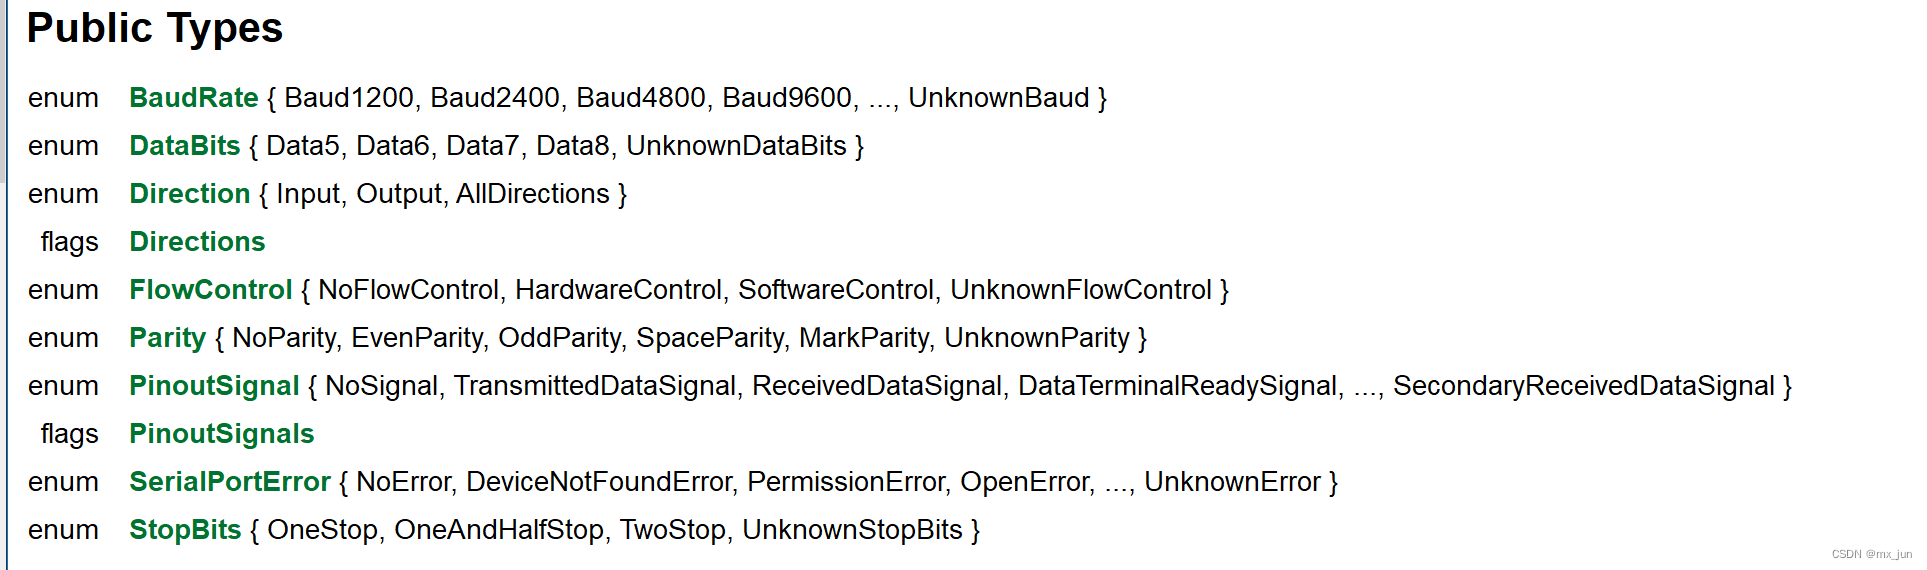
串口常用信息
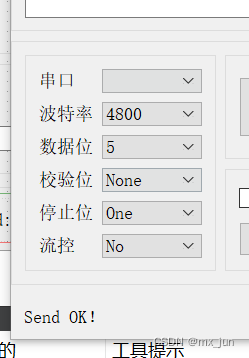
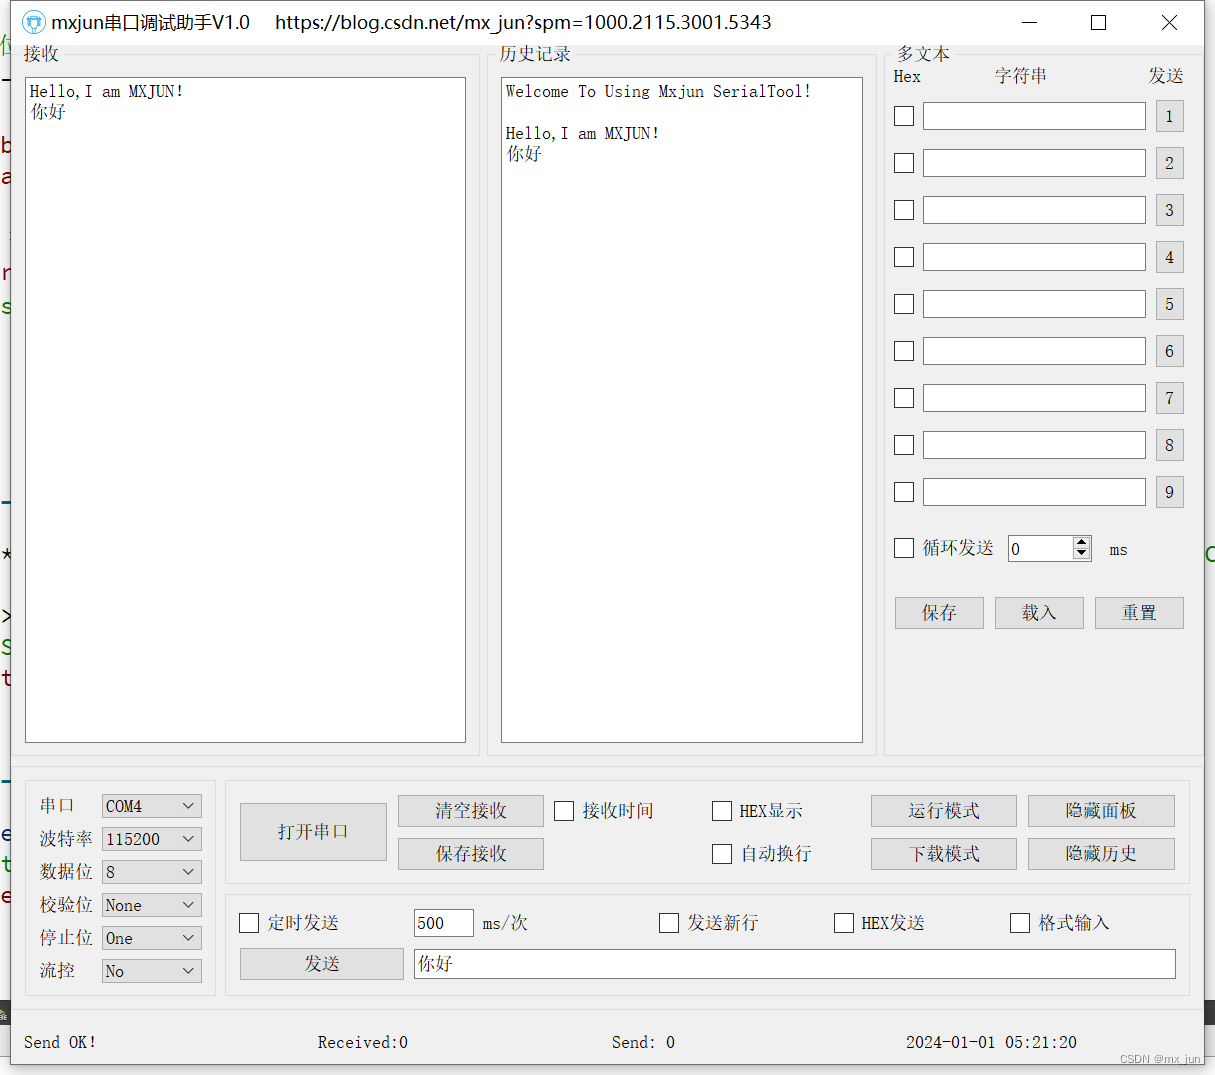
效果演示
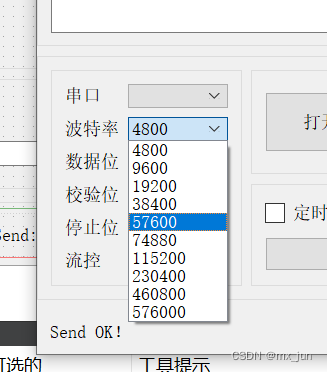
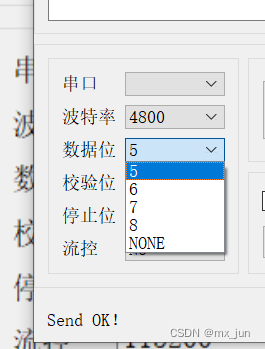
根据上面串口常用信息,填写进对应的ComboBox里面
注意根据调节ComboBox的(max/min)Size 一致来 实现整齐划一

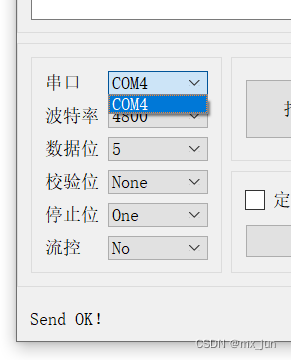
自动检测串口号:
使用说明:
不只是添加头文件
qmake(.pro文件) 里面还得添加: QT += serialport
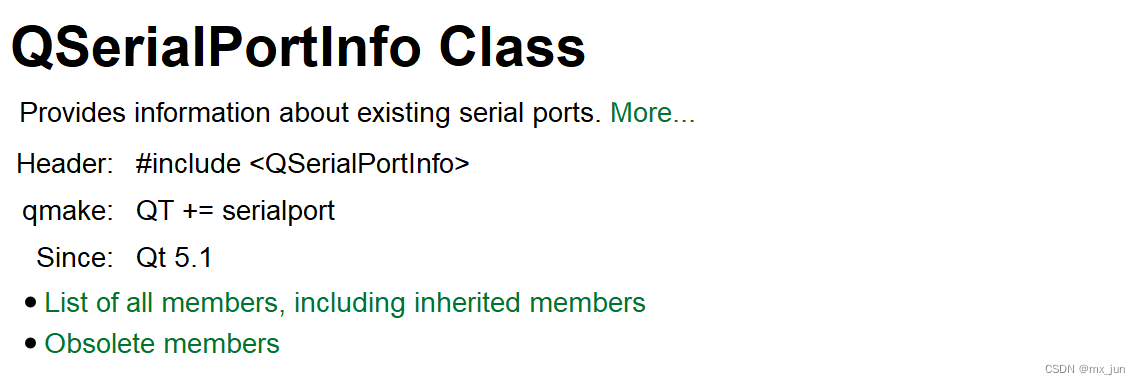
API :
这个函数判断系统中的可用串口:

addItem方法:addItem是QComboBox类(Qt中组合框的类)的一个方法,用于向组合框中添加一个新的选项。这个方法接受一个字符串作为参数,该字符串将成为下拉列表中的一个新项。serialInfo.portName():这里假设serialInfo是某种对象(可能是你自定义的类或来自某个库的类),并且它有一个portName方法,该方法返回一个字符串。这个字符串很可能代表了一个串行端口的名称或标识符
实现程序
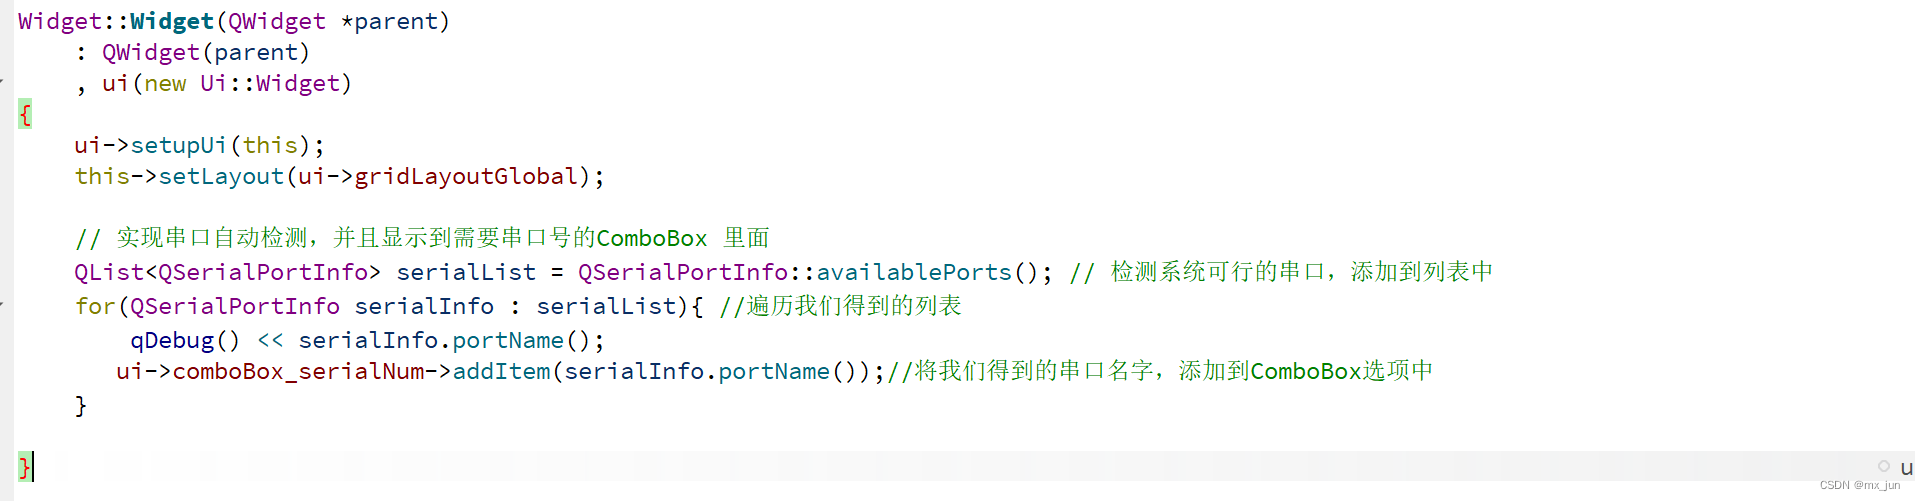
    // 实现串口自动检测,并且显示到需要串口号的ComboBox 里面
    QList<QSerialPortInfo> serialList = QSerialPortInfo::availablePorts(); // 检测系统可行的串口,添加到列表中
    for(QSerialPortInfo serialInfo : serialList){ //遍历我们得到的列表
        qDebug() << serialInfo.portName();
       ui->comboBox_serialNum->addItem(serialInfo.portName());//将我们得到的串口名字,添加到ComboBox选项中
    }
ui->comboBox_serialNum->addItem(serialInfo.portName());
将serialInfo对象的portName方法返回的字符串作为一个新项添加到comboBox_serialNum组合框中
实现效果
打开串口
先创建串口对象
头文件声明:
![]()
源文件实例化

QSerialPort里面的源码
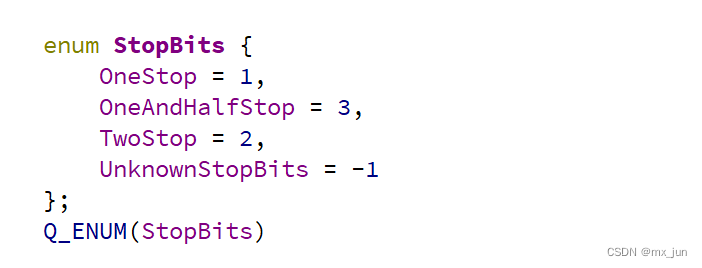
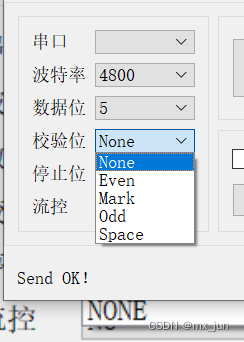
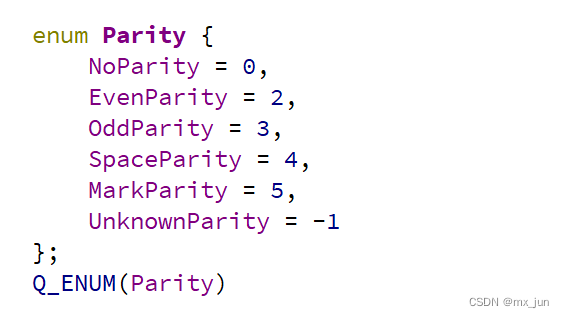
校验位
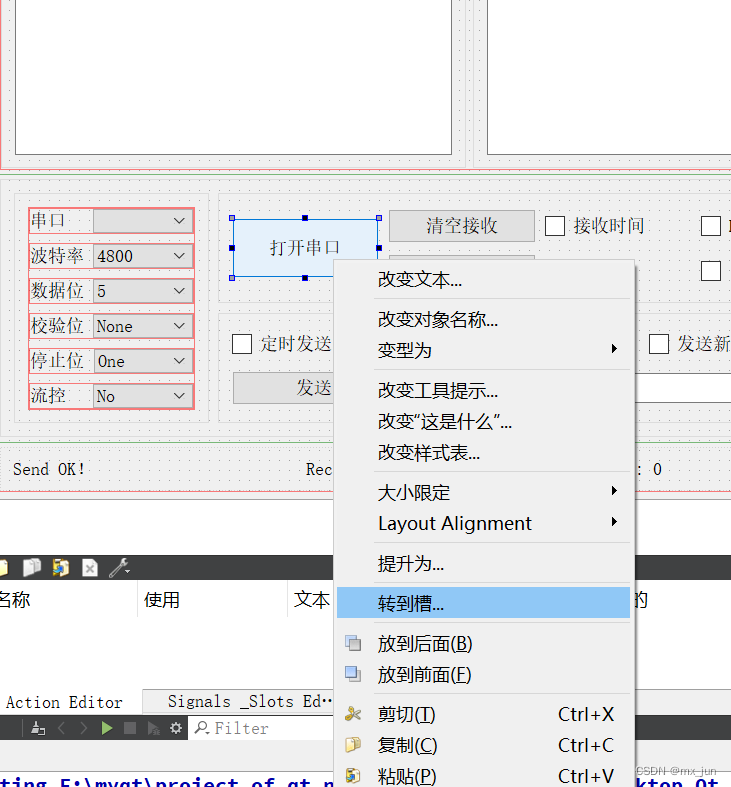
在ui界面右击 "打开串口"按钮,转到槽,给他添加槽函数
配置并且打开槽函数实现
void Widget::on_btnCloseOrOpenSerial_clicked()
{
// 1.选择端口号
serialPort->setPortName(ui->comboBox_serialNum->currentText());
// 2.配置波特率 注意把String ->int
serialPort->setBaudRate(ui->comboBox_Baudrate->currentText().toInt());
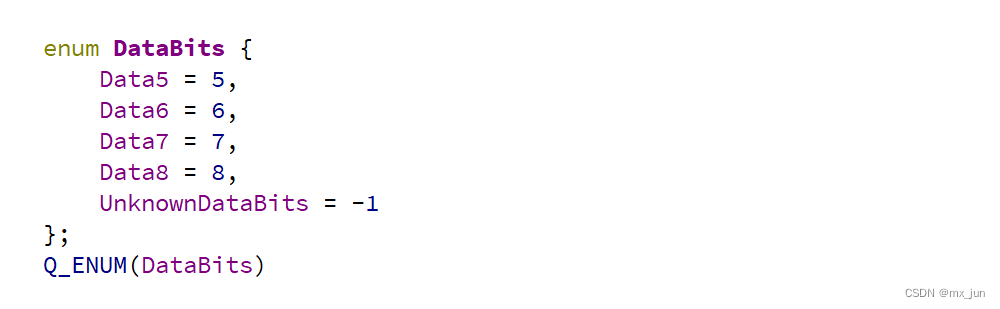
// 3.配置数据位
serialPort->setDataBits(QSerialPort::DataBits(ui->comboBox_dataBit->currentText().toInt()));
// 4.配置校验位
switch (ui->comboBox_checkBit->currentIndex()) // 根据下标来匹配
{
case 0:
serialPort->setParity(QSerialPort::NoParity);
break;
case 1:
serialPort->setParity(QSerialPort::EvenParity);
break;
case 2:
serialPort->setParity(QSerialPort::MarkParity);
break;
case 3:
serialPort->setParity(QSerialPort::OddParity);
break;
case 4:
serialPort->setParity(QSerialPort::SpaceParity);
break;
default:
serialPort->setParity(QSerialPort::UnknownParity);
break;
}
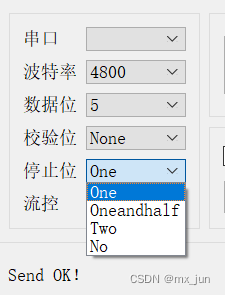
// 5.配置停止位
serialPort->setStopBits(QSerialPort::StopBits(ui->comboBox_stopBit->currentData().toInt()));
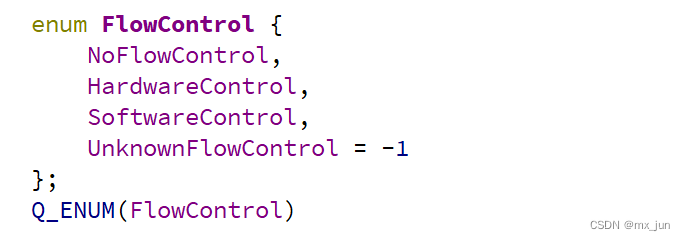
// 6.流控
if(ui->comboBox_fileCon->currentText() == "None")
serialPort->setFlowControl(QSerialPort::NoFlowControl);
// 配置完毕,打开串口
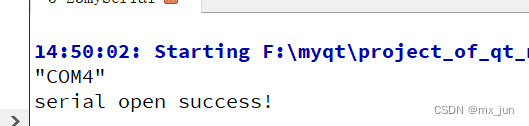
if(serialPort->open(QIODevice::ReadWrite)){ // open -- 能成功打开,返回true
qDebug()<<"serial open success!";
}
效果演示
实现自发自收
插入 我们的CH340,注意要用跳线帽连接tx,rx -->这样就完成了自发自收的前期准备
(没有跳线帽的可以用一根杜邦线)
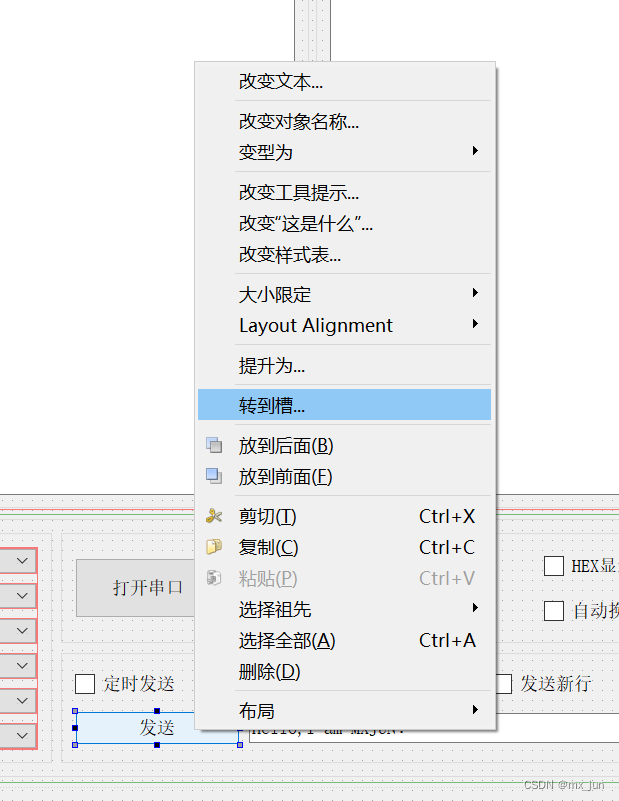
发送数据槽函数
void Widget::on_btnSendContext_clicked()
{
    const char * sendData = ui->lineEdit_SendContext->text().toStdString().c_str();//QString->String(C++)->char*

    serialPort->write(sendData);
    qDebug()<<"Send: "<<sendData;
}
实现接收
当串口收到数据的时候会发出一个信号,我们去捕捉这个信号,并且去实现他的槽函数,实现接收
connect(serialPort,&QSerialPort::readyRead,this,&Widget::on_SerialData_readToRead);
接收槽函数的实现
void Widget::on_SerialData_readToRead()
{
  QString recvMessage = serialPort->readAll();
  qDebug()<<"get Message: "<<recvMessage;
  ui->textEditRev->append(recvMessage);
}
效果演示
单独发送

实现自发自收


 9719
9719


 被折叠的 条评论
为什么被折叠?
被折叠的 条评论
为什么被折叠?
 到【灌水乐园】发言


