


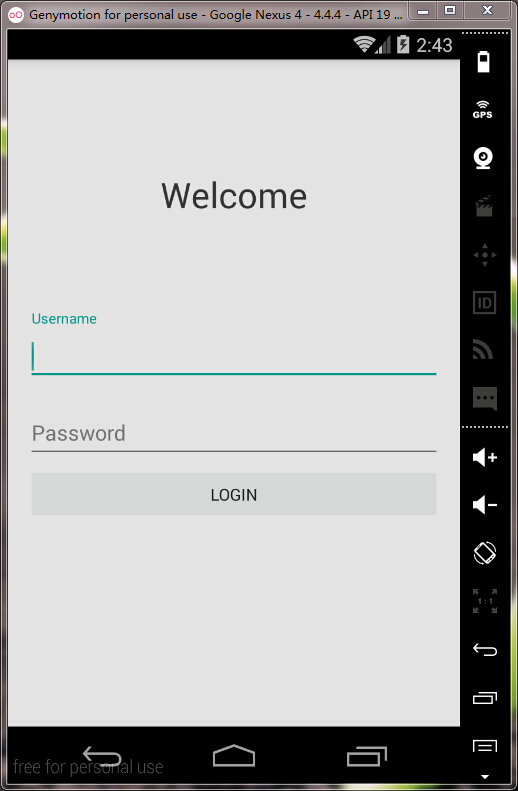
在tuts+上看到一篇文章用TextInputLayout在EditView上边放一个floating label,其中的Username和Password是EditView的hint,当点击输入框的时候,会自动上浮,效果还是很赞的,效果图如下:

实现过程:
1.使用TextInputLayout 需要导入两个包:appcompat-v7和 Design Support Library。
android studio导入包的方法:在build.gradle(Module: app)中的依赖库中添加下面的导包代码即可以完成包的导入。
dependencies {
    compile fileTree(dir: 'libs', include: ['*.jar'])
    compile 'com.android.support:appcompat-v7:22.2.1'
    compile 'com.android.support:design:22.2.1'
}2.简单的布局,使用了TextInputLayout,这个控件,位于Design Support Library这个库。
<RelativeLayout
        android:layout_width="match_parent"
        android:layout_height="wrap_content"
        android:layout_weight="0.5"
        android:orientation="vertical">

        <TextView
            android:layout_width="match_parent"
            android:layout_height="wrap_content"
            android:layout_centerInParent="true"
            android:gravity="center"
            android:text="Welcome"
            android:textSize="30sp"
            android:textColor="#333333"/>

    </RelativeLayout>


    <LinearLayout
        android:layout_width="match_parent"
        android:layout_height="wrap_content"
        android:layout_weight="0.5"
        android:orientation="vertical">

        <android.support.design.widget.TextInputLayout
            android:id="@+id/usernameWrapper"
            android:layout_width="match_parent"
            android:layout_height="wrap_content">

            <EditText
                android:id="@+id/username"
                android:layout_width="match_parent"
                android:layout_height="wrap_content"
                android:inputType="textEmailAddress"
                android:hint="Username"/>

        </android.support.design.widget.TextInputLayout>

        <android.support.design.widget.TextInputLayout
            android:id="@+id/passwordWrapper"
            android:layout_width="match_parent"
            android:layout_height="wrap_content"
            android:layout_below="@id/usernameWrapper"
            android:layout_marginTop="4dp">

            <EditText
                android:id="@+id/password"
                android:layout_width="match_parent"
                android:layout_height="wrap_content"
                android:inputType="textPassword"
                android:hint="Password"/>

        </android.support.design.widget.TextInputLayout>

        <Button
            android:id="@+id/btn"
            android:layout_marginTop="4dp"
            android:layout_width="match_parent"
            android:layout_height="wrap_content"
            android:text="Login"/>

    </LinearLayout>
3.Activity中的使用,本地自己验证了email输入是否合法,用到了一个正则表达式。
public class LoginActivity extends AppCompatActivity {

    private Button btn;

    /**
     * 验证用户名相关
     * EMAIL_PATTERN是Email验证的正则表达式
     */
    private static final String EMAIL_PATTERN = "^[a-zA-Z0-9#_~!$&'()*+,;=:.\"(),:;<>@\\[\\]\\\\]+@[a-zA-Z0-9-]+(\\.[a-zA-Z0-9-]+)*$";
    private Pattern pattern = Pattern.compile(EMAIL_PATTERN);
    private Matcher matcher;

    @Override
    protected void onCreate(Bundle savedInstanceState) {
        super.onCreate(savedInstanceState);
        setContentView(R.layout.activity_login);

        final TextInputLayout usernameWrapper = (TextInputLayout) findViewById(R.id.usernameWrapper);
        final TextInputLayout passwordWrapper = (TextInputLayout) findViewById(R.id.passwordWrapper);
        btn = (Button)findViewById(R.id.btn);

        usernameWrapper.setHint("Username");
        passwordWrapper.setHint("Password");

        btn.setOnClickListener(new View.OnClickListener() {
            @Override
            public void onClick(View v) {
                hideKeyboard();
                String username = usernameWrapper.getEditText().getText().toString();
                String password = usernameWrapper.getEditText().getText().toString();
                if (!validateEmail(username)) {
                    usernameWrapper.setError("Not a valid email address!");
                } else if (!validatePassword(password)) {
                    passwordWrapper.setError("Not a valid password!");
                } else {
                    usernameWrapper.setErrorEnabled(false);
                    passwordWrapper.setErrorEnabled(false);
                    doLogin();
                }
            }
        });
    }

    //隐藏键盘
    private void hideKeyboard() {
        View view = getCurrentFocus();
        if (view != null) {
            ((InputMethodManager) getSystemService(Context.INPUT_METHOD_SERVICE)).
                    hideSoftInputFromWindow(view.getWindowToken(), InputMethodManager.HIDE_NOT_ALWAYS);
        }
    }

    //验证email
    public boolean validateEmail(String email) {
        matcher = pattern.matcher(email);
        return matcher.matches();
    }

    //验证password
    public boolean validatePassword(String password) {
        return password.length() > 5;
    }

    public void doLogin() {
        Toast.makeText(getApplicationContext(), "OK! I'm performing login.", Toast.LENGTH_SHORT).show();
        // TODO: login procedure; not within the scope of this tutorial.
    }
}


 2885
2885


 被折叠的 条评论
为什么被折叠?
被折叠的 条评论
为什么被折叠?
 到【灌水乐园】发言


