


Spring Boot项目使用RabbitMQ队列
一、Rabbitmq的安装
RabbitMQ是一个开源的遵循 AMQP协议实现的基于 Erlang语言编写,**即需要先安装部署Erlang环境再安装RabbitMQ环境。
erlang的安装在windows中直接点击安装即可。
安装完erlang后设置erlang的环境变量ERLANG_HOME。
然后安装rabbitmq。
安装成功后。
可以在浏览器中输入http://localhost:15672,访问地址显示的结果如下。
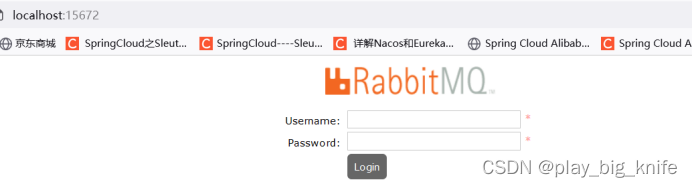
这里的username输入“guest”, password输入“guest”,然后点击“login”,之后进入rabbitmq的界面。如下图所示。
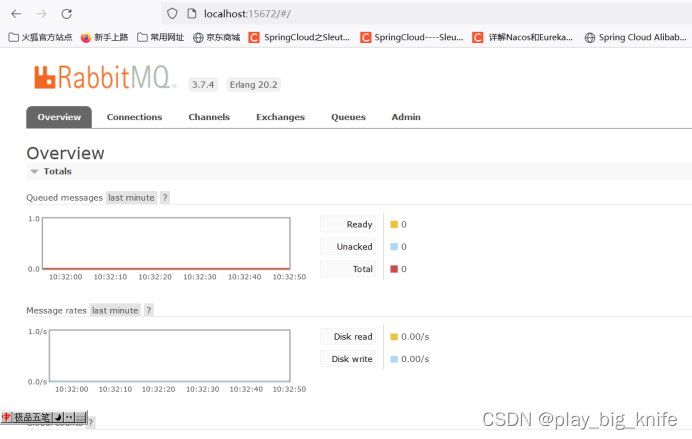
注意:这里rabbitmq的默认网页访问端口15672,rabbitmq的访问端口是5672。新建的sprint boot项目需要进行交互的端口号就是5672。
下面新建一个Spring boot项目。
二、Spring boot新建rabbitmq项目
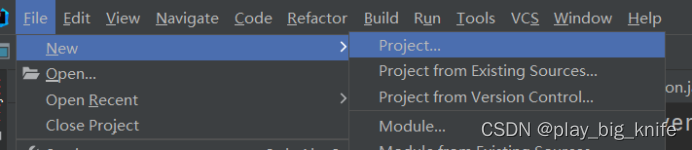
1、点击“ File”-->“New”---->“Project”。如下图。
2、点击“Project”后,就可以弹出对话框。

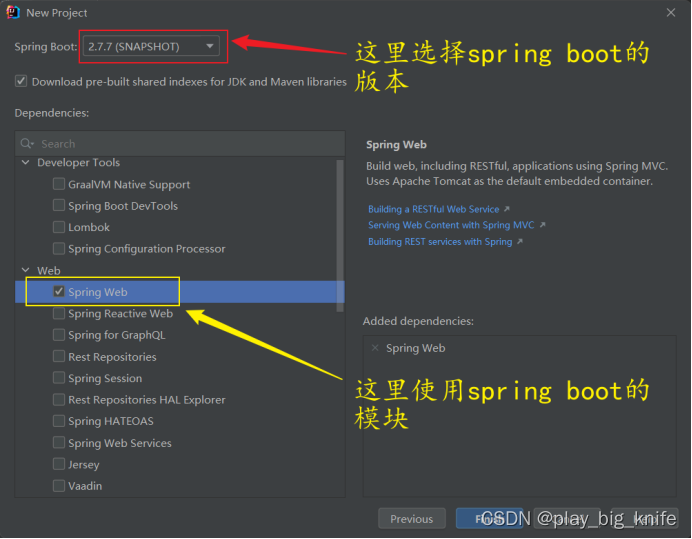
3、注意对话框中java的版本。然后点击“Next”。在弹出的对话框中选择Spring Boot的版本和Spring Web的模块。如下图所示。
4、选择成功后,直接点击“Finish”完成项目的构建。

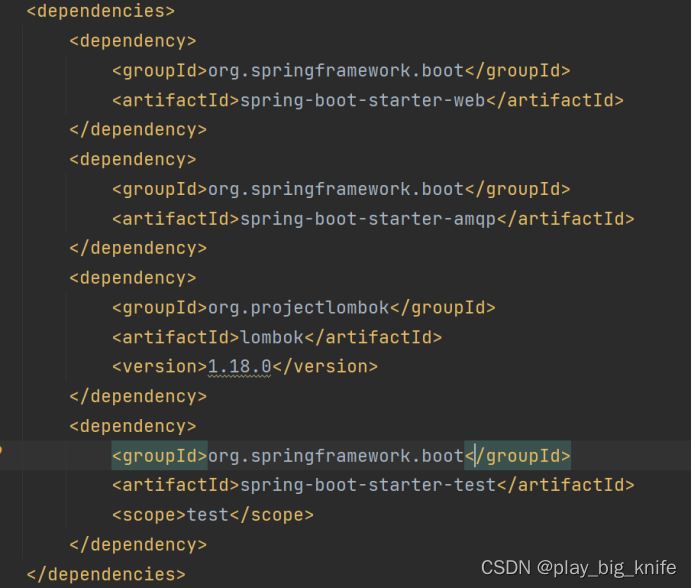
5、这里可以选择“New Window”,在新窗口中打开项目,然后在pom.xml中添加依赖。rabbitmq的依赖需要使用spring-boot-starter-amqp,因为这里还需要lombok。添加的依赖代码如下。
<dependency>
    <groupId>org.springframework.boot</groupId>
    <artifactId>spring-boot-starter-amqp</artifactId>
</dependency>
<dependency>
    <groupId>org.projectlombok</groupId>
    <artifactId>lombok</artifactId>
    <version>1.18.0</version>
</dependency>
6、pom.xml中添加依赖后的代码如下图所示。
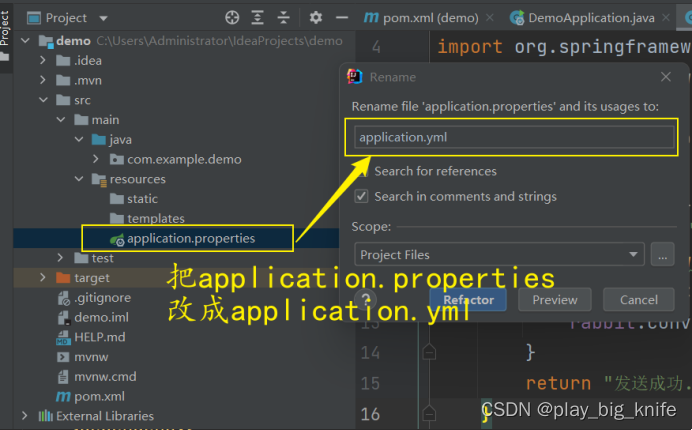
7、编写application.yml文件,可以把application.properties修改成application.yml。
8、在application.yml中设置spring boot连接rabbit的配置。代码如下。
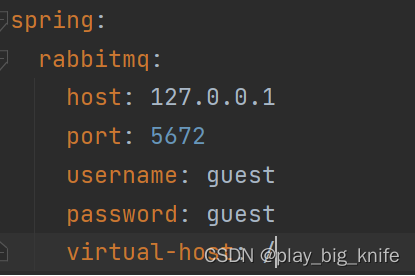
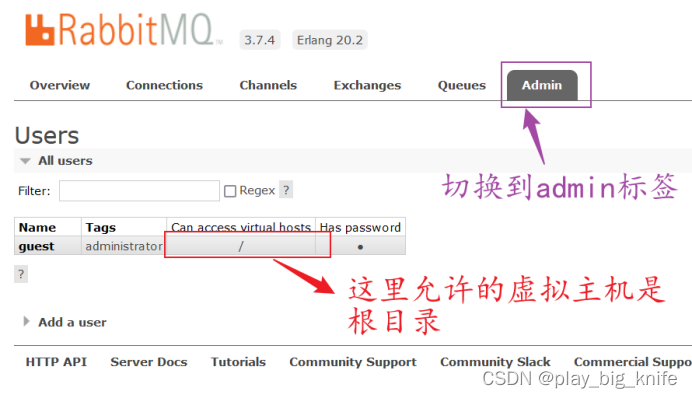
这里的port是默认的端口,用户名和密码是默认的guest,virtual-host可以通过rabbitmq的web界面中查看出来。如下图。
下面需要进行rabbitmq的开发设置。
三、rabbitmq的开发。
rabbitmq是部署最广泛的开源消息代理。
其是一个消息队列,消费队列具备:
代码解耦,提高系统稳定性
应对流量高峰,降低流量冲击,面对秒杀这种情况时,请求进来先去排队,可以保证系统的稳定
异步执行,提高系统响应速度
因为是消息队列,必然有生产者和消费者,其工作模式最简单的类型是简单类型,也就是消息只能有一个被消费,原理图如下。
图中有两个消费者,因为消息只能有一个被消费,会造成消息竞争,因此此方式不适合于多个消费者共享生产者的消息,需要使用发布订阅模式。
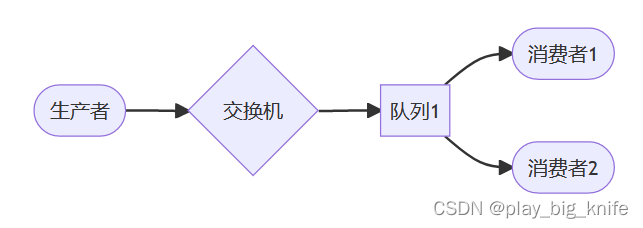
发布订阅模式这里有exchange交换机,生产者将消息给交换机,交换机根据自身的类型(fanout)将会把所有消息复制同步到所有与其绑定的队列,每个队列可以有一个消费者接收消息进行消费逻辑。原理如下图。

Spring boot中可以使用amqp的ConvertAndSendReceive方法来现controller的控制逻辑,其意义:按照一定的顺序,只有确定消费者接收到消息,才会发送下一条信息,每条消息之间会有间隔时间。
代码如下。
package com.example.demo.controller;
import org.springframework.web.bind.annotation.RestController;
import org.springframework.web.bind.annotation.RequestMapping;
import org.springframework.amqp.rabbit.core.RabbitTemplate;
import org.springframework.beans.factory.annotation.Autowired;
@RestController
public class RabbitMqController {
    @Autowired
    private RabbitTemplate rabbit;
    @RequestMapping("/rabbitmq/sendPublisher")
    public String sendPublisher(){
        for(int i=0;i<20;i++){
            rabbit.convertSendAndReceive("exchange_fanout","","测试发布订阅模式:"+i);
        }
        return "发送成功....";
    }
}
这里定义一个restful接口,接口请求sendPublisher传输生产者的接口方法,在逻辑中使用convertSendAndReceive方法使用交换器进行发送和接收,方法中第一个参数是主题,后面是具体生产者发送的相关信息。
当生产者发送信息后,需要消费者进行消费,消费者的消费是通过监听器完成的,通过listener来控制的。接下来需要写Listener监听器的代码。
监听器的代码必须定义成Component组件,也就是使用Component注解。
首先是定义一个新的交换机,主题是“ exchange_fanout”,将此返回的FanoutExchange定义成Bean。代码如下。
@Bean
public FanoutExchange exchangeFanout(){
    return new FanoutExchange("exchange_fanout");
}
这里定义两个消费者,每个消费者都需要绑定这个交换机,定义的两个消费者也需要定义成Bean。并且和exchange_fanout进行绑定,代码如下。
@Bean
public Queue queueFanout1(){
    return new Queue("queue_fanout1");
}
@Bean
public Queue queueFanout2(){
    return new Queue("queue_fanout2");
}
@Bean
public Binding bindingExchange1(Queue queueFanout1,FanoutExchange exchangeFanout){
    return BindingBuilder.bind(queueFanout1).to(exchangeFanout);
}
@Bean
public Binding bindingExchange2(Queue queueFanout2,FanoutExchange exchangeFanout){
    return BindingBuilder.bind(queueFanout2).to(exchangeFanout);
}
这里的bind方法实现的是消费者,交换机及生产者之间的绑定。
接下来通过RabbitListener的Rabbitmq的监听器来获取消息。
代码如下。
@RabbitListener(queues="queue_fanout1")
public void receiverMsg1(String msg){
    System.out.println("队列1接收到的信息:"+msg);
}
@RabbitListener(queues="queue_fanout2")
public void receiverMsg2(String msg){
    System.out.println("队列2接收到的信息:"+msg);
}
注意每一个RabbitListener的参数queues队列中的两个队列名称,这两个队列都是队列bean中产生的消息。
整体监听器的代码如下。
package com.example.demo.listener;
import lombok.extern.slf4j.Slf4j;
import org.springframework.stereotype.Component;
import org.springframework.context.annotation.Bean;
import org.springframework.amqp.core.Queue;
import org.springframework.amqp.rabbit.annotation.RabbitListener;
import com.rabbitmq.client.Channel;
import org.springframework.amqp.core.Message;
import org.springframework.amqp.core.FanoutExchange;
import org.springframework.amqp.core.Binding;
import org.springframework.amqp.core.BindingBuilder;
import org.springframework.amqp.core.TopicExchange;
@Slf4j
@Component
public class RabbitMqConsumer {
    @Bean
    public Queue queueFanout1(){
        return new Queue("queue_fanout1");
    }
    @Bean
    public Queue queueFanout2(){
        return new Queue("queue_fanout2");
    }
    @Bean
    public FanoutExchange exchangeFanout(){
        return new FanoutExchange("exchange_fanout");
    }
    @Bean
    public Binding bindingExchange1(Queue queueFanout1,FanoutExchange exchangeFanout){
        return BindingBuilder.bind(queueFanout1).to(exchangeFanout);
    }
    @Bean
    public Binding bindingExchange2(Queue queueFanout2,FanoutExchange exchangeFanout){
        return BindingBuilder.bind(queueFanout2).to(exchangeFanout);
    }
    @RabbitListener(queues="queue_fanout1")
    public void receiverMsg1(String msg){
        System.out.println("队列1接收到的信息:"+msg);
    }
    @RabbitListener(queues="queue_fanout2")
    public void receiverMsg2(String msg){
        System.out.println("队列2接收到的信息:"+msg);
    }
}
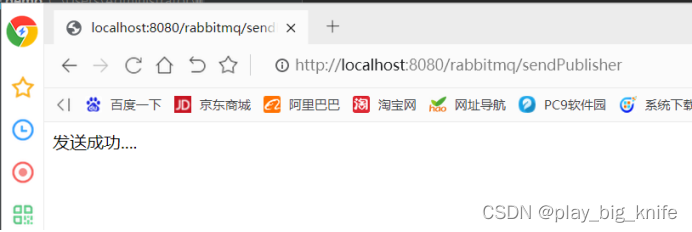
启动服务后,当浏览器访问“/rabbitmq/sendPublisher”后,在浏览器中显示文字“发送成功”,在控制台输出队列1和队列2的相关信息。浏览器显示如下图。
控制台输出结果如下图。
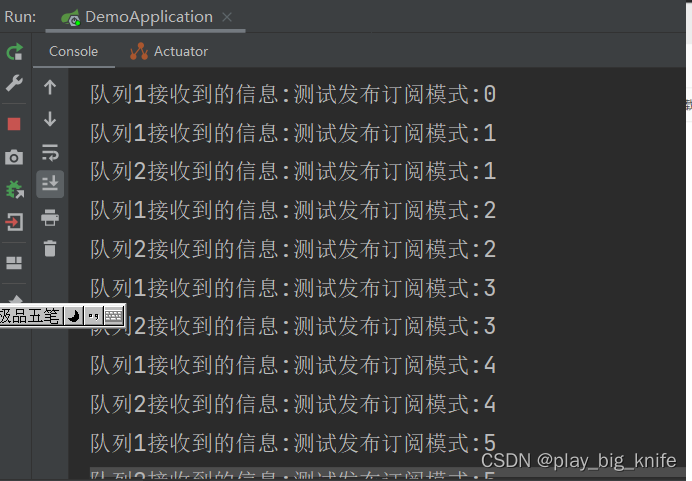
这里有两个队列信息,输出的都是1-20的相关数字。
也可以把1-20个数字分为奇数和偶数,订阅不同的主题来消费。
这里,在控制器中实现奇数和偶数发送不同的主题信息。代码如下。
@RequestMapping("/rabbitmq/sendTopic")
public String sendtopic(){
    for(int i=0;i<20;i++){
        if(i%2==0){
            rabbit.convertAndSend("exchange_topic","topic.fat.topic","测试发布订阅模型:"+i);
        }else{
            rabbit.convertAndSend("exchange_topic","topic.fat","测试发布订阅模型:"+i);
        }

    }
    return "发布成功.....";
}
生产者发送信息后,虽然交换的主题都是一个主题,但是路由的内容不同,接下来需要通过Listener监听器进行信息收集。
在Listener监听器中需要定义Topic的Exchange交换机,代码如下。
@Bean
public TopicExchange exchangeTopic(){
    return new TopicExchange("exchange_topic");
}
这个exchangeTopic也需要定义成Bean。还需要根据两个路由规则产生两个绑定规则,不同的路由规则产生不同的消费信息结果,需要定义两个不同的消费内容。
@Bean
public Queue queueTopic1(){
    return new Queue("queue_topic1");
}
@Bean
public Queue queueTopic2(){
    return new Queue("queue_topic2");
}
接下来通过bind方法绑定主题和生产者路由规则之间的联系,代码如下。
@Bean
public Binding bindingTopic1(Queue queueTopic1,TopicExchange exchangeTopic){
    return BindingBuilder.bind(queueTopic1).to(exchangeTopic).with("topic.#");
}
@Bean
public Binding bindingTopic2(Queue queueTopic2,TopicExchange exchangeTopic){
    return BindingBuilder.bind(queueTopic2).to(exchangeTopic).with("topic.*");
}
这里再通过RabbitListener监听器注解根据不同的主题,输出不同的信息,代码如下。
@RabbitListener(queues="queue_topic1")
public void receiverTopicMsg1(String msg){
    System.out.println("消费者1接收到:"+msg);
}
@RabbitListener(queues="queue_topic2")
public void receiverTopicMsg2(String msg){
    System.out.println("消费者2接收到:"+msg);
}
使用topic主题进行奇数和偶数分离消费的整体代码如下。
package com.example.demo.listener;
import lombok.extern.slf4j.Slf4j;
import org.springframework.stereotype.Component;
import org.springframework.context.annotation.Bean;
import org.springframework.amqp.core.Queue;
import org.springframework.amqp.rabbit.annotation.RabbitListener;
import com.rabbitmq.client.Channel;
import org.springframework.amqp.core.Message;
import org.springframework.amqp.core.FanoutExchange;
import org.springframework.amqp.core.Binding;
import org.springframework.amqp.core.BindingBuilder;
import org.springframework.amqp.core.TopicExchange;
@Slf4j
@Component
public class RabbitMqConsumer {
    @Bean
    public Queue queueTopic1(){
        return new Queue("queue_topic1");
    }
    @Bean
    public Queue queueTopic2(){
        return new Queue("queue_topic2");
    }
    @Bean
    public TopicExchange exchangeTopic(){
        return new TopicExchange("exchange_topic");
    }
    @Bean
    public Binding bindingTopic1(Queue queueTopic1,TopicExchange exchangeTopic){
        return BindingBuilder.bind(queueTopic1).to(exchangeTopic).with("topic.#");
    }
    @Bean
    public Binding bindingTopic2(Queue queueTopic2,TopicExchange exchangeTopic){
        return BindingBuilder.bind(queueTopic2).to(exchangeTopic).with("topic.*");
    }
    @RabbitListener(queues="queue_topic1")
    public void receiverTopicMsg1(String msg){
        System.out.println("消费者1接收到:"+msg);
    }
    @RabbitListener(queues="queue_topic2")
    public void receiverTopicMsg2(String msg){
        System.out.println("消费者2接收到:"+msg);
    }
}
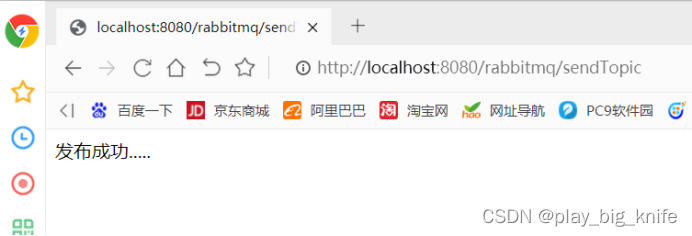
运行代码后,在浏览器中访问“/rabbitmq/sendTopic”,如下图所示。
控制台输出的结果如下图所示。
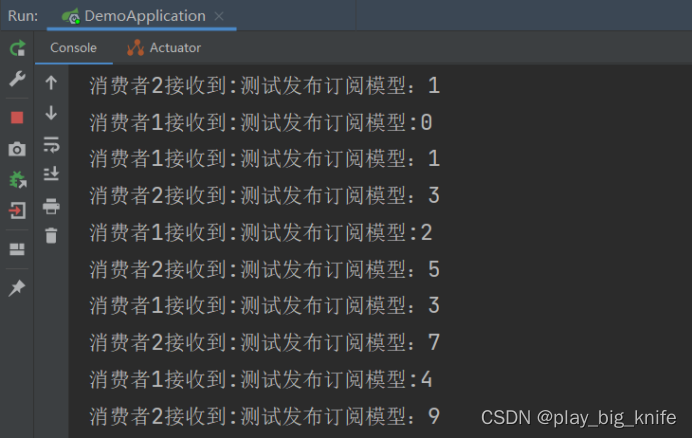
至此,spring boot使用rabbitmq的基本流程结束,欢迎期待rabbitmq的实战博客。


 49万+
49万+


 被折叠的 条评论
为什么被折叠?
被折叠的 条评论
为什么被折叠?
 到【灌水乐园】发言


